Reads: 7,770
Reading time: 17 min.
no comments
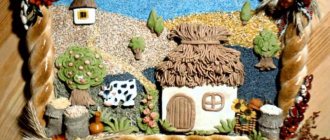
There are many ways to please yourself and your loved ones by making crafts with your own hands. One of them is to make a picture using the quilling technique, as experienced needlewomen advise. Of course, to master the basic techniques of this applied art, it will take a lot of time and a fair amount of perseverance. But the result will exceed all expectations! With patience, you will understand how to work with quilling and be able to create beautiful compositions.
What is quilling?
Translated from English it means “bird feather”. Historians claim that from the beginning of the 14th century, European monks trimmed the gilded edges of books and wound them with a pen, which they used to write strips of paper, hence the name. There are only two directions of this art in the world.
Europeans are laconic in their work and use a minimum of details for their crafts, while Japanese masters create complex and technical paintings, sometimes the number of parts can reach several hundred.
Therefore, it is wrong to say that quilling is fun for children. On the contrary, it is a complex art, like origami, that requires painstaking work and practice. But even a beginner can do something simple and extravagant.
The art of paper rolling
Quilling is the art of paper rolling, that is, making flat or three-dimensional compositions from long and narrow strips of paper twisted into spirals. The finished spirals are given different shapes. This is how modules are obtained from which works are created - paintings, postcards, albums, frames, figurines, etc. The art of paper rolling arose at the end of the 14th century in Western Europe. It is believed that quilling was invented by monks. By trimming the gilded edges of the books, they wound them onto the tips of bird feathers (hence the name, since quill in English means “bird feather”) and thus created an imitation of a golden miniature.
In the 15th - 16th centuries, paper rolling was considered an art; in the 19th century, it was considered a ladies' pastime (and almost the only handicraft worthy of noble ladies). In the 20th century, interest in the quilling technique faded, and only at the end of the century the art of paper rolling again entered the lives of creative lovers.
The Korean school of quilling techniques differs from the European one. European works, as a rule, consist of a small number of parts; they are laconic, reminiscent of mosaics, and decorate postcards and frames. Eastern masters create complex works that are more like masterpieces of jewelry. The finest volumetric “lace” is woven from hundreds of small parts.
Another manufacturing technique that deserves special attention is contour quilling. Works using this technique are also created from long narrow strips that are placed on the edge. Due to the use of the same material, this technique of working with paper is also called quilling, but due to the fact that the stripes are placed on the edge, the pattern is contoured. The products look more vibrant and realistic. And “mixed” works look especially good, where both quilling techniques are used - regular and contour.
What strips are used?
We should start by getting to know what we will be working with and what we will be using to create our paintings.
The length of the sheets is exactly the same as the A4 paper format; if necessary, the strips are trimmed or glued together.
The strips are sold already cut and their colors are completely different, able to satisfy any request - these are metallized, with different patterns, packaging with only one shade or with a color transition effect. In general, there is always something to choose from.
It is better to buy ready-made strips right away, since cutting them yourself with scissors is very painstaking work. There are special machines that will turn a piece of paper into what you want, but this is a technique for people who do this all the time. We do not consider this format. The width ranges from three millimeters to one and a half centimeters. The color is the same on all sides.
Quilling - what is it
Many crafts are made from cardboard and paper, but there is such a direction as quilling. This type of needlework dates back to the Middle Ages, when monks rolled strips of paper and made curls out of them to decorate icons and book covers.
The word quilling comes from the English “quill”, which means “bird feather”.
To make a craft using the quilling technique, you need to purchase a special kit at a craft store
It’s not for nothing that this type of needlework was called quilling, since the rolled paper resembled light, airy bird feathers that could easily be folded and twisted into any shape. Today, quilling is a popular type of handicraft, since all materials are easily available in any stationery store or kiosk, especially in the price category, they are not expensive materials. To create a masterpiece, you won’t need complex instructions on how to assemble various figures and roll paper, as anyone can do it.
About the tool
The most important tool in the work is a handle into which a thin steel rod forked at the end is inserted. It is used to grab the strip and then twist it. You can make it yourself: take a wine cork and insert a needle into it with the sharp end, then break the eyelet into which the thread is threaded.
Note!
DIY military crafts step by step: 150 photos of the best craft ideas for children for school or kindergarten
- DIY crafts for May 9 step by step: 150 photos of the best crafts for Victory Day
DIY crafts for February 23rd step by step: master class with photos and descriptions of how to make crafts for Defender of the Fatherland Day
You will also need stencils, this is either a ruler with different diameters of circles or something more complex, where other shapes are present. To move the finished spirals along the sheet, you may need tweezers, but not cosmetic ones, but with curved, elongated edges.
Tools, materials to get started
In order to start creating crafts using the quilling technique, you will need some simple materials and tools available in almost every home:
- narrow strips of paper;
- paper or cardboard for the base of the product;
- sticks-knitting needles for winding;
- glue stick and PVA;
- sharp scissors;
- tweezers;
- cork board;
- crimper;
- templates;
- combs;
- modeling mat.
If any material or tool is missing, it can be easily purchased at the nearest stationery or hand-made store.
About the paper
Paper strips are the main material for work. They are cut from not the thinnest paper, preferably colored on both sides. The width ranges from one to two mm to one and a half to two cm, the most commonly used is four to seven mm. They are cut by hand with sharp scissors or bought in whole sets at handicraft stores. The most commonly used material is Korean-made, sold through online stores.
The most important properties of quilling paper:
- color – plain, with gradient tints, small patterns, gold, silver tints, etc.;
- width - in purchased sets there are strips of 1-15 mm, less often - wider ones intended for leaves;
- density – paper with a density of 120-140 g is most convenient to use. per square meter. If the density indicator is less, the product will be easily deformable; if it is more, the paper will delaminate at the first attempt at curling;
- The length of the strips depends on the size of the workpiece you plan to make. The most convenient options are about 30 cm long, but in some cases longer ones are required - 50-60 cm;
- price - the cheapest option is to buy plain colored paper and cut it yourself, but not everyone can make even strips, so it is better to use purchased sets, the cost of which depends on the quantity, width of the strips, colors offered, and the reputation of the manufacturer.
You will also need a paper or any other base - everything that is twisted from strips will later be glued to a dense base, selected depending on the purpose of the product that is planned to be made. It can be not just a flat sheet, but a box, a box, a jar. Tip: in specialized stores you can buy ready-made paper rolling kits, which include not only strips, but also all the tools necessary for the job.
Tools
A tool such as a twisting stick is the main one. You can do it yourself by cutting off the tip of a toothpick, the refill of a ballpoint (but not gel) pen, a cotton swab, splitting the base in the middle, or buying a special metal awl with a fork at the end from a specialized store.
Glue is also necessary - for different purposes you will need a glue stick or PVA. You will need small but very sharp scissors with thin tips; among other things, they are used to cut fringe. Tweezers are suitable for medical, cosmetic, used for working with radio components, etc. It is not necessary to have one, but when handling small parts, tweezers make the work much easier.
A special ruler stencil with circles, ovals, hearts, and droplets of different diameters will also come in handy, especially if it has at least two elements of the same size. To create large-scale compositions, you will need safety pins with multi-colored heads. A cork or foam mat will prevent the finished elements from sticking to the table, since they can be secured to it with pins. A crimper is a tool for corrugating paper, which is needed when creating large-scale works.
A long-toothed comb is perfect for looping paper. If you decide to cut the strips yourself, you will need a breadboard knife, a ruler, and a special checkered cutting mat. All kinds of decor are used as additional elements - colored threads, yarn, ribbons, wire, rhinestones, plastic eyes, noses, etc.
To cut fringe, a special tool is sometimes used, which simultaneously cuts and advances the quilling strip.
Let's start with the basics
As in the art of folding paper, there are basic types of figures that serve as a kind of base, we cannot do without it. Any instructions for creating quilling crafts will be based specifically on them, so we need to learn how to execute them accurately.
Paintings using quilling technique: what is needed for work
So, if you decide that quilling is the most interesting type of applied art for you, you can try to create paintings and crafts from paper strips yourself. To do this, you need to prepare properly.
To work you will need:
- Paper strips of special paper. This is double-sided colored paper. It may already be cut into thin strips, or it may be solid sheets, and then you will need a special device for even cutting of the paper.
- Tools for working with paper: tweezers, scissors, needles. Also, on the modern “market” you can purchase special devices designed to better give paper the shapes you need, for quickly rolling paper strips, and so on.
- And most importantly: a lot of patience and accuracy in work, which is especially important for beginners.
All necessary materials for quilling are sold in a craft store.
Paintings made using this technique can be both large and small, it all depends on the imagination and theme that is displayed in the resulting picture.
After finishing the work, the finished paintings can, and even should, be framed and hung on the wall or gifted to a loved one.
This is a wonderful gift for a birthday or other holiday. In addition, as you can understand from exhibitions of modern talented quilling masters, such voluminous paper lace can be sold. To do this, various resources and exhibitions can serve to help beginning craftsmen.
droplet
To make a droplet, which is also a fairly common form, you need to wind the strip not very tightly, then remove it and squeeze one of the sides on which the end of the tape was located with your fingers.
If you also squeeze the droplet from the reverse side, you will get the third basic element of the figure, which will resemble either a tree leaf or an eye.
Miniature flower in a pot using quilling technique
This tiny planter from the "mee-mee" area is sure to delight the girls. So why not make a pleasant surprise for your beloved friend or deskmate?
In addition to pink, green, white and orange quilling paper, you will need: a wine cork, a toothpick, PVA and scissors.
1. From a cork and a toothpick, make a tool like this for winding paper.
2. Cut six orange strips and twist them into spirals, loosen them a little.
3. Press the spirals from one side, giving them the shape of droplets.
4. Glue three white strips 7 mm wide and make a fringe. This is the core of the flower.
5. Make a spiral from two green stripes, unravel and squeeze from both sides. So make 2 leaves.
6. Make a tight cone-stem from a green strip 6 mm wide.
7. Make a flower pot from three glued pink strips 1.5 cm wide. Twist a tight roll, squeeze the middle down. Pour PVA glue onto the bottom and glue a circle of paper.
8. Make the grass in the same way as you made the core of the flower. Strip width 10 mm.
9. And now the fun part - assembling the flower.
Here it is - a decorative quilling flowerpot and a new gift for a friend.
simple flower
Now it's time to make your own quilling craft. We'll start with a simple flower.
Make six spirals from stripes of the same color, then form them into droplets, which you will then turn into leaves.
Your base elements should be the same size.
Glue one of the petals to the paper, then take the second one and place it opposite.
Glue the rest, leaving a space in the middle where you place the bead - your first job is finished.
Doing quilling step by step
We create a quilling card for mom.
To do this you will need:
- Quilling paper in bright and rich colors;
- Scissors;
- PVA glue;
- Glue stick;
- Brush;
- Awl;
- Tweezers;
- Cardboard.
We take cardboard as the basis of the postcard and simply fold it in half. There will be a future applique on the front side, which means that before implementing it, you need to decorate the inside of the postcard and write a congratulation. After this, we decide on the image on the front side of the postcard.
A card with flowers will always be relevant for mom. Let's remember mom's favorite flowers - daisies.
It’s worth starting to learn the quilling technique by making crafts without complex elements
Choose a background for the postcard – blue. The background can be made by gluing blue paper to the front of the card or decorating it with paint or pencils. The oldest technology for coloring postcard backgrounds is grinding the core of a colored pencil into a “dust” fraction and rubbing this “dust” onto the desired areas with a piece of paper.
To make daisies on a postcard, you need to prepare a core from yellow paper by twisting the paper into a tight circle shape and white petals by twisting the paper into an oval shape. After all the elements of the daisies are ready, you need to coat the back side of the blanks with glue and glue them to the postcard. It is necessary to glue carefully, the part that needs to be glued must be held with tweezers, the glue must be applied with a brush, without overdoing it.
If you overdo it with glue, it will be visible and the postcard will be careless and not neat.
You also need to make leaves and stems for the daisies. Leaves can be made in the form of a “Droplet”. The drop can be twisted in different tones of green. For completeness and completeness, the image can also be made by rolling paper into a bee, parrot, or angel. The card is ready, you can give it to your mother.
You can make various flowers using quilling:
- Carnation;
- Rose;
- Lily;
- Pansies;
- Asters;
- Chrysanthemums and others.
If there is a small child in the house, then for his learning and development, you can make letters using the quilling method. He will not only collect words from them and remember how they are written. These letters can also be glued with double-sided tape to magnets that can be placed on the refrigerator. You can make various New Year's toys using the quilling method, such as a bird, fish, star, bell, bow, piano, cup, doll. It is not necessary to buy multi-colored paper; crafts can be made from plain white paper.
You just need to cut out strips of a certain size from white paper and roll them into tubes and glue them into shapes. Then coat it with glue and apply glitter. By twisting the paper you can create a whole Santa Claus, who can be placed under the tree.
You can make a New Year's garland. Cut multi-colored paper into strips 5 cm long and 1 cm wide and glued together in the form of a ring or droplet. For quilling masters, there is such a technique as loop quilling. To perform looped paintings, special skill is required. Folding and twisting of paper strips is carried out with a comb, comb, toothpick and awl, and dexterity of the fingers and hands is also required.
Volumetric flower
Take ten white stripes and form them into either droplets or petals, then start gluing, first two opposite each other, and then the rest. If there is room left, make one more petal or two. Place them with sharp edges towards the center. Leave no space in the core.
Next, take a yellow ribbon one centimeter wide, cut one of its edges, creating a fringe and begin to make a spiral. When it is ready, glue it to the center.
A stem is made from green paper and set aside for now. Both ends should be sharp, and it should be tightly twisted. For strength, you can insert a wire into the center. Next, make a spiral out of the green strip and insert a stem soaked in glue into it, allowing it to dry for some time.
Glue the chamomile to the base of the stem and your craft is ready.
Creating three-dimensional flowers using the quilling technique
Quilling is a very interesting activity for those who want to learn something new and unusual. The popularity of this type of creativity is due to the fact that to create works you only need paper, which is sold in a large number of stores. The technique can be mastered from scratch in just a couple of master classes.
In this master class I will show how you can make voluminous flowers that will look no worse than real ones.
What we will definitely need.
Materials:
- decorative square frame. The frame should be deep, without glass. Depth is a mandatory requirement for the frame, since the flowers are voluminous;
- quilling paper (3 mm wide) in several shades from pale blue to dark blue. I used 5 shades of the same color scheme;
- quilling paper (3 mm wide) dark green;
— paper (density 120 g/sq.m.) — white and blue;
Tools:
- an awl for quilling (for beginners, you can use a toothpick or a special tool);
- PVA glue;
- regular scissors;
- tweezers;
— colorless silicone sealant + gun (sold at any hardware store);
- ruler with geometric shapes.
How to make a bell.
For one petal we take 2 stripes of blue color (different shades are possible). Glue them together and roll them into a tight roll.
You can use a ruler by inserting a roll (not glued) into a hole with a diameter of 1 cm. Using a ruler allows you to make parts of the same size for those who do not yet have a full hand.
Glue the tip. I recommend using a ruler when you need all the petals to be the same size.
We give the roll the shape of “eyes”. Please note that the element is twisted very tightly. It is important.
Now we grease one side with PVA glue and wait until the glue completely dries (becomes transparent).
After the glue has completely dried, it is necessary to give the petal the desired curved shape. To do this, take the petal and fold it (as far as possible) in half, lengthwise. The side with the dried glue is on the outside (this side is not visible in the photo).
Now we bend one end of the element outward. The photo shows how the petal bends.
For one flower we make 5 petals.
To make the center you need 2 strips of paper of each color: blue paper - strip 2*10 cm, white paper - 1*10 cm.
We paste a white strip of paper over the blue stripe (along the long side), as in the photo.
Cut the fringe. For the middle of one bell, cut a 1 cm strip, twist it and glue it together.
Now we connect the petals and the middle, glue them together, adding volume.
We make the bud in the shape of a cone. Glue two strips of green paper together, roll them into a tight roll and squeeze out the middle. We pour glue inside for strength.
Now we glue the petals to the cone/bud.
The number of bells for the finished work depends on the size of the frame and your imagination. In the case of this work, there are 11 bells.
We glue the bells to the frame sequentially. To do this we use silicone sealant.
I composed compositions of 3 flowers.
You can complement the composition with petals made of green paper. We make the petals using the same technique as the petals for the bell: we give the shape of an eye to a tight roll. There is no need to lubricate one side with glue.
I am sure that the master class will be useful for both beginners and experts in quilling techniques.
Sunflower
Quilling crafts for beginners were listed above, but this figure belongs to the category of medium complexity, but once you have mastered the basic principles of working with tools and paper, you should be able to do it.
Take the yellow strips and form them into fluffy spirals, with a stripe pitch of one to two millimeters, and squeeze one of the ends to form a drop.
Take a sharp object, such as a needle, and move the center to the sharp end, fixing it in this position with glue.
Next, take the second petal and glue them together on the side at the sharp end and press them together again with your fingers. Make 20 similar petals and increase their number if necessary.
Cut out a circle ten centimeters in diameter from green paper, use a compass to form another one in it, but with a radius of two and a half centimeters.
Start gluing the petals, the blunt ones to the area of the drawn circle, and the sharp ones outward.
Take the green strip and glue two more to it, you should have a long ribbon. Start winding, making a spiral. Insert a wire into its center, bend it so that it does not fall out, turn the flower over and glue it to the green circle.
Follow the step by step instructions and use glue to place the second row of yellow petals. They should be located at the junction of the first row; your core will still be empty.
Form strongly fluffy petals from wide stripes of three millimeters of green color. They should be glued underneath the yellow ones, attaching them to the base of the round stem. Once ready, let the structure dry a little and form a stem from green paper, pasting over the wire.
To make the core, you will need either a long strip of several brown ribbons, or many tightly twisted spirals inserted into the center - your work is ready.
heart
The principle of creation is similar to the previous form. Only the winding directions of the spirals change. Press at the junction with your finger. This type of decor is good for decorating a gift for a girlfriend or wife.
Now you know the main shapes used in the quilling technique. To consolidate the effect of reading our instructions, we recommend that you familiarize yourself with the photos of quilling crafts. We are sure that you will find a lot of inspiration among them!
Snowdrops
As you may have noticed, any scheme for creating quilling crafts involves several options for execution. This is the pleasant part of working in this direction. Everyone is able to bring something of their own, based on their experience.
The first version of snowdrops is extremely simple. In fact, we don't need to twist the spirals. It is enough to form three droplets from small pieces of white paper and glue them to the green tape. The attachment point is hidden under a strip of a similar color.
Make three flowers and you can decorate the work by diluting it with grass and cotton wool snow. You can complicate this option if you use full-fledged droplets, but in this case, attaching the flower to the stem should be better and tighter from a full-fledged spiral.
The second option differs in the design of the flowers. Make semicircular spirals that resemble an arch, then take a green ribbon and glue its end to the snowdrop and it is ready.
Quilled snowdrops. Beautiful spring card
To make a floral card with snowdrops you will need: colored cardboard, an openwork napkin, PVA glue, a long toothpick, white and green quilling paper.
1. Using a toothpick, twist three modules called “free spiral”. These are snowdrop petals.
Form them into three basic “eye” elements by pressing a spiral from two opposite sides.
2. Take a green strip of paper and form it into a tight spiral. Using the blunt end of a skewer, squeeze out the middle of the spiral, thus forming a “cone” element.
3. Assemble a snowdrop flower: glue the petals and place them in the middle of the cone. If you want to make an unbloomed bud, place only one petal in the cone.
4. Cut out thin stems 8-9 cm long from green paper.
5. Cut ¼ of the openwork napkin, remove the sharp corner and make a basket blank, folding the edges into the middle.
6. There is very little left - glue all the details of the bouquet onto a cardboard blank and sign the card. I am sure that the hero of the occasion will be very happy with such a touching gift: beautiful flowers in the quilling style.
Butterfly
It is made very simply from five parts. The base is a ribbon twisted in the shape of a petal, to the sides of which the wings are glued. They are made in the form of droplets, the lower ones are glued with sharp ends outward, and the upper ones with blunt ends. You can make antennae from the black stripe.
If you wish, you can use an interesting technique where you take short strips of different colors and glue them together one by one. As a result, wings are formed from them, a very interesting effect is obtained.
Quilling ideas
Using the quilling technique, three-dimensional cards, vases, gift wrapping, toys, individual flowers, bouquets and much more are made. These can be hearts decorated with ribbons for a declaration of love, framing photographs from snow-white curls for a wedding, Christmas wreaths on the wall, colorful panels with a nature theme, jewelry in the form of animals, birds, interior design for a children's room.
Interior quilling decor is selected for a specific design. For baroque it would be appropriate to abundantly decorate mirrors and picture frames with voluminous flowers, birds; oriental style would be suitable for cherry blossoms made of paper, located on an empty plain wall. The country style will be decorated with many small flowers, fragments with rustic motifs - fences, roosters, sunflowers. Sharp broken shapes and stylized bricks are suitable for a loft.
Paper products should not be used in damp rooms - even if coated with varnish, they will quickly deform and become unusable.
Decorative wall panel using quilling technique
To make a colorful quilling panel, take an A3 landscape sheet, on which a simple schematic still life with a jug and draperies in the background is drawn in gouache or watercolor. It is important that the entire surface is covered with paint and that there are no gaps at all. Next, curls are formed from colored paper strips, and from them all kinds of flowers on intricate stems are formed. When the product is ready, it is placed in a cardboard or wooden frame.
Postcard design
On cards intended for birthdays and memorable dates, floral motifs are most often placed; hearts are suitable for Valentine's Day; snowmen and snowflakes are suitable for Christmas and New Year. If the card is intended for a woman, it is made in soft pink, red, yellow-orange tones; for a gift to a man, blue, gray, protective green, and light brown are suitable.
We create unusual jewelry
To make earrings, you will need two special metal earrings that will cling to your ears, and two flat rhinestones-pearls. To make a pentagonal design, ten rolls are twisted for each earring, which are flattened in the form of eyes and glued in pairs. Each pair is framed with a separate contrasting strip, all five parts are assembled into a “star”, framed with a common frame, a pearl is glued to the center, and a metal blank is attached to the top. Approximately the same design, only larger, is used as a neck pendant or keychain.
The necklace is made of simple circles, fastened together with small metal links. It will be more original if you take yellow and orange paper, twist the yellow into rolls, flatten them in the form of orange slices, edge the parts a little with orange paper, fasten them with iron brackets, and attach a special fastener.
New Year's decorations for the Christmas tree
New Year's decor can be done by the whole family. Several white rolls will make a fantasy tree, which is placed in a two-layer circle; the Christmas tree is made from green rolls flattened in the form of droplets, glued on all sides to a paper tube. From five red eyes, decorated with a dense edging, a star will come out, and from three simple but dense spirals of different sizes - a snowman.
Finished products for the Christmas tree are varnished with glitter, made of silver paper, hung with thread, and decorated with rhinestones and sequins.
Easter decor
One of the main symbols of Easter is the egg. To complete this you will need an empty chicken shell or a Kinder Surprise package. Next, many small rolls are rolled up, which tightly cover the surface of the egg. On one side there is a voluminous flower made of stripes with fringe. For an Easter panel, the outline of a chicken and several eggs is drawn on a sheet of cardboard, then the figures are filled with rolls adjusted to the shape. The chicken has legs made of a spiral bent in the form of a three-fingered paw, an acute-angled wing, a forked beak, and a flat puppet eye. At the bottom of the picture there are curlicues in the form of green grass or yellow-beige hay.
Stylish design of candlesticks
To make an original water lily candlestick, a metal base is taken that will protect the paper from burning when the candle is lit. Next, large spirals with a contrasting edging are twisted, a total of 20-30 of them are made, depending on the size of the structure, a droplet is formed from each. After that, exactly half of the drop rolls are taken, the wide side is glued to the bottom of the candlestick - flush with its bottom. The second layer of rolls is attached a little higher, but at an angle of about 70 degrees relative to the bottom row. The finished product is decorated with pearls and transparent beads symbolizing droplets of water.
To make the water lily more realistic, several leaves of a believable shape are cut out of green paper.
We design photo frames, clocks, mirrors
The original photo frame is made on a rectangular, oval, round, or other suitable cardboard base, which is pre-painted. Then the space is filled with round rolls of various sizes, chaotically located spirals, triangles, eyes, droplets.
It is preferable to design the watch symmetrically; for this purpose, the base is cut out, five to nine cm larger than the watch on each side. The space is filled with rolls in the shape of hearts, crescents, and pre-made flowers. On the surface of a large mirror, usually in one or two of its corners, quilling flowers, butterflies, and curls are also glued - a product designed in this way resembles a window with frosty patterns.
Chrysanthemum tree
Instead of searching the Internet for information on how to make quilling crafts, think about whether it is possible to implement something else from existing forms. For example, you can get a tree from an ordinary chrysanthemum, but if you use a napkin rather than paper as a basis, the result will be even more interesting.
Find an old napkin, it is better if there are several color options. Cut it into narrow strips three millimeters wide and make a fringe, the more magnificent it is, the better in the end.
Start twisting a loose spiral - the chrysanthemum is ready.
Make nine more flowers and start gluing them to the leaf. Four at the base, the next row three and so on until one. Decorate the craft with a stem of any color, beads, snow made of small white curls - you have a tree.
How to do quilling
To make a complex 3D model of a house or a three-dimensional painting with your own hands, you will need various tools.
Products made using the quilling technique have excellent aesthetic properties.
Namely:
- Strips of colored paper with sizes from 3x300 mm to 7x300 mm; many stores sell ready-made sets of paper for rolling;
- Quilling kit;
- Cardboard – depending on what basis the applique will be placed on;
- Cardboard for the base;
- Glue pencil and pva glue;
- Set of tweezers;
- Comb;
- Metal quilling stick;
- Short awl;
- Template of volumetric forms;
- Breadboard knife;
- Plastic board for quilling;
- Templates of geometric shapes for quilling;
- Quilling coach;
- Ruler-template for quilling;
- Diameter template for quilling;
- Universal and curly scissors;
- Tools for paper rolling;
- Paper cutting tools;
- Tool for corrugating paper;
- Set of glue sticks;
- Double sided quilling tool;
- Set of quilling pins;
- Figured and classic hole punch;
- Double sided tape;
- Ruler;
- Adhesive pads on a roll.
This is the basic kit for a needlewoman who does serious quilling. However, for a beginner it is not necessary to purchase specialized quilling kits; you only need a few tools including scissors, glue, paper, a ruler and tweezers with a toothpick. Not everyone has tweezers in their home either. It can be replaced with regular eyebrow tweezers.
Quilling paintings
The beauty of this creativity is that you can print any image and decorate it with strips of paper. For example, after printing an image of a running animal or a dancing person, decorate part of the silhouette in the direction of movement with curls of various shapes and complexity. You can use dense spirals to fill the entire picture - this is at your discretion.
With stripes and spheres you can imitate images that are familiar to us, starting with something simple, for example fish, you can end with an owl or something else, there are no restrictions.
It is only important not to forget and actively use the technique of gluing different colored stripes into one tape. For example, for an owl's eye, one strip will contain black, then yellow for the pupil, then again yellow and white.
The more experienced you become, the more you can be inspired by the world around you. In winter, make a snowflake, in summer, flowers seen in nature. Try to realize three-dimensional figures of various animals, it may seem somewhat tedious, but the result, believe us, is worth it.
Remember that often from the simplest forms you can get complex ones. You can make a grapevine from droplets and voluminous, convex spirals. The leaves will be green and the berries themselves will be purple. Nothing can replace your imagination and ingenuity.
We create paintings from quilling
Applied arts such as quilling are now gaining momentum in popularity due to their colorfulness and fun. It is suitable for both adults and children, provided they are assisted by adults. Using the quilling technique, paintings of various themes can be created.
This could be a painting whose style reflects the themes:
- Nature;
- Season of the year;
- Animals, etc.
First, let's look at what quilling is: it is one of the types of handicrafts, which involves creating pictures from thin strips of paper by twisting and giving paper circles different shapes.
You can make quilling paintings of any size
Many people call quilling paper filigree, because such paintings look no less beautiful than classic filigree in jewelry.
This art is quite old. The first mentions of it range from the 14th to the 15th centuries, and it was widespread in monastic circles at various monasteries. The monks created ornate paper decorations. All this was explained by the fact that ordinary people could not afford such expensive material at that time as paper, which is now available to almost everyone.
Paintings in the quilling style are popular due to their delicate beauty, which is more reminiscent of the finest lace, but has a pleasant volume than the usual classic lace made of threads. There are a wide variety of training videos. Any such video master class will help people who are starting to master quilling to become familiar with all the basic techniques, any subtleties of this manual labor, and also, famous quilling masters often share their secrets, which will help in subsequent independent work with paper strips.
Photos of quilling crafts for beginners
Lilies
To make a lily, a craftsman should arm himself with:
- a set of stripes of pink, white, yellow and black;
- diagram or sketch;
- PVA;
- a special tool for twisting strips;
- a tube of acrylic glossy varnish;
- wires;
- rings with a diameter of 0.7 cm for connection;
- a base for rings that can be expanded to any diameter;
- transparent glue.
The list of actions looks like this:
- First of all, you should make earrings and a pendant.
- Next, you should take pink strips with a width of 3 mm, a length of 95 mm and glue them to white strips with an identical width size, but the length will be 100 mm longer. The edges are glued together. In total, you will need to make 18 stripes for the flower.
- Paper ribbons are wound onto a special quilling tool or toothpick until spirals are obtained. You should start with pink so that these ribbons end up in the middle of the flower.
- The rolls are stretched to form an oval shape and bent at the tips on each side.
- Then a flower is formed by gluing 6 petals.
- To form the core of the lily, you need to take black and yellow strips, 0.15 cm wide and 40 mm long, and twist them into tight spirals (6 pieces yellow and 3 pieces black).
- 1 dark and 2 light spirals are glued together to form the middle of the flower. It should be glued to the center of the future lily.
Using the steps listed above, you can make a flower for a ring. The difference will be the size of the stripes. So, pink ones will be only 40 mm, and white ones will be 95 mm. For the middle, it is necessary to use smaller spirals (the length of the black and yellow stripes will be reduced to 30 mm).
To make jewelry with flowers, all the resulting lilies are coated on both sides with acrylic varnish, and the flower is set aside until completely dry. A smaller flower is fixed to the ring base with polymer glue.
When making earrings, you need to take earrings and, using a connecting ring, attach 2 large flowers to them.