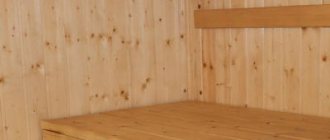
For owners of land plots and their own houses, the question is relevant: how to make a door from boards with your own hands? At any farmstead there is always a certain number of utility rooms: an external toilet, storage rooms for gardening tools, tools, various devices and supplies. The doors provide protection from dust, fallen leaves, and precipitation, depending on the time of year. If there are pets, doors block their access to unwanted places.
- 2 Simple door for unheated rooms
- 3 Door for rooms with insulation
- 4 Paneled entrance and interior doors
Decorating wooden doors
When all structural elements are ready, you can move on to the next stage of manufacturing wooden doors - decoration. This moment is very responsible and important, because during the finishing process it is very easy to damage components if you act ineptly.
Experts advise not to do such actions yourself, but to trust the professionals. However, if you have at least some skill with a brush and know how to apply paint, then treating the door yourself is not difficult.
If you need to paint several structures, then before making a wooden door, you can buy a spray gun and a compressor, which will make the process easier. But this is quite expensive and does not make sense if it is used only once. It's cheaper to rent them. These devices allow you to quickly and efficiently apply paint to the surface of wood.
In addition to painting, ways to decorate the door leaf are:
- treatment with varnish or stain;
- gluing with PVC or veneer;
- coating with film or laminate;
- leatherette lining;
- drawing a picture on wood;
- wallpapering;
- fabric decor;
- wax impregnation and more.
If you decide to make wooden interior doors with your own hands from a material that is susceptible to moisture, then before decorative finishing you should coat the future door with a water-repellent composition. It is also recommended to apply a composition that protects against putrefactive processes, as well as the formation of mold and the spread of parasites.
Required tools and materials
To begin work, purchase the necessary consumables and equipment. The specific list is determined by what kind of design you will make.
Materials
You can make a structure yourself only if you have the right material:
- Dry lumber - boards and beams. The thickness of the boards for interior doors is at least 2.5 cm, for entrance doors - 5.0 cm.
- Accessories - awnings, handles. An additional lock is purchased for entrance structures.
- Wood glue.
- Nails or screws.
It is better to choose lumber that has been technically dried, smooth, without knots or defects.
To finish the door, depending on its type, you may need the following materials and devices:
- primer;
- paint, stain or varnish;
- sanding paper of various grain sizes.
In addition to materials, you need to stock up on the appropriate tools.
Tools
Many tools are available in any home, but there are some things you will need to purchase in advance:
- hand or electric saw;
- hand router - for shaped processing of boards, making grooves and locking joints;
- drill;
- screwdriver;
- roulette;
- plane;
- square;
- grinding machine;
- level;
- chisel;
- hammer;
- brush or spray gun.
When all materials and tools have been purchased, you can begin direct work on the structure.
Installation of door structure
The last step in the manufacture of a wooden structure is its installation in its immediate place. If there was already a door there previously, and the frame is intact and undamaged, then you can install the canvas in it.
If the frame has become unusable, then before making the door with your own hands from wood, it is more advisable to replace it with a new one. It is assembled from the same material as the door. After making the box, it needs to be installed in the wall. In this case, polyurethane foam is used as the fastening material. If the composition comes out a little beyond the crack, it is not a problem, since after drying it is easy to cut off with a knife.
An important aspect is the correct insertion of hinges after making wooden doors with your own hands. The elements on the canvas must match the hinges of the box. Mortise and flush mounted ones are suitable. Such products are sold in construction stores. Their installation is not difficult - they are attached with screws or self-tapping screws.
Installing handles and locks will be much easier if you use a screwdriver and drill for these purposes. First, you should try on the fittings, mark the place for the lock and the entrance of the tassel tongue. Remember that the fittings for interior and entrance doors will be different. As for the creation, decoration and installation of the entrance wooden structure, the process will be no different from that for interior products.
We looked at how wooden doors are made. Thus, it is quite possible to manufacture a structure from natural wood on your own. The most important thing is to use high-quality materials, choose the right tools and have at least some skills in working with wood, as well as knowledge of building rules and terms. You can watch the video for more details on making wooden doors with your own hands.
Paneled homemade doors: assembly
It is very difficult to make paneled wooden structures yourself, since all elements are processed on complex machines and require certain skills and craftsmanship.
To reduce the cost of assembly, you should make design drawings with two simple-shaped large panels, and seek help from craftsmen who have the necessary woodworking machines. They will fulfill the order, and you can assemble the door yourself.
The product is a frame assembled from timber, the free space of which is filled with panels.
The manufacturing process consists of the following operations:
- Drawing up a detailed drawing of all structural elements indicating not only the length and width of the workpieces, but also the parameters of the grooves.
- The timber and board used to make the frame and cross members are machined to produce tongues and grooves that match the drawings.
- The surface of the panels is also processed with a milling cutter to obtain a relief, and the thickness of the edge is reduced so that it fits freely into the groove of the crossbars.
- Before assembly, all workpieces are impregnated with an antiseptic and dried.
- Assembly is carried out on a flat surface of a workbench or clean floor. All joints are covered with wood glue and the structure is assembled according to the drawing, tapping all the joints of the assembled product with a mallet.
- Check that right angles are observed during assembly, clamp the product with clamps and leave in this position until the glue has completely dried.
- After drying, markings are made on the door leaf for attaching fittings - door handle, lock and hinges, which are attached after final surface treatment.
Often, for production, a glued version of boards or timber is used from individual wooden blanks - lamellas, which are then covered with natural veneer of valuable wood. A door decorated in this way is difficult to distinguish from a solid wood structure.
https://www.youtube.com/watch?v=uHjVFIKCJK4
Some features
Door frame device.
The process itself looks something like this. First, a smooth board 5 cm thick (maybe several) is prepared, and 4 identical pieces are made from it. 2 of them are equal to the length, 2, respectively, to the width of the opening.
In this case, the segments have processing on only 3 sides - they must be made very smooth, the 4th is placed near the wall. Based on the width of the board, a cut is made into which the door will be inserted.
The incision is made only on the side where it opens. If a double door is planned, cuts are made on all sides. It is easier to make cuts on a machine, where it is possible to raise the table and adjust the required length. The existing material is cut to the required length, and all ends are machined.
When all the necessary workpieces have been prepared, they begin to process the transverse sections. The longitudinal compartments of standard doors are 193 cm, the transverse ones are 90 cm. The cut at the end of the door frame should be 1.5 cm deep and 5 cm wide.
DIY plywood doors. Step-by-step instruction
If you follow the detailed instructions for installing a sliding door, then installing it yourself will not be a problem. It is quite possible to do without the help of specialists to make a plywood door yourself. This does not require extensive experience; basic repair skills and the ability to handle tools are sufficient.
Making a single-layer plywood door
- A sheet of plywood with a thickness of at least 1 cm must be cut according to predetermined parameters
- Slats or wooden planks are attached along the perimeter of the sheet. This is necessary to give rigidity to the door leaf. You can fasten the planks with screws, small nails or using wood glue.
- To increase the strength of the structure, horizontal jumpers are needed, for which the same rail is used. First they are installed on one side of the sheet, then on the other.
- To give the door a more aesthetic appearance, you can smooth out the transition from the slats to the main panel using glazing beads.
- Next, the door needs to be sanded, putty and painted in the desired color. You can simply coat the plywood with varnish.
- Fittings are installed on the finished door
Making a frame door
This product will require two plywood sheets, which will be attached to a frame made of bars and planks. The frame is made according to the dimensions of the doorway. Wooden parts are fastened into one structure with self-tapping screws or metal plates.
The first sheet of plywood is fixed on one side of the frame using self-tapping screws. Then a layer of thermal insulation material or simply filler is laid so that the door is not hollow. Next, a second plywood plate is attached to the other side of the structure. All that remains is to treat the canvas with putty and paint it in the desired color, fasten the fittings - and the sliding door is ready for installation.
Installation of the structure
- Attaching the rollers to the door leaf depends on the system used. Manufacturers' recommendations must be followed. Most of them recommend retreating a certain distance from the edge and attaching the plates under the rollers there. They are fastened with self-tapping screws, the length of which should not be less than 70 mm. They need to be screwed strictly perpendicularly. Supports for the rollers are installed in the plates, and the platforms themselves with wheels are already attached to them.
- The guides are installed from above the doorway. The best option is to first hang the profile on a dry beam using self-tapping screws, and then secure this structure above the doorway.
- Hanging doors on guides. It is important to leave a distance between the floor and the door leaf so that the door does not shuffle across the floor when opening and closing.
- Installation of stoppers. They are mounted from above directly into the profile, starting from the sides. At the bottom, the stopper is needed at the same level as at the top.
Article on the topic: How to sheathe a metal door with dermantine
The final work is finishing. The top beam can be covered with a strip that matches the color of the door.
In what cases is it better to install
Sliding doors and sliding doors are installed between rooms. They are especially relevant in the following rooms:
- Kitchen where there is never enough space
- Interior space when two rooms are separated from each other
- Toilet and bathroom
- Dressing room, mirrored doors are often installed here
Doors can be made not only from plywood, but also from solid wood. However, plywood is preferable if you need to make a door leaf of a curved shape. Such designs are in demand mainly for dressing rooms. Plywood bends well, so giving it the desired shape will not be a problem. Radius doors are attached to the same curved profiles.
In addition, plywood is lightweight, it is resistant to high humidity and temperature changes, and is not afraid of direct sunlight. Plywood is easy to care for, as the material tolerates synthetic detergents well.