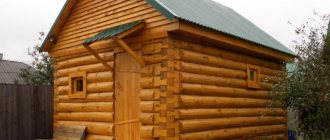
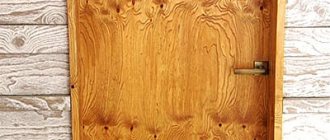
A special wooden box, popularly and by experts called a “jamb” and “casing”, consists of sides, a top, a window sill board or a threshold. Their installation is carried out in a wooden house in the openings in which doors and windows should be located.
The main purpose of using casing is to preserve doors and windows during the period of inevitable shrinkage in a wooden house. This is one of the hallmarks of architecture, during which the structure is protected from the risk of shifting logs. You should not refuse to frame the openings, as this can lead to disruptions in the optimal functioning of windows and doors.
general information
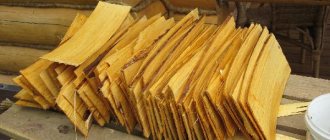
- To make the casing, wood is taken with a moisture content of at least 12% - too dry material will crack under mechanical loads.
- The width of the jamb should correspond to the thickness of the walls, but there is a recommended limit for this parameter - no more than 25 (±1) cm. The reason is the same - the risk of splitting the wood.
- When installing the casing, traditional fastening and fixing elements in the form of staples, nails, screws, spacer wedges are not used (only in individual cases, during assembly). It is not recommended to use polyurethane foam for sealing gaps. It has a gluing property, therefore, the mobility of lumber (logs, beams) of walls and casing relative to each other is excluded. This means that the meaning of installing a support box in the opening is lost.
- Before installing the casing, it is necessary to take measurements of the opening. If the window (door) block has already been manufactured or selected in a furniture showroom, then the reference point is its dimensions. The thickness of the frame board is added to them, and this, with a small gap for the insulation, corresponds to the required parameters of the opening. As a rule, its slight expansion in a wooden house does not cause difficulties. If it is necessary to slightly narrow the opening, it is enough to increase the thickness of the casing board.
- A gap of about 5 mm is left between the upper element of the frame and the ordinary log (timber). It is called shrinkage, and it serves to lay insulation and prevent structural destruction due to wood deformation.
DIY door frame
Preparing door frame parts
For the door frame, it is important to choose wood that does not warp. In this case, the master chooses pine, but other types of wood that are resistant to external influences, in particular teak and oak, can be used to make door frames.
To ensure that the door frame fits perfectly with the door panels, the craftsman lays it in folds on both side panels of the future door frame.
To ensure the correct position of the door, the master places 3 mm spacers between the frame elements and the door leaf - in the upper part, exactly in the middle and in the lower part.
This distance ensures that the door opens and closes freely.
Fixing door frame parts
To maintain the correct position of the door relative to the door frame, the master fastens them with long clamps.
Now the main thing is to keep all the elements in place; for this, the master uses three screw clamps. They are placed in the upper, middle and lower parts, exactly where the spacers are located.
Preparing the top panel
For the door frame, it is important to choose wood that does not warp.
Now the master takes measurements for the top of the door frame, which will adjoin both side panels of the frame on top.
The size is taken from the outer edge of one side panel of the door frame to the outer edge of the other panel and in our case is 86.2 cm.
Saw off the top panel of the door frame.
Now we still need to cut it so that it rests on top of both side elements of the door frame.
The parts to be removed must have a width equal to the thickness of the jamb, that is, 2.8 cm. The master places this size on the top panel.
When marking, it is important to use a square so that the cuts are absolutely accurate. It is also very important to adjust the saw as precisely as possible so that the width of the rebate is exactly 2.8 cm.
The cutting depth should be 1.4 cm (this is the distance to the bottom surface of the rebate). Then the top panel of the door frame will ideally fit the upper ends of the side panels of the frame.
So, all that remains is to simply cut out the marked pieces of the top panel on both sides. If you don't have a miter saw, you can use a fine-toothed hacksaw.
Before attaching the top panel, you need to double-check that it fits neatly between the side panels.
Securing the top panel
Everything is in order, and now it can be secured. We do this using wood glue, applying it along the edges where the top panel will come into contact with the side panels. We press the top panel, but not all the way yet. First you need to squeeze the glue a little between the outer edges of the panels on both sides. And then we press the panel properly.
The door frame needs to be assembled and fastened, and the master takes a 3.5 mm drill. He drills three holes: one at the top, one at the bottom and one in the middle. Then he screws in the 4.5 x 70 mm screws. The same must be done on the other side. Now the door is almost ready.
Adjusting the height of the door frame
Before the door frame leaves the workshop, the craftsman will reduce the height of the frame. Since the height of the threshold under the door frame is 1.8 cm, the master puts this measurement on the frame below. He draws lines using a square and saws off the excess with a hacksaw. Finish cuts carefully to avoid splitting the wood.
Once both frame side panels have been cut to the correct length, a support board should be installed to ensure the door frame remains stable during transport.
The long clamps can now be removed. The new door frame is ready for installation. It took the craftsman about 45 minutes to make a new door frame for an old door.
Pipe design
Regardless of the manufacturing method, the main parts of the frame are.
- Vershnik. Its purpose is to hold the upper ends of the sidewalls in a static position. Essentially, this is a horizontal casing strut. At the same time, it provides a shrinkage gap into which the sealing material is placed.
- Threshold. The lower part of the pigtail. In window openings this is the window sill. It solves a problem similar to that for the apex, but it is this element that bears the maximum load, and therefore great importance is attached to its strength.
- Sidewalls (carriages). Vertical casing elements installed on the sides of the opening. The function is to ensure the “sliding” of the walls of the house (up/down) when the wood shrinks.
Common materials for finishing doorways
High-quality finishing of doorways guarantees an aesthetic appearance, as well as sound insulation and tightness
High-quality finishing of doorways guarantees an aesthetic appearance, as well as sound insulation and tightness. Materials that are in demand for finishing doors:
- MDF panels or laminated fiberboard. These materials are durable, environmentally friendly and hygienic. They have excellent noise and heat insulation qualities.
- Drywall. Before making a jamb, you can look at photos of various modifications in advance, and you may choose the appropriate option for finishing the doorway. Drywall is an excellent alternative to plaster. This type of finishing is a simple, fast and aesthetic way to decorate a surface.
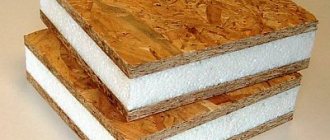
- Sandwich panels. This material has excellent noise and sound insulation properties. The most modern finishing method.
- Decorative stone finishing. Basically, this material is used to decorate door jambs without using doors, for example, arches.
- The classic option is plaster. This type of finish, in addition to its aesthetic properties, retains heat well and is highly durable.
As you can see from this article, there are many options for designing doorways. The main thing is to choose the most suitable one according to your tastes and preferences. In addition, the finishing method must meet all technical requirements and criteria, then it will delight the eye with its appearance for a very long time.
Sources:
- https://www.supersadovnik.ru/video/dvernaya-korobka-svoimi-rukami-10181
- https://goodlinez.ru/installation/613
- https://monateka.com/article/35211/
- https://jprosto.ru/kak-sdelat-dvernoy-kosyak/
Types of casing
From the array
The pigtail, made from solid wood, is characterized by increased strength and retains the texture of the material. Depending on the specifics of installation, there are two modifications: “in the block” has a groove in the shape of the letter “P”, “in the tenon” - with a section in the shape of “T”. Despite the advantages of these types of casing, their significant disadvantage is the complexity of manufacturing. In order for a window frame in a wooden house to effectively perform its function, all recesses and ridges must be accurately adjusted to size. In addition, to select material and turn protrusions, you will need a special tool (for example, a milling cutter, a circular saw, a chain saw); It is quite difficult to achieve the desired result using ordinary household products.
Note. There is another type of casing “in a tenon” - with a slope. The difference is that the pigtail is not made up of separate elements, but is whole. That is, it is a ready-made box with protrusions; it is mounted in the opening in assembled form. Typically for installing doors. But its manufacture can only be done by a professional, since high precision fitting is required.
"Embedded block"
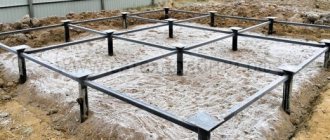
The most practical option, simple and convenient for self-assembly. The peculiarity of installing a pigtail of this type is that you can use scraps of lumber. You just need to select bars of an acceptable cross-section, polish them and cut out the corresponding grooves in the wall opening (on the sides and bottom). These frame components are placed inside the recesses and serve as support for the finishing board.
The pictures show typical drawings that give a general understanding of the design features of the pigtail. Its exact dimensions are determined based on the parameters of a particular opening.
Recommendation. The casing for the window block is done with or without sampling. The first option is for wooden houses, if no additional finishing is expected. The second is suitable for old buildings, the appearance of which requires updating (outside, inside).
Strengthening the door jamb
Sometimes the door frame is supplied disassembled; it will need to be assembled and firmly connected at the corners with nails. It is clear that this only applies to wooden jambs.
Before making a jamb, it is important to know that it needs strengthening; to do this, you need to frame it around the perimeter with a metal corner and secure it to the wall with iron pins about 120 mm long at a distance of 700 mm.
The iron door, that is, the frame, is welded around its circumference to metal pins that are firmly embedded in the doorway. Door hinges must be reliable and made of durable material, preferably steel. Fastening is usually carried out using screws, screws or welding, it all depends on the material from which the door jamb is made.
When the door opens outward, end hooks or anchor pins are installed on the hinge side. This device prevents the door from being removed if the hinges are cut. Hooks are made of metal rod having a cross section of 6-8 mm. When strengthening door jambs, you must remember that the door leaf must be made of high-quality and durable materials.
Manufacturing of casing
For windows
With wooden frame:
- Preparing grooves on the sides of the opening.
- Laying inter-crown insulation material in its lower part, with a block on top. Its task is to prevent displacement of the sidewalls.
- The grooves on the left and right sides of the opening are filled in the same way.
- Installation of the upper casing element.
For PVC windows
Experts do not recommend installing such blocks in wooden houses, but if the decision is made, then you need to know some of the nuances of installing the casing.
- Preparing the opening involves changing its geometry. The gaps between its sides and the block are at least 130 mm. A more accurate value is determined by the following indicators: the moisture content of the wood of the house and its service life (which means the degree of probable shrinkage), the thickness of the crown joints.
- Making a threshold. Cuts are made in it to obtain a comb. It is needed as the base of the carriage in which the groove is installed. This element ensures uniform shrinkage of the house without destroying the structure.
- Making a carriage. A beam of 150 x 100, with a length less than the height of the opening by 50 mm, is sufficient. A groove is cut into it and the surface is ground to ensure “sliding”.
- For the top, take a “magpie” board with a width of 120 - 150 (according to the thickness of the walls of a wooden house). It also contains grooves for connecting to the ridge of the opening.
- Installing the sidewalls is the same as for a wooden window.
- After checking the geometry, all casing elements are fastened with self-tapping screws. It must be taken into account that they should not go into the wood of the wall. Otherwise, it will form a “rigid” coupling with the supporting frame, and the pigtail will not fulfill its function.
- Insulation of the opening.
- Treatment of wood with special preparations.
For doors
*The simplest option
- Preparing the opening. If it is not pre-arranged in the wall, it is marked and a rectangular segment is cut out. At this stage, grooves are prepared for connection to the door frame.
- Processing the jamb. This technology implies that he is a door frame. Accordingly, wood is sampled for the grooves.
- Placing the box in the opening.
- Installation of horizontal struts (lower and upper).
- Sealing the casing with soft insulation. Another option is flax fiber. The work is carried out in such a way as to prevent the frame from being fixed in the opening; she must remain free.
- Removing the spacers.
- Treatment of wood with a fire-retardant preparation.
- Fastening platbands.
Other door lining technologies are difficult to implement. Considering the importance of this element for the home, it is better to entrust the work to a professional.
Methods for finishing door jambs
There are times when only the door leaves need to be changed, but the door frame remains the same. In this situation, it is recommended to repair the door jambs so that the new leaf does not particularly stand out against the background of outdated and deformed trim. You can finish the jambs to suit every taste, it all depends on the chosen end result. There are many ways to make a door jamb so that it matches the overall interior of the home, here are some of them:
- Paint the jamb. To do this, you need to walk over its surface with sandpaper or sandpaper, first coarse, then finer. This will allow you to remove the top layer, which has already peeled off in places or is simply damaged by time.
- If the jambs do not have openwork patterns, they can simply be sanded using a machine. Then you need to cover all the cracks and depressions with a special wood putty, and after drying, cover with varnish.
- Cover the jambs with self-adhesive paper. To do this, you need to remove the door from its hinges. Remove all dust and dirt, and possibly grease, using detergents or alkali. It is necessary to take into account that the door jambs, that is, their surface, must be painted or varnished. Next, strips of the required size are cut out, the bottom paper layer is removed and glued to the work surface.
Practical advice
Before you start making a pigtail, you need to consider a number of factors:
- What kind of door will be installed in the opening. For wooden houses there is a choice - metal structures (entrance), plastic, paneled, even glass panels. In accordance with this, making a pigtail has its own characteristics.
- Thresholds are not always made for interior doors, but they are a mandatory element at the entrance to the house.
- Steel blocks are mounted in the same way as PVC windows - with a “sliding” casing carriage.
- Considering the specifics of arranging openings in wooden houses, it is more advisable to order plastic windows after preparatory work, according to the final dimensions.
- Installation of casing in a new building is always carried out before caulking the log house.
In principle, it is not difficult to independently arrange a simple window frame in a wooden house. But its type is selected depending on the characteristics of the window, doorway and the block installed in it. If you are not sure of the quality result, it is better to order the casing (the approximate price of 1 linear meter is from 1,350 to 2,600 rubles including the cost of the material) or invite a specialist.
Some nuances when installing platbands
It is necessary to install platbands or a finishing frame on the doorway, the finishing of which will give a finished and aesthetic appearance to the structure. You can select the necessary platband from a large number of standard ones presented in a hardware store. They are fastened using finishing and liquid nails and self-tapping screws. Some tips that will make the process of installing trim on doorways easier:
- Heads of screws/nails or small cracks can be hidden using a wax corrector or acrylic-based sealant.
- Gaps where the planks meet each other can be eliminated with a single finishing nail.
- Large defects in the door frame can be hidden with wider trims.