We comply with the law
For the extension of utility blocks, the law specifies special standards. It is simply impossible to start construction without obtaining a building permit from the sanitary and epidemiological services.
There are standards for all private buildings, which clearly state that there must be at least 5 meters from the barn to the street. Along the internal boundaries of the site, the outbuildings from the house should be at a distance of 3 meters, other buildings - from 1 meter, and garden crops, including trees - 4 meters.
The influence of outbuildings on the house and plot
As you know, any structure affects not only the site and its visual perception, but also a private house. In this regard, it is important that the outbuilding is not only useful and functional, but stylish and attractive. The style of the outbuilding should match the style of the private house, complementing it with its beautiful design. If this is not possible, then you need to choose the right place for construction.
The purpose of the building affects not only its appearance, but also the project that will be used for its construction. It is also important to think about the interior layout of the room, because this is the only way to create a functional and attractive building. In addition, you need to think through the logistics of the site in advance, because the utility unit and tools should be as close as possible to the place of work.
Simple change house
If the plans include blocks without keeping livestock, it is recommended to comply with sanitary and household standards, namely, at least 6 meters from adjacent territories. Before you begin registering a utility room, you must obtain an agreement from the firefighters.
Usually this is done by representatives of the Ministry of Emergency Situations; they will come upon request and make a conclusion on the technical characteristics of the object. When all the documentation has been collected, you can safely begin the construction of the planned buildings.
Design
Every structure begins with design, and a do-it-yourself shed is no exception.
In suburban areas, the utility room is designed not only for storing items, but can serve as a separate room for a summer shower and toilet. In this regard, it is worth designing the placement of windows and doorways in advance.
One of the simplest design options is boards with brackets, but there are many other options with different materials. Below are details about the most popular options.
What it is?
Before moving on to considering all the features of utility units, it is advisable to understand what they are.
So, a utility block is a non-residential building that is reserved for storing a variety of equipment and tools for working in the garden. They are often supplemented with recreation areas and places for eating. Many summer residents decide to equip utility blocks with corners for taking water procedures. Often on sites you can find outbuildings that are built together with a spacious woodshed, where the necessary raw materials for lighting a fire, as well as operating a fireplace or stoves are stored.
The type of construction under consideration can be not only capital, but also temporary. If the structure is made only for some time, then to create it you can use the simplest available materials (including used ones).
A capital structure will require a more thorough approach to construction work. The craftsman will need to build full walls, lay out the roof, and install window and door structures. In addition, capital utility blocks need a detailed project indicating all dimensions.
It is not at all necessary to build a high-quality utility unit with your own hands. The building can also be purchased ready-made. Such designs are sold in specialized retail outlets. The summer resident only needs to choose the most acceptable option that will meet all his requirements.
Installation of a utility block on a plot of land can be carried out either by experienced specialists or by the homeowner himself.
Why are outbuildings needed in a private yard?
It is not difficult to guess that any outbuilding should perform one function - to help with various household chores. For example, to grow plants you need greenhouses, to store food you need a barn or cellar. With the help of a greenhouse, plants can be planted earlier and harvested longer, a shed will be useful for storing special clothing and tools, fertilizers and other equipment, and a cellar will allow you to preserve the collected products until the next season.
If the owner of the plot plans to breed animals, then he will need a chicken coop or a summer kitchen, sheds and a cellar. The birds will spend the night in the chicken coop; the summer kitchen will be useful for processing them. In the barn you can store feed and hay, straw and sawdust, as well as equipment and work clothes. A compost pit is necessary for the disposal of straw and sawdust. After work on the site, a summer shower may be useful, because it will allow you to get rid of the smell characteristic of the chicken coop, and a cellar is needed so that the bird can not be cooked immediately, but can be extended its shelf life by salting or smoking the carcass.
What types of outbuildings are there?
If we talk about the types of outbuildings, then everything depends on the purpose and configuration of the building. For example, a small one-story building with several rooms can be used as a guest house or a summer kitchen, workshop or storage room. Utility rooms can be located separately from each other or combined under one roof, creating a single utility block. In this regard, most buildings have several functional tasks.
However, there are also buildings whose internal configuration implies only one use, for example, an outdoor shower and toilet, an aviary and a chicken coop. Of course, you can store firewood or a workbench in a chicken coop, but such a solution is unlikely to be convenient. In this regard, before moving on to the construction of an outbuilding, it is important to determine its functional tasks, because each building on the site must fully correspond to its purpose.
Metal utility units
Metal utility units can be divided into three categories:
- welded - made according to an individual project from sheet materials;
- converted shipping containers;
- ready-made block containers with factory configuration.
Welded utility blocks
To some extent, they can be compared with similar garages. The only difference is that a door is installed instead of a gate. The advantage of this manufacturing method is the freedom to choose sizes. Although this is possible if the “box” is made on site (for large structures there are transportation restrictions).
In this option, channels and corners are used as load-bearing elements of the frame. Additional stiffening elements can be made of metal tape, and the sheathing is sheet steel or corrugated sheets. Inserting doors and windows requires the installation of additional strength profiles.
Planed edged boards, OSB-3 or moisture-resistant plywood can be used as internal cladding. If the interior of the utility unit needs to be made warm, then insulation is carried out using expanded polystyrene or penoplex.
Converted containers
Even from a small container you can make a utility unit with one section. Large sea containers (20 or 40 feet) will produce a “wide-profile” cabin, where you can place not only a room for storing garden tools, but also equip a full-fledged sanitary compartment with a shower and toilet.
For a simple change house that is intended only for storage, using a container is the best option. There is no need for windows and the locking system is strong enough that all you need is a good lock.
For a multifunctional utility unit, the container needs to be modified:
- install partitions;
- cut in doors, and if necessary, windows;
- fail communications;
- cut passages for pipes, cables and ventilation;
- sheathe individual sections (insulate if necessary);
- make a roof so that the container does not heat up in the sun.
Interesting: The purpose of canopies and awnings over the porch of a private house, arrangement rules, fundamental differences
Ready-made block containers
This is the most expensive version of a metal utility unit, but the easiest to assemble and the fastest to install on site. If the owner of the dacha is not limited by budget, then there are quite a lot of offers on the Internet for the sale of ready-made sanitary containers, including those for domestic use. Unlike samples intended for public use, household models consist of two compartments - a toilet and a shower.
Wooden utility units
There are two main options for wooden cabins - panel and frame .
A panel utility block differs from a frame one only in the assembly method. The panel assembly method is used less frequently - it is inferior to a pure frame in terms of fit quality. But some builders prefer to assemble entire walls “on the ground,” each with its own frame, and with all the necessary openings. Then these walls are lifted, installed on the lower frame, connected to each other and with the base, and the top frame and roof are mounted. Moreover, for small outbuildings, a hanging type rafter system can also be assembled on the ground.
The supporting structure of the frame utility block is assembled from timber. Then, depending on the purpose of the cabin, they are sheathed with boards or OSB, followed by interior and exterior finishing (if necessary).
Lightweight structure
A frame shed is the fastest to erect and easier to assemble. The advantages can be noted:
- Possibility to use lumber of lower grades
- Ease of design
- Possibility of transferring to another place, if this is specified in the design in advance. To do this, craftsmen make a support frame with a small protrusion, notched at an angle of 45 degrees.
- Minimum construction time.
Capital premises
They usually have a concrete base - the floor. Nor is the presence of high-quality, wooden floors made of planks or other similar materials. A plank floor implies the presence of joists underneath. They are also of wooden or iron construction.
If the building size is small, the floor is made without lag at all, but with the addition of strong strapping.
Choosing the optimal barn layout according to the drawings
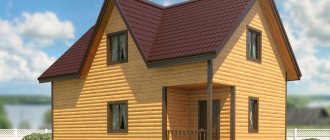
Prefabricated barn made of timber. The laconic geometry and neat appearance will allow the building to fit well into the surrounding environment. The compact frame is suitable for storing tools and garden equipment.
Standard option - rectangular building Source domicomfort.ru
To better retain heat, you can arrange a vestibule Source bankfs.ru
A shed made of timber is often used for showers and toilets, as well as for other purposes. First of all, because this design, compared to a gable roof, is cheaper and easier to build. The advantage of a pitched roof is effective ventilation.
The rafters for building a pitched roof will require 2 times less than for a gable roof Source yurlkink.ru
Economical bathroom option for a summer cottage Source domicomfort.ru
A garage made of foam blocks for a small car (motorcycle, moped), with a small utility room. A reliable structure will protect well not only from precipitation, but also from temperature changes, humidity and uninvited guests. A simple shed made of foam blocks for storing equipment and as a workshop is also possible.
Eco utility room
Since ancient times, wood, namely logs, has been used as a building material. This is an advantageous option for building a wooden shed.
This barn looks great, especially if combined with a bathhouse. One of the shortcomings is only the ability to work with such material.
Stages
The production of a high-quality utility unit consists of several stages. You should not neglect any of them if you do not want to make serious mistakes. Let's look at each of the steps to create a useful outdoor “house” with your own hands.
Foundation
The foundation is the first thing you need to do correctly when making the structure in question with your own hands. Before work, it is recommended to examine the condition and quality of the soil on the site. If we neglect this, a person risks making a mistake in choosing a specific type of foundation. In this case, the building will quickly begin to deform, sag, and ultimately may collapse. Checking the soil type is carried out by specialists whom you must call to your site.
Let's look at how to make a foundation correctly, using the example of a pile foundation.
- First of all, it is necessary to prepare a place for the future construction of the foundation. Remove the top soil layer, remove all weeds, roots and other unnecessary elements.
- Next, wooden pegs or reinforcement are driven in. A string or thread is pulled between these parts. In this way you will mark the boundaries of the planned foundation.
- In the designated places, wells are made at a distance of 100-120 cm from each other. Their depth should be at least 70 cm, and their diameter should be 30-35 cm.
- The base of the concrete pile must be below the soil freezing level.
- A 10 cm layer of sand should be poured into the bottom of each hole. It is compacted, and then gravel is poured on top. The walls of the well must be strengthened if they crumble. An excellent waterproofing material would be a roofing material wrapped in a tube, which is inserted into the hole.
- The foundation will be stronger if you supplement it with a frame. It can be constructed from reinforcing bars. The frame can be made from 4 pieces of metal rods with a height corresponding to the pillars.
- The reinforcement cages will be located at the level of the foundation base. They need to be bent a little (45 degrees).
- Next, the prepared frames are installed in the pits. Concrete solution must be poured inside the roofing felt tubes.
- Before the base has time to harden, anchor posts must be fixed in the upper half of the column. These will be the connecting elements for mounting the lower frame trim.
- On average, the mixtures harden within 3-6 days, but sometimes it takes 10 days.
Interesting: Step-by-step instructions on how to make a carport with your own hands
Frame assembly
For construction, you only need dry wood with its own moisture content of 18-20%. In addition, before installation, all wooden parts of the frame and cladding must be treated with antiseptics. It is also advisable to treat the wood with fire retardants, but universal fire protection compounds can also be used.
Note. Drying oil is not suitable for these purposes.
For the bottom trim, use a beam with a cross-section of 150x100 mm, placed on the long side, or a beam with a cross-section of 150x150 mm. The corner connection is standard - in the “wood floor”. The lower frame is placed on the foundation blocks by laying a roofing material folded in half.
For an insulated floor, you can put a second crown of 100x100 mm timber. On the remaining 50 mm shelf, logs with a section of 100x50 mm are attached.
Corner posts are made from 100x100 mm timber. Openings into which doors and windows will be installed are assembled from the same timber. You can save money on intermediate racks - they are often made from 100x50 mm timber. All load-bearing elements are attached to the lower frame using metal corners. Each rack is set at a vertical level and temporarily fixed using jibs nailed to the framing beam.
The top trim is made of 100x100 mm timber. First, grooves are selected on the beam at corner joints and intersections with floor beams. Then the timber is mounted along the long wall with the grooves up, and fixed to the racks with temporary fastening (perforated metal tape or staples). After this, the remaining elements are installed, the levels and angles are checked, and the upper trim is finally attached to the racks.
The distance between the intermediate posts is selected according to two criteria:
- dimensions of the cladding material (if these are OSB boards);
- width of the insulation (if the utility block is insulated).
The pillars of door or window openings are installed according to the size of purchased products. An exception is if window frames and doors are made by hand.
Walls and partitions
Next, you need to assemble the frame of the future walls and partitions of the outbuilding. All wooden parts are pre-treated with antiseptics. For the bottom trim, a beam with a section of 150x100 or 150x150 mm is suitable. These parts must be placed on the long side. The corner sections will be connected into half a tree. The lower frame is laid on the foundation blocks by laying roofing material folded in half. To install insulated floors, you can assemble a second crown from 100x100 mm timber. On the remaining 50 mm shelf, logs with a section of 100x150 mm are installed.
For corner posts, 100x100 mm timber is suitable; openings are made from it, into which windows and doors will then be installed. The intermediate posts can be made from 100x50 mm timber. The load-bearing components are attached to the bottom trim using metal corners. Each side must be aligned with the vertical level. Temporarily the parts can be fixed using jibs.
The top trim is made from 100x100 mm bars. First, grooves are made in the timber in the area of corner joints, as well as at the intersection with floor beams. Then a block is installed along the long wall with the grooves up and attached to the racks using temporary fasteners. Next, install the remaining components, check all levels and angles, and then attach the top trim to the racks.
Between the intermediate posts it is necessary to select suitable distances in accordance with certain parameters:
- the size of the sheathing material, if it is OSB boards;
- indicators of the width of the insulating material.
It should be taken into account that it is advisable to finish an uninsulated utility block only from the outside. The walls of insulated buildings consist of the following layers:
- external cladding;
- waterproofing film;
- insulation laid between the racks;
- vapor-proof film;
- internal lining.
Floor
Logs are attached to the strapping beam or the “second crown” beam. The pitch of the lag depends on the thickness of the floorboard - the thicker it is, the greater the distance. So for the “twenty” logs are laid in increments of 30 cm, for boards 30 mm - 40 cm. If OSB is used for the subfloor, then the principle remains the same: 16 mm - 30-35 cm, 18 mm - 40 cm, 22 mm - up to 50 cm.
In an insulated utility room, the floor is made in the form of this “pie”:
- the bottom is hemmed with board or OSB;
- lay a waterproofing film;
- insulation is placed between the joists;
- a covering is installed on top.
Ceiling
If the utility block is located in the open sun, then thermal insulation is required for the ceiling (or roof). This will also allow you to prolong the “active” operation of the cabin in early spring or late autumn. A layer-by-layer insulated roof looks like this:
- roof with sheathing;
- waterproofing;
- insulation laid between the rafters or on a false ceiling;
- vapor barrier;
- roof lining or ceiling.
Roof, doors and windows
Racks and openings for door and window structures are installed strictly in accordance with the purchased products. The only exceptions are those cases when the owners make both the windows and doors themselves. For a homemade utility block, it is best to make a pitched roof.
- Pairs of rear and front struts are made in 2 different fixed sizes. The upper trim is mounted, making the necessary slope. In this case, the rafters must be attached directly to the harness itself.
- The racks can be made equal, and the top trim can be installed clearly horizontally. The slope angle then must be formed using the front wall posts. The rafter parts are installed with one side directly on the frame, and the other on the support beam.
Interesting: How to build a summer kitchen in your country house with your own hands
To fix the legs of the rafters to the strapping, use a groove cut in the strapping block. Or you can use a support beam with an oblique end, nailed to the rafter base.
If corrugated sheeting or metal tiles were chosen as the roofing material, then waterproofing is laid on top of the rafters. Then the sheathing is installed. Its pitch will depend strictly on the angle of inclination and the parameters of the roofing material.
Brickwork
In the event that additional space in the yard is needed for centuries, then the construction site is built with bricks. This is not an easy task, but it is still worth it.
I would like to note that this idea will be a little expensive compared to the previous options presented.
All this is because for brick construction you will have to purchase associated consumables, such as gravel, cement, sand.
Frame project 6×3 – how much material is needed
Let's look at how to build a 6x3 m utility block, how much and what material will be needed. We focus on one option, because it is impossible to consider all the diversity. If the dimensions of your frame structure differ, it is easy to calculate the amount of material by increasing or decreasing it.
When starting construction, we make sure to draw a drawing as best we can, and based on it, we draw up a list of materials. You shouldn’t rush into this; it’s better to think it through carefully until you find the ideal option.
You will need bars 100×100 mm:
- for lower and upper frames 6 m long - 6 pieces, three-meter ones - 8;
- for vertical supports – 2.4 m – 11 pieces;
- 2 pieces of 6.6 m each for rafters;
- plus horizontal bars on doors and windows.
You will need beams for the frame.
You will need boards:
- 20 pieces 25×150 mm for the floor, the same number for the ceiling or replace with another material (plywood, fiberboard, etc.);
- for the sheathing – 7 pcs. 25×100 6 m long;
- for windshields the same 2 pieces, but 3.6 m long;
- for fastening rafters – 50×100×3600 – 6 pieces.
If we are making a metal frame for a building, we focus on the length of the lumber. We calculate the amount of material for the foundation and covering based on the size of the building. If the foundation is strip, you will need quite a lot of sand, cement, and crushed stone. The columnar one will cost much less; for a frame utility block it is a good option.
Block barn
To save time and some family budget, some developers use gas silicate blocks. In this case, it is worth saying - “The miser pays twice!”
The fact is that when a person thinks about how to build a shed from blocks, he does not take into account several important facts - the material loves to absorb moisture, so there is no way to do without additional finishing.
Block shed at the dacha
Building blocks have become widespread due to their characteristics. To build a shed, you can choose cinder block, foam block, aerated concrete, shell rock, adobe block and others. You will need to focus on many indicators, but most of all - the reliability and durability of the material, the ability to quickly build with your own hands, as well as obtaining a warm and dry structure.
The foundation for a small shed is identical to a brick one—shallow strip or pile with a grillage.
The construction of block walls is a little easier, since they are much larger than bricks. Construction will go quickly, only the floors must be made in strict accordance with the technology - using an armored belt, or on the basis of wooden beams and boards, which is more than enough for a barn. The roof can be either gable, if a small attic is needed, or flat with a slope!
Temporary utility room
If an extension is needed only for a short period of time, then you should pay attention to the fastest and most economical options.
Such structures can be made from improvised means. For example, old boards, slate. You can install any doors for the barn that you find on the farm.
How to build a shed: choosing a location, materials and layout, installation stages, price comparison
The optimal room for storing household equipment and many other necessary things is a country shed. In addition, this utility room is often used as a home workshop. But, despite the simplicity of the design, you will have to make a lot of effort - choosing the right material and construction technology so that the result satisfies your wishes is not easy. If you don’t have the experience or time, then instead of a high-quality outbuilding you’ll end up with a hut on chicken legs. But nevertheless, the pressing question remains: what is cheaper to build a shed from, and is it worth saving?
However, fans of non-standard solutions may also like chicken legs Source ursa-tm.ru
Note to the master
When constructing long-term premises, it is important to take into account the level of groundwater in the area. When spring comes, the snow begins to melt - the waters will rise, and quicksand will form in the back room.
To avoid this, craftsmen measure the water, lay it, and pour the foundation at the required depth.
Interesting to know
Some craftsmen, especially in rural areas, use compressed straw to build walls. It turns out that it costs several times less than other materials, but it retains heat better than all existing options.
Moreover, as experts point out, such blocks do not burn at all due to their strong structure.
Purchasing a ready-made option
The best and simplest option is to purchase a ready-made block. When delivered to the site, you can assemble it yourself, because such structures are not complicated. Basically, they are made either metal or plastic.
- One or several sections are made of plastic. The utility unit consists of a frame and panels that are assembled into a single unit in a few hours.
- This design does not require a foundation; due to its lightness, it is mobile, well ventilated and does not require window openings if we are talking about outbuildings. It can withstand up to 10 years.
- For a metal block you need a frame and profiled sheets. Such a building does not have a floor covering - this is one of the differences between it and a plastic house.
- Instead, concrete is poured or tiles are laid. To make the structure more resistant to impacts, it is coated with varnish on top. This prevents rust from developing quickly.