How good life is in the summer at the dacha! The air is fresh, the birds are singing, your eyes are taking a break from the computer - beauty, and that’s all! If there is a bathhouse, you can wash off dust and labor sweat. And if not? What if a bath is contraindicated? Of course, you can heat water in a saucepan or bucket and wash yourself in a basin. Romance? Undoubtedly. But gradually such a life begins to tire and I want to transfer at least some of the benefits of civilization from a city apartment to a country house.
Fortunately, this is not a big problem now. It can be solved quite easily, quickly and does not require large financial investments. Moreover, you don’t even need to build anything - the lightweight collapsible structure turns into a shower stall in a few minutes, and in the fall it can just as easily be disassembled and hidden until the new season. If at your summer cottage there is a secluded corner where you can install only a water tank and a shower head with a tap, then it will cost even less .
About materials
The materials from which it is made are of decisive importance for a summer shower. The design of the shower, its durability and construction costs depend on them.
It is necessary to select the material before starting construction of the shower.
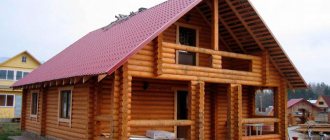
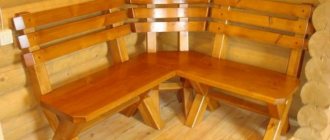
- Tree.
Cheap, durable, environmentally friendly and beautiful material. It keeps you warm. However, under the influence of moisture, wooden structures are destroyed, so they are treated with an antiseptic.
- Metal.
Lightweight, durable and beautiful material, but afraid of corrosion. Welding skills are required for installation. Due to the high cost of construction and the need to constantly paint, the material has limited use in summer cottages.
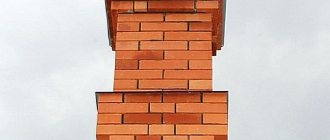
- Brick.
This material has an attractive appearance. Brick construction is durable and inexpensive. True, it is always cool in a shower made of such material.
- Polycarbonate.
A universal building material with low weight, moisture resistance and low price. Material of different colors is easy to cut. It is considered an alternative to glass. But in the shower they use a color version so that it is not visible what is happening inside the cabin.
- Profiled sheet.
Beautiful, durable and inexpensive metal sheet. Shower walls covered with this material do not need to be constantly painted.
The choice of building materials is not limited to the types listed earlier. However, wooden beams or profile pipes are used for lintels and racks of the cabin, and any other materials are used for walls.
Shower trampler: principle of operation (video)
Instead of corrugated hoses, ordinary plastic tubes can be used, but such a system will require timely replacement, which is caused by possible breaking of the plastic at the bends during transportation or use.
The operating principle of the structure is very simple and does not require any complex preparatory steps:
- hang or secure a hose with a nozzle to a sufficient height so that the nozzle is located above human height;
- install a rubber mat under your feet;
- Immerse the end of the hose in any container filled with warm water.
It is enough to stand with your feet on the rubber mat and perform forward movements, which will start the water supply mechanism. Functioning on a principle reminiscent of the operation of a foot pump, it was possible to call such a device pneumatic. The main advantages of such shower structures are high reliability, compact size, mobility and long service life. Among other things, trampling showers, regardless of the model, are sold at a price quite affordable to a wide range of consumers. Popular models in our country: “Step”, “Step-M”, “Dachnik” and “Toptun”.
About choosing a place
Using the shower will be productive when a location is chosen before installation work begins. It must meet certain conditions:
- the storage tank should not be in the shade, so choose a place for the shower away from country buildings;
- if the tank is heated, then combined water heating is used: from the sun and electricity. For such a shower, it is necessary to provide a convenient and safe installation of the electrical network;
- in order not to get sick after water procedures, the shower stall should not be blown from all sides;
- a shower located on a hill never stagnates.
Waterproofing and ventilation of the shower - what to pay attention to
Organizing a shower even in a wooden house is not a problem thanks to modern materials and solutions. So, you can level and protect the walls with moisture-resistant plasterboard with mandatory gluing and puttying of the joints. The sheets should not reach 0.5-1 cm from the floor. If the walls are concrete or brick, you can immediately begin finishing them.
The waterproofing is applied to the screed and should cover the entire floor, extending onto the walls at least 15 cm. The walls in contact with the shower are also covered with waterproofing.
It can be either mastic or built-up roofing material. Special attention should be paid to the outlets of pipes and electrical appliances. At the junction of the walls and floor, as well as at the corners, an additional sealing tape is glued, the edges of which are also rubbed with mastic.
But proper organization of waterproofing in the shower is only half the battle. Constant high humidity, even if it has no effect on the facing material, can ruin the most modern bathroom. Therefore, forced ventilation should be provided at the planning stage.
The direction of air in the ventilation shaft, if it also affects living rooms, should be from “dry” rooms to “wet” ones - the bathroom and kitchen. Otherwise, constant dampness in the bedroom will be ensured. At the same time, it is advisable to do the hood even if there is a window - in the cold season it is hardly rational to constantly ventilate the shower room.
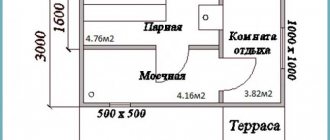
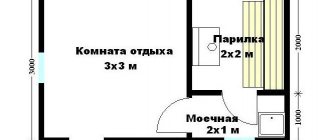
About dimensions
The dimensions of the cabin should allow you to freely stand, turn and bend.
The following sizes are considered optimal:
- height - 2.5 m;
- width - 1.4 m;
- length - 1.5 m.
To ensure that clothes and towels always remain dry, a locker room is equipped in the form of an extension with dimensions of 2 square meters. m.
Drawing of a summer shower with a changing room
About the storage tank
For summer showers, various storage tanks are used. They differ in three respects.
- Case material.
- Metal tank.
Without painting, the structure quickly rusts, so the water turns yellow. It’s easy to paint the container black on the outside, but you won’t be able to get to the inside through the neck.
- Galvanized tank.
The protective zinc coating lasts up to 30 years. The water in the tank is always clean. Due to their low cost, such tanks are in great demand.
- Stainless steel tank.
This container never rusts. It is durable, and most importantly, it looks aesthetically pleasing. The high price limits the use of structures made of such material in dachas.
Stainless steel tank with heating element
- Plastic tank.
Possible breakdowns
With proper care, tankless water heaters last a long time, from 8 years. Breakdowns are rare, mainly:
- leak;
- poor heating;
- does not turn on;
- stale smell.
With prolonged use of the tank, its surface is corroded by corrosion and cracks appear. Gaskets dry out over time and require replacement. Before leaving, you need to drain the water and wipe the inside of the container dry with a soft cloth.
If there is a leak, you should call specialists from the manufacturer. The technical passport usually contains all their contacts.
When heating hard water for a long time, the heating element becomes covered with limescale. It needs to be cleaned periodically. Otherwise the heating element will burn out. If it does not turn on, you should call an electrician.
How to supply water to a heated tank
Many summer residents prefer a shower that has a heated tank. It allows you to wash comfortably and not catch a cold in any weather.
With combined heating from the sun and an additional source, the water in the tank is always warm. There are different sources of water heating.
- Firewood.
A stove is installed next to the cabin in which wood is burned. An additional tank is installed on the stove, from which boiled water is pushed into the main tank. Thanks to the circulation and mixing of liquids of different temperatures, warm water for washing is obtained.
- Electricity.
This type of shower uses a storage tank with a heating element. To reduce installation costs, it is enough to locate the shower cabin with a tank close to the power supply and water supply.
The water in the tank is heated by a cartridge or double-ended heating element. For a 200-liter container you will need a heating element with a power of 2.0 kW.
When choosing a tank with a heating element, be sure to take into account the state of the electrical networks and the pressure in the water supply system.
Before supplying water to the heated tank, you must ensure that it is securely attached to the cabin. A frame made of a profile pipe installed on the foundation will provide a stable position for such a tank.
At a summer cottage, water is supplied to the heated tank from a centralized water supply or an equipped well. To do this, a water pipe is laid from a well pump or from a hydraulic accumulator.
The water level in the tank is controlled by a float valve. If you install an additional cold water tank nearby, you can get water at any temperature.
A tank with a heating function is easy to install, in addition, it is inexpensive and lasts up to 40 years.
Shower-treadmill: device, review of models and operating principle of the pedal
A foot pump or shower-treadmill for a summer residence can be used almost anywhere, due to the mobility of the system. A compact country pedal shower can fit into a small bag. Corrugated hoses twist easily, but even when folded they will not lose their original shape.
The mechanical shower-treadmill or “frog” is designed quite simply and, regardless of the model, is presented:
- rubber mat or rubber pedals;
- valve system;
- corrugated hose for water intake;
- corrugated hose receiving water;
- shower head.
About water supply
Water is supplied to the shower storage tank from various sources located at a distance. Such sources are:
- Centralized water supply.
In rare cases, summer cottages are connected to a centralized water supply, so this source is rarely used.
- Water well.
For reliable water supply to a summer cottage, a well is installed.
When water is used only in summer, then one submersible pump with a capacity of 1 m3 of water per hour is sufficient. For year-round use of the well, the arrangement includes the installation of a deep-well pump and a hydraulic accumulator, which ensures constant pressure in the network.
Using 20 mm metal-plastic or polypropylene pipes, the water supply source is connected to the shower storage tank. Such pipes have advantages: durability, lack of corrosion, easy installation, and the ability to put away for the winter.
Making your own shower-treadmill
The simplicity of the mechanism of the “toptun” shower system allows you to make such a convenient design with your own hands. To make such a shower device yourself you need to use:
- foot pump for car;
- a rubber hose of sufficient length;
- rubber or wooden stopper;
- plastic container equipped with a lid;
- comfortable shower head;
- plastic or metal tube.
Step-by-step instruction:
- pour water into the container;
- drill a hole with a diameter of 10 mm and a hole with a diameter of 20 mm in the plug;
- install a tube reaching the bottom into the large drilled hole;
- install a shorter tube into the drilled small hole;
- attach the foot pump structure to a supply tube of smaller diameter;
- attach the shower head to the pipe in the large hole.
An additional and optional piece of equipment is a shower head holding device. The throughput capacity of such a pump design is relatively small, approximately a couple of liters per minute.
About water drainage
If the water from the independent shower does not flow to the prepared place, then a “swamp” constantly collects around the cabin.
The method of drainage is laid at the stage of foundation equipment. Used shower water is disposed of in different ways.
- Centralized sewerage.
Few dachas have the opportunity to use centralized sewerage. This method is not widely used.
- Drainage pit.
A cheap and reliable way to collect shower drains. The receiver is installed under the shower stall. To do this, dig a hole up to 0.8 m deep and lay the bottom with coarse gravel.
A tray made of metal, plastic or wood is placed on top of the pit.
Alternatively: drainage from old car tires
- Sewage pit.
Such a receiver collects wastewater from the entire summer cottage. The water is discharged into a cesspool or septic tank. To prevent wastewater from stagnating, when installing pipes it is necessary to maintain a level difference between the pit and the shower stall.
Step-by-step instructions for equipping a shower room with your own hands
The methodology outlined below has stood the test of time, so a novice builder can safely rely on it.
Floor construction
It is recommended to make the base for the floor from a steel pipe with a diameter of 89 mm.
Horizontal sections are laid along the perimeter of the room, and racks buried 400 - 500 mm into the ground are installed across the entire floor area with a certain frequency.
The upper surface of the contour laid along the walls and the ends of the racks must be in a horizontal plane.
Next, the following structural elements are laid on the metal frame:
- Flooring made of boards wrapped in plastic film.
- Concrete screed with expanded clay filler 100 mm thick.
- Thermal insulation is made of PSB-25 foam plastic, 100 mm thick (consists of two layers 50 mm thick, the slabs are laid with bandaged seams).
- Reinforced cement-sand screed 30 mm thick (as a reinforcement frame, you can use a masonry mesh with a cell size of 100x100 mm, pre-laid on reinforcement with a diameter of 12 mm).
- Expanded clay concrete screed 50 mm thick.
- The final coating is ceramic tiles laid on a sand-cement mortar containing liquid glass.
Internal partitions separating the shower room from neighboring rooms can be made using frame technology with plasterboard sheathing or laid out from sand-lime brick.
The brick partition is plastered on both sides and leveled with oil-adhesive putty.
Next, the outside of the wall is painted with decorative textured paint, and the inside (from the bathroom side) is lined with ceramic tiles.
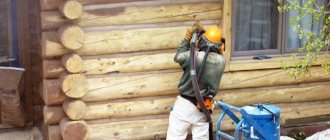
If the outer wall is made of wood, it must be treated with an antifungal and fire-retardant compound.
Next, the following materials are laid layer by layer:
- 1 layer of roofing material (sheets are laid with an overlap of 150 mm and sewn with a construction stapler).
- Foil thermal insulation 4 mm thick - adgilin or polyfoam will do.
- Lathing made of bars pre-treated with an antiseptic with a cross-section of 40x30 mm, attached to the wall with dowels or self-tapping screws.
- Sheathing made of xylitol fiber sheets (sheets 10 mm thick are laid in two layers with the seams bandaged and screwed with plasterboard amortizers).
- Finishing – PVC panels or ceramic tiles.
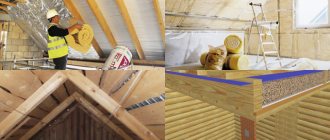
Waterproofing a summer shower
At the installation site of the shower cabin, xylitol fiber sheets can be painted with 2 layers of PF-115 enamel, which will serve as a hydro- and vapor barrier.
Ceiling
The same materials should be laid on the ceiling as on the main (external) walls, with the exception of the finishing coating - for this purpose it is recommended to use white PF-115 enamel, applied in two layers.
Before starting work, a ventilation hole should be made in the ceiling. Before painting xylitol fiber sheets, holes should also be made in them for installing lamps.
The laying of utilities should be thought out and planned ahead of time.
Without knowing the exact dimensions of the equipment being installed, this will not be possible, so before starting work you need to purchase all the plumbing, heated towel rail, lamps, exhaust fan, etc.
Sanitary installations should be connected to the sewer with a DN50 pipe.
For hot and cold water supply, a pipe with a diameter of 15 mm is used. In a private house, where pressure and temperature surges in the hot water system are excluded, polypropylene pipes can be used instead of metal-plastic pipes. Fittings for them are cheaper, and connections made by welding are more reliable.
To connect electrical consumers from the input device, a separate wire must be laid with the installation of an RCD rated for currents up to 10 mA. Connection to ground is mandatory, so a 3-wire wire must be used. It is better to take copper in double insulation, with a core cross-section of 1.5 square meters. mm.
Wooden structures swell, warp, and lose their practical properties under the influence of moisture. High humidity can negatively affect the condition of buildings made of logs or timber. To avoid this, it is necessary to waterproof all shower surfaces. Thanks to the abundance of modern waterproofing materials, you can create a functional and comfortable room in any wooden house.
Stages of arranging a shower room in a wooden house:
- Install a reliable ventilation system to remove water vapor.
- Install a water drain.
- Waterproof the room.
- Install a shower stall.
- Carry out finishing work.
It is generally accepted that in houses made of timber or logs, air circulation is ensured naturally, through micropores in the wood, and they do not need a full-fledged ventilation system. It should be borne in mind that wooden floors not only breathe, but also absorb and release moisture well. This property can quickly turn from an advantage into a disadvantage.
passive air exchange in a private house
For a small wooden house, a passive ventilation system is sufficient. With this method, air exchange occurs naturally without the use of supply and exhaust fans. Air enters the house through micro-cracks in building structures or through supply valves installed in living rooms. Air outflow is carried out through exhaust openings in the upper part of the wall in the kitchen, shower and bathroom.
Tips for arranging ventilation:
- The common exhaust pipe must protrude at least 50 cm above the roof.
- The outer part of the air duct must be insulated to prevent condensation.
- All equipment must be made of non-combustible materials.
- Ventilation shafts in the shower must be equipped with dampers to block the flow of oxygen in the event of a fire.
Air in passive ventilation systems circulates due to temperature differences and pressure differences inside and outside the building. Air currents penetrate the house, heat up, rise to the top and are discharged outside through exhaust openings. This method of air exchange is effective in the cold season. In summer, the circulation of air flows largely depends on the intensity of the wind and pressure changes.
Installing a wall fan in the shower:
- Mark the installation location of the device on the wall.
- Use a drill to cut a hole.
- Insert the coupling and cut off any protruding parts.
- Connect the electrical wiring.
- Drill holes for fasteners.
- Install the housing and muffler.
- Close the housing with the lid.
- On the street side, close the hole with a ventilation grill.
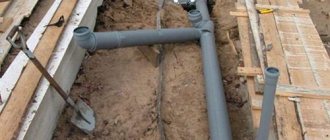
Sewerage
A wooden or timber building shrinks over time. This feature should be taken into account when choosing sewer pipes. Therefore, it is better to use drainage systems made of materials that are resistant to mechanical damage: polyethylene, high-quality plastic or metal-plastic.
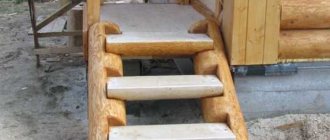
Gangway installation
Principles of sewerage design:
- For the shower and washbasin you need to take pipes with a diameter of 50 mm. A pipe with a diameter of 100 mm is connected to the toilet (if there is one).
- All internal drain pipes are discharged into a common riser.
- The pipes are positioned at a slight downward angle.
- For fastenings, it is better to use movable joints that prevent damage to the sewer in the event of shrinkage of the floor.
The area of the floor that is located under the shower stall requires additional reinforcement. To do this, additional supports are installed under the finished floor at the construction stage at the location of the booth. Wooden floors must be treated with water-repellent and antibacterial compounds. Then the floor is insulated with polymer mastic or a self-adhesive rubberized membrane. After this, a cement-polymer mastic screed is made.
Laying a rubberized membrane
Floor preparation procedure:
- The wood flooring is cleaned of dirt, oil and paint stains.
- The surface is treated with compounds that protect against water absorption and mold formation.
- A rubberized membrane or a layer of polymer coating is laid on the floor.
- The drain holes are closed with drains.
- 2 layers of cement-polymer mortar are poured on top. The thickness of each layer is 2–3 mm. The second layer is applied 2–3 hours after the first.
- After 6–10 hours, the floor can be decorated with finishing materials, such as tiles.
Tiling
Wall construction
Almost all the walls in a wooden house are load-bearing, so they need reliable waterproofing, which is carried out along the entire perimeter of the room. The wood is treated with water-repellent compounds. If it is decided to leave the walls wooden, then the processing ends there. Before facing with finishing materials, vertical surfaces are covered with waterproof plasterboard.
About the pallet
To prevent water from accumulating inside the shower stall, use a tray. The choice of tray depends on what type of floor is needed in the shower stall. There are several options for pallets.
- Wooden boards with gaps.
An option that does not require large expenses, since the drainage flows through the cracks directly into the drainage pit. This type of tray has a drawback: cold air is blown in through the cracks in the floor.
- Tray with drainage hole.
The outflow of water is ensured by homemade or purchased products made of iron, wood or acrylic. For fixation, the tray is screwed to the wall of the booth. It is necessary to maintain a slope towards the drain. A wooden ladder or mat on a pallet will protect your feet from the cold.
What to make a shower cabin from
There are many ways to equip an independent shower in the country. Each site owner chooses his own option. These options are worth considering.
- The cabin frame is made of wooden blocks. The cabin walls are covered with planed boards.
- The cabin frame is welded from profile metal and covered with tarpaulin or waterproof material.
- The simplest garden shower looks like this: a screen is attached to a frame made of profile pipes using rings, which covers the sides of the cabin.
- A shower cabin is welded from profile metal. The side walls are sheathed with corrugated sheets. As a rule, for such a shower, leftover material is used after installing the roof or fence.
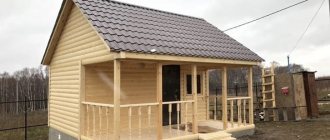
- The polycarbonate shower cabin looks very aesthetically pleasing. The basis of the structure is a metal frame, which is sheathed with material that allows sunlight to pass through. This material is often used in factory models.
- A corner for water treatments attached to a stone fence does not require a frame. The wall must be tiled and the watering can removed.
- A cabin made from living plants is obtained by attaching a mesh to a metal frame and then weaving the side walls with hops or ivy.
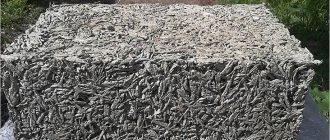
- The design of the summer cottage will be complemented by a structure made of natural flat stone. The masonry is carried out without cement, since the stone is held under its own weight. There is no provision for installing a storage tank above the cabin.
- The frame and partitions are made of wood, and then the walls are woven with willow vines. This booth blends well with the surrounding vegetation.
In general, an independent summer shower is easy to install and operate. You can try to do it yourself if you have even a little construction skills.
For more information on the nuances of choosing a sealed shower tank, watch our video:
dizlandshafta
Advantages
- Basic operation of a shower structure . You just need to insert the tube into a container of water, and then take a couple of steps on the mat to start the system.
- Saving . The average price for a structure is approximately 1,500 rubles. Compared to a traditional shower in a suburban area, this will significantly save money and time resources.
- Mobility . The system is simply disassembled and assembled, making it easy to transport to any location.
- Versatility . As mentioned above, in addition to its main function, a trampoline can be used to water beds and also wash large surfaces.
- Compactness . The parameters of the shower lie in its design features; the mechanism consists of a rubberized mat and two tubes.