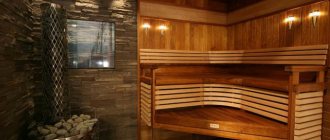
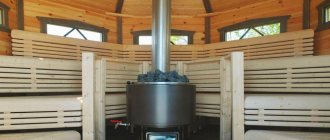
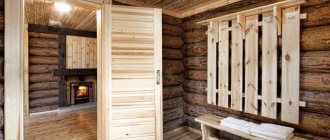
Baths cut from logs are gradually becoming a thing of the past, unable to withstand competition with light, modern, inexpensive materials, but the lining of the steam room and furniture are always made of wood. Only this material can create a special healing atmosphere in the bathhouse and provide comfortable conditions. If you want to save money, then try making a bench for a bathhouse. Since its design is very simple, a do-it-yourself sauna bench can be made without special tools, and a thing you create yourself is always better than something you bought.
Wood for benches
The benches are made only from wood, since this material is not damaged by high temperatures and does not damage the skin. Boards used to create benches must have the following properties:
- Ability to withstand temperature changes and high humidity. That is why hardwoods are usually used for baths, which do not crack with prolonged use.
- No damage. The boards should not have chips or knots. Such defects contribute to reducing the strength of sauna products.
- High drying speed. It is because of this property that boards made of linden, oak and aspen are often used. You should not use pine boards, as they are resinous.
When choosing wood, it is worth considering that aspen boards have a significant drawback: they rot from the inside, so damage can go unnoticed for a long time while using benches. But such problems do not arise if high-quality materials are purchased.
Choosing a place
On-site fitting
The process is simple:
- Place. On the site behind the house I choose a place to install a future bench.
- Setting the angle. I place the posts directly on the ground and, using a protractor, set 120 degrees between them (120+120+120=360°).
- Drilling points. I mark places on the ground for drilling holes.
Bench sizes
Sauna benches can be used for sitting and lying down, and therefore, when creating them, it is necessary to take into account the height of an adult. If the bathhouse will be used by people of average height, it is worth taking the following dimensions as a basis:
- Benches for sitting. Their width should be approximately 40 cm, and their height should be from 50 to 90.
- Benches for saunas, which are used in a semi-sitting position. Their height can also range from 50 to 90 cm. Such benches are created with backs having a height of about 110 cm.
- Benches for lying down. The width of such structures should be about 90 cm. Their height is usually about 50 cm. There is no footrest for such benches.
When creating the described products, you should also follow some recommendations. For example, the length of a bench for one person should be about 90 cm. If the product will be used by several people, about 60 cm should be added for each of them. When creating a bench, the supports should be positioned in such a way that the product does not tip over when the edges are loaded. When creating such products, the characteristics of the room should be taken into account. For example, in a small bathhouse you should not install benches that will be difficult to move.
Care Tips
To increase the service life of benches in the bathhouse, you should take care of them:
- after each procedure, you need to wipe the seats and backrests with a dry towel;
- also, after using the steam room, it must be well ventilated;
- depending on the type of wood used in the manufacture of benches, it is necessary to periodically treat the products with oil or oil wax;
- if the bench in the bathhouse is dirty, you can wash it with warm water and laundry soap; abrasive or liquid cleaning agents cannot be used: they contain active chemical compounds that evaporate or disintegrate under the influence of temperature, releasing harmful substances;
- If the boards show signs of rot or mold, the affected parts must be immediately removed and replaced with new ones.
Important! Extra oil treatment must be carried out if the bench has been damaged.
Benches for washing area
Wooden benches with the simplest design are created for the washing room. They are placed along the walls, next to the shelves intended for bath accessories.
The requirements for such sauna products are quite simple - they must withstand the weight of one or more people and containers of water. Benches must be stable and not tip over when one person sits on the edge of the product. The legs are installed as wide as possible in the transverse direction, which makes the structure more stable. The thickness of the boards for the bench should be more than 40 mm.
I make guides
Guides from boards
I had to competently cut the lumber I had:
- The blanks are 1.5 m long. I cut 1.5 m from each 40×20 board. I got 6 parts for the guides and made a 45-degree bevel at each end.
- Blanks 0.8 m each. I cut 6 pieces of 800 mm each from 100x100 mm timber.
Benches for the rest room
Since there is no high air humidity in the rest room, benches do not have to be made of hard wood. Furniture for the rest room can be made from any wood, but the material must be carefully processed before use.
Portable wooden benches with backrests are usually installed in the rest room. It is worth remembering that benches in the rest room should be more comfortable.
Digging holes
Garden auger at work
Using a garden auger, I dig holes for the legs of the bench. A total of 6 holes were required - 3 in the center and 3 on the edges.
Note! You can also use a rented electric drill, but for homemade work it is more important to use available tools.
I place the legs in the holes.
I determine the height of the bench and fill the legs with soil, having previously set the guides to the level.
How many benches should there be in a bathhouse?
To calculate the optimal number of benches for a bathhouse, it is necessary to draw up a drawing of each room and place the benches in them in such a way that they do not interfere with free movement and at the same time allow the number of people for which the room is designed to be accommodated.
Benches for sitting should be placed in the washing room, based on the number of people who will use the bathhouse at the same time. Usually in small buildings there are 2 shops, one of which is intended for two, and the second is created for one person.
In the rest room, benches are usually installed near the table and are large in size, since they are intended not only for sitting, but also for lying.
Collecting materials and tools
Timber and clapboard for work
I take it out of the barn:
- lining 2.4 m long each;
- boards 40×20 with a total length of about 9 m;
- timber 3 pcs. for pillars 100x100;
- nails 150 mm and 75 mm;
- hammer;
- circular saw;
- wood saw;
- building level;
- roulette;
- drill;
- garden drill
Power tools
Bench manufacturing technology
The simplest design for saunas consists of legs and boards that are secured as a seat. It is created as follows:
- First, a drawing of a sauna bench is created, which indicates the dimensions of each structural element.
- After this, the legs are made. For this, bars with a cross section of 50x50 mm are usually taken.
- Then grooves are created on the inside of the supports. This is necessary to install the transverse bars connecting the legs. The connection does not only occur at the top of the supports. At a height of 1/3, additional bars are installed that connect the legs. Subsequently, they are connected using a bar in the middle, located along the structure.
- After securing the lower longitudinal support, the transverse bars are connected using boards. For greater stability, grooves are created in them.
It is necessary to leave gaps between the boards so that water does not accumulate at the joints. The screws should be tightened so that the head is completely recessed into the wood. The holes must be filled with a mixture of PVA and sawdust. After manufacturing, the bench needs to be plastered. To make the bench safer, it is worth removing sharp corners using sanding discs.
Making a built-in bench for a sauna with your own hands: detailed instructions
Let's look at how to make a bench for a bathhouse with your own hands.
General recommendations
- We will collect beams of different lengths, planks, choppers, a hammer, a plane, sandpaper and a hacksaw.
- We plan all the sawn parts with a plane and sand them to perfect smoothness.
- Let's make the frame with fasteners.
- We will nail the planks from below with wooden nails in 3 cm increments for good ventilation and drainage. At the same time, we will recess the caps deeper and cover the recesses with putty.
- In multi-tiered structures, we make the lower and upper benches removable for easy cleaning.
Regular bench
A classic bench without a back consists of a seat, 4 legs, and braces and crossbars will ensure its stability.
The operating procedure is as follows:
- we cut the seat - a 50 mm thick board, struts and legs;
- We will polish all the resulting parts well;
- we fasten the legs with the crossbar with self-tapping screws;
- screw the seat to the resulting structure;
- We fix the struts to the seat, and then to the middle crossbars.
A stable do-it-yourself bathhouse bench is ready! We can paint it with the “For Bath” composition.
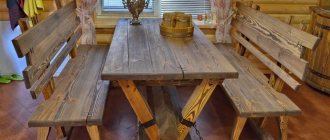
The rustic style involves placing simple, comfortable benches here.
A practical two-seater bench will require the simplest materials available in every household.
Manufacturing instructions:
- we construct 2 bench elements from the beams - in the letter P, connecting with glue, then with self-tapping screws;
- connect the legs with 2 boards for stability;
- we put 5 boards on top of these racks, leaving a gap of 1 cm, and we get seats 40 and 60 cm wide.
This design is quite rigid and, judging by the photo, guarantees stability, does not loosen and will last a long time.
We cut out the elements of the bench:
- legs made of bars 50x50 mm;
- seat – 50 mm board;
- crossbars, struts are also made of bars.
Fastening:
- in the middle of each leg we will make a small inset for the cross bar;
- on the inside of the leg we will make an insert for the upper cross member;
- we assemble the legs together with the crossbars;
- attach the seat;
- We fix the struts with self-tapping screws first to the middle cross members, then to the seat.
Before starting work, it is useful to familiarize yourself with the presented photo and video materials. As a rule, they show approximate diagrams and drawings of do-it-yourself bathhouse benches. This will help you better understand the principle of arrangement of components when assembling bath furniture.
When deciding to make a bench for a bathhouse with your own hands, you don’t have to make the drawings yourself. The scheme of actions is quite simple, and you can limit yourself to the detailed instructions given below.
In order to assemble a regular portable wooden bench for a bathhouse, you will need:
- wooden beam with a section of 6×7 cm;
- slats for the seat in the amount of 9 pieces, 6 cm wide and 2–2.5 cm thick;
- fittings for fastening (wooden or metal);
- necessary tools (saw, hammer and mallet, screwdriver, pliers, angle grinder with circular saw and attachments for it, tape measure, level).
When all materials are prepared, you can begin assembly:
- Cut the timber so that you get 4 pieces, about 40 cm each, for future bench legs;
- Take 2 pieces of timber, 60 cm each, and use these parts to knock down U-shaped racks for cross lintels;
- Make the slats for the seat approximately 160–170 cm in length, this is the optimal size that will allow you to steam while lying down on the bench;
- Start assembling the bench by stepping back 20 cm from the edge of the lintels and stuffing slats on them, maintaining a gap of 1 cm. This will not only ensure the strength of the structure, but will also not interfere with the drainage of moisture and the process of contraction-expansion of wood under the influence of water and high temperatures .
- Connect the legs and uprights with the remaining slats, making a kind of strapping for the bench 10–15 cm from the floor, which will give the structure additional stability. You can also use special corners for fastening. Then they should be stuffed from the inside, since in the steam room the metal parts become very hot, and there is a risk of getting burned. For the same reason, the fittings are recessed into the wood by several millimeters.
Pre-compiled approximate do-it-yourself sauna bench drawings will help you decide on the desired shape of the product and the location of the parts. It should be noted that, just like portable bath furniture, built-in benches for a bath with your own hands should be made with lattice.
For this you will need:
- timber with a section of 5×6 cm;
- strips 10 cm long and 5 cm wide;
- flooring boards;
- fastening fittings;
- necessary tools (saw, angle grinder with circular saw and attachments for it, hammer and mallet, screwdriver, pliers, tape measure, level).
The instructions below will make assembly much easier. So:
- To install a multi-tiered bench, the most suitable place would be a blank wall, to which you need to attach the bench frames themselves. In a small room, a steam bench can be placed along the wall, along its entire length, which will significantly simplify further work.
- Attach 30 cm long planks to the walls, in 1 m increments, with anchors in order to secure the frame to them, and begin assembling it.
- For the lower bench, fasten the beams together with anchors or fastening angles, and recess the fittings into the wood. The width of the resulting structure should be 1 m 20 cm. For greater reliability, it must be mounted at a height of 50 cm from the floor on the base of the retaining strips. Nail the decking boards onto the frame, leaving a 1 cm gap between them.
- Make the upper tier in a similar way, only the frame for it needs to be made twice as big. As a result, the distance between the upper and lower tiers should be at least 70 cm. You can put planks on the wall above the second tier of the bench with a sheathing of polished boards. This will allow you to rely on a kind of backrest during bath procedures and create additional comfort.
The construction phase of the bathhouse is over, the time has come for its internal filling. And an integral attribute of the decor is its furniture, including benches. Because with their help, a cozy and comfortable environment is created and, in addition, it is the furniture that provides excellent opportunities for relaxation.
Furniture can be a variety of items, but a bath bench, made with your own hands, is one of the main ones, and also a reason for pride. The bench is one of the mandatory components of the bathhouse interior, but making it yourself is not difficult and, moreover, its price will be low.
Such benches in the rest room are very original
Not a single person who has visited a Russian bathhouse can imagine it without benches. These are not only functional items, but also mandatory interior attributes. In order for these products to be durable and look harmonious in the bathhouse, you need to know exactly how you can make them yourself.
Bench sizes
You can make a bench for a bathhouse with your own hands, especially since the work does not require any special skills.
The bathhouse can be built from any material, but the interior decoration and furniture are best made of wood. Making a table, canopy, and benches for a bathhouse with your own hands will not be difficult. If the bathhouse was built with your own hands, then assembling the furniture is easier - simpler. How to assemble a bath bench with your own hands, what you should pay attention to, we will look in more detail in the article.
Before assembling the bench, you need to decide on the size and shape. The size depends on several factors:
- Where will it be used (one size is used for the steam room, a different size for the waiting room, and rest rooms).
- The size of the room where the bench is used. (in a small steam room you cannot install a massive structure; for relaxation, you can make a large one with a backrest.
- Features of furniture design and its arrangement.
- Number of potential vapers.
When choosing a size, consider how the bench will be used. If it is installed in a relaxation room or steam room, then the length and width are calculated so that it is comfortable not only to sit or place a basin, but also to lie down. Of course, if the room is small, then the size of the shop is chosen to be small.
| Purpose | Size (height, width, back height, footrest), cm |
| For sitting use | 50-90x40x110x20 |
| For semi-sitting use | 50-90x60x110x20 |
| For use in a supine position | 50x95 (footrest and backrest can be omitted) |
| To be used while lying on your side with your knees bent | 50x60x145-180x110x20 |
The bench in the steam room does not have to be standard. It is necessary to take into account individual characteristics and choose your convenient size.
It is better to make a bench in a steam room from moisture-resistant types of wood.
In the bathhouse, wood is used to make benches and canopies. But constant humidity and high temperature dictate their own rules. In traditional Turkish steam rooms, a bench-table for massage is made from natural stone, such as granite or brick topped with ceramic tiles. For Russian and Finnish, you need to use wood. Choose depending on the purpose of the bench.
You can build benches and shelves for the steam room, hangers, shelves and even a font for the washing room yourself, knowing how to choose the right material, taking into account the specifics of each bath room. This will significantly save money and create an original design in the bathhouse.
- Furniture material
- Preparation for production
- Washing bench
- Wooden font
- Making a shelf
- Furniture for auxiliary rooms
- Hanger in the dressing room
- Table for the rest room
Properly selected furniture in the bathhouse not only contributes to a comfortable rest, but also complements the overall atmosphere. And making it yourself allows you to significantly save money and make your personal project a reality.
There should be nothing unnecessary in this room so as not to interfere with proper air circulation. Therefore, only shelves and a bench are traditionally installed as furniture here. You can make them yourself by making the right calculations and choosing high-quality wood.
Simple bench without back
Choosing wood
Conclusion
Having figured out how to make a bench for a bathhouse with your own hands, let’s remember the key points:
- Bath benches should not be painted or covered with spectacular but slippery paints - this is unsafe and fraught with injury. Stain or special composition “For sauna” is acceptable.
- Careful sanding will rid us of splinters and improve the furniture.
- We make the seat very strong and stable so that you can sit and lie down and place basins and buckets without fear.
- When installing the bench, we leave gaps between the seat boards to allow water to drain.
- We don’t place it close to the wall so that it doesn’t rot.
So, making comfortable sun loungers for a bathhouse is not difficult. (see also the article Features of the Turkish bath Hamam) Our desire and imagination can easily make up for the lack of experience - and the product will turn out durable and beautiful. And the video in this article will clearly demonstrate the stages of work.
Did you like the article? Subscribe to our Yandex.Zen channel

