The Russian bathhouse is not just brooms and heat, first of all, it is traditions. Since ancient times, the use of the bathhouse was carried out for medicinal purposes: the sick and infirm received the necessary boost of vigor and seemed to be born again. Whether they went to war, or whether children were born, christenings or weddings, nothing could be done without a bathhouse, which is why Russians are still experts in this matter.
The ancients also knew how to assemble a log bathhouse correctly so that the healing warmth would have the best effect on the people who visited it. Is it possible to make such a design yourself, and how to do it will be discussed below.
Russian bath - features
First of all, the bathhouse is a certain complex of structures - a steam room, a washing room and a dressing room. They are all responsible for different processes, so they must be manufactured in accordance with their purpose. So, before you think about construction, you should decide on the dimensions.
They must come from the total number of people for whom the object is intended. As a rule, 1 m² per person is enough for a wash room, 1.8 m² for a steam room, and at least 2 m² for a dressing room. Dimensions are based on standard design.
The individual bathhouse is not constrained by anything. Perhaps someone wants to arrange a swimming pool or billiards there, then these dimensions are calculated accordingly.
Disadvantages of small structures
Of course, with any construction, the owner is looking for savings. But believe me, a small bathhouse, that is, a steam room combined with a washroom, is not a very good option. There will be no rest in such a log house due to the stupefying heat.
And, perhaps, steam is contraindicated for some of the household, and thus there will be no health. Further:
- Small rooms heat up faster, however, this is where the pitfall lies - due to the lack of space, the wood may not withstand the heat. In advanced cases, a fire occurs.
- You can’t install ovens in washrooms – carbon dioxide has not been abolished.
- Electric water heaters or other devices are strictly contraindicated. It is not a fact that the waterproofing of a bathhouse is reliable. And the meeting of two resources, oh, how undesirable and fraught.
- You cannot make a steam room out of resinous wood - it serves as a blockage to the wounds of the trunks, and will have the same effect on humans. In particular, on the respiratory tract or heart muscle. Yes, and it leaks - no comfort.
Taking into account the possibility of problems arising for any of the listed reasons, you need to carefully think about the question of how to assemble a bathhouse from a log house with a dressing room, so that the comfort does not disappear along with the steam.
Thermal insulation work in the dressing room
Proper insulation of the dressing room is necessary to stabilize the temperature in the steam room and prevent condensation. In addition, leaving a hot steam room on a cold floor is not entirely comfortable. It is necessary to insulate not only the walls, but also the floor and ceiling.
READ MORE: Is a warm floor in a steam room or washing room necessary or not?
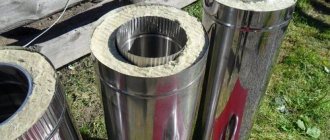
If desired, you can equip water, electric and even infrared “warm” floors. However, keep in mind that they will not be cheap. A budget option is considered to be laying passive insulation materials (extruded polyurethane foam, stone wool). Thermal insulation work is carried out in the following order:
- We stuff beams for the “subfloor” onto the joists.
- We lay a vapor barrier membrane on top.
- We lay insulation between the joists. We make sure that it fits tightly to the frame elements.
- Using a construction stapler, we fix the waterproofing layer with an overlap of 15-20 cm. We glue the joints with metallized tape.
Remember that it is advisable to treat beams for rough flooring and wooden joists with an antiseptic compound to prevent rotting.
Proper insulation of the ceiling minimizes heat loss as hot air rises. Don't forget about vapor barrier either. First of all, the ceiling is sheathed, then the walls.
During the process we follow these instructions:
- We place basalt wool between the floor beams.
- We fix the foil polyethylene overlapping on top using strips with a cross section of 2*5 cm. The reflective surface should be located inside the room.
- Carefully seal the joints with reinforced tape.
If the use of the attic is not intended, then a flat ceiling can be made. In this case, sawdust, clay, and expanded clay can be used as insulation.
Traditionally, a log house is insulated from the inside to preserve its original appearance. Foil materials that can reflect heat are very popular as insulation.
We carry out the work in the following sequence:
- We fix a vapor barrier membrane on the wall.
- We attach a sheathing of beams with a cross-section of 5 cm2 on top in increments of 0.5 meters. Please note that the sheathing parts must be pre-impregnated with antiseptics to protect the wood.
- We lay roll insulation between the individual frame elements.
- Using a construction stapler, we attach foil polystyrene foam on top.
At this stage, you should also connect all communications and lay the wiring in a special corrugated pipe to protect it from moisture.
Calculation
Let's start by marking the site according to the construction plan. The dressing room occupies the largest place in this matter: it serves for relaxation, installation of the stove and for spending time free from the bath business, and often plays the role of a summer overnight stay. This means that its area is calculated according to the internal dimensions.
You should immediately indicate on the plan all placements - from shelves to space for the stove and fuel storage. Adding to this the entire thickness of the material, we get the net size of the dressing room. We do the same with the rest of the premises.
Preparing for the construction of the dressing room
If at the stage of building a bathhouse you did not calculate the dimensions or decided to increase the area of the steam room to equip a full-fledged dressing room, then the most suitable option would be to build a frame structure.
A shallow foundation can be installed for it. In addition, the construction of walls will take a little time. Before you make a dressing room with your own hands, you need to calculate the amount of materials required. Traditionally it is built of wood. In any case, all wood for frames and finishing must be pre-treated with several layers of antiseptic. Otherwise, its service life will be significantly reduced due to the appearance of mold and mildew. It would also be a good idea to treat the wood with fire-retardant compounds. Especially if the bathhouse is heated with a traditional wood stove.
For insulation, hygroscopic heat insulators such as stone wool, polystyrene foam, and polyurethane foam are used. All fasteners must be galvanized. Phosphated elements are not suitable due to low moisture resistance.
Don’t forget that before you build a dressing room, you need to think through its design. We calculate the optimal room area according to the principle of 1.3 m2 per person. The width must be more than one meter. The standard dimensions of the dressing room are 1.4 x 2.3 meters. But you can make its length arbitrary, especially if you plan to combine the dressing room with the rest room.
When the construction plan is drawn up, we clear the area for installation of the foundation.
Foundation
Now you need to transfer all the finished dimensions directly to the site itself, using pegs and strong threads to mark the laying of the foundation. The solution to the question of how to properly assemble a log bathhouse depends directly on him. If the design is conceived as a small building, then it is quite possible to get by with a columnar version.
It makes it very convenient to install a sewer system and arrange a sloping floor for a washing room. However, if the dimensions exceed the standard 3x5 m, then you should think about a strip foundation. Next, holes are dug, reinforced with rods or pillars are built, and all excavations are filled with concrete.
After this, the foundation needs to stand. Depending on the structure, this takes from two to three weeks to six months.
Disadvantages of layout
According to the standard, the bathhouse is represented by a structure made of foam block or wood.
The bathhouse element described in the article (dressing room) plays an important role, since its incorrect layout can lead to discomfort. This happens when, for example, they put up a log house or erected a box of foam blocks for a bathhouse, but did not think through the layout. The existing building only accommodates a steam room and a washing area.
But for a full-fledged dressing room, in which you can take a break from procedures, drink tea and change clothes, it is not possible to allocate enough space.
Why do you need a waiting room in a bathhouse?
It performs several functions:
- is a buffer zone, does not allow cold air to enter the steam room from the street;
- You can use it to cool down from the procedures before going out into the cold;
- it has a changing room where you can hang your clothes and not be afraid that they will get wet;
- a table is installed in it where you can drink tea and relax between procedures.
Log house
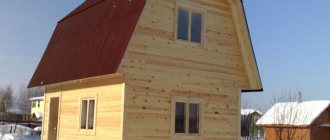
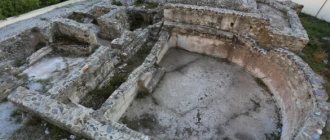
This word is understood to mean anything - buildings made of timber with corresponding cut corners, and rounded logs. Models made from wild materials are also not uncommon, but such options are too labor-intensive and it will not be possible to solve the question of how to assemble a bathhouse from a log house yourself. Let's look at the example of a rounded log.
Cutting into the bowl must be done by a qualified craftsman; the result of the heat preservation of the bath depends on this. The lower crown must be laid on an insulated and moisture-resistant foundation.
To do this, use bitumen resin or several layers of roofing material. The crowns are carried up to the rafter system according to the diagram, and then the work can be completed for a year, for thorough shrinkage.
We build an extension to the bathhouse with our own hands
The construction of a dressing room involves a complex of insulation and finishing works, as well as the arrangement of ventilation in the room. To perform each of these processes yourself, it is important to take into account many nuances. After all, the temperature in the bath depends on this.
- Floor covering
- Walls and ceiling
- Exterior decoration
- If you decide to build a compact bathhouse on your site, then you can do without a rest room. But the dressing room should be present in any case. It protects the steam room from direct exposure to cold air. You can also leave things in it so they don't get wet. Some combine it with a recreation room, equipping a functional room.
Summer area with storage room
Many already know how to build a bathhouse in a private house on their own, but not everyone takes into account that in the future there may be a desire to expand its usable area. Don’t be upset if you didn’t build an extension right away, because if you have the necessary funds, you can easily build it next to the wall of an existing steam room.
The increase is not necessarily limited to one extension, since even the steam room and washing room can be expanded if desired. Such cases occur quite often, so many experienced bathhouse attendants have tried various methods of expanding the area of a bathhouse in a private house.
There are such publicly available solutions as an extension for a bathhouse in the form of a polycarbonate gazebo. Of course, you can also use the material from which the bathhouse is built.
As practice shows, the most common type of extension is a gazebo, since its construction does not require the knowledge of a qualified specialist, that is, it can be erected independently. Such an extension is easy to build, because there is no need to dismantle the wall to which the new room will be adjacent. The building will be located close to the bathhouse, but not close.
You can choose any plan for the gazebo, since this is not the key point in expanding the usable area of the bathhouse. It is only necessary to make solid the side of the building that will be adjacent to the main building.
If your building with steam room and washing rooms does not have a dressing room, you can use the bathhouse exclusively in warm seasons. But if you add a dressing room, then you will have the opportunity to visit the steam room even in the cold season.
Spacious terrace
When constructing an extension, the following factors play an important role:
- bath design;
- durability of the structure;
- roof layout;
- foundation and the degree of its deepening;
- building materials that were used in the construction of the bathhouse;
- the amount of money spent on the construction of the building.
To build a bathhouse extension you need:
- a set of carpentry tools;
- welding machine;
- fittings;
- building materials (brick, foam block, wooden beams and boards);
- cement and sand for mortar;
- bitumen resin and roofing felt for the foundation;
- steam, heat, waterproofing materials.
Attaching an additional room to a bathhouse with your own hands can be done using wood such as a profile beam or a rounded log.
It is advisable to build a wooden extension only if the main structure was erected less than 10 years ago. The reason is the accelerated reduction of wood material in the walls of the old building in comparison with the new one, the extension. This can lead to the formation of a fault between the two structures.
Before starting the construction of a new premises, it is necessary to select or create its plan, on the basis of which the required building materials will be purchased. After this, you need to clear the area allocated for the extension.
The foundation must be laid so that it is connected to the base of the existing building. In addition, the foundations must be of the same type. Most often, when constructing a bathhouse, a columnar or strip type of base is chosen, so laying the same type for an extension usually does not cause serious problems.
A tight connection between the foundations can be achieved using small pieces of reinforcement that will be lowered into the bases of both buildings. The outer surface of the base of the structure must be covered with bitumen resin and roofing felt.
READ MORE: Cork flooring varieties, technical, adhesive, floating
Arrangement of the foundation for the terrace
The foundation of a new building is laid deeper than the foundation of the old building. This will prevent the foundation from settling or moving over time.
The lower part is laid on top of the water-repellent layer. It is problematic to combine the links of the lower beams and the wall of the main building, so the new extension should be built as close as possible to the bathhouse. In this case, you must immediately take into account the expansion joint, which can move within 1-5 cm.
Any method is suitable for angular beam connections. But the easiest way is to use a bunch in a paw or in a spike, since such operations are quite easy to carry out independently. In addition, the extension will receive the most reliable structure.
Roof construction
If you plan to remodel the roof of the main building, the extension must be built to the level of the bath walls. But if you decide to leave the existing roof, the walls of the new room should be a couple of links lower.
The gap that appears at the point of the expansion joint can be treated with light thermal insulation (mineral wool, glass wool). The seam is closed from the outside and inside using a vapor barrier material. It is necessary to nail profile wooden slats on top of the insulation.
Advice from the master!
The vapor barrier material must be placed freely so that it does not accidentally tear during construction work.
Slings for pitched roofs
The roof usually has a connection to the main building, but it can also be done separately. The wooden extension is often loosely adjacent to the bathhouse. Therefore, the option of creating a separate roofing system, as in the photo, will be the most suitable solution in this situation.
You can also find photos showing the roof having a connection to the main building. In this case, the bathhouse should be made of brick, since such a building material provides more opportunities to establish a tight connection between the walls.
Brick buildings for a bathhouse made of similar material are much more common than wooden buildings. This is due to the ability to firmly combine the main building and the additional one. It is much easier to implement such a project. Construction of an extension based on foam block or brick is a very profitable undertaking, since these building materials can boast of durability and reliability.
It is necessary to take into account a certain sequence of actions. At the preparation stage, you first need to measure the area for the proposed premises. After this, you will need to clear the ground of plants and remove the soil covering, making the soil more dense.
Then you need to dig a recess under the foundation over the entire area of the future extension. After this, horizontal openings 50 cm deep must be drilled in the base of the bathhouse. Fragments of reinforcement 1 m long will be placed there. Metal strapping must be welded to the reinforcement rods, which serves as reinforcement.
Now you need to fill the dug hole. You can use sand and gravel for this. Formwork must be laid on top of them, and its level must coincide with the height of the bathhouse foundation. Upon completion of the work, it is necessary to fill the formwork with concrete mortar.
The base of the building must dry completely, this takes about 5-6 days. As soon as the foundation is dry, you can begin laying the first row of bricks (foam blocks).
After laying the first row, you will need to drill holes again for the reinforcement. You need to connect the walls with reinforcement every 2 rows of masonry. This will ensure maximum adhesion of the new room to the old one.
When laying, you need to use cement mortar, which is mixed with sand in proportions of 1/3. It should be diluted with water and mixed until a homogeneous thick mass is obtained.
When constructing a brick extension, the roof can be built so that it is integrated with the main building. But you need to wait until the extension settles. If you used brick, shrinkage will take about six months, foam block will require no more than 3 months.
It is worth considering that a common roof will require a complete dismantling of the roofing system of the main building, so you should not neglect the option with a separate roof.
The roof should be constructed from boards measuring 10-15 x 40-50 cm. This is necessary to ensure special strength with a relatively light weight of the roof. Plus, you can save on the cost of your roofing system.
The extension must have a false ceiling and a wooden floor, which is laid on logs. The walls can be lined with softwood clapboard.
Thus, to build an additional room for a bathhouse, you do not need to be a jack of all trades; this task is within the power of everyone. The main thing is to follow the recommendations and follow the sequence of actions. At the same time, you can always entrust the construction of an extension to a construction team, and the information received now will help you calculate the costs yourself.
How to make an extension to a bathhouse? This question arises for many owners of small baths when, as they use them, they want to get additional comfort. Quite often, when building a bathhouse, there are not enough funds for a large structure, but you want to start cleaning procedures as quickly as possible. So a small compact structure with a clearly directed function appears.
READ MORE: Laminate installation on wooden floors
In principle, a sauna extension can perform a variety of functions, including expanding the steam room. Quite often, there is a need for a separate washing room if the original project included only a steam room and a dressing room. The most common option is a recreation room, because it is the last thing people remember, as an area that can be easily dispensed with.
The question of how to make an extension to a bathhouse to organize a recreation area can be solved in different ways. This can be an open summer terrace or a closed veranda where you can relax all year round. Often the idea arises of how to make a frame extension to a bathhouse in the form of a separate multifunctional room.
Foundation for frame construction
This will be discussed in this publication.
In a cozy dressing room you can take a break from the procedures by drinking tea or kvass.
Frame construction has clear advantages over other types of construction technologies.
Its distinctive features:
- light weight of the structure under construction, requiring a less massive foundation;
- ease of installation of elements;
- many options for creating the interior and exterior of the building;
- excellent thermal insulation of the structure.
As a foundation for a frame dressing room, a lightweight foundation should be used: pile or shallow foundation.
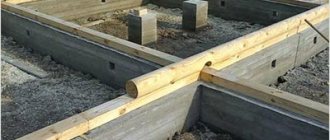
Creating a shallow foundation is done as follows:
- The area is being planned and marked.
- In places where the walls of the building should be located, half-meter trenches with a width of 30 centimeters are dug.
- Sand is poured into the trench in layers and also compacted layer by layer with water wetting.
- Formwork is created along the perimeter of the trench.
- The base of the formwork is reinforced.
- The concrete solution is poured according to the level of the formwork.
- After the concrete hardens, waterproofing roofing felt is laid.
Cold waiting room
The name “Cold dressing room” speaks for itself. Another thing is that in our time, much more attention is paid to the decoration and interior of the dressing room than before, if only because now there are more opportunities to create comfort and coziness in the bathhouse.
- frame made of racks and crossbars, for which timber or 50mm edged boards are taken: single or double, depending on the element of application
- external cladding made of clapboard, block house or vinyl siding
- internal lining from clapboard or block house
- ceiling made of planed boards on beams made of timber or edged boards t=50mm
- plank floor on beams (joists)
- rafter roof at the same level as the log house or flat, attached to the pitched roof of the bathhouse log house
- insulation of wall and ceiling structures - none
- interior decoration is present, because now it is both fashionable and possible
Arrangement
When deciding how to make a dressing room for a bathhouse, do not forget about its internal arrangement.
The waiting room space should accommodate:
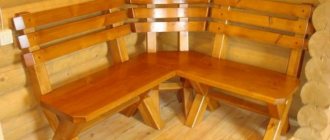
- convenient hanger with bench;
- table with benches for relaxation;
- mirror;
- a small refreshment area with an electric kettle and dishes.
In addition, when laying the foundation for the dressing room, think about whether to expand it to create an external veranda in front of the bathhouse. In the summer, it can become an indispensable extension of the rest room. On the veranda you can install a font for those who like to plunge into cold water after a steam room.
DIY dressing room: choosing a frame construction method
Extension of a dressing room to the log house of a bathhouse with the installation of a pile foundation.
There are many options for expanding the structure of a bathhouse, but it is necessary to choose an economical and efficient type of construction. When deciding how to attach a dressing room to a bathhouse, we advise you to pay attention to the option of frame construction.
Its advantages are that:
- the lightness of the design allows you to reduce the cost of building a foundation;
- speed of construction;
- versatility of external and internal decoration;
- frame walls retain heat well.
So, it was decided that we would build a dressing room using frame technology.
Foundation
Installation of formwork for a lightweight shallow foundation.
For frame walls, a lightweight type of foundation can be used. We choose pile or shallow-depth options.
Instructions for installing a shallow foundation:
- we do site planning;
- we dig trenches 50 cm deep and 30 cm wide under the future walls;
- we fill the trenches with sand and tamp them in layers, spilling them with water;
- We place the formwork in a trench 50 cm high and 30 cm wide;
- we reinforce the base of the formwork;
- fill the formwork with concrete;
- let the concrete dry;
- cover with a layer of roofing material.
Frame
Construction of a frame for the installation of a bath dressing room.
First of all, we make the bottom trim from timber with a section of 10x10 cm and corner posts. Next, we place intermediate posts along the bottom trim and make the top trim. To strengthen the frame, we install braces in the corners.
Next, you can install floor joists, preferably from paired boards, and a rafter system. When deciding how to build a dressing room, choose a roofing option that will not disturb the existing bathhouse roof, but will be a continuation of it.
The photo shows a variant of the roofing of the dressing room, as a continuation of the roof of the bathhouse itself.
Sheathing
The frame is ready and it's time to move on to its covering. For a bath dressing room, it would be logical to use wooden clapboard.
We start by covering the outer walls of the bathhouse. Here it is better to place the lining horizontally. Don’t forget that you need to lay a layer of glassine under the lining, reinforcing it with an overlap.
We invite you to familiarize yourself with the construction plan for a bathhouse made of timber.
Next, we lay 50 mm thick roll insulation in the walls, securing it with lathing on the inside of the walls. Insulation can be laid in 1-3 layers, this depends on its thermal performance. We finish the interior walls with clapboards, having previously secured polyethylene along the sheathing.
As a result of the work carried out, the following pie of walls will be obtained:
- external lining;
- glassine;
- roll insulation 50 - 150 mm;
- polyethylene film;
- internal lining.
Frame wall pie option.
There may be other options. For example, instead of external wooden lining for a bathhouse, you can use siding. Now, choose the price of which material suits you best. If the bathhouse itself is built from rounded timber, then it is logical to cover the dressing room with a material that imitates it, which is called a blockhouse.
Next, we lay the floors and sheathe the ceiling, not forgetting about insulation, and install the entrance door of the bathhouse.
As you can see, finishing a dressing room with your own hands is not particularly difficult for people who are at least a little familiar with carpentry.
Foundation for frame construction
Once the frame is ready, you can begin covering it. It is best to use wood material (lining) for finishing. The sheathing process begins on the outside of the building. Sheets of material should be placed horizontally. It is best to use overlapping glassine as a lining under the lining.
Then, roll-type thermal insulation material with a thickness of 5 centimeters is laid into the walls and fixed with lathing on the inside of the wall. It is allowed to lay up to 3 layers of heat-insulating material, taking into account its characteristics. Inside, the lining is fixed to a lathing with a layer of polyethylene.
Thus, a wall pie is obtained from the following layers:
- outer layer of lining;
- glassine;
- rolled thermal insulation material 5-15 centimeters thick;
- polyethylene;
- inner layer of lining.
In the process of attaching a dressing room to a chopped bathhouse, you can place layers of material in the cake using alternative methods. For example, instead of wooden lining it is permissible to use siding. Naturally, the choice of material remains with the owner, who has a certain amount of money.