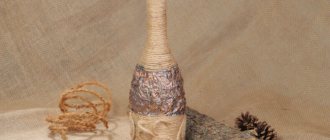
Decoupage of wedding bottles with your own hands - an unconventional, original and memorable thing
Nowadays, people are increasingly paying attention to handmade creativity.
That is, something that was made by the hands of craftswomen or something that was beautifully made by ourselves. Using the decoupage technique, craftsmen turn even the most ordinary bottle into a work of art. But before you try to make decoupage beauty, it’s better to find out what it is:
“Decoupage (French découper - “to cut out”) is a technique for decorating various objects, based on attaching a drawing, painting or ornament (usually cut out) to an object and then coating the resulting composition with varnish for the sake of safety, durability and a special visual effect.”
Decor with rhinestones and bows
There are simpler ways to decorate wedding bottles. To do this, use rhinestones or bows. You can often see how a lush satin bow is hung on the neck - light for the bride’s bottle and dark for the groom. Types of decor using bows:
Tie the neck with a wide ribbon, onto which a fluffy bow is glued to hide the label. To tie the middle of the bottle, use either 1 voluminous bow or 3 small flat ones. Connect two bottles together by the necks and hang a single bow on them. With this design, it is imperative to remove the labels. Often such garters look unusual; lace or strings of beads can be used for them, and sometimes they are made in the same style as the bride’s garters. Connect the bottles in the middle with a wide piece of fabric; to do this, place them tightly next to each other and tie them with ribbon or lace.
After this, they hang a large bow of a necessarily different color in order to stand out from the general background and attract attention. Gluing small bows in a chaotic order onto bottles.
If you use too many bows, they will look ugly and sloppy. You can easily decorate glasses in this way.
Wedding bottles can be decorated with rhinestones.
Bright shiny stones can either completely cover the surface or partially. The chosen design depends on the style of the wedding, the imagination of the newlyweds and how patient they are.
Ways to decorate bottles with rhinestones:
- Full surface coverage with plain stones.
- Full coverage of the bottle, but several colors are used to create a design. These can be either abstract curls or symbolic patterns of newlyweds, birds, rings or hearts. The more complex the image, the smaller the diameter of the pebbles.
- Applying abstract patterns to the bottle, while the rest of the surface remains clean.
- Image on the surface of symbolic drawings.
- Gluing rhinestones in the form of Capitonne (carriage screed).
- Chaotic gluing of stones.
Before creating a rhinestone decoration, you need to clean the glass from labels, and then wipe the surface with alcohol or acetone. This treatment guarantees maximum adhesion between the decor and the glass.
DIY decor master class
You don't have to have any special skills or talent to create a real work of art. The main thing is to have desire, imagination and free time. Select decorative elements taking into account the theme of the celebration, as well as color design and your own imagination. But first, we recommend that you carefully study video master classes online or attend real courses on creating unique jewelry. Specialists will help you decorate the containers on the festive table with your own hands, making it as solemn and unique as possible.
Satin ribbons
The shiny satin ribbon on the bottle looks especially bright. It is beautiful both as a canvas and as a detail. In addition, it is perfect for decorating wedding containers. Moreover, such decor does not have to be black and white. It is quite possible to use ribbons of other delicate shades. To do this you will need:
- satin ribbon;
- decor;
- lace;
- rhinestones;
- scissors.
To begin, measure and cut the required amount of tape. Apply only a small amount of glue. Then cover the surface, starting from the neck, and gradually go down. Do this as carefully as possible; we recommend gluing the tape in several layers. Mask the joints with another tape. As soon as the champagne is ready, you can safely put it on the gala table.
Bows, contrasting fabrics, brocade and lace also look great in such a situation.
Velvet suits
Velvet looks especially luxurious. This material has excellent stretch, which makes it possible to create mini bottle outfits from it. Velvet can be any color, but it is best to use white fabric for the bride's suit and black for the groom. If you choose a themed, not quite standard wedding, then try to demonstrate this in the decor.
Classic black and white
If you decide to have a classic wedding, we recommend creating black and white bottle decor. This way you will complement the decoration of the celebration. To do this, you can use any type of fabric, just try to stick to a certain style. Choose materials only in black and white. At the same time, you can complement the decor with white artificial pearls or black beads.
Champagne Bride
A wedding is the brightest and most unforgettable celebration. The majority of ceremonial decorations can be made independently. This does not require any talent or skill. Even if you want to decorate bottles at an event in a special way, you don’t have to worry that you won’t succeed. We recommend using bottle decor in the form of a married couple’s outfits.
Regarding the bride, we recommend using a white tulle skirt, a lace corset and velvet elements, also in white. From classic champagne containers you can create a real masterpiece. This exclusive item will become the center of attention at your event. We recommend that the young couple devote the maximum amount of free time to creating a festive atmosphere.
Champagne Groom
Table decor is only gaining popularity every year. Therefore, we advise you not only to decorate the bottle in the form of a groom’s suit, you can make a whole set from a bottle and a couple of glasses.
Regarding the design of the container in the form of a groom, we recommend using black and white fabric and complement the decor with several pearls. This way you can imitate the buttons on the groom's suit. If you want to make the bottle as festive as possible, complement the costume with a boutonniere made of fresh or artificial flowers.
Magnificent decoration of wedding champagne bottles with your own hands: photos of incredible ideas
Modern people are very different from those who got married just fifty or a hundred years ago. Not so long ago, a white Volga as a motorcade, as well as a competition to eat apples on a string, were the height of dreams. Crystal glasses of a special shape generally aroused the wild envy of the bridesmaids. Today everything is much simpler, because you can decorate your own celebration exactly the way you want, and there are plenty of devices for this, the main thing is to show your imagination and not be shy.
Important
An invariable attribute of a wedding ceremony is a festive bottle of champagne, and ideally there should be two of them. Tradition says that these bottles should remain untouched on the table, which is why you want to decorate them in a special, unusual and original way. The first bottle is opened on the anniversary of marriage, and the second by the time the successor, the first-born in the family, is born.
Anyone can decorate a bottle of champagne with their own hands for a wedding the way they want, but you must make sure that your decor authentically fits into the overall style of the wedding, since inconsistencies can ruin the whole picture. It should be in harmony with the decoration of the hall, the dress of the bride and her bridesmaids, the groom's suit and everything else.
Among other things, if the newlyweds make the decor themselves, that is, with their own hands, then there will be much more reasons for pride. And the guests will be amazed by such crafts if everything really works out. There can be simply a colossal number of options for decorating bottles for a wedding with your own hands; you just have to choose exactly what you like the most, as well as what best suits all parameters.
Beautiful flowers made of polymer clay - an original and delicate solution
Decorating champagne for a wedding with your own hands will look incredibly chic and beautiful, photos of which can be found in abundance on the Internet, which are made using a material such as polymer clay. Moreover, this will not require any special expenses, you will only need to buy a little:
- Champagne to taste and choice.
- White paint in an aerosol can.
- Flowers made of polymer clay, which are easy to purchase at any craft store.
- Special contour pencil for drawing on glass.
- Beads and half-beads.
- Scissors, glue, ribbons, etc.
There should be no problems at all with the work, just paint the bottles white, and then, after drawing an outline with a special pencil, glue the decor of your choice, beads, ribbons, roses, etc. to them.
DIY champagne decoration for a wedding using photographs of the newlyweds
Photos of the newlyweds themselves, which can be pasted in place of labels, are considered a very popular decoration for decorating wedding champagne bottles today. Moreover, there you can write the date of the celebration, the time of the wedding, the names of the bride and groom, and even congratulations and wishes. For this decoration, you will have to print a photo of the newlyweds on thin paper, or you can decorate the bottles using the decoupage technique, if you are skilled in it.
If you don’t know where and how you can print special labels, contact your nearest printing house. Do-it-yourself wedding champagne bottles with photos really look amazing and even somewhat intriguing; you should definitely consider this option.
Decorating champagne for a wedding with your own hands: photos of magnificent engravings
Another very profitable and also beautiful option for decorating wedding champagne is engraving. Such a bottle will not lose its appearance, even after long years of storage, and the inscription can be made in verse, it will be even more touching and beautiful.
Such an original design will look solemn and original, and you can choose the pattern yourself, although the work must be done by a professional craftsman. Although you don’t need to think that it costs a lot of money, not at all. If you don’t have any special skills, it’s better not to try to decorate wedding bottles with your own hands, otherwise you could get hurt at an uneven hour, and before the wedding, this is completely inappropriate.
Decorating bottles for a wedding - the best design projects for stylish events + 67 photos
A wedding event is one of the most important events in the life of every person.
Any attribute that is present here must be harmoniously and pleasantly decorated, since any slightest thing can ruin the whole holiday.
Popular articles Macrame bracelet weaving patterns
It is worth noting that at such an important event, even the simplest trinkets are often decorated, which will attract the attention of guests, ultimately leaving a good impression of the holiday. In Russia, there has been a tendency to beautifully decorate one of the most important attributes - bottles of champagne. These are not simple bottles that are opened at a wedding event, but those that symbolize the continuation of marriage and family lineage
These are not simple bottles that are opened at a wedding event, but those that symbolize the continuation of marriage and family lineage
In Russia, there has been a tendency to beautifully decorate one of the most important attributes - bottles of champagne. These are not simple bottles that are opened at a wedding event, but those that symbolize the continuation of marriage and family lineage.
To do this, take two bottles, each of which stands in the most visible place during the celebration and remains untouched until the end of the holiday.
It is a year later that the first bottle is opened, which is how the first wedding anniversary is celebrated. The second bottle opens on the birthday of the first child.
It is very important that even such a symbolizing attribute is colorfully decorated. This is not a simple champagne, but one that is of great importance to the family.
How to decorate bottles for a wedding
Very often, recently, newlyweds use the services of designers who design a festive bottle to order. The couple themselves can come up with a concept that suits them completely.
But it will be much more interesting to decorate bottles for a wedding with your own hands, because in this process it is important to put your soul and desire to fulfill what they symbolize. To do this, in order not to think for a long time, you can look at photos of bottle decorations for a wedding on the Internet
You can either choose a suitable design or come up with something of your own based on other people’s ideas.
To do this, in order not to think for a long time, you can look at photos of decorating bottles for a wedding on the Internet. You can either choose a suitable design or come up with something of your own based on other people’s ideas.
The most pleasant design is considered to be the one that the newlyweds not only came up with together, but both of them did it on their own.
Most often, wedding bottles are decorated with:
- polymer clay flowers;
- photographs of the newlyweds;
- engraving;
- elements of handicraft.
Flowers made from polymer clay are considered one of the most interesting, and most importantly, suitable ways to decorate a bottle. Thus, decorating champagne bottles for a wedding will strongly resemble the bride's outfit and will pair beautifully with the wedding dress at the event.
The only thing is that such decoration is very popular, so more and more newlyweds are resorting to other decoration methods.
Photos of the newlyweds are another good way to decorate bottles. In this way, you can take photographs from the shooting of a “love story” or other photo shoots, or early photographs of the couple.
These don't have to be pre-holiday photos at all. It is best to choose those pictures that resemble the most interesting moments in the life of a couple even before marriage.
Making your own decoration
Engraving is used to decorate glasses and bottles for weddings. Here, it would seem, flights of fancy will not be enough; specific approaches and methods are needed.
But no, with the help of engraving on bottles you can not only write something, but also draw it. It turns out even more beautiful than just gluing a photo to a bottle.
Doing it yourself is difficult, but possible. Such bottles can be stored for many years even after opening, as a keepsake.
But how to decorate bottles for a wedding with your own hands?
In this case, handicraft elements come to the rescue and help you create a unique bottle design.
The newlyweds can come up with all sorts of interesting things - small crafts, origami, ribbon design, and anything else that comes to mind. Such bottles turn out to be very beautiful and aesthetically pleasing and will fit into any interior.
Decorating with ribbons is a hand-made item that requires special attention when decorating. You need to do everything exactly according to the instructions, since you can ruin a lot of material and still not do anything meaningful.
You will need to watch master classes and read the step-by-step instructions.
You can choose any fabrics, colors, make different designs. This method is one of the most interesting today, which you will probably like too.
Engraving
Engraving is one of the most sophisticated and impressive types of bottle decoration. Only an artist can do it independently if he has the necessary equipment. Therefore, engraving is ordered in special workshops. If time is limited, laser engraving is chosen. The desire to see a filigree ornament is ensured by handmade work that is more expensive and takes longer to complete.
Handwork is done using diamond or special alloys. Sometimes the design is applied to a thin layer of brass, which is subsequently glued to the bottle.
The engraver can order any inscription, including poems and warm wishes. Rings, hearts, cooing doves, floral motifs, even portraits and favorite aphorisms of the young - there are no barriers to this technique.
Of all the types of wedding bottle decorations, engraving is the most long-lasting. It will not darken over time, will not fall off, and will not become dusty. The engraved bottle can be washed under running water at any time. This is an excellent talisman of longevity and unfading love.
You can also decorate the newlyweds' festive glasses with engraving. If handled with care, they can drink the fizzy drink at both a calico and a diamond wedding, each time reminding them of the first marriage kiss.
Ways to decorate champagne bottles for a wedding
The process of decorating champagne for a wedding appeared not so long ago, but today there are already many ways in which you can make real masterpieces of art from simple, nondescript bottles. Anyone can master these techniques because they are not that difficult.
You can attend a master class or, after watching several lessons on the Internet, make a simple design yourself. Now there is a lot of beautiful decor that can also be used for decoration - stickers, flowers, figurines, etc. You can do much of this yourself using special home craft kits.
We offer you the most common design options for champagne:
- Ribbons and lace. By combining ribbons with lace you can make flowers, bows and other decorations. Often the entire bottle is covered with tapes, creating so-called clothes.
- Textile. “Clothes” for bottles can be made from any material. As a rule, clothes for champagne are sewn in the outfits of newlyweds.
- Polymer clay. More often, flowers are made from it, and bottles are decorated with them in combination with painting, rhinestones, ribbons and other decorative elements.
- Beads and rhinestones. More often they are used in addition to various types of decoration, but beautiful options are obtained if you lay out a pattern of beads over the entire surface of the bottle.
- Decoupage. This technique is increasingly gaining popularity because it is very simple to do and looks elegant. To implement it, you need to purchase a special kit.
- Natural flowers. This design looks beautiful, but it is not durable, so it is not used for storage throughout the year, but only for the duration of the celebration.
Heroes of the occasion
One of the most common design options is champagne, symbolizing the bride and groom. For this purpose, bottles are dressed up in a tailcoat and a wedding dress. Not real, of course, but symbolic.
To prepare the bottles, you need to peel off all the labels from them, leaving only the foil on the neck. Any materials are suitable - fabric, ribbons, rhinestones, beads, pearls, etc. The required tools are scissors and a glue gun. The rest depends on the design option.
The dress and tailcoat can be sewn separately and stretched over champagne bottles. It is important here that they do not bunch up and cover the entire surface of the glass. The materials can be any fabric from organza to felt. A veil looks especially symbolic, and the bottle-groom can be given a top hat.
An outfit made from ribbons is neat and beautiful. In this case, the costumes will definitely be on time and, if necessary, you can add a couple of ribbons to cover the entire surface. To make a groom bottle, you need to make a collar from ribbons:
A tie will also come in handy:
Next, glue several overlapping ribbons to make a shirt:
Then make a tailcoat from ribbons. Colors as desired. The second half of the bottle can be glued not diagonally, but wrapped with wide tape. Complete the decoration with rhinestones imitating buttons, as well as a symbolic scarf or boutonniere.
The bride's outfit is done in a similar way. The top is glued from short ribbons, but it is not necessary to make a collar. The bottom can be covered with a wide ribbon and lace, or you can also use a narrow ribbon to reach the bottom of the bottle.
It is advisable to make a full skirt, for example, from organza. Decorate it as desired.
Well, veil:
Beautiful decoration with ribbons:
Painting a champagne bottle and decorating with rhinestones
There is a tradition of placing paired bottles of champagne on the newlyweds' table. They are not opened at the holiday, but are left to be kept by the newlyweds until the couple achieves certain successes in family life. The groom's bottle is printed on the first anniversary, and it symbolizes that patience, mutual understanding, and the ability to overcome difficulties and routine reign in marriage.
The bride's bottle is opened when the firstborn crosses the threshold of the house - in honor of the fact that the family has grown larger.
Therefore, they will remain on the table throughout the holiday and will appear in every photo. To make them look beautiful and according to their status, they are decorated accordingly.
The easiest way to decorate champagne bottles is to wrap them with satin ribbons. To do this, you don’t need special knowledge or skills - just the selected material, a little imagination and a few hours of free time.
Materials needed for decoration:
- several skeins of satin ribbon of different colors, 1–2 cm wide;
- glass glue or instant crystal;
- champagne;
- scissors.
At the preparatory stage, it is necessary to attach one end of the tape to the glass, at the level of the transition of the bottle body to the neck. After this, wrap the fabric around, placing the second edge to the first. The ends should form a right angle, and the middle of the segment, which is behind, rises above them.
Glue is applied to the section over the entire surface and applied to the bottle, as at the preparatory stage. In this case, the right edge ends up on top of the left. The same is repeated 4 times with a ribbon of the main color, after which several turns are made with golden material.
When decorating the neck is finished, proceed to the main part of the bottle. To do this, you need to measure the diameter and, adding 1 cm, cut off the golden ribbon and several parts in the main color. It is also necessary to make a piece of ribbon in the main color, twice as long as the height of the main part of the bottle.
The longest piece is glued to the back so that it runs along the bottle, leaving half hanging freely. The golden ribbon is coated with glue, wrapped around the very bottom, connecting the edges at the back - so that there is glued material under them.
The piece with the main color is glued in the same way as the golden one, but it is necessary that it overlaps the previous layer. Continue repeating until you reach the decorated neck.
After this, the hanging end is coated with glue, and the connection of the tapes is closed. The main decoration of bottles for a wedding is ready, now you can complement it with other decor.
A bit of symbolism and traditions
This anniversary was not called the Tin Wedding for nothing. Over the 8 years of married life, the young couple managed to go through a lot: developing their characters, having children, and financial difficulties. It was also difficult for blacksmiths to obtain tin. To make the material by hand, blacksmiths soaked untinned tin for a long time in a liquid made from rye flour, then greased it with lard, dipped it in solutions and rubbed it with tow until shiny. Only after this a high-quality and durable metal was obtained. Likewise, those married couples who kept their family together after so many years became as strong and flexible as tin.
It is also no coincidence that poppies became a symbol of the eighth wedding anniversary. For many peoples, the poppy is considered the flower of angels. The Chinese call these flowers a symbol of peace and fertility. For the Romans, the poppy symbolized beauty and sweet dreams. The peace that poppy gives means the calming down of everyday storms and the pacification of the couple. And if you combine this with the infinity of the number 8, you get a foreshadowing of a fertile life and endless love.
Popular articles Folding postcard with love
How to decorate bottles with your own hands?
Bottles of wine, decorated by hand, should fit into the overall tone of the holiday and its style. There are simply an incredible number of options for decorating a drink; choose the one you like and follow the instructions step by step. For those who have a penchant for handicrafts, a great option is to decorate a bottle with polymer clay. Minimum costs and your masterpiece will delight all guests!
You will need:
- a couple of bottles of sparkling wine;
- white spray paint;
- ready-made polymer flowers;
- glass pencil;
- rhinestones, beads for decoration;
- glue, ribbons, lace, scissors.
The work itself will not take much effort and time. First, paint the bottles with white spray paint, then draw the outline of the desired decor option. Place polymer flowers, beads, ribbons, rhinestones, bows along the finished contour and secure them with glue. This type of champagne decoration is very simple, and the effect is amazing.
An equally interesting, but much rarer option is decorating champagne with photographs of a married couple. Photos can be placed on bottles instead of labels. In a similar way, you can decorate the bottle with a sticker with the date of the celebration or wedding, with the names of the bride and groom. Decorating with photographs is a simple process. First, print the necessary photographs on thin paper, and then apply them to the bottles using the decoupage technique. The contours and the rest of the bottle can be decorated with ribbons and rhinestones.
You can contact your nearest photo studio, where they will help you select special wedding pictures and logos and print them on paper of the required format and quality. Champagne with images of newlyweds in reality look magical and intriguing. Be sure to consider this option for decorating the drink and you definitely won’t go wrong.
Champagne looks rich and elegant in bottles decorated with gold or silver. In this design, the drink can retain its original appearance for many years. The choice of patterns and inscriptions suitable for decoration, of course, is a purely personal matter, but it is better to entrust this kind of work itself to professionals who know a lot about this matter.
You can create another champagne decoration option on your own - decorating bottles with satin ribbons. To work you will need:
- bias tape;
- glue;
- rhinestones, beads, feathers for additional decor;
- two bottles of champagne.
The point of the process is to attach pieces of bias tape to the bottle according to the pattern. The pattern depends on the selected pattern. These can be bottles in the suit of the bride and groom, vest bottles for a wedding in a nautical style, etc.
It is better to start designing from the neck of the bottle. The top can be decorated with a black hat or mustache, or a veil. Add beads and rhinestones as desired. Do not cut the ribbon into pieces at once, as the length will change as you work, depending on the shape of the drink bottle.
As you move from top to bottom, the edges of the attached tape are hidden under the top edge of the next row. The widest bottom part of the bottle is also decorated with ribbons, but the tails are secured from the bottom. It is not at all necessary to attach the tapes at an angle, it all depends on your imagination. If somewhere you get a sloppy stripe or the ribbon is crooked, you can fix everything by attaching a decorative element over the satin. This decor option looks good with the addition of feathers of different colors and sizes.
As you can see, there are really many options for decorating champagne. This is only a small part of what you can do with your own hands. It’s up to you to decide – use ready-made ideas and master classes or come up with your own unique design.
Tili-tili dough
For decoration you will need:
- bias tape in white (ten meters) and black (eight meters);
- lace stripe - ten cm;
- satin ribbon black (1.3 cm wide (for a bowler hat and bow tie) - one and a half meters and twelve cm; size 5x5 cm (for a bowler hat) - ten cm) and white (1.3 cm wide (for a hat) Bride") - twenty cm; size 5x5cm (for the "Bride's" hat) - ten cm);
- white organza (for the “Bride’s” hat) - a small piece;
- adhesive material gossamer - a small piece;
- white cardboard;
- glue stick;
- glue “Moment” (Crystal);
- wide nylon tape - three meters;
- beads and rhinestones.
Description of work
- Bottle preparation: Remove all labels except the foil on the end of the bottle. To do this, put the bottles in water for an hour, and then use a scraper, knife and sponge to remove the label.
- Decoration of the "Bride".
Basis: using a marker, thinly draw a vertical stripe on the bottle, then try to ensure that the ends of the glued materials meet on it. Determine the exact size of the lace strip, trying it on the “neck” of the “Bride”, cut off what is unnecessary. Then, carefully smear the neck with glue, attach the lace.
Also try on white bias tape, cut it off, stick it on, stretching it a little. Cut off the remaining turns of the tape after gluing it. Watch the ends of the binding, they must be carefully glued.
Each next turn should be slightly on the edge of the previous one. Thus, trim the expanding part of the bottle.
Article on the topic: Amigurumi bear. Description of knitting
Cover the place where the width of the bottle is stable with tape without cutting, trying to attach the bias tape strictly horizontally. Cover the bottom of the bottle in this way.
After pasting the bottle, decorate it with a skirt, jewelry and a hat.
Making a skirt: cut the wide bow into three pieces one meter long. Solder the ends of each segment by folding them together, pressing them with a knitting needle or a metal ruler and holding them with a hot soldering iron.
In the photo there are ready-made blanks for the skirt:
Fold each piece lengthwise, but not in half, but with a difference of about one cm. Fix the fold of each part of the skirt with small stitches, and pull it together.
Place the skirt blank on the bottle, do not tighten the thread too much, as in the photo:
Gather all three tiers of the skirt. Make sure that the fabric is distributed evenly.
The “belt” of the skirt can be decorated with golden braid. The width of the braid is two and a half centimeters, the length includes the circumference of the bottle plus two centimeters for the connection and another half a centimeter for a loose fit. Connect the edge of the braid from the inside to the frill.
After this, fold the golden braid, hide the edge of the frill and secure it with monofilament, a thread reminiscent of fishing line.
Attaching the "skirt". First, try on the bottom frill so that it almost touches the bottom, mark the edge of the frill on the bottle with a dotted line with a simple pencil, raise the frill so that you can apply glue. Apply Moment-Crystal to the dotted line. Place the frill on the glue and press tightly. Similarly, attach the middle frill two centimeters above the bottom one.
Sew the upper part of the skirt with golden braid to the monofilament binding around the bottle.
Neck trim: attach beads and rhinestones to a golden braid half a centimeter wide with thermoplastic glue, without touching the braid with a hot-melt glue gun, since the hot surface of the gun leads to deformation of the braid. Also glue the decoration to the “neck” with hot glue.
Related article: Knitted hat for a boy: how to knit a hat-helmet and winter earflaps for kids with video
If the braid is wide, it is easy to cut the desired width with a soldering iron using a metal ruler.
Decoration of the “head”: to make the brim of the hat, glue two pieces of organza together using adhesive web. Select a cup or glass that fits its circumference and trace it around the organza with a hot soldering iron.
Use a soldering iron to cut darts inside the brim of the cap.
Glue the darts of the hat brim into the top part and press tightly.
Take a white satin ribbon and make a circle on it along the diameter of the bottom of the hat and a ribbon to decorate the crown from the inside. Glue them inside.
Cut a strip of organza. Attach it above the crown to create small folds.
"The Bride" is ready.
- Champagne “Groom” is made according to the same scheme as “Bride”.
Please note that the first, second, third and fourth turns are made using white binding, and the “suit” is made from black. Decorated with a bow tie made of black satin and beads.
“Bow tie”: the length of the product is two and a half centimeters. Prepare the ribbon based on the following: you will need two lengths of the tie and plus 3 mm.
Fold the edges of the ribbon so that they overlap one another by 3 mm, as in the photo below. Make a couple of stitches in the center of the butterfly.
And tighten the thread, gathering the bow tie. Fasten the thread.
Then decorate the butterfly with a bead or rhinestone by gluing it.
Attach the butterfly to the “neck” with hot glue. Glue three “buttons” to it below: beads or rhinestones. Making a “pocket”: make a “valve” - a rectangle from a narrow black ribbon. Glue a “scarf”, a piece of white tape, to the inside of the “valve”. Then attach the blank in place of the chest pocket.
The creation of the “Cauldron” follows the pattern of the “Bride’s” hat: let’s start from the bottom of the cauldron. Make a circle with a radius of 1.7 cm, stepping back one centimeter from the edge, cut it out, then cut out darts on it.
Article on the topic: Crochet hat for a girl: pattern for winter, autumn, spring and summer from experienced craftsmen with photos and videos
The “crown” consists of a strip three cm wide and thirteen cm long. Spread it with glue on one side, glue it to the darts of the previous workpiece, and press well. Glue the ends of the strip overlapping.
Bowler brim. We make a circle again, but this time double: the inner one with a radius of 1.7 cm, the outer one with a radius of 3.2 cm. Make darts inside.
Glue the darts of the brim to the crown and press well.
Cover the paper pot with cloth. Cut out a large circle from black satin. Glue it to the bottom and top of the crown, make cuts on the protruding edges of the fabric and also glue it.
Sixteen strips of black satin ribbon, 1.3 cm wide, and cover the margins.
To decorate the crown, glue the ribbon to the top of the bowler with several turns. We cover the inside of the pot with satin according to the size of the bottom.
The result is a cute hat, which can be additionally decorated with a flower.
Champagne in the style of the bride and groom
Like wedding glasses, champagne bottles are often decorated in the style of the bride and groom. Such accessories look impressive and interesting, especially if they are in harmony with other details of the newlyweds’ table and their wedding dresses. Did you like this idea of decorating bottles with your own hands? Then feel free to take on its implementation with the help of the next master class!
Materials and tools:
- satin ribbon cream and brown 2*150 cm;
- pink ribbon 2.5*50 cm;
- white fabric 3*60 cm or ready-made frill 30 cm long;
- white fabric 7*31 cm;
- glue and brush;
- white paint (acrylic or water-based);
- pink and gold cardboard;
- beads, lace, bow, textile flowers for decoration.
Time: 60 minutes.
Detailed instructions:
- Paint the bottles with white paint. If necessary, apply several coats to achieve perfect whiteness.
- Take a beige ribbon about 25 cm long, tie it around the neck of the bottle and cross it on the front side. Use glue to securely attach the tape to the bottle.
- Repeat the same steps with other ribbons. Where the neck of the bottle widens, cut the tape 2-3 cm longer.
- Repeat the same steps with the pink ribbon.
- Glue pieces of pink fabric or ribbon to the sides of the bottle, and cover the bottom of the bottle with white fabric.
- Add decorative elements to the bottle: a frill on the bottom, a flower and a bow on top. You can buy a frill ready-made, or you can make it from a lace ribbon, gathering it with threads. You can also make a bow yourself or purchase it at your local fabric and accessories store.
- Cut a 1cm wide strip of pink cardstock and make a ring out of it. The length of the strip should be 0.5 cm longer than the neck of the bottle. Cut out a circle the same diameter as the ring you made (this is the top of the hat), and also another circle 3 cm larger (this is the brim of the hat). Make cuts in circles as shown in the picture.
- Glue all the parts of the hat together.
- Glue a lace frill and a piece of tulle to the hat. The bride's champagne is ready!
- Make a pattern for the groom's champagne outfit: wrap the bottle in thin paper and secure it with thread or tape. Draw the lines of the groom's coat as shown in the picture.
- To decorate the bottom of the bottle, cut a piece of white fabric 5-6 cm wide and 0.5 cm wider than the bottle. Glue it to the bottle.
- Create an imitation shirt collar using ribbons, as for the bride's bottle.
- Make the bottom layers darker.
- Cut the coat according to the pattern and sew it. Please note that you need to allow about 0.5 cm of overlap at the seams. Place the frock coat on the groom's bottle. If you don't like to sew, you can simply glue the finished piece directly onto the bottle.
- Complete the outfit you made with a white collar and buttons.
- Make a groom's champagne hat.
- Complete the bottle with decorative elements: a flower and leaves, a bow.
- So you have made your own original champagne clothes for your wedding!
How to decorate a bottle of champagne for New Year 2021 using decoupage technique
If you have the time and desire, it’s worth making real New Year’s bottles, which can also be used as a souvenir if you go to visit.
Decor with napkins
A simple solution that will allow you to get a very interesting result. It will look no worse than purchased products. What you need for work:
- Napkins. You need one with a pattern that will be placed on the bottle and several white ones - without patterns or pictures.
- Acrylic paints and varnish (it is most convenient to purchase it in a spray can).
- PVA glue.
- Jewelry and glitter.
DIY napkin decor is done like this:
- Remove all labels from the bottle. To do this, the easiest way is to partially place the container in warm water, and when the paper gets wet, carefully remove it. It is best to remove the remaining glue with a solvent or acetone; at the same time, the surface will be well degreased.
- Paint the glass surface with white acrylic paint. Apply one coat, wait until dry, then paint again to create a dense, all-white base.
- Cut out a piece of a napkin with a picture of the required size, not forgetting to remove excess layers - only the top one is needed. Coat the painted surface with PVA glue, then carefully apply the napkin. Straighten it, remove folds, air bubbles and excess glue.
- Tear the white napkin into pieces, form small lumps and glue to the surface of the bottle coated with PVA glue. In this way, decorate the entire area where there is no pattern. To make the paper stick better, it is better to cover it on top with PVA glue diluted with water by about half. Leave until completely dry. This usually takes at least 6 hours.
- Paint it any color you like, you can make a two-tone design. Then apply a little glue and sprinkle with glitter so that they evenly cover the surface.
- After complete drying, evenly coat with acrylic varnish from a can. Add decor as desired. Small balls or pine twigs will do.
For your information!
Apply the varnish outdoors or in a well-ventilated area.
The finished bottle looks unusual and attracts attention. Thanks to the varnish, all elements are securely held on the surface, the glitter does not fall off. If you don’t have napkins with a New Year’s pattern, you can find a suitable picture and print it on thin paper. Before gluing it should be slightly moistened with a spray bottle.
Combination of decoupage and glue gun
Another interesting solution that is easy to make if you have a glue gun and several sticks for it on hand. Any option will do - size and performance don't matter. To work you need the following:
- Napkin with a New Year's picture.
- PVA glue.
- Acrylic paint and acrylic varnish.
- Sequins and decor.
Prepare your work area in advance, cover the surface so that drops of hot glue do not damage the furniture. Follow simple instructions:
- Remove the labels from the bottle and degrease the surface (if there is no solvent, you can use nail polish remover).
- Separate the top layer of the napkin, trim the design so that only what is needed remains.
- Paint the bottle completely; for this it is convenient to use a sponge or a medium-sized brush. It's better to do this twice. Apply the second layer after the first has completely dried.
- Apply PVA glue to the place where the design will be located. Then carefully glue it and straighten it so that there are no folds. You can place the picture on the reverse side if you wish. Coat the top with glue again and leave to dry.
- Next, use a glue gun to cover the neck with drips. They should be evenly distributed, the less the base is visible, the better. Apply white paint to the glue. It is most convenient to do this from a spray can, then it will fill all the unevenness and the result will be perfect.
- Apply glitter on top and secure with acrylic varnish. After drying, the surface will be durable and will not get dirty.
Advice!
If you don’t have a glue gun, you can wrap the neck with twine, apply PVA glue to make it hard, and paint it.
If desired, you can use any decor or tint the picture a little to give it more expressiveness. Such products should be stored in a cool, dry place. It is not recommended to put them in the refrigerator.
A bottle for a wedding made from ribbons - festive champagne: instructions with photos
Champagne in the form of the bride and groom is not a requirement for a wedding. You can deviate from the standard and place a bottle of champagne beautifully decorated with ribbons on the table. For decoration you will need:
- satin ribbon (blue, black, green are suitable for a men’s bottle; white, pink, beige, milky for a women’s bottle);
- Super glue;
- decorative elements (lace, beads, feathers).
Starting from the top, try on the tape at the corner, cut it and glue it. With the next one, do the same steps. Make 4-5 wraps with the main tape, change it to a decorative one. In our version it is a golden ribbon. Glue 2-3 strips of a different color, still on the corner. Cut ribbons of the main color according to the diameter of the bottle. Starting from the bottom, glue one gold ribbon, and then cover the entire bottle to the top with ribbons of the main color. Leave room at the top for one gold ribbon. The seam (the junction of the glued tapes) should be at the back. Place a ribbon of the main color under the bottom gold ribbon at the seam. Glue it to the seam to hide the joints of the tapes glued in a circle. Hide the top of the vertical ribbon under the last gold ribbon passed in a circle. Decorate the front of the bottle with ribbons, beads, and feathers.
For a wedding, you can make two identical bottles or differentiate them for the bride and groom using the colors of the ribbons.
Wedding decoration with champagne “Bride and Groom” - master class
Let's start decorating the wedding champagne. Let's start with the groom. Let's tie a beautiful tie for the groom, but before that we need to make the shirt collar. Take a white satin ribbon 2 cm or more wide. We bend it in half lengthwise and iron it.
We measure how much ribbon is needed to braid the neck
Please note that we are already beginning the process of braiding the bottle with ribbons, so place the ribbon at the back a little higher than at the front. You will understand how it should be correct, since the tape should lie perfectly flat and fit snugly
We burn the edges of the tape with a match or lighter. Apply glue to the surface of the bottle and glue one end first, then the other
It is important that the upper corners of the collar touch and do not intertwine
Next, we raise the collar (just like in a shirt), take a white ribbon of the same thickness and weave it around the bottle close to the fold, repeating exactly the slope of the collar. First we glue one end, then we glue the second overlapping. Next, each layer of tape must be overlapped with the previous one by 1-2 mm upward.
We glue another tape. The collar and shirt are finished.
Let's tie a fashionable tie with an "Eldridge knot" from a blue ribbon, which we will braid around the entire bottle. Below is a detailed diagram of tying such a knot. You may not like it and you can tie a different type. The only advice: the end of the ribbon in the right hand should be long (about 30 cm) so that it is convenient to weave, and the end in the left hand will remain unchanged (it will make up the tie).
We put the tie on close to the fold of the collar and tighten it.
We lower the collar down and glue the end of the tie to the bottle.
Next, we begin to braid the bottle with a blue ribbon (width 1.3 cm or at your discretion).
We braid this until the shape of the bottle begins to change dramatically and we have to glue several rows of tape in one place.
When the smooth surface of the bottle begins, glue the end of the tape in front in the center. The tape should be level and overlap slightly, where the oblique rows end on the reverse side.
We wrap the bottle very tightly with tape, securing each row at the front with a small drop of hot-melt glue.
We cut the ribbon and fasten it in the front in the middle. We cover the cut with beads and decorate them further, imitating buttons. Glue on the boutonniere and the groom is ready!
Take a white ribbon of the same width as for the groom's suit. You need to start braiding the bride from the level where the groom's blue ribbon (jacket) begins. First, in the back center, you need to secure a bottle-length tape with the front side to the surface using hot glue. It will cover the joints. We braid the bride in the same way as the groom, only part of the shirt and tie is missing.
The only difference is that when the flat surface of the bottle begins, we fasten the edge of the tape in the middle at the back and fasten the end there too. Everything ahead must be perfect.
The base of the dress is done. Now we will wrap the flat part with lace. The joint should also be at the back. Apply glue to the joint and a couple of drops on top so that the lace does not slip.
Let's prepare a bow for the top of the dress. For it you will need a blue ribbon 2.5 cm wide, a ribbon 0.7 cm wide. Place the blue ribbon in the center, and cut two pieces of the white one and place it along the edges of the blue one. We tie a bow with a white ribbon into two knots, hide them at the back, and cut off the ends.
Apply glue to the knots and glue the bow in the front center above the lace. First, we braid the bottle with blue tape on one side and the other, sealing it at the back at the junction, and then with white tape, slightly covering the edges with blue. The basic rule: the ribbon should lie flat and cover the edge of the lace. Hot melt glue can be applied pointwise when we braid it with tape.
We lower the tape at the back and glue it, covering all the joints. Glue the end of the tape to the bottom of the bottle and decorate it with beads.
We glue a regular bow from a thinner white ribbon on the front and decorate it further with beads (at your discretion).
The bride's dress is ready!
Now you know how to decorate wedding champagne with your own hands. You can decorate glasses in the same colors. We will tie a regular bow from white organza (2 cm or more wide) and the blue ribbon from which the groom’s suit was woven. First we tie it with a white thin ribbon, placing the knots on the back side. The ends should be the same - we will use them to tie the bow to the leg.
Then we tie it in the same place with a blue ribbon, but we cut off the ends end to end. Glue a bead in the middle.
We tie it to the leg with a white ribbon, tying a knot in the front. Leave the ends free. We burn the ends of all the ribbons.
Wedding champagne in the shape of the bride and groom is ready to decorate the festive table!
Decorating bottles for a wedding with your own hands: champagne for the bride and groom
The bride and groom at a wedding can be not only at the table, but also on the table. Of course, we mean decorated champagne. You can make a bottle bride and groom with your own hands using bias tape or ribbon. For two bottles you will need the following materials and tools:
- 10 m of white bias tape;
- 8 m of blue or black bias tape;
- 4 m of bias cream binding;
- 10 cm white lace;
- 3 m of wide lace, bow or piece of tulle;
- glue in a pencil (super glue moment);
- scissors;
- decorative ornaments;
- cardboard for hats.
Below is a step-by-step process for making wedding bottles.
Bottle for a wedding - Bride: step-by-step master class with photos
Just like a real bride, the bottle of champagne in this outfit should be the center of attention, and this requires perfect execution of the job.
Initially, use a marker to draw a straight line in the front center, along which you will need to glue the edges of the tapes. Try on the lace at the neck, cut off the required piece. Spread the bottle with glue and glue the lace. Coating the glass of the bottle, glue the bias tape, cutting off its long part after gluing.
Continue oblique gluing until the middle of the bottle. From the middle, the bias tape is glued in a circle to the very bottom of the bottle. Take a wide bow near the subway, use an iron ruler and a hot soldering iron (a knitting needle heated over a fire) to solder the edges of the bow. It should look like this.
Fold it in half and sew with a cast-on stitch. Put the resulting skirt on the bottle, tighten the thread to its size. Remove part of the skirt and follow the same example to make two more skirts. Determine the place where the skirt will be attached. From its upper part you need to mark a place for two petticoats, coat these places with glue and glue two blanks.
Sew golden bias tape to the overskirt. Glue it onto the bride bottle.
Fold a piece of a wide bow in half. Using a mug and a hot soldering iron, make a circle (the edges will stick together under the influence of the heat). As shown in the photo, cut out the darts so that the brim of the hat can be glued on.
Make a ring out of cardboard to fit the diameter of the bottle neck. Cut out a circle with teeth for the top of the cap. Bend the teeth, glue the top part of the cap and brim. Glue a white ribbon in a circle on the outside and tie an organza ribbon.
Glue beads to the bride’s “neck” and put on a hat. The bottle-bride is ready for the celebration.
Bottle for a wedding - Groom: step-by-step instructions for working with photos
The bride is ready, now let's get down to creating the groom. The work is carried out identically to the execution of the bride bottle.
First, fold the white ribbon in half and try it on the neck of the bottle.
Apply glue to one half of the folded tape and glue it to the neck of the bottle so that the upper part can bend.
Raise the top of the collar of the first tape, glue another 2-3 rows to the bias underneath it.
Measure out the main color of tape to attach to the bottle. Raise the collar and tie a ribbon tie for the groom. Lower the collar and continue gluing the blue ribbons (on top of the tie) onto the bottle. When the narrowed part of the neck ends, cover the bottle in a circle with ribbons to the very bottom. Glue buttons to the groom's jacket. Decorate the “chest” with a boutonniere.
Prepare such parts for making a top hat for the groom. Glue a cylinder out of cardboard. Cover it with ribbons and decorate it to match the jacket.
Place the top hat on the bottle and the groom is ready.
How and why wedding champagne bottles are decorated
There are many interesting wedding traditions, including two untouched bottles of sparkling drink, most often champagne, with the exception of completely non-alcoholic ceremonies.
This indispensable attribute of the wedding ceremony is specially decorated and sealed so that they remain intact.
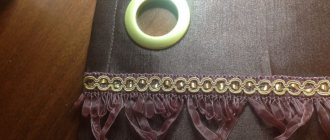
Decoration with satin ribbons or paper details
Why don't they touch them? According to tradition, the newlyweds must take them with them from the wedding table.
You will have to drink the contents of these, in fact, holiday souvenirs much later:
- for a wedding anniversary;
- after the birth of the first child, when he and the young mother are brought from the maternity hospital.
Champagne decor with lace, tulle or other beautiful fabric
There are a lot of options for how to decorate this table souvenir. There are many master classes on decorating wedding bottles, but not every technique is accessible to beginners. Among the most popular offers.
| 1. | Decoration with a photo of the newlywed couple | Photo, heart-shaped frame, accessories. |
| 2. | Spray paint | With the addition of small decor after drying. |
| 3. | Sewing clothes for the “Groom” and “Bride” | A conventional veil and skirt is enough for her, a jacket for him. |
| 4. | Pasting with guipure and other textiles | We mainly decorate the “Bride”. |
| 5. | Decorating with napkins using decoupage technique | Napkins and postcards from handicraft stores. |
| 6. | Moldings | Polymer clay. |
| 7. | Partial staining with “windows” | We apply stickers, remove them after painting, and make inserts and overlays. |
| 8. | DIY ribbon decor for wedding bottles | Ribbons, bias binding, textiles. |
Bottle decoration using original techniques (decoupage, scrapbooking and others)
The main idea of decorating a couple of bottles is to give them the symbolism of the bride and groom - He and She with the attributes of a wedding dress. If both the bride and groom have experience in making things with their own hands, you can prepare a surprise for each other. But it’s better to agree on what color and material will be. Then, on the wedding day, everyone will give their other half an original souvenir.
With a photo of the newlyweds
This design looks original and unusual. To decorate, you need to print two photographs of the newlyweds on thin paper. This can be done in any photo studio or at home if you have a color printer. Next, decorate using decoupage technique.
Related article: How to remove fungus and mold from the walls of an apartment or house
You can also order special labels for champagne in the photo salon. This design is the easiest to do. Peel off the old labels, glue new ones, if desired, add decoration with ribbons and flowers.
Paired decoupage
There is another way to decoupage champagne for a wedding using the kanzashi technique. The principle is similar, only satin ribbons of different colors are used. For example, the bottles of the bride and groom can be wrapped with black and white ribbons, respectively. But containers with decor matched to the colors of the wedding celebration will look more elegant. The groom bottle is decorated in the classic way:
- the neck is wrapped in a herringbone pattern;
- the wide part is decorated with even winding;
- a bow tie or tie is put on the neck;
- attach a boutonniere and buttons (beads).
The bottle bride is dressed up in a tulle or lace skirt. The lower edge is decorated with lush flowers. You can hang a necklace of beads on the neck. Hats are made from textiles or cardboard, and they can also be bought ready-made. A bowler hat will suit the “groom”, and an elegant wide-brimmed hat or veil will suit the “bride”.