A perfectly flat ceiling surface is a prerequisite that must be met before decorative finishing of this surface, so that the quality of the work carried out is of a high level. This is especially true for ceilings made of reinforced concrete slabs. The evenness of the ceiling is achieved after the ceiling has been dry screeded.
A perfectly flat ceiling surface is a prerequisite that must be met before decorative finishing of this surface.
Design features
The answer to the question of why a ceiling screed is needed is quite simple. Reinforced concrete slabs are massive floor elements that, even with the help of technology, are difficult to install on one level, therefore, as a rule, there are some differences between them. Their size depends on the quality of installation of the floor: the better the specialists and their work, the smaller the difference in the levels of the bottom of the slabs will be.
Of course, you don’t have to save money on your own home and call a team of specialists who can quickly and efficiently screed the ceiling. But if you study all the nuances of this process, you can try to do it yourself.
Is it necessary to make a new coating?
In a new building suitable for living, this is not necessary, but in older buildings, where there are wooden floors or old tiles, and major renovations are planned, this is necessary. The previous one may well be unusable, have cracks and various air bubbles, and unevenness. A simple restoration will not be enough, because sooner or later all these problems will appear again and will have to be eliminated. This is especially important when laying porcelain stoneware, because any subsidence will lead to a chip or failure in the most inappropriate place.
Alignment methods
Before you begin screeding the ceiling surface, you need to decide on the method you will use. There are two types of ceiling surface screed: “wet” and “dry”. The first method involves the use of solutions or mixtures. This could be a concrete ceiling screed made from cement mortar.
The second method requires the use of sheet materials such as plasterboard, plywood, fiberboard or chipboard. How to determine the right method for making a screed with your own hands? Of several criteria, it is worth paying attention to one main one. To do this, measure the difference at the junction of the plates. If it exceeds 5 cm, then wet screed will not work, since the thickness of the applied plaster will exceed the normalized value. This is fraught with the fact that, under the weight of its own weight, the plaster layer simply cannot withstand it and falls, and this can lead to human injuries.
In addition, a large thickness of plaster can exceed the normalized load for which the ceiling was designed, which will also lead to negative consequences. To prevent all this from happening, you should use a dry screed. Of course, she also has her shortcomings. For example, this method “steals” quite a lot of height from the room, so already low rooms will become even lower.
Plastering the ceiling
Plaster is a hardened concrete mixture, the application process of which is quite labor-intensive, especially on the ceiling surface. But this method of screeding the ceiling does not lose its relevance, because sometimes it is the only way to create a flat surface. In addition, you can plaster any coating: wood, concrete or metal. But in any case, it is necessary to carry out preparatory work. They include several stages:
- Cleaning the surface of contaminants, for example, mold or other fungal stains that need to be disinfected;
- Removing old coating in the form of paint, whitewash, etc.;
- Priming the concrete surface using strengthening mixtures;
- For wooden and metal structures, the installation of reinforcing mesh is required.
Then they move on to the installation of beacons, which are then used to plaster the ceiling. Using a paint cord, you need to mark the zero level, which determines the lowest level of the ceiling surface. It will be the first lighthouse. The rest are installed every 30-50 cm on plaster marks. The height of the beacons should not be greater than the thickness of the plaster, that is, 5 cm.
Applying plaster on beacons
After installing the beacons, you can begin plastering. To do this, you need to make a working solution based on gypsum, cement or lime. Then follow these simple instructions shown in the video:
- Apply the first layer of spray without leveling;
- Distribute several primer layers, gradually leveling the plaster;
- After applying the last layer, remove the marks with beacons and fill the recesses remaining from them with the solution;
- Using a rule applied along, across and diagonally to the ceiling, check the evenness of the surface (excess plaster is cut off, and, on the contrary, more mortar is added to the missing places);
- Use a trowel to seal the internal corners and joints between the ceiling and the walls;
- Apply a final, carefully leveled coat to create a smooth surface.
When applying plaster, be sure to ensure that no defects in the form of shells or pits are formed. After the rough screed, you can apply the finishing coat in the form of putty.
Dry screed
Do-it-yourself dry ceiling screed can be made from plasterboard, which serves as a high-quality alternative to the long and labor-intensive method using plaster.
As you can see in the photo, with the help of plasterboard sheets, designers implement various ideas and plans in interior design, which is a definite advantage.
In addition, simplicity and speed of installation can also be attributed to the advantages of dry screed. The sequence of work includes only three stages:
- Marking the ceiling surface, when the zero level is placed on the walls, the corners and frame are marked, and options for laying out plasterboard sheets are determined so that their shift is equal to the pitch of the sheathing;
- Installation of the frame structure is a stage that involves fastening guides, which can be made of wood (attached with screws or direct hangers) or metal (fastened only with direct hangers);
- Cutting and installation of plasterboard sheets according to the drawing.
Types of cement screeds and their features
Concrete flooring is made in several ways. Each of them has its own advantages and disadvantages, which determine both the place and frequency of their use in construction. Among them there are options for dry and wet rooms that can withstand high loads or only minor furniture pressure, typical for a bedroom.
Wet screed in the apartment
One of the most common solutions that forms an even and relatively smooth surface on the floor that does not require further processing. There are 4 categories that are conventionally distinguished. They differ from each other in preparation and final result:
- Viscous. It is laid down in a single, monolithic layer, waterproofing is applied on top of it, and then the finishing is applied.
- Mixed with self-leveling coating. First, a rough layer of cement is laid out; it may not be very leveled. All roughness is hidden by a special cement fill that is evenly distributed over the surface.
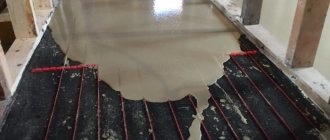
- Based on waterproofing. The heated floor screed is laid on the insulated layer.
- On thermal insulation. This is a solution for private houses where the base is soil. Initially, a sand cushion is poured, insulation is laid out on it - expanded polystyrene or mineral wool, expanded clay or polyurethane foam. Then the waterproofing is poured, and then the cement.
Often this coating is reinforced to achieve higher strength and resistance to stress. This also allows you to evenly distribute the entire concrete mixture. Drying takes from one day to several days.
DIY dry cement floor screed
It is a quick method because it does not require long-term drying. It stands out for its excellent thermal and sound insulation, low weight and high installation speed.
Consists of several layers:
- Main floor slab.
- Expanded clay or perlite.
- Moisture-resistant drywall or wood panels.
Due to its flowability and poor resistance to mechanical stress, it easily dents and forms unevenness.
Semi-dry floor covering
It resembles a wet screed, but the water consumption here is reduced, but the amount of sand is increased. This speeds up the hardening time, but has a bad effect on strength.
Self-leveling floor in the apartment
Rarely used on its own, more often used for finishing leveling and filling possible cracks. Such mixtures can be either cement-sand or polymer. Both of them are completely safe for humans.
Results
Screeding the ceiling with your own hands is possible, despite its labor intensity. The main thing is to follow the installation steps and recommendations of specialists. Then the ceiling with its evenness and beauty will only emphasize the interior design.
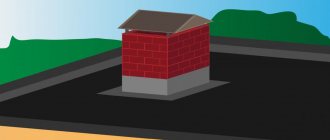
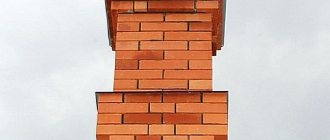
This article is about how to build a concrete ceiling. Pouring a concrete ceiling is a common technique in Europe. However, although it is more expensive and time consuming compared to a wood ceiling, it has several advantages that may make you think twice about building your home. Therefore, by constructing a concrete ceiling, the rigidity of your home will be much better and it can support more weight compared to lightweight structures. On the other hand, a concrete ceiling has good sound insulation and is more durable.
But this technology also has a few disadvantages, such as the high cost of the project or the fact that pouring a concrete ceiling can take up to several months before you can actually build the walls and roof. Additionally, you must build formwork to be able to construct a concrete ceiling.
Pouring a concrete ceiling is difficult without the help of a qualified engineer. In addition, you must comply with the rules in order to obtain a building permit. The thickness of concrete ceilings varies depending on the weight it must support, but it is generally in the 5-6″ range for residential buildings. It is necessary to take into account the weight of the reinforcement, as well as the weight of the concrete; this is very important for reliable construction.
In order to build a concrete ceiling, you need the following:
Materials
1 × 4 wooden planks for formwork construction / plywood 4 × 4 wooden beams for ceiling support / metal reinforcement, nails / screws for formwork fastening
Tools
protective gloves, glasses, tape measure, carpenter's pencils, square, circular saw, for creating formwork, hammer.
Adviсe
use protective clothing, clean your tools thoroughly after completing the project, wear safety glasses and gloves to avoid possible injury, ensure that the ceiling formwork is at the perfect level
Time
Several hours are possible per day, depending on the surface of your foundation and the number of workers
Consumables and tools
- Laser or water level - it is advisable to have both. They are used to calculate surface irregularities and defects.
- Beacons - installed to avoid various deviations from a given direction and height. Metal guides are suitable for this, but you can also choose wooden beams. In this case, the floor is filled in equal blocks. These can also be special pins set according to level.
- The rule is to level the laid screed based on a cement mixture. It is made of aluminum and has a trapezoid shape.
- Mixing form - builders use special concrete mixers when processing large areas, but they can rarely be installed in ordinary apartments. Therefore, specialized mixers and durable buckets are often used to prepare different amounts of cement composition.
- Shovel - the ideal solution is the so-called “American” one with a sharp end. It is easier for her to remove the resulting mixture.
- Trowel and plaster float - designed for leveling small irregularities and eliminating various defects.
- Reinforced mesh - it is not installed everywhere and not always, but it allows you to strengthen the composition and distribute it more evenly. Made from wire and sold in rolls.
- Primer - it is used before starting work, after removing the old coating and removing debris.
- Additionally, you will need a roller, pencil, marker, waterproofing if the renovation is carried out in the bathroom or kitchen.
How to make formwork for a concrete ceiling
In order to build a concrete ceiling, you need to make the right formwork. Building formwork is a complex process, but if you have experience working with wood, you will succeed.
Complete information about formwork, as well as reinforcement, must be provided in the plans of your house. Remember that constructing a concrete ceiling is essential to the longevity of your home, so you should consult a qualified professional before starting such a project. In addition, you must follow all the rules and obtain all necessary construction permits so as not to expose yourself to unnecessary threats.
Smart advice
: When constructing formwork, you should use pressure treated wood, make sure it can support the weight of the reinforcement as well as the concrete.
As you can see in the image, you must build the first row of formwork using 4×4 boards. On this structure you need to install 2 × 4 wooden planks or plywood. The first option is better for a project with a limited budget, but we recommend that you use sheets of plywood, then everything will be completely straight at the bottom of the ceiling and you will not have to put in extra effort to make it level.
If you are using wooden boards, you must ensure that they are straight and in good condition. Also, make sure that you do not leave any gaps between the boards, as this may cause the concrete to leak.
Smart Tip:
When building formwork, you must use a level to make sure it is level, otherwise you will waste money and time correcting these imperfections.
You can look at the ceiling from inside the house to get a better idea of the procedure. This may look unusual to you, but this is the correct way to pour a concrete ceiling. You will notice that there are many 4×4 timbers installed every 15″ to support the weight of the structure and concrete.
Smart Tip:
use adjustable metal reinforcement when constructing a concrete ceiling. It can support more weight and can be easily adjusted to the height of your room.
We have prepared this sketch to show you in detail what the ceiling formwork structure should look like. As we said, these details will be provided by the architect, but we want you to get used to these construction techniques.
Smart Tip:
Use a 4' spirit level to ensure the shape and level of the supports are plumb correctly. Construction of a concrete ceiling requires, in most cases, to build a strong reinforcement, otherwise it will not be stable and the walls will not support their weight.
If you are using 4×4 joists, you must carefully attach them to the base of your ceiling. Hence, you should use 2×4 lumber and some nails to fix it firmly. Use a level to check that the supports are plumb correctly.
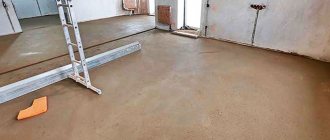
Screed on concrete slabs
The structure, built on concrete slabs, can withstand high operating loads.
The choice of final characteristics of the screed on concrete slabs depends on the type of room where the installation will take place
It is for this reason that it is often used in multi-storey buildings. The system can have different thicknesses, with or without insulation.
Among all the technologies that are in use today, the following work on concrete slabs:
- classic concrete screed and its varieties;
- semi-dry screed;
- screed based on ready-made cement mixtures;
- final leveling with bulk solutions.
When working with this technology, be sure to take into account the following:
- unevenness of the base;
- gaps between the plates.
Preliminary preparation
The principles of preparation can be very diverse.
If there is an old concrete covering, it is dismantled. This will reduce the load on the floor and maintain the height of the ceilings. Old concrete can be easily removed using hammer drills. Only professionals should act. Otherwise, the floor slab may be damaged .
The sludge is removed, the slab is cleaned with metal brushes and removed from dust using a construction vacuum cleaner. Deep cracks must be eliminated using cement-sand mortars.
If work is carried out on the ground floor, in basements, or in garages, it is recommended to consider the issue of waterproofing. This will prevent the penetration of moisture into the enclosing structures and the formation of fungus and mold. It is optimal to use rolled materials (based on polyethylene, roofing felt) or viscous coating compositions.
The principle of laying the material is identical to that for working on the ground - a continuous sealed layer must be formed on the base with the obligatory approach to walls and other enclosing structures. After installation is completed, a damper tape is placed around the perimeter.
The purpose of the damper is to compensate for the expansion of concrete against the background of temperature fluctuations. The width of the tape is chosen taking into account the design thickness of the screed - the material should rise above the structure by 3-4 cm. After completion of the work, it is cut off with a construction knife.
Reinforcement
When working on concrete slabs, it is very important to maintain the level of loads on the base, so light fiberglass mesh with a cell size of 5*5, 10*10 cm is used as a reinforcement layer. You can use a metal mesh with an identical cell width. The material is laid over the waterproofing layer with an overlap and the joints are secured with wire . For additional insulation and waterproofing protection, you can sprinkle the base with a thin layer of fine or medium expanded clay.
Beacons and guides
Laying concrete screed on floor slabs requires the placement of guides.
To make the horizontal as accurate as possible, the level is applied across the profile, capturing three beacons at once
The work is subject to the following principles:
- visually determine the highest point of the floor and use a laser level to draw the horizon line (along the perimeter of the room);
- measure the distance from the horizon line to the base. The value of the design thickness of the structure is subtracted from the minimum value. The resulting value is laid down from the horizon line and the line of the finished floor is drawn;
- according to the mark, beacons are placed based on a T-shaped metal profile;
- the width between the beacons is selected based on the width of the rule + 150-200 mm;
- the guides are leveled horizontally and fixed with cement-sand mortar or gypsum mortar;
- the entire system of exposed beacons is once again checked for evenness. If necessary, adjustments are made - the profiles are lifted above the solution or pressed into it;
- the system is left to dry the solution.
Laying the screed
To lay the screed, mix a mortar based on cement and sifted construction sand. The grade of cement should not be lower than M400. The proportions of the components are taken as 1:3, with 1 hour of water. Preparation is carried out in a concrete mixer, and for small volumes of work - with a construction mixer.
If a thermal insulation layer was not used during preparation, polystyrene chips can be added to the solution for insulation. Instead of reinforcing mesh, volumetric reinforcement can be provided when fiberglass is introduced into the solution . Given the tight deadlines for work, plasticizing additives are added to concrete. This will make the screed more durable and dry in a shorter time.
Laying is subject to the following principles:
- the base is slightly moistened, installation begins from any far corner, placing the solution between the beacons;
- the solution is poured onto the base so that it covers the beacons by 2-3 cm, distributed with a shovel;
- They place a rule on the guides, guide them across the profiles, leveling the material;
- As a rule, you should press on the solution so that it is densely distributed over the surface and the entrained air comes out;
- in this way all areas of the room are sequentially filled;
- When the screed is poured and leveled, it is left to mature. The beacons remain in the concrete body;
- the design requires protection with polyethylene film and periodic moistening.
Strengthening the building structure for a concrete ceiling
After you have built the formwork for pouring concrete, you must create and fix the reinforcement in the desired position. The concrete ceiling is almost floating, it is supported only by a few walls and pillars, so you must use a lot of reinforcement (the architect will calculate the required amount)
Smart Tip:
If your formwork is made of wooden planks, it would be a good idea to stretch plastic film over the entire surface to prevent concrete leakage.
In this photo you can see a close-up of the reinforcement used to strengthen the concrete ceiling. You may have noticed the thick iron pins, are you wondering what they are for? The reinforcement pins are located at the top of the wall and are connected to the rest of the reinforced concrete ceiling. This way, the concrete ceiling will support the walls and will be more rigid and durable.
Smart Tip:
You must always follow the construction plan, otherwise you may jeopardize your safety.
In this photo you can see the reinforcement of the structure around the stairs. You may have noticed that we used a lot of rebar around the stairs and along the walls.
Smart Tip:
These kinds of projects need to be carried out by qualified and experienced professionals, so you should learn the basic principles for yourself. We recommend that you hire an experienced architect and a team of qualified workers.
How to reduce dry cracks
Let's start with the fact that cement floor screed can vary in the amount of water. There are two types:
- Conventional, in which the volume of water is approximately equal to the volume of cement.
- Semi-dry, in which water is only 20-30% of the volume of cement.
With the same proportions of cement and sand, a semi-dry screed has higher strength and gains strength faster. After drying, it has fewer irregularities and fewer cracks. For some coatings, you can only rub the surface without using leveling mixtures. Why does this happen? Because there is less water, therefore less volume evaporates, causing less shrinkage (change in size). Hence - fewer cracks, fewer irregularities.
Cracks are not always visible, but they are always there.
Why is a regular liquid screed used more often? Because it's easier to make it. The liquid solution has a longer time to set. This allows even workers without experience to lay and level the composition. For a semi-dry solution, the time before setting begins is very short - about 20-30 minutes. And this is provided that the composition contains an additive to increase plasticity, prolonging the installation time.
To make a semi-dry screed with a longer period to start setting, look for cement with a long period to start crystallizing. This parameter is indicated on the bags. There are short periods - up to 20 minutes, there are 2 hours or more.
If a semi-dry mortar begins to “become”, but there is no time to lay it, it will not gain sufficient strength. That is why there are so many stories about fragile and crumbling semi-dry floor screed. It was just done incorrectly, with the installation time not correct. A properly made semi-dry cement floor screed is very strong and smooth.
A high-quality cement floor screed has very small differences, and to minimize cracking, expansion joints are laid
So what can you do to ensure that there are fewer cracks in the screed when filling the screed with ordinary mortar?
- Add the minimum possible amount of water.
- If necessary (on an elastic base), lay reinforcing mesh.
- Use reinforcing additives.
- Grind the surface after it begins to set.
- Lay a damper membrane around the perimeter of the room.
- For large rooms (more than 10*8 m), cut/lay expansion joints.
This is a whole set of measures that allows you to obtain a concrete floor with a minimum number of cracks. But first of all, we must follow the technology and recipe. This will be a guarantee of quality.
How to choose materials
The strength of a cement floor screed depends not only on the quality of the cement, but also on the quality of the sand. For a good result, you need washed river sand, from which all dust and foreign components have been removed. It is highly desirable that the sand contains grains of sand of different sizes. If the sand is of only one fraction, part of it (1/3 or 1/4) can be replaced with fine granots. With this composition - large, medium and fine fractions - sand fills the voids well, and the remaining empty space is filled with dusty cement. This cement floor screed is dense and durable. This is good for sound insulation, it cracks less and behaves better in use.
Brand of mortar for floor screed - from M100 to M200
What brand of cement should I use? The best choice is Portland cement. Marked PC. A cheaper ShPC is suitable. It is better not to take any mixes, since the result of their use is unknown. We do not add clay and lime to the CPS. These are dust-like particles; they replace cement, reducing its strength.
Features of the batch
Beginners often have the desire to add more cement to the screed solution. It seems that the more binder, the stronger the floor will be. Well, no. There will be more cracks. That's for sure. And the presence of a large number of cracks means poor quality of the foundation. Another point: in order for the cement floor screed to be strong, you cannot add a lot of water to it. To make it easier to lay the “steep” solution, plasticizers are added to it. The most affordable is dish detergent. A couple of spoons per batch, and the solution with a small amount of water is perfectly leveled. But if possible, it is better to add an industrial plasticizer. Detergents that increase elasticity reduce strength. So it is better not to use it for solutions of low grades.
Sand-cement mixture for floor screed - the basis for mixing
Even if you make a traditional solution, do not pour water right away. First, mix the dry ingredients - sand and cement, and then add a little water (half the norm). Add a little water, stir well, add a plasticizer (special additive or dishwashing detergent), stir. Too thick? Add a little water. After laying the solution, there should be no puddles on the surface. The presence of puddles indicates that there is a lot of water and its amount needs to be reduced.
How to pour concrete on a ceiling
After installing the formwork and strengthening the structure, you must fill everything with concrete. Therefore, you must rent a machine equipped with a pump and several hoses to pour concrete into the ceiling form.
Additionally, you must order the required amount of concrete from your local company (they will deliver it by car). You should be aware that there are several types of concrete, so make sure you order the one specified in your building plan (generally for ceilings, you should use B250). Ideally, you should hire an engineer to supervise the workers who are pouring the concrete ceiling.
Smart Tip:
if the surface to be filled is large, then it is better to start from the farthest corner. In this case, you won't have to run through liquid concrete with a hose. Additionally, you should wear rubber boots to protect your feet from getting dirty from the concrete.
After finishing pouring the concrete into the formwork, you must level it from one end to the other. But first you must pound the concrete to make sure there are no air pockets left in the concrete.
Make sure you level the surfaces properly, make sure it is level. However, in most cases you will need to screed after the concrete ceiling has dried to make it completely level.
Next, you must wait a couple of months until the concrete ceiling is completely dry. Once the ceiling is dry, you can remove the formwork and continue building the walls and the rest of your home.
Smart Tip:
If the outside temperature is high, you should spray the concrete with water at least twice a day.
Spray the concrete with water, otherwise the ceiling may crack. In the worst case, you'll have to do it all over again if the cracks are too deep (cracks can affect the rigidity of the ceiling).
Smart Tip:
Do not remove the formwork too early, otherwise the ceiling will crack or become crooked. This is why it is important to consult a qualified structural engineer.
Once the ceiling has dried properly, you can begin to build the walls and roof of your home. Pouring a concrete ceiling is not very difficult if you follow the directions from your structural plans.
Smart Tip:
just make sure you install the fortifications properly. Make sure you use the right tools and materials to ensure your project is done to a high standard.
A perfectly flat ceiling surface is a prerequisite that must be met before decorative finishing of this surface, so that the quality of the work carried out is of a high level. This is especially true for ceilings made of reinforced concrete slabs. The evenness of the ceiling is achieved after the ceiling has been dry screeded.
A perfectly flat ceiling surface is a prerequisite that must be met before decorative finishing of this surface.
Concrete screed on the ground
Installing a structure on the ground is a labor-intensive process that requires not only the main stage of work, but also high-quality insulation of the foundation, blind area, and a device for draining water from the base.
However, the system has a number of advantages:
- the structure is suitable for most types of soil, including complex sandy and clay soils;
- a well-insulated foundation is resistant to the forces of frost heaving;
- concrete consumption may be less compared to a typical slab base;
- reliability;
- communications do not require additional insulation;
- there is no need to ventilate the underground space.
Among the disadvantages are the following:
- If a high base is being built at the site, backfilling with a large volume of soil is required. This leads to higher costs of work.
The structure is often laid in the presence of a good heating system, which will eliminate freezing and deformation when the groundwater level is not higher than 4-5 meters. A multilayer system is always laid on the ground . It is important to follow a strict sequence of work, since each layer carries its own functional load.
General structure of the ground screed:
- base;
- sand cushion;
- gravel or crushed stone cushion;
- rough screed (leveling based on lightweight concrete);
- a layer of steam, hydro, and thermal insulation;
- finishing reinforced screed;
- finishing coating.
Preparation
Preliminary preparation is a mandatory stage of work when installing a screed on the ground. When starting work, you must remember that each layer of the system is aligned horizontally.
To begin with, the zero level is set. Marks are placed along the perimeter of the walls, with a reference point to the bottom of the doorways. By raising or lowering this line you can vary the thickness of the “pie”. The thickness of the fill is controlled using a stretched cord, which serves as a level.
Preparing the soil and filter layer
If necessary, the plant layer is removed with shovels, and the soil is dug out to the thickness of the structure (zero level serves as a guide).
If the volume of work is large, it makes sense to turn to professional soil compaction rollers.
The soil must be well compacted, for which vibratory compaction equipment is used . Such machines provide a combination of static and dynamic loads, which ensures high preparation density and a high depth effect.
The backfill base - sand - should be shed with water. The preparation is carefully compacted in layers. The thickness of each layer is 10-15 cm, the amount depends on specific conditions.
Operating principle:
- sand is spread on the ground, maintaining the optimal thickness;
- pass through the layer using vibrating compaction equipment “dry”;
- the preparation is sprayed with water from a hose with a spray nozzle. The material should become damp, but not wet. Excessive water will ruin the tamper;
- tamper along wet sand in two approaches, changing the orientation of movements;
- secondary humidification;
- tamping in 2-3 approaches.
Next, crushed stone or gravel backfill is used (coarse crushed stone is used). When compacting crushed stone backfill, local impacts act on the base, which works to further deep compact the underlying layers.
Waterproofing
When the preparation is completed, the issue of waterproofing becomes relevant. The task is to protect the system from moisture. At this stage, the question often arises about the construction of the sub-concrete layer. When working on the ground, this step is not required. The footing works under the pressure of groundwater, which is important for basements .
A polyethylene film of 150-250 microns is placed on the base. An overlap of 15-20 cm is required, the joints must be treated with tape. The material can be applied in two layers. The waterproofing should extend onto the walls a few centimeters above the zero level. The material must be carefully spread in the corners, since this is where the likelihood of moisture penetration is highest.
As an alternative, bitumen-polymer membranes or polyvinyl chloride can be used.
Pouring rough screed
Light (lean) concrete with the addition of crushed stone is used. For mixing, take 1 hour of cement, 2 hours of sand and 4 hours of crushed stone. The thickness of the preparation should be about 4-8 cm. There are no special requirements for the rough screed, however, the differences in height should not exceed 4 mm.
Thermal insulation
If the project provides for the installation of a thermal insulation layer, this stage is implemented. It is important to choose the working material wisely.
It should be:
- fireproof;
- high strength;
- convenient to use;
- with a low thermal conductivity coefficient.
Due to its properties, thermal insulation, as a rule, also has a soundproofing effect.
The market offers a large number of materials, but the following thermal insulation is suitable for ground screeds:
- expanded clay;
- Styrofoam;
- mineral wool;
- isolon;
- extruded polystyrene foam.
Each type of insulation requires its own installation technology. In practice, slabs based on mineral wool, polystyrene foam, and expanded polystyrene are most often used. The thickness of the layer is calculated based on the climatic conditions of the area. However, the minimum thickness cannot be lower than 100 mm . The mats are laid staggered, close to each other. Thermal insulation is arranged in one or several layers.
If the finished layer is made on the basis of foam plastic, mineral wool, it is covered with an overlapping polyethylene film with gluing of the joints, since these materials are afraid of direct contact with concrete. Extruded polystyrene foam does not require such manipulations. At this point the preparation can be considered complete.
Reinforcement
Reinforcement helps provide additional durability and strength to the concrete structure and prevents cracking. According to the technology, a steel mesh with a rod with a diameter of 5-6 mm, a cell of 100 * 100, 150 * 150 mm is used.
The reinforcement layer should not be adjacent to the thermal insulation, for which special clamps are used - “chairs” - so the mesh will be in the body of the concrete . The material is laid overlapping on one cell, connecting the joints with wire. For high operational loads, a reinforcement cage is built.
Installation of guides
Installation of formwork and guides allows you to accurately maintain the required level of the structure. It is customary to set the screed level based on the level of the doorways. To do this, markings are applied around the perimeter using stretched cords.
They act this way:
- The area of work is divided into equal sections. The width of each of them should not exceed 2 meters;
- install guides with a height corresponding to the level of the screed;
- after checking the horizon, the guides are fixed on the base with cement-sand mortar;
- Formwork is installed between the guides. So the area will be divided into rectangular zones (maps), which will be filled with concrete.
It is recommended to treat the guides with special oil, since they will subsequently be removed.
Preparation of concrete
Concrete is prepared on the basis of cement grades M400, M500, observing the proportional ratio of sand and crushed stone. To calculate the required amount of materials, we focus on the pouring area and the thickness of the structure.
To lay the screed on the ground, take 1 hour of cement, 3 hours of sand, 5 hours of crushed stone
Fill
To obtain a monolithic surface, several technological approaches are used.
Technology for pouring screed on the ground:
- Filling the formwork begins from the corner. When several rectangles are filled, the solution is distributed with a shovel over the base;
- carry out rough alignment. As a rule, move it towards you, removing excess solution;
- concrete is compacted with deep vibrators;
- 24 hours after laying, the formwork and guides are removed in the finished areas. All resulting voids are filled with cement mortar;
- When the screed is completely filled and leveled, it is covered with plastic film. If required, additional grouting is carried out using concrete finishing machines.
The finished structure requires maintenance. For 4-5 days, the concrete is moistened 1-2 times a day by spraying water.
Seam cutting
Concrete is a very fragile material in its structure that cannot resist plastic deformation. Cracking can occur under the influence of loads and internal stresses caused by hardening processes and temperature changes. To control this process, expansion joints should be cut.
Seam cutting technology:
- the seam should be clean and straight. The worker involved in this stage of work must know which seam should be cut and when, to what depth;
- cutting is carried out when the screed has gained sufficient strength. If a seam cutter is used, work begins 24 hours after pouring, but no later than 72 hours. Using wet cutting technology with special cutters, seams are made 4-12 hours after finishing the screed;
- Before starting work, it is better to make a test cut. If aggregate falls out of the concrete, it is too early to start work;
- The location of the seams is marked with chalk, focusing on the stretched rope. Cutting is carried out in the same sequence as pouring concrete to 1/3 of the thickness of the screed.
To support the edges of the seams under loads, they must be sealed. The sealant is selected based on the operating conditions of the screed and the type of load. A correctly made concrete screed turns out to be homogeneous, impeccably smooth, without defects or flaws . The evenness of the surface is checked by the rule. Per square meter, the height difference should not exceed 4 mm.
Strengthening concrete
The finished structure can be further strengthened with toppings. This is a solution for industrial floors where a high level of load is expected, for garages and similar premises. In residential premises, it is enough to limit yourself to applying epoxy impregnation.
Design Features
The difficulty in leveling the surface of reinforced concrete slabs (unlike others) lies in the fact that most often they do not lie in the same plane, but there are significant differences between them.
The difficulty in leveling the surface of reinforced concrete slabs (unlike others) lies in the fact that most often they do not lie in the same plane, but there are significant differences between them. In any newspaper you can find advertisements in which professional builders will do everything quickly and efficiently for a certain fee. But if you want to save money, then you can try to do everything yourself, based on the recommendations of experts. Moreover, the described nuances are suitable for almost any ceilings.
There are two known ways to level (screed) the ceiling:
- "wet";
- "dry".
“Wet” screed involves the use of special solutions and mixtures, and “dry” screed involves leveling the ceiling surface using sheet material. These include:
- drywall;
- plywood;
- Fiberboard, chipboard and many others.
There are several criteria for choosing a ceiling screed method, but the main one is that if the differences at the joints are more than 50 mm, then you should choose the “dry” leveling method, since the thickness of the plaster layer will exceed the permissible standard and may fall off during operation, causing serious injury person.
It should also be noted that the ceiling screed significantly reduces the height of the room, which is not very beneficial for. In this case, it is more advisable to use putty for leveling (provided there are small differences).
Return to contents
Maximum height tie
No standards establish the maximum possible thickness of the screed. This parameter depends on several factors and is determined specifically for each concrete coating. But, as practice shows, in most cases it is not advisable to fill a screed with a height of more than 15 centimeters, since this will be quite a costly undertaking in terms of building materials and time.
It is entirely justified to install a coating of maximum thickness only in rooms where a large load will be placed on the floor covering, for example, in garages.
Also, high screeds are poured when they will be part of the load-bearing structures in buildings. As a result, a monolithic surface of maximum thickness will become both the floor and the foundation. According to experts, the height of the screed should be increased when the base of the floor structure is problematic soil.
In a number of situations, the thickness of the concrete layer is increased in order to hide significant differences existing on the surface of the subfloor. Before making a decision regarding pouring a 15-centimeter-high screed, professionals recommend evaluating the possibility of using crushed stone or expanded clay to eliminate unevenness. You can also remove sudden changes using a powerful jackhammer.
To eliminate significant defects in the rough surface, in this case the minimum (thin floor screed) is not suitable, but the amount of building materials required will be less. If you use only concrete mortar to eliminate large differences equal to 15 centimeters, then the cost of building materials and wages for builders will amount to a huge amount.
You should not pour a screed of maximum thickness when installing a warm water floor system, since such a height of the concrete layer located above the heating element will not allow the floor surface to warm up quickly. As a result, the design's efficiency for heating will be minimal with significant amounts of heating costs.
Ceiling screed: installation process
To work, you will need to prepare the following tools and devices:
In preparation for screeding, the layer of previous finishing material, whitewash, and putty is removed from the ceiling.
- spatulas of different sizes;
- aluminum rule;
- metal smoother or grater;
- plaster comb;
- plaster falcon;
- a plastic container with a volume of at least 18 liters;
- drill with mixer attachment;
- sponge grout.
Before you begin directly leveling the ceiling surface with your own hands, you need to prepare it, especially if this is not a newly built house. The layer of previous finishing material, whitewash, putty, etc. is removed from the ceiling.
To ensure that the work progresses quickly and not too tediously, you should use the recommendations of experts:
The plaster is removed with a sharp spatula, periodically sharpening it.
To make work easier, you can lengthen the handle of the spatula by screwing a wooden or plastic stick to it.
The plaster must first be moistened with a spray bottle or a foam sponge.
It will be much easier to remove a layer of water-based paint if you add a few drops of iodine to the water.
The most difficult situation is with water-dispersion paint. Here you will need to use either a drill with a wire brush, or a special remover, which can be purchased at any hardware store.
- a layer of old material is removed not only from the surface itself, but also from the tile joints. To do this, take a pick, hammer and spatula. Only the lagging and cracked part of the material needs to be removed;
- if there is fungus on the surface, then you definitely need to pay attention to this problem. Otherwise, the new surface will suffer the same fate. First, the surface is treated with an antiseptic, which is either bought in a store or made by hand, and then it is primed to increase adhesion to the material.
Screeding the ceiling with your own hands begins with eliminating the largest defects using coarse putty for rough work. You can use tow, which is soaked in a solution of such putty and you get a kind of sponge for sealing cracks. To prevent the joints between the plates from cracking, they are reinforced with a special mesh, which is pressed into the layer of putty.
Return to contents
How to calculate cement consumption?
There are several basic, proven values:
- For 1 m2 with a layer thickness of 5 cm, 20 kg of mixture is required.
- For 1 m2 with a height of 10 cm - 50 kg.
One bag of the finished composition usually contains fifty kilograms; they are multiplied by the area of the room and the required amount of composition is obtained.
Final moments: do-it-yourself flat ceiling
Before applying the second layer of putty, you need to “comb” the first one with a plaster comb, without waiting for it to harden.
After all of the above, they begin to putty the entire surface of the ceiling, for which the prepared mixture is applied to the base and carefully leveled with a spatula. The putty mixture is applied in a direction away from you, with a thickness of no more than 20 mm. Next, the layer is leveled with a rule of zigzag movements towards itself. Before applying the second layer, it is necessary to “comb” the first one with a plaster comb, without waiting for it to harden.
Only after two days can you begin to apply the next layer.
Combing the previous layer allows you to roughen the surface to increase the adhesion of materials.
The length of time the layers are kept is determined by the level of humidity in the room.
If the room is dry and warm, then the plaster hardens very quickly, and high humidity promotes uniform hardening of the material.
It is necessary to take into account the fact that during work the air humidity increases, therefore, the plaster will not dry quickly. You should not change the humidity level artificially, since the layers of plaster must harden under the same conditions in which they were applied.
To level each subsequent layer, the rule is set with a straight edge towards itself.
Thus, the new layer will be thinner and smoother than the previous one, since the rule will remove all unnecessary things. Before applying a layer of plaster, carefully check the levelness of the ceiling.
To do this, you need to move the rule from one side to the other, and if there are any irregularities, they are sanded with sandpaper.
If the ceiling is to be pasted or painted, after applying the plaster, work is stopped for 10 minutes, and then the surface is moistened and rubbed in a circular motion with a special sponge grater.
This will make it possible to mask the marks left from working with a wide spatula. As soon as the surface of the ceiling becomes matte, this will indicate that the plaster has dried and can be smoothed over with a metal trowel. The ceiling screed is completed by applying a finishing layer of putty.
From all of the above, we can conclude that screeding the ceiling with your own hands is possible if you follow all the recommendations of professionals.
If a man is independent, then this is good, but if he is also constantly learning something new, then this is a godsend for his wife. Not everyone can make a ceiling canopy with their own hands, but everyone can learn how to do it, but this requires desire
.
If you feel it, then you have come to the right place - here you will find several valuable lessons from an experienced master for the home owner.
The most popular ceilings in the house
This article will consider two types of ceiling repairs - a suspended ceiling made of plasterboard and leveling (plaster)
putty solutions. There is also a video clip at your service that will allow you to visually consolidate the acquired knowledge.
Due to the fact that it is simply impossible to post absolutely all the information about these issues, here are the basics of these two types of finishing, the use of which will allow you to grow as a master.
Plasterboard ceiling
- To make a ceiling canopy with your own hands, you definitely need to learn how to use a water level
.
This is not difficult, but there is one caveat - given that we will have to place marks right under the ceiling, the plastic cones that are attached to the ends of the tube will interfere, resting against the ceiling. There are two options - put the marks 10-15 cm lower
, and then raise them using a tape measure, or simply
get rid of the cones
, which is much preferable. - So, let's put the first mark on the wall
.
Please note that the minimum distance from the main ceiling must be no less than the thickness of the CD profile for the suspended frame, which is 25mm
. So if you want to raise the suspended structure as much as possible, then these figures will be the limit for you, and besides, the calculation must be made from the lowest point on the main ceiling.
- Using a water level
(you can also use
a laser level
), transfer the reference point to all internal and external corners of the room.
After this, stretch the chokeline (painting cord)
and beat off a control line, which will indicate the lower plane of the hanging frame.
- When the control line
, you can proceed to the installation of the frame, and start with the wall profile
UD
.
You screw it along the reference line so that the bottom of the UD coincides with the reference line. Some UD profiles are available with mounting holes, but if there are none, then do it at a distance of 40-50cm. - To secure the profile, you can mark the places for drilling
on the wall through the profile holes, and then make them. But there is a faster way - to drill holes in the wall through the body of the profile. To do this, use a 6mm drill and dowels of the same diameter, and the screw head will still be larger. - Let's move on to marking the ceiling for hangers.
I would like to immediately make a reservation that we will not make a cellular frame, but only with transverse profiles - practice shows that in terms of strength it is not inferior to a cellular one, but, at the same time, it saves both time for its installation and the financial costs of the material. The plasterboard sheet is 250 cm in length, so we will make markings every 50 cm, across the intended direction of the gypsum board.
- On the lines marked on the main ceiling, we install ribbon hangers
on which the
CD
.
The distance between the pawns should be no more than 50-60cm
, and they need to be installed on two of the same dowels as the
UD
.
Recommendation. Hangers are often installed on a ceiling made of concrete floors that have voids in the middle. An ordinary dowel falls through there during installation, so you can use two little tricks.
Firstly
, dowels can be purchased
with an extension at the inlet hole
so that it is wider than the seat.
Secondly
, if there are no such dowels, then insert it through the suspension so that the edge lingers on the tape, and then it will not fall through.
The optimal screw thickness for a 6 mm dowel is 4-5 mm.
- We continue to install the ceilings in the room with our own hands and move on to installing the CD
.
The length of the profile will be equal to the distance between the opposite walls on which the UD is screwed minus 5mm
. This allowance is necessary to cover the thickness of the wall profile, as well as for ease of installation so that the CD does not deform. Insert all the profiles, but do not screw them in yet.
- To make the ceiling even, you need to level each profile,
a nylon thread
, stretched under the frame and secured with screws to the lower UD shelves, will help with this But the thread will be pulled back by the CD profiles, so they need to be temporarily tightened with hangers. Bend the middle pawn under each CD to raise it above the plane and begin leveling one at a time.
- The profiles are screwed to the hangers and to each other with special self-tapping screws
made of galvanized or oxidized steel for sheet material up to 0.9 mm.
in 1 screw
on each side of the profile , sometimes there will be some play left, so to prevent the frame from “rattling”, screw in an additional self-tapping screw.
A screw is put on the PH#2 nozzle and installed in a horizontal position, but with a slope towards the screw by 40⁰-45⁰. If the screw does not fly off in this position, then it will be easy to work with.
- When the frame is ready, you can begin installing drywall
, but do not forget that there will be lighting in the room and the lamps will most likely be installed on the ceiling.
Therefore, you need to make a wiring harness
and hide it in a corrugated cable channel, which, in turn, needs to be attached to the main ceiling. - For recessed lamps, as a rule, loops are made on the wire
, and you can make them together with a protective hose. When you need to connect the lighting device, cut the corrugation along with the wire, and remove the excess pieces of the hose by simply pulling it to the required distance.
- To attach one plasterboard sheet to the ceiling, about 60 metal screws, 25 mm long,
. They are screwed in at a distance of 30 cm from each other and the head of the screw should be recessed under the plane of the gypsum board, but without breaking through the paper. To ensure that the paper remains intact, use a special attachment for drywall with a lampshade that fixes the depth of the cap.
- You need two people to lift a sheet of drywall (if there is no special mechanism) so that it does not break, and in this case it is much easier to fix it with screws. When the gypsum board is in place, fix its edges and center
, and then you can release it and tighten it with two screwdrivers.
- Please note that the edge of the plasterboard covers only half of the CD profile
, because the next one will lie on the other half. It is especially important to adjust this when installing the first sheet as the walls may not be level, so you may have to trim the drywall around the edges of the wall to get it to fit correctly. - In technical rooms, sometimes instead of gypsum board (gypsum plasterboard sheet) they use GVL (gypsum fiber sheet)
. In appearance, the materials are almost the same, but GVL is made without a cardboard shell, and its structure is reinforced with reinforcement in the form of fluffed cellulose, waste paper, etc. Its density is much higher and has 1250 kg/m 3. - You can make ceilings from gypsum plasterboard with your own hands in the same way as from ordinary plasterboard, but the whole question is whether it is advisable to use
such a material. Typically, GVL is used for walls, and sometimes for floors. - When installing gypsum boards, do not forget to take out the wires for the lamps
a hook
or other type of console must first be installed for it
- The joints between the sheets should be sealed with fugenfüller or ordinary putty
, but in this case an additional adhesive perforated tape is installed. The entire surface of the ceiling (not just the joints) should be primed. After the primer has dried, the ceiling is ready for further finishing.
Recommendation. If the ceiling area is large enough, then the gypsum boards should be installed in a staggered manner so that there is no continuous joint line. This is especially important in houses located near a railway or road where heavy vehicles pass, and in order to cause a seam failure, start installing every second sheet from half.
A smooth, snow-white ceiling is considered by professionals to be the most important indicator of a flawlessly completed repair. Of course, this means someone who has not experienced the trends of modern fashion with its inherent complications, such as multi-levels and the rejection of white. Making a ceiling screed is a labor-intensive task, but it is quite doable, and all the work can be done independently.
The use of plaster or leveling mixture, especially in rooms with low ceilings where the possibilities for creating suspended structures are limited, allows you to “save” the height of the room, and the use of natural materials makes the ceiling “breathable”.
The preparatory stage of work includes thorough cleaning of the ceiling surface from layers of old coatings and peeling plaster. It is also necessary to determine the greatest height difference. It should not exceed 50 mm if the ceiling screed is to be done using leveling mixtures.
For small differences (up to 5 mm) it will be enough to use leveling putties. On the construction market you can find a fairly large assortment of putties that can be applied in a thick layer. The putty is applied to the surface and, after drying, treated with fine-grain sandpaper.
But if the difference is more than 20 mm, it is necessary to use a reinforcing mesh and then work with plaster. Painting (serpyanka) and metal mesh are used. The serpyanka is glued to the ceiling with glue. PVA is most often used. All seams should also be sealed with mesh. You can also find self-adhesive serpyanka on sale. To secure the metal mesh, staples or nails with wide heads are used. This mesh is used if it is necessary to apply a layer of plaster more than 50 mm. Before plastering, the surface must be primed, for example, with concrete contact. Among modern materials that make it possible to eliminate significant differences, we can note, for example, Rotband mixtures.
Alignment quality control is carried out using various methods. You can use beacons, which are often used as nails. They are driven in so that the caps lie in the same plane, and the ceiling is leveled along a thin rope or thread stretched between them, filling the gap between the thread and the surface with plaster.
Another way is to use a water level. At its core, this level is two communicating vessels filled with water. By applying level tubes in different places, the degree of surface leveling is assessed. A more modern method is the use of laser marking. With this device you can mark both vertical and horizontal lines.
After waiting the required period, a layer of leveling putty is applied to the dry plaster. Then they prime and paint, if this final finishing option is chosen. As a primer, you can take the same paint, diluted with the thinner indicated in the instructions for use, by 20 percent. If you decide to use a primer, then it is better to use it in tandem with paint from the same manufacturer.
Before decorating the ceiling, its surface must be made perfectly flat. Only in this case the quality of work will be high. First of all, this condition must be observed for ceilings made of prefabricated reinforced concrete slabs, which are not always perfectly installed. Therefore, first we screed the ceiling, and only then move on to the decorative design.
Primary requirements
The screed layer in the entire floor structure performs a certain list of functions.
With the help of this layer, the dynamic and static strength of the flooring is ensured, and also creates a smooth surface necessary for high-quality laying of tiles, laminate or linoleum. The screed allows you to evenly distribute the load on those layers of the floor that are located under it, thereby extending their service life. With the help of a screed, they not only level the floor, but also create slopes provided for by the renovation project. The screed in a living space must be strong enough to withstand the physical stress that occurs as a result of arranging furniture and moving people living in it around the room. The screed layer must be equally dense over the entire floor; any voids inside it, as well as chips and cracks, are not allowed.
The thickness of the screed has a direct relationship with the service life and strength of the floor structure. There is no specific figure indicating the optimal thickness of the subfloor. The thickness of the fill depends on the room in which the renovation is being carried out, what loads the floor is intended for, and what type of soil is used as the base.
Types of concrete screeds
The concrete screed is a monolithic base and is implemented in connection with the base or with separating and insulating layers. All of the presented varieties are endowed with weak and strong points.
Linked Plan Screed
Installation of such a screed is carried out directly on the base, which is prepared by applying a primer with deep penetration. This method guarantees the best grip and can withstand severe overloads. For example, a similar concrete screed is implemented in a garage.
Application of a separating layer
Such a device for a concrete screed assumes that during the preparation of the base a waterproofing layer was laid, and only after that the prepared mixture was poured.
Rolled, coating or painting materials can be used as insulation. With this type of concrete floor screed, the technology requires that the thickness be at least three centimeters. This design is endowed with excellent moisture resistance, but the strength indicators are slightly reduced.
Screed with insulating layer
If a concrete structure is being repaired and it is necessary to perform a floor with excellent insulation parameters, then a thermal insulation layer is added to the structure. If a heated floor system is implemented, then this layer guarantees the redirection of heat deeper into the room and the preservation of the accumulated heat.