Infrared heated floor reviews: pros and cons of the heating system. Recommendations for installing heated floors under ceramic tiles or laminate New technologies and developments have come to replace and help traditional heating devices, such as heated towel rails or spiral heaters. They successfully help make people's lives easier by providing effective home heating even in harsh climatic conditions. One of these innovative developments is infrared heated floors.
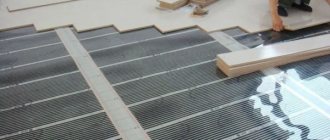
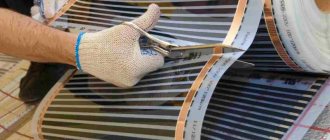
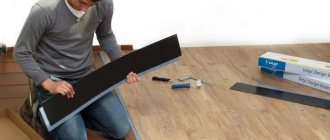
Film for installing floors with infrared heating
There are a lot of opinions and discussions about this product now. Indeed, in addition to its undeniable advantages, it also has a number of disadvantages, which the manufacturer often forgets to mention.
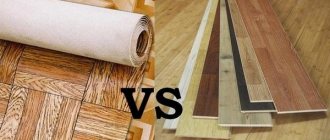
What floor coverings are film heated floors compatible with?
The basis of the heating system is a heating carbon film, which, when connected to the electrical network, begins to emit infrared rays. Due to the heat-reflecting substrate, the radiated heat is directed to warm up the floor covering. This heat can be transferred to other interior items that are located in close proximity.
A modern heating system is most often installed under parquet boards, linoleum, and carpet. They have optimal thermal conductivity and perfectly accumulate heat. But when installing a film heating system under carpet and linoleum, it must be covered with fiberboard sheets.
The heating film can be laid under tiles and laminate without any problems
Compared to parquet boards, laminate provides a lower floor temperature. The sensitive finish heats up quickly and cools down just as quickly. An infrared heated floor system, with which laminate goes well, helps to compensate for this deficiency.
Tile, despite its rather presentable appearance, is rarely used as a finishing floor material in homes. The reason for this is that the cold surface of the material, according to reviews of owners who chose tiles as a floor covering, is not particularly suitable for barefoot in the cool season. But due to the ability of ceramic tiles to conduct heat well, in combination with infrared heated floors it provides an excellent effect. By quickly warming up the floor covering and surrounding objects, optimal conditions are created for a comfortable stay in the house.
Installation of heated floors
Attention: Fears that ceramic tiles will not adhere to the film floor, and its seams will crack when heated, are in vain. If installed correctly, it will hold as firmly as on a regular screed.
The tiles are installed on a special adhesive for heated floors. To increase the quality of the bond between the heating film and the glue, a reinforcing fiberglass mesh is laid between them.
Infrared heated floor
Vladimir_Vas wrote: The field energy decreases with the square of the distance (according to the law of conservation of energy), namely, energy has an effect on the biomaterial. I made this correction. Now about radiation. The coaxial cable is still intact - it does not radiate at all. Not on any frequencies. At low frequencies, a twisted bifilar is close to a coaxial, since antiphase EMRs are mutually canceled out. In this sense, the VVG in your walls has a much higher radiation efficiency due to the significant separation of the phase and neutral wires and the lack of curling than a high-quality floor heating cable. I’ve been just a radio engineer for 35 years with a specialized education and nothing but antenna-feeder devices. Although in general, electric floors are harmful, not for your health, but for your wallet. That's why I have a water one.
As the distance from the source changes from 0 to 2 meters, the EMR changes approximately proportionally to the cube. You did not measure the field strength, but I did.
If you are a radio amateur, then make an uncalibrated device for measuring field strength in the form of a simple frame of copper wire with a microwave diode in 5 minutes. And make sure. And calibration is not needed to measure relative rather than absolute values.
Orthodox science can only explain special cases, and not always. Theory, divorced from practice and practical laboratory measurements, is simply dead.
I have also repeatedly carried out official certification of workplaces (without bribes for myself) equipped with computer equipment by specialists from Rospotrebnadzor (formerly Regional SES). And specialists from the SES measured the intensity of electrostatic, electromagnetic and magnetic fields using certified and metrologically verified instruments. And I struggled for a long time to bring everything into line. The biggest problems were precisely in the electrostatic fields of industrial frequency.
For example, grounding resistance has a huge influence on the magnitude of these fields. It is unlikely that anyone would measure the grounding resistance at home so that it would be no more than 0.2 Ohm. Most people use the same microwave ovens without grounding at all. And no one pays attention to the fact that in almost any passport of a powerful electrical appliance such as a microwave, oven, refrigerator, washing machine, dishwasher it is written in BOLD FONT: “Operation without grounding is prohibited!” And this, by default, means that you also had to call electrical inspection to measure, among other things, the grounding resistance. That is why, with each new generation, people's health is deteriorating. And it will get worse at an increasingly rapid pace. Because we have forgotten the wisdom of our ancestors, and we are increasingly “surrounding” our lives with a harmful environment.
You can officially measure the fields emitted by bifilar TP cables at a frequency of 50 Hz with normal instruments, if you are really interested in knowing this and not trolling. Upon receipt of official paper. This is for themselves, and not when they “certify” and “certify” products that are harmful for use, sold for a bribe.
The advantages of infrared heated floors indicated by the manufacturer
All manufacturers of this innovative product present it as something high-tech, with a lot of advantages and no disadvantages. Among the undeniable advantages of the heating system it is worth highlighting:
- Economical. The thermal conductivity of carbon is much higher in comparison with analogues on the market. Thanks to this, the infrared heating system is highly efficient with lower energy consumption. For example: 1.5-2 sq.m. Depending on its width, films will “draw” approximately like a light bulb per day. And the consumed electricity is used only to replenish the heat losses of the heated room. In percentage terms, energy savings are about 20%. Today, this factor is especially relevant against the backdrop of a limited limit on energy resources.
Connecting IR film - Easy installation and the ability to “grow” the system. In comparison with analogues, such as electric or water heated floors, installation of an infrared system does not require pouring onto a concrete floor. The system installation can be completed in just 2-3 hours. If necessary, you can always dismantle and even “grow” the system to cover a larger area.
- High system reliability. High-strength carbon fiber, which serves as a material for the manufacture of heating plates, is resistant to various impacts. The manufacturer's warranty for this system averages about 10 years. It is convenient to adjust the surface temperature using a thermostat. It limits the heating of the film, preventing its overheating and destruction and thereby optimizing the operation of the heating system according to the specified modes.
Installation of IR floor is very simple - Environmentally friendly. Infrared rays, acting like solar heat, kill pathogenic bacteria, thereby reducing the likelihood of developing allergies in residents of the house. The effect of radiation resembles the work of aeroin generators used in medicine. By deodorizing polluted air, they help get rid of unpleasant odors in the apartment. This is especially true for pet owners whose pets like to leave “marks” on their territory.
- Versatility of use. Infrared heating film can be installed not only on the floor, but also attached to the ceiling and walls, insulating curved surfaces without fear of deforming the material. Today there is a wide selection of this innovative product on the market. The key to the reliability and durability of the system is the correct choice of heating film for infrared heated floors.
Recommendations for choosing material in the video:
There is a common myth about the ionization of a room heated using an infrared “warm floor” system by anions (negatively charged ions). During the heating process, the film actually emits a small percentage of anions, but the laid tile or laminate acts as an obstacle to their path.
When to choose infrared heated floor
Electric or infrared heated floor
Both cable and film options are classified as electric heated floors. The presented options can be compared in terms of the amount of energy consumed, efficiency and reliability of the equipment. The advantage of infrared heaters in this case is lower energy consumption and no energy loss for heating the screed. But it is also necessary to take into account that the screed also serves to protect electrical equipment from possible mechanical damage.
For example, linoleum without a screed can be pierced with a sharp object along with a film heated floor. If we compare the systems according to their level of reliability, the disadvantage of infrared heated floors is that they are structurally composed of separate strips that are electrically connected to each other. It is at the junctions of elements that problems most often occur (especially if the equipment gets wet frequently).
Water or infrared heated floor
When comparing infrared and water heated floors, the first thing worth noting is the fact that the first option is more suitable for use as an auxiliary heating system. At the same time, water heaters can be successfully used as independent equipment that fully provides heat to the house.
On the other hand, one of the key advantages of electric infrared floors is the ability to install them on vertical and inclined surfaces, which is not possible for water systems. In addition, the use of both types of heated floors (infrared and water) is only possible in private homes. In an apartment, connecting additional heating devices to a centralized system requires special permission and leads to a significant increase in hydraulic resistance in the system.
Disadvantages of an infrared heated floor system
The main disadvantage of the system is the presence of a large number of hidden contacts. Therefore, after installing an infrared heated floor, be sure to test its performance, checking the reliability of the contacts between the heating film and the wires.
Although installing the system is not difficult, the difficulty can be caused by the silver contacts, when connecting which you should know a number of nuances. For example: the contact must be placed on the film with a certain side, otherwise when clamping it is impossible to ensure a reliable connection. Therefore, the installation of heated floors should be entrusted to a professional who knows all the intricacies of the technology.
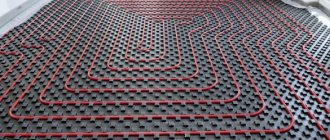
Diagram: connecting IR heating
The statement that when installing on a concrete floor there is no need to screed is only relevant if the base has the most even surface possible. The heating film is thin and can simply tear when laid on a “relief” surface.
Advice: When installing a film heated floor under a laminate, it is not recommended to immediately put the system into operation. You can start it when the laminate warms up to room temperature.
Video review: heated floors - pros and cons
Characteristics
technical parameters speak in favor of the use of infrared film floors :
- Operating voltage - 220 V 50 Hz.
- Film coating parameters: thickness – 0.4 mm; width of the canvas: 0.5 and 0.8 m.
- Maximum heating temperature: 55 ⁰С.
- Maximum power: 150 – 400 W/m2, depending on the operating mode.
- The length of infrared waves is 6 -20 microns.
- Emission range: 91%.
- Film melting temperature: +265 ⁰С.
- There is no electromagnetic field.
When installing an infrared heated floor as the main source of heating, it must occupy at least 70% of the heated room . Otherwise, the effectiveness of this heating method will not be sufficient.
Advantages and disadvantages
When choosing a heating system for their home or apartment, many consumers have some doubts about which floor heating to choose: infrared or electric?
In order to answer this question, it is necessary to analyze the “strengths” and “weaknesses” of these materials and draw appropriate conclusions.
Advantages :
- Simplicity and high speed of installation.
Installation of this system does not require any special preparation, for example, creating a cement-sand screed or installing a boardwalk.
- Compatible with all types of floor coverings.
Infrared heated floors can be laid under linoleum , laminate and other coverings, without the risk of their destruction or damage. However, it must be taken into account that when used in conjunction with linoleum and carpet, it must be covered with plywood or chipboard.
- High efficiency and reliability.
The use of this system ensures uniform heating of the premises, without temperature differences.
- Possibility of operation under increased loads.
Infrared floors are approved for use in gyms, office spaces and public institutions.
- Minimum thickness.
When laying film floors, the floor level remains virtually unchanged. This eliminates the additional costs of manufacturing thresholds, steps and other additional elements.
- High moisture resistance.
- Environmental Safety.
But, infrared heated floors have not only obvious advantages, but also disadvantages, for example, price.
In addition, its disadvantages include:
- Small thickness of film material.
Of course, this is one of the main advantages, but also an obvious disadvantage of this heating system. The fact is that thin film breaks very easily . And this must be taken into account during installation.
- The need for a perfectly level base.
Despite the fact that a screed device is not required for laying infrared film floors, they must be laid exclusively on a flat surface, otherwise they will not be able to work efficiently and correctly .
- Difficulty connecting conductive contacts to the film.
Because of this, it is better to entrust the installation of infrared heated floors to specialists, and this again means additional costs .
Read how to make a long-burning solid fuel boiler with your own hands. Choose an electric boiler for heating a private home correctly, taking into account all the recommendations in our article.
How to choose a good heat exchanger for a heating system, read here.
Advantages of heated floors:
Comparative characteristics of popular heating systems are presented in the table:
| Criteria | Types of heated floors | ||
| Infrared | Electric | Film | |
| Possibility of use as the main source of heating | Yes | Yes, but from a practical point of view it is not economically feasible | |
| Places of operation | In private homes | In premises for various purposes with a small area | |
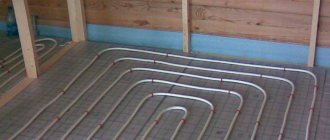
| The need for additional manipulations during the installation process | It is necessary to fill the screed, lay and solder the pipeline | A flat surface is needed; if necessary, layers of hydro- and thermal insulation are laid | |
| Laying options | Pipe system installation | Cabling | Layout of infrared film |
| Influence on furniture arrangement | Does not affect | It is not recommended to place under furniture and large household appliances | |
| Cost of materials and installation | Average, due to the costs of additional work and equipment | Average, with independent connection | High, due to the cost of the floor itself |
| Cost of operation | Low (when used in conjunction with a gas boiler) | High | High |
| Additional features | No | No | Health benefits due to infrared radiation |
That is, the choice of a particular system is primarily influenced by the location of its future operation.
User reviews: what in fact
Not everyone takes into account the nuance that furniture cannot be placed on top of a film floor. This provokes overheating of this section of the system, as well as damage not only to the floor covering, but also to the interior items standing on it. Plus, in this area the energy consumption will be slightly higher. Do not cover the area where the temperature sensor and thermostat are located. This may cause the device to malfunction.
It was also noticed that if you put a heated film floor directly under the linoleum, then when you turn on the system, a characteristic smell appears. A layer of polyethylene and plywood between the heating film and the finishing coating helps prevent this problem. In addition, as user reviews show, when centralized heating is turned on in parallel with the operation of the heated floor, the air dries out. Therefore, you should still worry about purchasing a humidifier.
Infrared heated floor under laminate
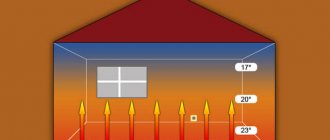
Thanks to the development of modern technologies, traditional wooden floors are gradually being replaced by laminate, which imitates natural wood and is moisture-resistant, durable and inexpensive. The disadvantage of the material is reduced thermal conductivity. It creates discomfort in a heated room, which warms up unevenly due to convection. Warm air tends to the ceiling, and cold air is located near the floor. By installing a heated floor under the laminate, you can easily solve the problem of maintaining a comfortable microclimate.
What is infrared heated flooring under laminate?
Film-based heated floors are gradually gaining popularity. It confidently competes with cable and water heating, the installation of which requires a significant amount of concrete work.
The design of a film heated floor under a laminate includes the following layers:
- a base made of wood or concrete, which is pre-planned and bears the load;
- a polypropylene layer that performs a waterproofing function and has heat-reflecting properties;
- infrared film heater, which is a source of thermal radiation;
- a special film that protects the emitter from damage when laying the finishing coating;
- a laminated surface, which is a finishing coating assembled from individual elements.
Let us dwell in detail on the technical characteristics, design features, and operating principle of the heating source. Knowing the dimensions of the film supplied in rolls, it is easy to calculate the need for material to heat a specific room and determine energy consumption.
Roll dimensions:
- length – 50 m;
- width – 50–100 cm;
- thickness – 0.2–0.5 mm.
Main technical parameters:
- energy consumption per square meter per hour – 0.025–0.035 kW;
- Heater operating temperature -32 °C.
Film emitter has unique characteristics. It is a multilayer design that ensures the conversion of electrical energy into thermal radiation with an efficiency of 98–99%.
Heater includes:
- outer protective layers made on the basis of a polymer film that is resistant to mechanical stress and moisture. Durable polymer freely transmits infrared radiation, reliably protecting conductive elements;
- carbon heating element that emits thermal energy in the infrared spectrum. The film surface is formed by conductive strips, which are connected by copper busbars.
Maintaining the set temperature is ensured by an adjustable thermostat, through which the conductive mats are connected to the electrical network. The film laid under the laminate forms a thin heated surface, which heats up when an electric current passes, transferring thermal energy to the laminate. Waterproofing material with a reflector makes it difficult to transfer heat from the emitter to the cement screed. As a result, thermal energy is transferred to the surface of the laminate, providing a comfortable temperature in the room.
Film heated floor under laminate - pros and cons
A film floor with infrared radiation installed under a laminate has an undeniable set of advantages compared to other types of heated floors:
- ease of installation. There is no need to perform labor-intensive work on pouring a concrete screed;
- possibility of installation in a renovated room. No dust is generated during installation;
- ability to heat various types of finishing coatings. Along with laminate, the film effectively heats parquet and carpeting;
- small thickness of the emitter, not exceeding 0.5 mm. Thanks to this design feature, the useful volume of the room is preserved;
- accelerated heating. Reduced inertia significantly reduces the time for heating the surface;
- possibility of uniform heating of the room. The method of laying infrared fabric ensures that there are no temperature changes;
- increased load-bearing capacity. The strength of the film allows it to be used in rooms with increased load on the coating;
- increased efficiency. The design features of the heater allow you to get the maximum heating effect;
- ability to connect to an intelligent “smart home” system. Electrical equipment is easily switched for remote control;
- absence of an electromagnetic field that negatively affects health. The emitter is safe for people;
- ease of dismantling the heating system. If necessary, in case of moving or replacement, the film can be easily removed;
- long service life. The heating element is highly reliable and can be used for decades;
- resistance to corrosion. Covered with a polymer film, the heating elements are not afraid of high humidity and destruction as a result of corrosion;
- economical energy consumption. The ability to select the optimal heating mode allows you to reduce heating costs;
- accelerated installation rates. Having completed laying the film, you can install the coating and complete the work in a couple of hours.
It should be emphasized that if the integrity of the conductive elements is damaged as a result of mechanical impact, the heating system continues to function, with the exception of the damaged area. This design feature is achieved through parallel connection of heating elements, which are evenly distributed over the area of the sections.
Along with a set of positive aspects, the design has certain disadvantages:
- increased costs for purchasing a roll-on heater, the cost of which is quite high;
- the need to form ideal flatness in order to ensure the integrity of the film;
- problematic installation in rooms where there is a high probability of water leaks and high humidity.
Despite a number of weaknesses, infrared film is gradually gaining wide popularity due to its undeniable advantages.
Laying infrared heated floors under laminate
Despite the fact that representatives of specialized stores advise installing film flooring by specialists, it is not difficult to install the film yourself, and if you have the skills, connect it to the electrical network.
In summary, the technology for installing infrared heating provides for the step-by-step implementation of the following measures:
- Development of an installation diagram.
- Layout of the floor surface.
- Installation of sheet heater.
- Connect to the network and start.
Let us consider in detail the specifics of each stage.
Drawing up a diagram for installation
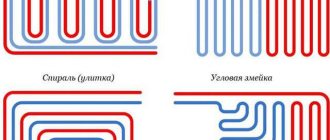
Development of an installation diagram is a preparatory operation preceding the actual installation of a heated floor. It includes the following work:
- Determining the installation location of the thermostat to which the electrical wires will be connected.
- Development of a graphic scheme for placing infrared elements on the floor surface.
- Drawing an electrical diagram for connecting cables to infrared elements.
At the preparatory stage, pay attention to the following points:
- the correct placement of the temperature sensor on the diagram, which should be located in the center of the element, in the coolest area of the room;
- connection of neutral and phase conductors, which must be connected on opposite sides of the emitter;
- the size of the heated surface, which should not be less than 3/4 of the total area of the room;
- maintaining a gap of 4–5 cm between parallel infrared plates and no overlap;
- lack of heating elements under the furniture. Load from interior items can cause increased consumption and failure;
- ensuring a constant distance to walls and permanently located heaters - 20–25 cm;
- cutting the film, which must be carried out in accordance with the manufacturer’s recommendations and the cut lines marked on the material.
Having carefully thought through the specified set of issues and drawn graphic diagrams, we can consider that the preparatory stage has been completed and begin preparing the surface.
Preparing the surface for infrared flooring
Preparation of the foundation includes:
- ensuring horizontality;
- elimination of defects;
- restoration of problem areas;
- impregnation with a strengthening composition;
- primer coating.
Having completed the specified work, perform the following operations:
- Remove construction debris and vacuum the base.
- Place a thermo-reflective layer with the foil part facing the heater.
- Ensure that the strips laid end-to-end are immobilized with double-sided tape.
- Cut recesses in the thermal reflector for the sensor, terminals and cables.
Now you can begin installing the infrared heater.
How to lay heated floors under laminate and perform switching
Installation and switching of the film heater is carried out according to the developed diagram and provides for:
- Cutting film material into strips of the required size.
- Insulation of unused contact points using sealing tape.
- Laying the film on the surface with the copper bars facing the floor.
- Fixing cut film fragments using tape.
- Installation of contact groups that are inserted into the existing cut in the material.
- Press the clips tightly to ensure electrical contact.
- Layout of electrical cables with clamping of current-carrying ends in terminals.
- Installation and fastening of the temperature sensor in the center of the film coating.
- Careful insulation of contact groups using bitumen tape.
- Laying and fixing wires in pre-prepared grooves.
Connection and startup recommendations
Algorithm for connection and performance testing:
- Connect the cables to the temperature control unit located on the wall.
- Connect the circuit breaker to the power wires of the control unit.
- Ensure connection to the residual current device.
- Check the correctness of the connections and perform a test run.
Having completed the performance check, you can lay the laminate on a protective film previously laid on the infrared heater. The use of rolled polyethylene, laid with an overlap of 20 cm, will allow you to safely operate the floor and protect the heater when liquid spills onto the laminated surface.
Having completed the installation work, turn on the heating and set the optimal temperature, corresponding to 25 °C. Now you can fully enjoy the comfort.
Warm floors under laminate - reviews
Despite the fact that there is a debate among experts about the effectiveness of film flooring and its advantages compared to traditional types of heated floors, positive customer reviews indicate improved performance characteristics:
- economical consumption of electrical energy;
- automatic maintenance of the set temperature;
- uniform heating of the surface;
- accelerated return to operating mode;
- used for heating walls and ceilings;
- self-installation possibilities;
- high degree of indoor comfort.
Conclusion
Laying film heated floors under laminate can be done on your own. It is necessary to study the technology and use quality materials. If you lack confidence in your own skills, it is advisable to use the help of specialists. Professionals will perform the assigned work efficiently and provide a guarantee for heated floors under laminate.
Infrared heated floor: photo
Infrared heated floor under laminate - installation, pros and cons, operation
One of the film conductors is connected to phase, and the second to zero. If there is a braided shield, it is connected to the ground terminal.
Then all connections obtained are checked for reliable contact, after which the system begins to be tested. To increase the strength of the heating surface, before covering it, it is covered with a plastic film about 0.2 mm thick, through which infrared rays pass freely. The individual strips are laid overlapping and secured with single-sided tape for more reliable sealing.
Installation of infrared strips under laminate
The installation of infrared film heaters is carried out in accordance with the previously prepared plan (see subsections above). During this process, care must be taken to ensure that the coating surfaces are not damaged when unrolling the IR rolls. If damaged elements are detected, they are immediately replaced with new samples.
Useful note: The rolls are cut in the right places strictly according to the markers indicated on the purchased film with special dotted lines.
Before starting work on installing an infrared heating system, you should first check the purchased workpieces for functionality. To do this, you will need to completely unroll the roll and connect the outlets from it to the network, according to the attached diagram. By the heat flow emanating from the film and felt by the palm of the hand, one can judge its performance and serviceability.
The general procedure for installation work is given below:
- First, the film strips are laid on the substrate so that the reflective foil layer faces the subfloor.
- Then they are attached to it with ordinary tape, and the conductive parts of the cut film, to which the wires are connected, are insulated on both sides with bitumen tape.
- After this, a hole is made in the substrate to accommodate the thermal sensor and narrow grooves for laying connecting conductors.
- Next, the body of the device is fixed in the middle of the canvas fixed to the base (in this case, free access will be provided to it).
- At the next stage of work, clip-type terminals are taken, through which the outermost section of the IR film is connected to a 220 Volt household network.
Additional information: The contacts of each of the working strips are attached in such a way that the top plate fits into the clip slot all the way, and the second plate is located below.
Upon completion of the connection to the network, the terminals are crimped with pliers, after which they proceed to connecting individual strips. To do this, complete conductors are taken, stripped of insulation at the ends by about 10 mm. Then, using the same terminals according to the diagram, they are connected between the working films.
At the final stage, all electrical contacts are carefully insulated with bitumen tape, and then they are placed in pre-cut grooves in the floor substrate. There they are securely fixed and secured on top with insulating tape. Upon completion of these operations, the system is ready to be put into operation.
Connection to the regulator and commissioning
The wires are connected to the temperature regulator block according to the diagram available in the technical documentation for the kit. The designations given in it are deciphered as follows: L – means phase wire. N is the zero core. Some kits have a grounding contact, marked with a special symbol.
One of the conductors of the IR film is connected to phase, and the second to zero. If there is a shielding braid, it is connected to the grounding contact. Then all connections obtained are checked for reliable contact, after which the system begins to be tested.
To increase the strength of the heating surface, before covering it, it is covered with a polyethylene film about 0.2 mm thick, through which IR rays pass freely. The individual strips are laid overlapping and secured with tape for better sealing. The laminate is installed in the order specified for the selected type of panels.
Features of operating heated floors under laminate
Once the system is ready for operation, you can proceed to laying laminated panels, which are installed in the order prescribed for the selected type of flooring. Upon completion of their installation, it is not recommended to immediately turn on the heating at maximum power.
First, the temperature in the rooms is set at 15-20 C and the system is allowed to work for some time. Subsequently, it is raised every day by several degrees until it reaches a comfortable level. The procedure for caring for laminated panels can be found in their operating instructions.