Using a duct extension
What it is
Flow extension with thermal head for adjustment
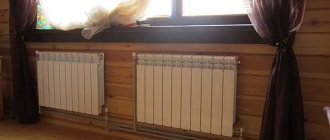
- If there are more than 10 sections in the radiator, then there is a possibility that with a side connection they will heat up unevenly, that is, the further the section is from the supply pipe, the colder the coolant will be in it, since circulation in the heating device will take place at different speeds. Therefore, in order not to change the side connection to a diagonal one after installing the battery, which can cause certain problems with arranging the interior of the room, you can install a duct extension for radiators with your own hands.
- After installing such a device, the circulation of the coolant becomes uniform - the internal diagonal movement of water begins to occur at the same speed, and thus the problem of uneven heating of the battery is eliminated by itself.
But it turns out that not everything is as simple as it should actually be - the fact is that buying a duct extension in a store that sells plumbing or even ordering it on the Internet is a whole problem and the reason is the most banal - no, not the high price , but their absence. But for those who have a desire to arrange their home, we can solve this issue - you can make the adaptation yourself.
Do it yourself
For any type of connection, a shut-off valve must be embedded in front of the radiator
In order to carry out such a manipulation with the radiator, there is one important condition, which, however, must be met for many situations - this is the presence of shut-off valves on the supply and return pipes, which will include ball valves and “American” valves. To dismantle you, first of all, you need to turn off both taps and carefully unscrew the upper left or right fitting - there is a chance that the silicone gasket will be damaged, therefore, it is best to buy it in reserve - fortunately, it costs a pittance
Of course, it’s best if you completely free the battery from the pipes and remove it from the brackets - it will be much more convenient for you to carry out further work on the floor
To dismantle you, first of all, you need to turn off both taps and carefully unscrew the upper left or right fitting - there is a chance that the silicone gasket will be damaged, therefore, it is best to buy it in reserve - fortunately, it costs a pittance. Of course, it is best if you completely free the battery from the pipes and remove it from the brackets - it will be much more convenient for you to carry out further work on the floor.
Now let's figure out how to make an extension cord, but first of all, to implement the project you will need a piece of copper water pipe - its outer diameter should be 18 mm, and the wall thickness should be at least 1 mm. In addition to the pipe, you will need a twentieth coupling for soldering - its outer diameter is not 20, but 19.5 mm.
Copper pipe soldering tool
To solder the sleeve to the pipe, you will need a set of special tools, such as:
- A pipe cutter with which you can cut a copper pipe without deformation;
- A chamfer remover, which you can use to remove chamfers and burrs at the ends after cutting;
- Pipe expander or flaring machine;
- Steel brush for cleaning copper surfaces before soldering;
- A brush for cleaning the treated surfaces from dirt that will interfere with soldering;
- Solder;
- Gas burner with nozzle, adjustable.
Copper pipe cutting
First of all, you will need to solder the sleeve to the pipe, but first you need to cut it off evenly - we use a pipe cutter for this, only the pipe itself must be held strictly perpendicular to the tool so that the edge is even.
Then we remove the burrs with a brush, which in any case will be on the cut end, and use a brush to clean the surface from the inside. We remove burrs and dirt, and then apply flux to the surface of a smaller diameter, distributing it evenly with a brush.
In the photo: the soldering process
We insert the parts into each other, wiping the squeezed out flux with a napkin and heat the ends evenly, determining readiness by the color of the flux - when heated enough, it becomes silvery.
We apply solder to the joint - it will melt from the temperature of the pipes, without heating from the temperature of the copper, and, spreading, fill the voids - this happens due to the capillary effect.
When you see the solder starting to bead up, stop the process immediately, but continue to hold both ends (without blowing on them) until it hardens completely - this will take less than a minute.
Installing a homemade extension cord
In terms of length, you can make the pipe to the middle of the last section when it is in a twisted state - in some cases the length is made to the middle of the radiator, but you will always have time to trim off the excess. Insert the extension into the hole and tighten it.
Flow extension (duct) for bimetallic radiator – Construction
07.12.2019
Flow extender: where to buy, how to make a heating extension, where to put it in the radiator?
When new radiators freeze in the first winter: the first 2-3 sections are hot, the rest are cold - many begin to look for a method of “how to direct the coolant to the distant sections.”
And in the web they find such a divine solution as a flow extender
: you can install it yourself like an amateur and you don’t even need to remove the risers!
And no messy alterations of connection diagrams with burnt wallpaper from welding. In general: the naive dream of any spider.
Flow extender - this tube is inserted into the inside of the radiator after the tap.
With this flow extender: all sections are heated more or less evenly: the water has reached the end of the radiator. It seems like everything is fine!
But in reality, everything is not so: the temperature of the radiator is much lower than the temperature of the risers:
The risers are hot, but the battery is just warm.
Maximum heat transfer can be obtained by moving water inside the radiator from top to bottom: only with such circulation is the natural circulation gravity pump
and the main factor of non-heating (the most important problem) is the draining of the cooled coolant from the radiator from above. A flow extender does not correct this factor!
When the flow is extended in half of the sections, the water moves from bottom to top - again a loss of 50% of gravitational circulation.
And this tube inside the radiator will narrow the upper or lower battery collector. There are already two flows: inside the tube itself and outside between the walls of the radiator.
If the diagonal is incorrect (the diagonals for the top and bottom feed are completely different and are not interchangeable), at least all the pipes pass outside: there are no narrowings inside the battery.
Mixed up diagonal
- and it gives more heat than this extension cord! But you won’t get warm on it either - I’ve already remade it.
To avoid waste coolant escaping from the top of the radiator
— it is better to use a bottom connection: a bottom-to-bottom circuit.
In this scheme there is no concept: distant sections - the entire radiator is also heated evenly as with an extension cord and even better: there is less difference in the temperatures of the riser and the radiator.
But the loss of heat transfer against the upper spill is up to 30% - it depends on the internal flow area of the vertical channels in the sections - it is better to choose radiators with large diameters.
There are imported extension cords on sale for true bottom connections: when plastic pipes run through the floor of the apartment and exit from below under the radiator itself, there are no steel heating risers in the corner of the room.
And many begin to think: this is a factory-certified product, which means it works! Yes - this extension cord works!
But it works in a 2-pipe collector system (there is a pressure difference in the supply and return risers), where all apartments are connected in parallel, and it often happens that the radiators inside 1 apartment are in a parallel circuit.
And the problematic bottom supply is a single-pipe system with a vertical riser inside the room: the pressure in the pipes in front of the radiator is the same (the bypass jumper in front of the battery completely equalizes) and all the radiators on the riser are connected in series.
- In an imported extension cord there is no outlet of waste, cold coolant from the top of the radiator.
- And in fact, it has a purely decorative function: 2 pipes side by side enter the radiator from below from the floor.
- And without an extension cord, the connection will be: 2 tubes separately at the ends of the battery - this is kind of less beautiful!
- This imported hydraulic extension works like a BOTTOM-BOTTOM circuit - just a slightly different visualization.
- There is also a more expensive bottom connection unit for plastic pipes in the floor: an additional external supply pipe to the top of the radiator.
Summary:
The effectiveness of extension cords for 2-pipe and single-pipe heating systems is very different due to hydraulic features:
- Parallel and series connection of radiators,
- And the pressure difference in the supply and return risers.
- The bottom-to-bottom circuit is similar to an extension cord - but it works better!
Better yet: radically change the connection diagram to the top filling - rather than sticking extension cords in. Comparison of an extension cord with a diagonal overlap. They often write on forums that an extension cord helps: all these scribblers are either from central Russia or from the southern regions - I haven’t met them from Siberia.
Apparently the Siberian frosts do not respect this half-length, elongated solution.
Moscow often votes for an extension cord - what is the reason for this?
- There are no severe frosts again,
- possible good circulation in heating networks (new powerful pumps)
- and the third glamor factor: beauty comes before heat transfer.
- There is also 4 - a social factor: 10-15 years ago they began to mistakenly lie about the effectiveness of the extension cord - but now how can you publicly admit your mistake?
- The whole province will laugh at the capital - how can the glamorous capital plumbers then look down on the poor people?
- And people believe - they suffer, they freeze - they make homemade extension cords for single-pipe systems
, and after 1-2 winters they completely remake the connection diagrams to OVERLAY or DIAGONAL. - And often such a real assessment breaks through:
Flow extension: it’s better to lengthen other sagging parts: all sorts of boyish tails,
You can do it under a girl’s harness, under two muzzles - and then compare: who has more sagging, or who has longer - only partially, piecemeal-half raises the temperature in the room.
- Hot water moving inside the radiator from bottom to top: as it cools - giving off heat to the air in the room - it becomes heavier, denser and with its added weight presses down the upward flow of hot coolant from below: the hydraulic brakes inside the radiator are activated and the coolant leaves along an easier path - through the bypass, jumper in front of the battery.
- If less coolant enters the radiator, it cools down faster than new hot fluid enters - the battery is cooler.
- This is a reverse gravity pump - or the movement of water “against the grain”.
Accordingly, a direct pump - accelerating the circulation inside the radiator - when the battery is on the top fill: the hot coolant enters the top of the radiator - goes down in sections - gives off heat and becomes heavier - and begins to go down even faster - the circulation accelerates.
So: the release of cooled coolant from the top of the radiator or the movement of water inside the battery from bottom to top is always “against the grain” and the brakes!
This is a purely physical meaning - everything is according to physical laws. And not a single glamorous Moscow plumber can jump over this science - physics!
Even if he imagines himself to be the “God and Tsar” of Russian plumbing: “Jesus Christ is super Zvezda.”
In short: The star is shocked by the provincial respect for physical laws.
A homemade extension cord made of copper pipe is an experimental entertainment for 1 winter.
And then the smoked one comes and begins to twist the pipes with sea knots.
Duct extension
Uneven heating of heating radiators is a very common problem. It seems that the calculation of the number of radiator sections was done correctly and was connected by professionals, but only the first section remains hot, and the last ones are slightly warm. How to solve such a problem?
Often the only option that the same heating specialists can offer is a diagonal connection.
The coolant then passes through the entire radiator, heating it evenly. The method is correct, but its implementation in practice does not look aesthetically pleasing and is very poor if the apartment renovation is completed with your own hands.
How to be?
Few people know, but a diagonal connection is not the only way to solve the problem. Famous European manufacturers have long been optionally equipping their products with a duct extension.
Radiator duct extension
Improves the operation of the heating system and significantly increases the efficiency of heat transfer when connecting radiators with more than 10 sections to the side.
This eliminates the problem of uneven heating of heating radiators, when only the first sections from the riser are hot.
The duct extension for the radiator allows you to organize the internal diagonal movement of the coolant, without changing the lateral connection diagram.
Having obtained all this information from authoritative sources, I decided to buy a duct extension, but that was not the case. In specialized stores, sellers shrugged their shoulders and had not even heard of such a thing. Later, an extension cord from the Rifar company was found, but it did not meet the required characteristics, and it was decided to make it ourselves. There are no particular difficulties in this.
DIY duct extension
A necessary condition is that the radiator must be connected through ball valves with “American” connections. Close the taps, drain the water and remove the heating battery.
- Carefully, so as not to tear off the paint, unscrew the top plug with the installed part of the detachable connection.
- You may need to replace the silicone gasket under the plug during installation; buy it in advance.
- You will also need the following materials:
- Copper pipe for water supply with a diameter of 18mm. Wall thickness 1mm. The length is equal to the length of the radiator.
- The coupling is straight for soldering. External diameter is about 19.5mm.
The first step is to solder the pipe and sleeve. I used solder fat as a flux and soft solder. We connect the parts and heat both parts with a burner. But the photo is an ordinary small burner, fueled with lighter gas.
- After heating, we apply solder to the joint; if the heating temperature is correct, it melts and flows into the joint.
- The internal diameter of the “American” after cleaning from deposits is 19mm.
The coupling diameter is larger. Using sandpaper or a fine file, remove the excess until it’s “ready to hammer in.” But to avoid damaging the parts, use wooden spacers when driving.
That's all! The duct extension is ready.
All that's left is to play with the length. In my case, I did it until the middle of the last section. Depending on the water supply, sometimes better results can be achieved if done to the middle of the radiator. But it's never too late to cut it off.
Pros and cons of technology
The connection method is chosen to ensure uniform heating of the radiators
The optimal option for using a unit for connecting a heating radiator with a bottom type of connection is a two-pipe system. Communications eliminate heat losses and have several advantages:
- uniform heating of the top and bottom of the batteries;
- ease of serial connection of pipes;
- high-quality heating of rooms, which allows only the two-pipe method to be implemented;
- masking radiator elements in the floor or walls;
- quick dismantling and replacement of elements;
- possibility of installing pipelines made of polypropylene, copper, PEX, bimetal, aluminum, steel.
The disadvantages of the lower supply include the need to equip each battery with air vents and the impossibility of installing it if there is a circulation pump.
Node connection diagram
The connection of the lower node is carried out according to several schemes.
Via bypass
Bypass reduces heat loss by approximately 20%, which saves money
Bypass is implemented through:
- Built-in channel with adjustable hole diameter. It can be connected to single-pipe communications for uniform distribution of water temperature. Using eccentric nuts, you can connect pipe bends with any axial distance.
- A remote element to increase the inlet temperature with subsequent equalization in the system. The tube is connected through a fitting with a built-in thermostat. The coolant will be directed through the bypass to the top of the battery and flow down. To regulate the return flow, an air bleeder is built into the upper part.
Through the injector
The injection, or lower side, method requires the presence of special devices. The injectors are made in the form of a pipe installed in the outlet pipe body. A special feature of the scheme is the direction of hot coolant into the battery through the inlet near the pipe and return through it to the return line. On the side of the injection device there is a valve regulator, screw or automatic thermostat.
Tichelman wiring
Tichelman wiring does not allow the coolant to cool completely
Relevant for single-pipe heating systems. The main line is retrofitted with associated wiring with the same total distance for the supply and return lines.
Using flow extenders
The device is mounted at the bottom and has no outlets to the top. The coolant circulates, moving to the middle of the battery, and then exits at the end. It rises and pushes water through the outlet pipe. Flow extenders are not used in gravity lines.
Using an adapter
The element is screwed in at the bottom, and a stainless steel pipe is directed up. Heating pipes are connected to the adapter from below.
Do-it-yourself duct extension for a radiator – Metalworker’s Guide
Perhaps many are familiar with the situation when only the first couple of sections of the radiator heat up, and the rest remain cold, and you are sure that there is no air in the heating device, and the connection is made as required by the instructions - you won’t be able to tamper with it.
As a rule (99%) plumbers will offer you a reconnection, in other words, replacing the old connection with a diagonal one - this allows the coolant to be evenly distributed over the entire area of the heater, but the rework will require not only material, but also aesthetic costs, which is not acceptable for everyone.
Based on this, it is possible to use another option, which we would like to tell you about, and also bring to your attention the video in this article.
How to solve the problem of uneven heating of batteries?
With the start of the heating season, many residents again remembered the old problem - uneven heating of the radiators.
And the number of compartments is sufficient, and the connection is made correctly, but still the first few sections are hot, and the last are barely warm.
A solution to this problem can be a diagonal connection or a flow extension for the radiator. The second option looks more aesthetically pleasing, and implementation is cheaper and easier.
What is a duct extender?
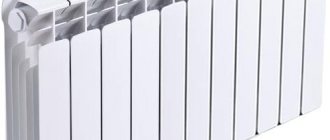
Most homeowners have a very unpleasant problem, the essence of which is that a seemingly new bimetallic battery installed in accordance with all standards does not heat up evenly.
The first 3-4 sections of the battery in this situation are heated up as they should be, but as for the rest, their temperature does not rise to the required level, which will allow heating the room.
In this situation, it would be most prudent to make sure that no air was accidentally introduced into the heating device during installation. Any plumber can easily identify this problem.
If the problem is not the accumulation of air, then you can hear from the housing office workers the conclusion that the whole issue is directly in the heating battery itself. Because of this, a new problem arises, which is the purchase and installation of a new radiator.
But there is a way out of such a situation, which will not hit your budget very hard, and also will not require much time for installation, and it is a duct extension for radiators.
Features of work
The flow extender is used for radiators connected to the system through simple American taps. There must be shut-off valves on the supply and return pipes. If it is missing, connecting the flow extender will be impossible. You will have to reconnect the radiator, which will require more effort.
The main feature of the work is that it does not cause much difficulty and does not require changing the visual appearance of the structure. This is what unknowing plumbers often do when they make a diagonal connection. This type of heater installation will increase heat output, but will not be as effective as using a flow extender.
How to make a flow extension for a radiator
A flow extender for a radiator is a rational solution for uneven heating of the heating structure. It distributes the coolant equally over the entire length of the battery and thereby brings the necessary heat into the room. Suppose, in the case of a lateral connection, the first sections of the battery are hot, and the next sections are cold.
- Peculiarities
- How to make it yourself
Flow extension for radiator radiator right 1/2″
The housing office specialist tells you that the problem is in the battery, and you are presented with two options:
- or reconnect the radiator using a diagonal coolant supply circuit;
- or build a special flow extension cord with your own hands.
The first method will require large financial investments. Plus, not every property owner will be happy to reconnect the radiator, since such an operation will definitely spoil the entire design of the rooms.
Conclusion - if you recently carried out a major overhaul, then reconnecting the battery will not be an option for you. That is, you will need to look for another option.
This is where the duct extension for heating radiators comes to the rescue.
Below you will read more about what a flow extender is, how it works and how to install it correctly.
Peculiarities
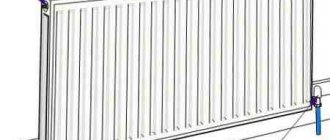
A duct extension for a radiator is a ½- or ¾-inch fitting-type part with an outlet for connecting a metal-plastic, polyethylene, stainless steel or copper “extension pipe”, which is installed on the return connection of the heating structure and facilitates the movement of the coolant diagonally in the battery when lateral connection.
An extension cord is used, as a rule, for batteries with a number of sections of ten or more.
It can be used for batteries connected to the heating system of the house through standard taps with an American connection: there must be a shut-off valve on the coolant return and supply circuit. If it is missing, you will not be able to connect such an extension cord for a bimetallic radiator. You will have to call a technician and do the labor-intensive job of reconnecting the battery.
Operating principle of a flow extender for a radiator
The main problem with an extension cord is that it is not that easy to get. It is rarely found in a plumbing store.
However, there is a way out - you can assemble and install the flow extension for the heating radiator manually.
How to make it yourself
As mentioned above, it is possible to make a flow extender for a bimetallic radiator with your own hands, and anyone can do it.
An important condition is that the battery is connected through ball valves with American connections:
You need to close the taps, drain the water and remove the heating structure. Carefully, in order not to damage the paint, you need to unscrew the top plug with the installed part of the detachable fastening.
During self-installation, you may need a silicone gasket under the plug, so you should purchase it in advance. + You need to take care of the presence of a copper water pipe with a diameter of 18 mm with a wall thickness of 1 mm (the length should be equal to the length of the battery), as well as a straight coupling for soldering with an outer diameter of about 19.5 mm.
It is necessary to connect the pipe and sleeve using soldering. You can use fat for soldering as flux and soft solder. The parts are connected and both elements are heated by a burner. You can take a standard small burner, guided by lighter gas. After this, solder is applied to the joint.
If heated correctly, the solder melts and flows into the joint. The diameter of the American from the inside after cleaning from plaque is 19 mm. The coupling diameter is larger. Using a small file, you need to remove the excess to such a state that you can hammer it in
However, you should do this carefully so as not to harm the parts.
To do this, when hammering, you can take wood spacers. That's all. All that remains is the installation of the duct extension for the radiators. You need to “play” with the length. Depending on the water supply, sometimes it is better to leave the length to the middle of the battery. However, you can always cut it off.
The flow extension and gasket are installed, the radiator is put in place.
The work is finished. All that remains is to remove the air from the structure. Why do you need to use a Mayevsky crane?
Remember that the radiator must be bimetallic, because installing a copper flow extension for a heating radiator on aluminum is unrealistic. Both metals are non-ferrous and react chemically, oxidizing and breaking down.
A systematic approach to installing a flow extender yourself
It is necessary to separate a section of suitable size from a piece of copper pipe using a pipe cutter. The edge of the received product must be smooth. After this, use a stiff brush to remove any remaining nicks from the edge of the cut piece.
Next, solder is applied to the joint. If you do not heat it correctly, the solder will begin to melt and flow into the joint.
Soldering must be completed after the flux begins to form droplets. After this, keep the ends of the pipes pressed for a few more minutes. This time should be enough for the solder to completely harden. After these steps, your work can be considered complete.
The resulting extension cord must be inserted directly into the radiator itself, and then install the battery in place. After installation, do not forget to tighten the plug.
After all these simple steps, the flow extender will serve you well and warm your home.
Do not forget that the extension cord can only be mounted in a bimetallic radiator. Under no circumstances try to repeat this experiment with a cast iron battery, because the metals will oxidize and destroy each other.
DIY extension cord
When making your own, it is better to use a copper pipe
It is not difficult to make such a design yourself if you have all the required components and a suitable type of battery connection. The valves through which the radiator is connected must be ball-type and equipped with American valves. They need to be shut off and the water drained. Then you can begin installation work.
Procedure:
- On one of the sides there is an upper footer. It must be unscrewed together with the detachable fastening element mounted there. This must be done carefully so as not to damage the paint coating. Then it is advisable to replace the silicone round. You can completely dismantle the heating battery if this seems more convenient for work.
- Proceed directly to the assembly of the extension structure. The tube cut with a special tool will need to be soldered to the sleeve. First, it is cleaned from the inside from plaque and dirt using a brush. Solder fat works well as a flux. Using a small brush, it is applied on top of a part that has a smaller diameter. Then one element is inserted into the other and the excess fat is wiped off. The joint area begins to be heated with a burner until a silvery tint appears.
- After this, solder is applied to it. If heating is performed correctly, the solder softens from the high temperature, flows into the joint area and fills the space. When this happens, you need to wait at least a minute until the molten metal completely hardens.
- The American one with cleaned inner walls has a diameter of 1.9 cm. The coupling has a slightly larger diameter. You can use a small file to remove excess. This must be done carefully so as not to damage the parts. For driving, you can use wooden spacers.
- Sometimes you have to experiment with the length of the tube. Sometimes the optimal length is to the middle of the radiator, but it is preferable to start with a longer one. If necessary, excess length can be cut off later.
Required tools and materials
Installing a flow extension into a radiator
You need to select a piece of pipe that will serve as an extension. The thickness of its walls should be at least 1 mm, and the cross-section should be 1.8 cm. The length is taken approximately equal to the length of the heating radiator itself. If necessary, it can be shortened in the future
It is important not to forget about the ban on installing copper elements in the same structure with aluminum ones (including bimetallic radiators with parts made of this metal). Ignoring this rule is fraught with the destruction of all reacting parts of the system
For installation you will also need to prepare the following parts and tools:
- Straight coupling for soldering with an outer diameter of 2 cm.
- A pipe cutter that allows you to evenly cut a piece of extension to the required length without deforming the metal. When working with this tool, the workpiece is held at a right angle. Once the trimming is complete, you can use a brush to remove any uneven areas.
- Bevel remover. With its help, burrs are eliminated in places adjacent to the ends of the tube segment.
- A metal brush and a stiff brush.
- Device for expanding pipes.
- Solder.
- Soldering torch. A simple device of small dimensions will do; you can fill it with gas used for lighters.
The silicone gasket installed in the connection should also be replaced with a fresh one.
What is a flow extender? Main characteristics and place of application + Photos and
At the beginning of the heating season, the problem of uneven heating of the radiator reminds itself.
Even in the case when the correct number of compartments and connections were made correctly, but only the first couple of sections are hot and the rest are cold, a flow extender for the radiator will help solve this problem. The flow extender distributes heat evenly along the entire length of the radiator.
What is a flow extender? If you have a problem with uneven heating of the batteries, do not rush to buy a new radiator. This problem can be solved without major financial investments if you buy a flow extender.
General information
This is an element that is connected to the radiator with or without a tube. The flow extender is usually mounted to the return connection of the radiator, so that there is a diagonal movement of the coolant in the radiator if it is connected on one side.
A flow extender for a bimetallic radiator allows you to solve the problem of uneven heating of the radiator compartments.
Where can a flow extender be used?
The flow extender is used in radiators in which the number of sections is ten or more and they must be connected in a side circuit.
Attention. The use of a flow extender is only possible in those houses where the radiators are connected to the heating system using conventional American taps.
What does it mean? This means that there must be shut-off valves on the coolant supply and return pipes. If it is missing, you will not be able to connect the flow extender.
The flow extender applies only to bimetallic radiators and is not used in cast iron radiators.
The big problem with the flow extender is that it is difficult to purchase this element in hardware stores - they usually don’t have it there. This part is very cheap and easy to manufacture, so plumbing manufacturers consider it unprofitable.
You can make a flow extender yourself
What is needed for this:
- Solder coupling;
- A section of copper water pipe, the walls of which must be more than 1 mm - cross-section 18 mm;
- A pipe cutter that will allow you to cut the required piece of copper pipe without deformation;
- A chamfer remover, which will allow you to remove nicks along the edges of the product;
- Brush with stiff bristles;
- Silicone gasket;
- Flaring machine or pipe expander.
When you have all the necessary tools, you can begin installing the flow extension. Attention. Don't forget to close the taps, drain the water and remove the radiator from the wall
After this, you need to unscrew the top button with part of the installed detachable fastener in order not to damage the paint.
In theory, the extension cord can be installed without resorting to dismantling the structure. But doing this will be extremely inconvenient. Therefore, save yourself time and effort and remove the wall radiator before installing the flow extension. After dismantling the battery, check the condition of the silicone gasket; if it is already pretty worn out, then immediately replace it with a new one.
A systematic approach to installing a flow extender yourself
It is necessary to separate a section of suitable size from a piece of copper pipe using a pipe cutter. The edge of the received product must be smooth. After this, use a stiff brush to remove any remaining nicks from the edge of the cut piece.
You need to connect the sleeve and pipe using soldering. Then you need to take soldering fat and soft solder. Often these two elements are connected using a torch. Therefore, usually stock up on a gas burner that is not very large.
Next, solder is applied to the joint. If you do not heat it correctly, the solder will begin to melt and flow into the joint.
Soldering must be completed after the flux begins to form droplets. After this, keep the ends of the pipes pressed for a few more minutes. This time should be enough for the solder to completely harden. After these steps, your work can be considered complete.
The resulting extension cord must be inserted directly into the radiator itself, and then install the battery in place. After installation, do not forget to tighten the plug.
Attention. The length of the extension cord may vary
Usually the length is chosen based on the fact that the end should be in the middle of the very last section in the battery.
After all these simple steps, the flow extender will serve you well and warm your home.
Radiator fasteners
Installing heating radiators is a responsible matter that requires maximum attention. Nothing can be done “by eye” here. Any deviation, either upward or downward, can cause uneven heating of the sections, which will lead to cold in the room.
Brackets for bimetallic radiators are available for floor and wall mounting. To be sure that the battery is installed securely, you should know what criteria to use when choosing fasteners.
It is important to consider the material from which the radiators are made. Size and weight of the heating structure. The material from which the walls are made. Number of heating battery sections.
When counting the number of brackets for a bimetallic radiator, you should assume that there should be one upper and lower fastening for 3 sections. If the battery is heavy, then the thickness of the holder should be sufficient to “tolerate” its weight.
Floor brackets for bimetallic radiators are used less frequently. Usually, this is due to the peculiarity of the interior of the room or the presence of too weak walls. They may be supplied by the manufacturer, but most often they are purchased separately. When choosing legs for a bimetallic radiator, you should adhere to the same criteria as when purchasing wall mounts.
Radiator components are parts that you cannot do without during their installation, repair or maintenance. Whether it is a key for a bimetallic radiator, plugs or gaskets, they must comply with the technical parameters of the heating device. In this matter, saving is prohibited, since any discrepancy can lead to an accident, which will cost more.
Flow redirection
The situation when the radiator heats up unevenly, but the room is cool, is familiar to many. This phenomenon is often attributed to the presence of air pockets, but what to do if there is no air congestion, and the system is installed correctly, but some sections are still cold.
As a rule, in response to such complaints, the technicians from the heating network will offer to reconnect the heating batteries, but this costs a lot of money, will make changes to the interior, and will require time, which is not available at the height of the heating season.
A flow extender for a bimetallic radiator with a side connection type can help in such a situation. This device is used to increase heat transfer and redirect the flow of coolant, but it can only be used in structures of 10 or more sections.
The main task of the device is to change the direction of movement of the coolant so that it begins to flow diagonally. This promotes uniform heating of all sections of the radiator without reconnecting it to the heating network.
An important requirement for installing the device is a tap for bimetallic radiators, connecting them to the pipes of the heating system. If there is no shut-off device on the return and supply pipes, then it will not be possible to connect the flow extender, and the only solution will be to completely reconnect the battery.
The big disadvantage of this device is its absence on store shelves, both virtual and real. This is due to low consumer demand for such a design, which makes it unprofitable for production, but this does not mean that it cannot be made independently.
You will need a piece of plastic pipe, which must be placed in the radiator return manifold. To do this, you need to turn off the coolant supply, drain the water from the battery and remove it. Using flux, the pipe is fastened to the pipe and placed in the return manifold, where when the coolant is supplied, even under low pressure, it will have to pass through all sections of the battery each time, thus warming them up.
The length of the tube should be equal to the length of the radiator, minus one section. If only the middle elements of the system are not heated, an extension cord is not needed, since the reason for poor heating is a clogged conductive channel. In this case, you will have to wash or replace the section.