9786 0 11
Vadim September 14, 2016
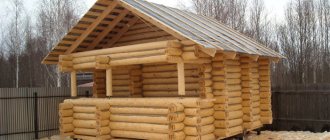
Over the past couple of decades, a lot of new and fairly high-quality finishing materials have appeared on the market. But cladding the balcony with clapboard still does not lose its position in the popularity ranking. There is an opinion that only professionals can do this kind of work, but I can assure you that this is not the case. Any normal owner who is not afraid of a drill and hammer can handle this. Today I will tell you how to properly cover a loggia or balcony with clapboard, without outside help.
Balcony covered with wooden clapboard.
Opening with varnish
The final stage of finishing the balcony will be varnishing the lining. It is acceptable to leave the lining “as is”, but if you want the balcony sheathed with your own hands to last as long as possible, it is better not to neglect this stage. Opening with varnish will minimize the impact of moisture and ultraviolet radiation on the boards and will serve functional and decorative purposes. Numerous transparent or tinted varnishes make it possible to imitate almost any type of wood, which will greatly please those who are not happy with the natural color of the lining or want to create an interior in a single color scheme.
Photo of the balcony after finishing with clapboard.
That's it, your balcony is lined and ready to use!
Many houses have an unheated room such as a balcony or loggia. How to insulate it and make it suitable for normal use in winter will help.
Residents of Khrushchevkas are familiar with the situation of disorder on the scanty balconies that these legendary buildings of the USSR are equipped with. In order to somehow organize it.
The article talks about the technology of covering the ceiling on a balcony with plastic panels, including preparatory work and installation of the ceiling.
Methods for restoring balcony slabs, their characteristics, and possible options for strengthening are considered using the example of repairing a balcony slab in a Khrushchev-era building.
We will show you how to arrange cabinets under the parapet on a balcony with a carry-out, mark and attach frame profiles under the sheathing, and sheathe the balcony parapet.
Work organization
The good thing about finishing balconies with clapboards yourself is that the work does not require special skills or sophisticated equipment. Below are step-by-step instructions, which are divided into 2 parts:
- preparatory;
- main
You need to follow simple guidelines and be careful to get the job done.
During the work process, do not forget about lighting equipment
Part 1 - preparatory activities
First you need to purchase materials, the list is presented in the table.
| Materials | Recommendations for selection |
| Lining | You choose the version of the planks yourself; there are many options. The required quantity is determined simply: the length and width of the ceiling are measured and the quadrature is calculated |
| Bar | The frame will be constructed from it. The thickness of the elements depends on whether insulation will be performed. If insulation is present, the frame must be no thinner than the insulation |
| Fasteners | The frame is secured using dowel nails. Finishing a balcony with wooden paneling is done using nails or special fasteners called clamps |
| Insulation | Used when necessary; if not needed, the frame can be made thin |
You can use the option with a reflective layer to further retain heat on the balcony
Finishing of loggias and balconies with clapboard is done using special tools:
A building level, tape measure and pencil are needed to control the plane and measure work. To create a reference plane, you can pull the cord; this is very convenient for ceiling work;
Perforator for drilling the ceiling;
Hammer and hammer - if nails will be used. If you fasten the clamps with self-tapping screws, you will need a screwdriver;
Ladder or stable table. Finishing balconies with clapboards, or rather covering the ceiling, is impossible without using either a ladder or a table
It is important to ensure ease of work.
It is important to ensure safety when working
Part 2 - Workflow
Let's figure out how to decorate a balcony with clapboard.
The process for covering the ceiling is as follows:
Measurements. First of all, we need to take measurements and cut the block into pieces of the size we require. Do not forget that the frame is located perpendicular to the position of the lining
It is also important to leave 5 mm gaps at the edges so that the wood does not deform due to changes in temperature and humidity;
Drilling. Holes are made in the block through which drilling is carried out in concrete
After this, the elements are secured using dowel nails. To align the structure evenly, you may need to place blocks under the frame at the distance you need; this is especially important when using insulation;
It is important to set the frame level
Surface insulation. If insulation is required, the material is cut so that the pieces are wider than the distance between the bars. This will allow you to fill the cavities very tightly, without securing the mineral wool with dowels. If you use polystyrene foam, then it is better to fill all the joints with polyurethane foam; it will serve both as an adhesive and as a heat insulator;
Mineral wool is more convenient to use, as it does not leave gaps in the gaps
Preparing the lining. When the structure is ready, you can proceed to the next part of the work (by the way, finishing with plastic lining is done in exactly the same way before this stage). First of all, you need to take measurements to determine the length of the elements (do not forget about the necessary clearances). Cutting is done either with a hand saw with a fine tooth, or with a power tool;
It is important to take accurate measurements so as not to cut off too much and ruin the material.
- Fastening is done from any side; usually the part of the ceiling that is best visible is selected. The first element is placed close to the wall with the tenon facing forward;
- From the edge, the fastening is done directly through the lining, the joint will still close;
- On the groove side, the element is fixed either with nails or clamps, there is not much difference in this;
Fit. In order for a ceiling trimmed with clapboard to look its best, it is worth combining the planks tightly.
- To do this, each element is tapped through a wooden spacer so that the joints are as tight as possible;
Fastening is done only from the groove side; there is nothing complicated in the process;
It is important to fit the products together well
The measurements of the holes in the lining are determined locally; they should not be taken in advance
Finishing a balcony or loggia
How to cover a balcony with clapboard yourself? You just need to be careful, patient, and of course, purchase finishing materials:
- a 50 by 40 mm block for installing central beams;
- staples for attaching drywall material;
- 20 mm edged boards for floor joists;
- board or plywood sheet for the floor;
- polyethylene for hydro- and vapor barrier;
- insulation;
- polyurethane foam;
- corners for fastening lags;
- self-tapping screws 3.5x5 mm and 3.5x7 mm;
- dowel nails for mounting brackets and angles to concrete;
- 35 mm nails for installing lining.
Of the tools you will need to clap a balcony with your own hands, you should prepare:
- drill or hammer drill;
- electric jigsaw;
- screwdriver;
- stapler;
- level;
- tape measure, as well as carpentry tools.
Preparation for finishing
Before covering the balcony with clapboard, it is necessary to prepare it: dismantle the window slopes and interior decoration, remove the old covering from the walls with your own hands. If the balcony is located on the cold side, be sure to treat the floor and walls with a special primer against fungus.
In particular, this applies to cities with high humidity and a cool climate (for example, St. Petersburg). If the balcony railing is made of sheet metal, it is necessary to make a structure of foam blocks, one block thick. They are laid on cement, always using a level. We wait for the solution to dry completely and install double-glazed windows.
Before clapboarding a balcony, it is extremely important to first inspect the condition of the double-glazed windows or balcony frames.
If you have wooden frames on your balcony, check them for rot. If the percentage of surface damage is large, they need to be replaced.
In case of small fires, the wood should be cleaned and treated with special solutions.
Installation of guides and insulation
Attach the lining with your own hands to guide bars 50 by 40 mm. If the lining needs to be positioned perpendicular to the floor, then the guides are attached horizontally. The interval between the bars is set so that later it is convenient to lay the insulation.
If polystyrene foam is used for insulation, then the gap should be equal to the width of the sheets of insulation material. When choosing mineral insulation, it is advisable to remove 0.5 cm. Mats that were laid with slight compression will hold tightly without additional fastening. If you are not going to insulate the balcony, the distance can be any. One condition is at least 60 centimeters.
Related article: How to lay tiles in corners: methods of joining ceramic tiles
You must begin your DIY installation by attaching drywall brackets. Then we place the guide bar from below and attach it to the brackets.
Using a level and an auxiliary block, we place the block on top in the same way. The middle guides must be set while leveling them using an additional block.
After the installation of the guides is completed, we place polystyrene foam in the spaces between them. Then we pull out the free remains and thoroughly foam all the cracks with polyurethane foam. We cut off the remaining hardened composition with a sharp knife. For more information about installing lining, watch this video:
Walls facing the street need to be insulated. If you want to get a really warm balcony, it is important to insulate the floors and ceiling. If you use mineral material, you must put a waterproofing film underneath it. It is important to do this so that moisture from the street does not penetrate inside and spoil the material. The insulation is very sensitive to water.
Don't skip the waterproofing step! Otherwise, after several wet seasons, all the insulation will need to be redone - insulation materials do not tolerate water.
We lay a vapor barrier film on the surface of the insulation. It protects against evaporating moisture inside the loggia.
It will be convenient to mount the guides on the ceiling after finishing the wall decoration. They need to be laid along the length of the balcony. The outer bars are attached tightly to the sheathing, and the intermediate ones - at some distance. This will allow you to install the insulation without problems.
Floor finishing with clapboard
Before finishing the floor with clapboard, you yourself need to install logs from boards measuring 20 mm. The width of the boards should be selected depending on the floor level. The optimal size is 10 cm.
The board is placed on its end and attached to the floor using a corner. To attach the latter to the concrete, we use dowel nails, and to the board, we use 3.5x35 mm wood screws.
We begin to install the logs by making a frame base around the perimeter of the floor of the room with a distance of a couple of centimeters from the walls. Inside it, logs are installed across with a distance that will be equal to the dimensions of the width of the insulation blocks. We attach them to the right places using a corner.
All cracks are treated with foam. Insulation and a film vapor barrier are laid between the joists, which are secured using a construction stapler.
For the floor, you can use any floorboard or moisture-resistant plywood. We cover the last material with acrylic varnish as soon as all work is completed.
Wall and ceiling cladding
Now we cover the balcony with clapboard. It is preferable to start covering and finishing the surface of walls and ceilings from the most difficult angles. If you leave them until the end of the work, it will become difficult to get to this place. We place the starting board strictly according to the level. Inaccuracies and misalignment can lead to you eventually having to redo the entire work. Remember that eurolining has a ventilation groove on the inside. It is needed for proper air exchange. If this is not the case, rot or mold may appear.
Related article: Step-by-step installation of an acrylic bathtub with your own hands
The lining is attached to the guide bars using special nails. They are small and have the same hat. Nails install the boards into the grooves at a 45-degree angle. The initial board is attached to all guides, subsequent ones - strictly to the upper and lower ones. The boards are attached to the intermediate bars in a checkerboard pattern.
Each subsequent plank is inserted into the groove with a tenon, and then tapped with a light hammer through the block so as not to get defects. After that we nail it for the final stage.
So, the lining of the balcony is finished, now we are finishing the ceiling with clapboard. We install the guides using a level, then lay the insulation (if insulation is planned). The final stage is the use of polyurethane foam. It is best to finish the ceiling in the transverse direction. This simple technique visually expands the room.
Description
Eurolining is called wooden boards that are processed on all sides along the edges. The material has a tongue-and-groove type of connection, which allows for cladding without visible joints or fastenings. When a perfectly smooth surface is not required, it is better to use air ducts that are located on the back of the eurolining. This will prevent harmful condensation from forming.
The category of building material is determined immediately after the manufacturing process (depending on the presence of various defects, curvatures, etc.); during sorting, it is divided into 4 grades. Products are divided into classes:
- “Extra” - there are no defects whatsoever, the lining is impeccably even and smooth;
- A – there may be 2 cracks, 1 knot, 2 resin pockets, while the diameter of the second one can be from 5 to 15 mm;
- B - the number of cracks and resin pockets is the same as in the previous case, but the possible number of knots increases to 4 (diameter - 20 mm);
- C – many unsightly stripes and blue spots, cracks, knots and resin pockets.
Balcony cladding
Eurolining is a high-quality, but expensive material
The first step is purchasing materials and selecting all the necessary tools. It is preferable to use boards made of hardwood to cover a balcony with clapboard, since pine clapboard begins to evaporate resinous substances when the temperature rises.
Before purchasing, it is important, first of all, to calculate the finishing area. We multiply this figure by 1.3 - the amount that will be needed for adjustment, taking into account the 30% margin. Try to select the length of the material so that there is less waste left.
Premium grade lining - the best material
The type of boards can also be different. For example, grade A costs more than grades B and C, but it is processed much better and does not require additional polishing. You can save money and buy B boards and then sand it after finishing. What is the difference between the various categories of lining?
Premium and A class category – the best material. The boards have a uniform color, there are no knots or irregularities. Class A lining is slightly cheaper than Premium class.
Related article: Coordination and features of installing an opening in a load-bearing wall
Class B lining can contain up to 4 knots for every 1.5 m. It has poorly processed planks and a slightly uneven color.
As for the covering material of category C, this is the cheapest and not entirely high-quality option. A large number of knots, uneven color and lack of processing of the planks are its distinctive features.
Moreover, the purchase of such lining will ultimately not be economical - you need to spend time on sanding and painting it if you want a beautiful appearance. So it’s better to buy the first two categories.
The working process
It is worth familiarizing yourself with the features of how to make a hallway with your own hands. If you have a small room, then give preference to those items that will not overload it. With a minimum number of square meters, you can use compartments designed to store outerwear, shoes, as well as the items you need.
If you have a spacious hallway, then you can use a spacious closet. Depending on its parameters, the cost of the product is calculated.
After determining the model, it is necessary to take measurements and make accurate calculations. Prepare a set of tools that will be useful during work.
A little theory: what is lining and what is it eaten with?
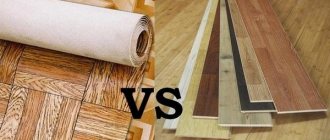
Eurolining is made in two profiles: Standard - with right angles and Soft Line - with rounded chamfers. Contrary to popular misconception, eurolining is not subjected to any special treatment or impregnation and does not possess any miraculous properties; it must be protected from fungus as carefully as any wood. But working with eurolining is convenient, and the cladding turns out very elegant. Correctly sheathing a balcony or loggia yourself with eurolining is easier than with a simple tongue-and-groove board.
Plastic lining differs from very similar PVC decorative panels in dimensions, profile and lock, exactly the same as those of wooden lining. Can be textured like wood. “It doesn’t breathe wood,” but in purely decorative terms it is not inferior to it, surpassing it in durability and fire safety. The technology for covering a balcony or loggia with plastic lining is similar to that for PVC panels, but plastic lining can also be laid using the “wooden” technology described below.
Read separately about finishing the balcony with ordinary wide plastic panels. We also recommend that you study in more detail the criteria for choosing material for the internal cladding of a balcony.
How to cover a balcony with clapboard yourself
First of all, you need to decide whether you will insulate the balcony or not, and if so, which parts of it and with what material. The structure of the lathing and the thickness of the bars used depend on this. The order of work will change slightly - there will be no installation of insulation. All other stages and their sequence will be similar.
Work order - step-by-step instructions
First, all the old finishing is dismantled, plaster, paint, and tiles that do not hold well are removed. Anything that holds firmly can be left untouched. For greater reliability, before covering the balcony with clapboard, it is worth priming the walls, floor and ceiling with an antifungal compound. This is especially true if it was previously open. After the composition has dried, the actual installation work begins:
- Lathing is installed on the walls and ceiling. It is usually made from wooden blocks. If the balcony or loggia is to be insulated, the installation step of the slats is consistent with the width of the insulation.
- The insulation is installed and secured.
- Floor joists are installed.
- Insulation is laid between them.
- Moisture-resistant plywood with a thickness of at least 10-12 cm is laid on top and secured into the joists with self-tapping screws.
- The lining is mounted on the walls.
- The ceiling trim is being installed.
- Floor and ceiling plinths, corners, and slopes are installed.
Below we will talk about some of the stages and materials in more detail.
How to insulate
Before covering the balcony with clapboard, it is necessary to lay insulation. Any of the thermal insulation materials available on the market will do:
The width and thickness of the houses varies widely. Comparison of the thermal conductivity of various thermal insulation materials. The required thickness of the material to ensure equal heat loss is indicated in centimeters
Any of these insulation materials can be used on the ceiling, floor or walls. There is a natural and inexpensive option for the floor - expanded clay, but it is not nearly as effective as the materials presented above: the average thermal conductivity is 0.1 W/(m K) (twice higher than that of mineral wool).
Which one is better to sheathe?
Lining comes in several types, differing in operational and external characteristics. The specifics of installing boards and caring for them, as well as the interior of the future living space, depend on the choice of material. You can cover the loggia with one of the following types of lining.
Wooden
Natural material with all the ensuing advantages. The lining is made in the form of thin panels of different sizes. Timbers are made from different types of wood: ash, oak, alder, cedar, linden, spruce, pine, larch. The material “breathes” and prevents the air on the balcony from stagnating. An unusual feature of the lining is its pleasant, fresh aroma. It comes, first of all, from coniferous boards.
Depending on the quality of the raw materials, the lining is divided into types:
- The material labeled “Extra” is considered the best. The boards are well processed and free of external flaws. The cost of such material is higher.
- Class “A” allows for the presence of small knots, but is highly durable.
- Medium quality wood is used to create class “B” lining. There may be cracks and resin pockets on the beams.
- Class “C” material has the lowest quality. The lining is poorly polished and easily deformed. The boards contain captive knots up to 25 mm in size, non-through cracks, stripes and other defects.
Eurolining
A type of wood paneling. Externally, these types are very similar, but eurolining is of higher quality, since it is manufactured according to European standards. This material is more expensive, the price is due to its high performance characteristics. Eurolining is stronger and made from the best types of wood.
The material is divided by size and shape. There are standard profiles, softline, landhouse, landhau, American, block house.
Eurolining is made taking into account strict requirements, including those related to its dimensions. It has a thickness of 13, 16 or 19 mm, and a width of 80, 100, 110, 120 mm. The length of the beam is 500-6000 mm.
Plastic
Building materials are made of PVC and vinyl and have good heat and sound insulation characteristics. The service life of plastic lining reaches 30 years.
Plastic beams are easy to install and guarantee joint tightness. They are resistant to ultraviolet rays and do not fade in the sun. The material is not afraid of cold and hot weather: its operating temperature range is from -50 to +50 C. A wide variety of beam designs allows you to choose them for any interior. Manufacturers create plastic lining that imitates natural materials, decorated with drawings or patterns.
The listed materials have their pros and cons. Plastic panels act as a cheap analogue of wooden beams and even have a longer service life. At the same time, it is wood boards that are associated with nobility and comfort. Wooden lining is more resistant to sudden temperature changes, but plastic lining is resistant to fire.
Advantages of PVC plastic
The main advantages of this material are the huge selection of colors and patterns of the lining. There are hundreds of different shades, which allows you to choose a material to suit every taste and color.
There are designs that resemble stone, textiles, wood, bamboo, etc. Plastic does not deteriorate over time and can last for several decades. Thanks to the cavities inside the material, plastic lining has noise and heat insulating properties.
Today, such panels are environmentally friendly and fireproof. The material is quite light and is great for hanging balconies. They are easy to install and do not require special care. It can be easily cleaned from various contaminants.
The wooden version is more difficult to install and may fade when exposed to sunlight, but its appearance looks more respectable.
Wooden lining is made from various types of wood. They may differ in both variety and processing technology. The most commonly used types of wood are: pine, cedar, linden, alder, aspen or larch.
If you choose pine, you need to be prepared for the fact that resinous drops may appear on the surface over time, but this will prevent the appearance of various fungi and pests.
Interior decoration of balconies with cedar or larch clapboard is more popular, since such wood has a beautiful pattern and has less resin. You can also use a tree such as oak, but this option is much more expensive, and its use is not always advisable.
The main thing you need to pay attention to when purchasing wooden profiles is the dryness of the material, which should be no more than 10%. Otherwise, the wood may lead to drying out, cracks appearing, and the overall structure may be damaged. The fact of how thick the material is is also important. A maximum of 25 mm is recommended, and 14-16 mm is best.
Also read on our website: Decorating balconies and loggias from the inside: materials
How to process wooden lining?
Having completed the installation of the lining, it needs to be treated with varnish, and not just a simple one, but a special one that will not crack at low or high temperatures.
Protective varnish can be used to cover both the entire finished surface and individual panels of the lining. Before you coat the wood with varnish, you need to dry it quite well, otherwise moisture will still manifest itself, which will adversely affect the condition of the surface of the wood and the varnish coating.
In addition, the lining should not have particles of chips and other processing waste. Here you can use antiseptics, or even better - use ship varnish, it has an excellent price-quality ratio. Although, there is a drawback: the wood will not breathe under a layer of such varnish, so it will not last long.
You can also use expensive modern scuba tanks, the main thing is to check that they are water-based and contain ultraviolet filters, so the wood will not darken over time. Good varnishes, for example, are from the manufacturers Penotek or Tikkuril. The varnish is applied in several layers, each subsequent one only after the previous one has dried, after which the entire surface is sanded to smooth the lining.
The surface coated with varnish will shine like a mirror. And this is not the only advantage of covering the balcony with clapboard. If you have any questions, you can watch the video material with detailed instructions regarding the installation of wooden lining on loggias and balconies. Good luck in job!
We cover the walls with clapboard
Covering the walls with clapboard does not require much effort. The instructions are extremely simple and clear. And if you have an automatic or semi-automatic tool, you can get the job done in literally a day.
More attention will need to be paid to the final stage. The lining, for example, can be varnished to preserve the wood texture. But you can use other finishing options:
- Stylish and modern. For a modern style, it is better to paint the lining white and use the room for work or study.
- Under a light tree. There are special compounds that are applied over the lining and even out and lighten the color of the wood. Light wood is more appropriate on the balcony because it does not clutter up the space.
- Partial clapboard finishing. If you use dark lining, which is additionally varnished, it is recommended to decorate only one wall with it. Then the design will look more advantageous.
Very often, designers use lining of different textures. Part of the wall is in light wood tones, the rest is in dark. This option also looks stylish, but it is difficult to create a suitable composition without having the appropriate knowledge.
What do you need for work?
In addition to the lining itself, you will need construction tools and accessories.
Tool:
- Hammer/drill, preferably high power;
- Screwdriver (preferably, but you can use a drill);
- Bit holder and bit set for screwdriver/drill;
- Hammer;
- Hacksaw/jigsaw;
- Various brushes for applying primer and antiseptic;
- Building level;
- Pencil, ruler, square.
Materials:
- Polyurethane foam;
- Polyethylene foam;
- Scotch tape (painting);
- Frame material (metal profile or timber);
- Lining;
- Holders for lining;
- Nails, screws;
- Decorative elements (corners, baseboards);
- Varnishes/paints for wood);
- Priming;
If necessary - insulation, film to protect the insulation.
Required Tools
To install the lining with your own hands, you do not need specialized professional equipment, and this is its advantage. The list varies depending on the type of material chosen, but in general the list of tools includes:
- Hammer, drill with impact mechanism;
- Drill with a diameter of 4 or 6 mm;
- Screwdriver (electric or battery);
- Boer;
- Hacksaw, jigsaw;
- Construction level, body kit, nylon cord;
- Cross bat;
- hammer, axe.
To take measurements you will also need a tape measure, a square and a pencil; fastening is carried out using nails with large heads (60 mm), wood or metal screws (50, 75 and 90 mm) and umbrella anchors. And during the finishing work, you will need parts for the fittings: corners and baseboards.
Installation of lathing and thermal insulation material
This stage of work should begin with markings for installing the frame. For sheathing, timber can be mounted both vertically and horizontally. The first option is suitable for horizontal installation of slats, and the second - for installation of lining vertically or diagonally.
Installation of insulation
Do not forget that when attaching the bars, the distance between them should be 60 cm. At the same time, the width of the frame elements should be 6 cm, and they should be aligned along the upper border. All lines when marking must be strictly parallel to each other.
After marking has been completed, you can proceed to the installation of the frame for installing the lining. This process includes the following steps:
- Cutting timber into strips.
- The strips should be placed under the line, drilling holes in them every 50-80 cm. The depth of the holes should be approximately 6 cm. Plastic dowels should be inserted into the holes.
- Installation of waterproofing material. In this case, polyethylene film is most often used. For fastening, it is best to use assembly adhesive or liquid nails.
- Installing the sheathing using self-tapping screws. To ensure that the sheathing is installed evenly, you should use a plumb line, which must be secured to the top bar.
- Insulation should be installed in the cell between the sheathing. In this case, mineral slabs are most often used, but foam plastic, basalt slabs and other materials can also be used.
Installation of sheathing
Correct installation of the sheathing is the most important element of lining a balcony with clapboard. If the work is done poorly, further cladding may turn out to be sloppy and short-lived.
Balcony insulation and sheathing
These two stages are combined because their sequence may vary. So, if you plan to use flexible roll materials for insulation, then you should first fasten them, and then proceed to installing the sheathing. If the insulation is solid, then you should first do the lathing, and then fix the cut pieces of material between the profiles (the gaps between them must be filled with polyurethane foam, otherwise the cold from the street will penetrate through them).
The lathing is best made from wooden beams measuring 40x40 or 50x50 millimeters. If you install the elements horizontally, then the sheathing should also be horizontal; if installed vertically, attach the beams vertically as well.
Lathing installation steps:
- First, the corner posts are installed.
- Next, fasten the rest along the level of the corner beams, not forgetting to level them. They are fixed with anchor bolts or self-tapping screws. The step between elements is usually about 50-70 centimeters.
- Install longitudinal beams between the main beams.
- Attach a vapor barrier film over the sheathing to protect the lining from condensation.
Tip: It is recommended to first make markings to cut the beams to the required length and position them correctly.
In order for clapboard finishing to extend the service life of the material, it must be processed properly. Use an antifungal protective compound and cover the lining on all sides with it. It must be completely dry before installation.
Installation methods
The lining is attached in two ways - directly to the wall or to a frame made of slats - lathing. The first option is used for installation on wooden walls, the second - on brick or concrete.
Installation of wooden panels over lathing with insulation
The lining can be installed vertically or horizontally. The frame slats are attached to the wall perpendicular to the finishing slats. The insulation is placed between the guides. A vapor barrier is laid on top of the heat insulator, taping it to the sheathing with a stapler.
When placing the finish horizontally, make sure that moisture cannot get into the joint. The boards begin to be laid from below, pointing the edge tenon upward. The next element is pressed onto the protrusion, thereby ensuring the tightness of the connection.
Material calculation
Before covering the balcony with clapboard with your own hands, determine the consumption of basic materials:
- finishing board or imitation;
- bars for sheathing;
- fasteners;
- insulation, hydro- and vapor barriers.
Calculation is needed so that there is no surplus or you don’t have to go in the middle of work to get missing materials.
Lining
Stores offer lumber by the piece or in cubic meters. The width of finishing wooden boards is 60-200 mm, length 300-6000 mm in increments of 100 mm. When calculating, take into account the working part of the lining without a tenon, which is indicated in the marking. The conversion of volume to area is carried out by dividing by the thickness of the element.
The width of PVC panels varies between 100-250 mm, length - up to 3000 mm. The MDF lining has dimensions of 150-325 x 2400-3700 mm.
The working area of one board is found by multiplying the width by the length. For example, for a material marked 15x96x3000 mm it is 0.288 m².
To determine the required number of panels, find the area of the walls and ceilings minus the openings, then divide it by the area of one element.
Drawing to determine the finishing area
When calculating, it is taken into account that the lining may have to be trimmed. The remaining pieces are installed above the windows or balcony door.
Lathing
The frame is made of wooden bars 30x30 mm, treated against rotting. They are installed in increments of 400-600 mm. For rooms with high humidity, it is recommended to use aluminum or galvanized steel profiles.
The slats are also mounted near openings, internal or external corners, niches, floors and ceilings in order to subsequently attach the plates to them. If this is not done, the coating may become deformed or bent. When calculating the consumption of bars or profiles, the height and length of the room, the size of the openings, and the presence of protrusions are taken into account.
Fasteners
Information on how to cover a balcony with clapboard would be incomplete without considering the advantages and disadvantages of fasteners.
For fastening use:
- self-tapping screws;
- nails;
- staples;
- clampers.
In damp rooms where wood is subject to constant deformation, self-tapping screws are used. They provide reliable fastening of the panel due to the increased thread pitch.
It is recommended to use yellow or white hardware with a protective coating that protects the metal from corrosion. Most often, the lining is fastened with self-tapping screws 20-45 mm long and 2.2-3.5 mm in diameter. Consumption - 30-50 pieces per 1 square meter.
Nails are used only in dry rooms; they are prone to being pulled out when the wood dries out. During installation, the surface may be damaged by a hammer, so furniture hardware with wide decorative caps is recommended. For 1 sq. meter spend 30-60 pieces.
Horizontal boards are fastened with staples, directing the stapler at an angle into the tenon of an already mounted element. Then the next lamella is placed on top and the operation is repeated. The most common sizes are leg length 4-14 mm, bracket width 11.4 mm. For wet rooms, copper-plated or galvanized metal products are used.
Clamps are special flat brackets with a tongue for fixing the board and holes for attaching to the sheathing. They are absolutely invisible, and their use does not damage the lining.
Fastening with a clamp
Recommended only for dry rooms; if humidity fluctuates, the lamella may simply jump out of the fastener. For the same reason, lamps, shelves or other hanging equipment cannot be mounted on the surface. You can combine clamps with screws or nails, installing staples only in visible places.
Cladding the balcony with clapboard
The question of how to calculate the material is easily resolved. Calculate the total area of the surfaces to be covered and add to the result obtained from 10 to 30% for trimming. The tolerance depends on the chosen installation method.
For beginners, it is best to start with horizontal or vertical installation. Diagonal, and even more so mixed laying requires experience. Personally, when I installed the lining diagonally for the first time, I ruined at least 40% of the planks. So think about whether you are ready for such sacrifices.
Mixed installation of planks.
Now let's talk about how to cover your own balcony with clapboard. The whole process is divided into several stages:
- The first stage is glazing and thorough sealing of the balcony. Here it is better to immediately order plastic windows and not suffer. At the moment, a better option than this has not yet been invented;
- Next, it will be necessary, if possible, to completely tear off all the old cladding from the walls of the floor and ceiling, if any, and at the end treat the balcony with antiseptics;
- After this, a load-bearing wooden sheathing is installed and insulation is laid;
- When the sheathing is ready, you can proceed directly to the installation of the lining;
- And finally, at the last stage we will talk about the best way to cover your lining. A balcony is a special room and you cannot leave a tree unprotected here.
Plastic windows on the loggia.
Dismantling old cladding
I don’t see any point in writing about glazing, since in the case of plastic windows, this will be done by professionals. You will need to tear off all the old cladding and prepare the walls.
If there are large cracks on the walls, they need to be puttied. The fact is that such cracks necessarily contain fungal and mold spores. And if they are not destroyed, the fungus will begin to actively grow under the wooden cladding.
Convenient clapboard box on the balcony.
Personally, I did this. I widened and cleaned all visible cracks using a grinder. After which I covered everything with ordinary alabaster. If you don’t like alabaster, you can buy specialized putty with an antiseptic effect, but it will be a little more expensive.
Some craftsmen recommend pre-plastering the walls. There is nothing wrong with this advice, but I don’t see much need for such finishing. What really needs to be done is to cover the walls, floor and ceiling with an antiseptic.
Wooden fittings for finishing corners.
In a budget option, you can use a five percent solution of copper sulfate. But I do it differently. Now the so-called white impregnation is sold on the market.
This is an antiseptic based on PVA glue and is relatively inexpensive. For one balcony I take a 20 liter canister.
This impregnation is suitable for both concrete and wood. First I spray all the walls, floor and ceiling a couple of times. And I use whatever remains to impregnate the wooden sheathing bars.
Installation of load-bearing sheathing and insulation
Installation of wooden sheathing and insulation of the balcony are two inextricably linked processes. Insulation can be light or major. Light insulation involves covering all surfaces with foil foam, after which a load-bearing wooden sheathing is placed on top.
Lightweight insulation with penofol.
Foil penofol is polyethylene foam coated on one or both sides with a layer of aluminum foil. The thickness of this fabric ranges from 10 to 15 mm. In this case, the layer of foil should be directed towards the inside of the room.
When thoroughly insulating a balcony or loggia, the procedure will be slightly different. Here, a wooden sheathing is first installed, and then insulation is laid into it.
In the case of light insulation, the sheathing is only needed to attach the lining to it, so the bars can be taken with a thickness of about 25 - 30 mm. It is not recommended to install thinner ones, as the bars may split when driving nails.
Horizontal guides with foam as insulation.
For major insulation, I use a 50x50 mm block. This thickness was not chosen by chance. If you want to get a really warm balcony, then the thickness of the foam or mineral wool should be at least 50 mm.
For horizontal installation of the lining, the load-bearing sheathing is packed vertically. Accordingly, for vertical or diagonal installation of planks, the sheathing is mounted horizontally. In both cases, the distance between the slats is about half a meter.
I prefer to work with foam. It is easier to install and lasts longer than mineral wool. The sheets are simply laid in the sheathing, and all gaps are filled with polyurethane foam.
Ceiling trim.
In the case of mineral wool, a vapor barrier will need to be placed in the sheathing, then the mineral wool itself, and another vapor barrier on top. The fact is that cotton insulation is afraid of moisture and if proper protection is not provided, the wool will quickly become wet and become completely unusable.
Fixing the plank with a nail.
But there is another important point here. The lining cannot be sewn close to the insulation. There must be a ventilation gap of at least 15 - 20 mm between the insulation and the cladding, otherwise the wood will rot.
Therefore, after laying the insulation, I stuff another row of strips onto the wooden frame to ensure this very ventilation gap. It is on these strips that the lining will be mounted.
Some craftsmen additionally glue foil penofol onto the foam. And already on top of it they fill the sheathing strips under the lining. This “sandwich” increases the thermal insulation of the balcony by at least 30%. But of course you will also have to spend money on penofol.
Cladding with MDF panels.
Fastening the lining
The lining can be stuffed in several ways. The planks are fixed with nails, self-tapping screws, a stapler or clamps. At one time I tried all the fastening methods, and I can say with full responsibility that in the case of wooden lining it is best to use clamps.
Options for fastening wooden planks.
Plastic and MDF planks are easier to fasten with a stapler or self-tapping screws. There is another option here - fixing with clamps, but in this case you will have to buy special guides with a central groove along which these clamps move.
The installation itself is quite simple. Any lining is connected according to the tongue-and-groove principle. We start the trim from the door or from the near left corner. We will move from left to right, that is, clockwise.
The first plank is inserted with a tenon into the corner and nails are driven into this tenon or screws are screwed into it. On the reverse side, the clamp tongue hooks onto the edge of the groove and the plate is nailed to the sheathing bar with special nails measuring 20 mm.
General diagram of fastening the lining with clamps.
The tenon of the next plank is inserted into the groove of the previous one, after which it is also fixed on the reverse side with clamps. Plastic or MDF are fixed in approximately the same way, only instead of clamps, stapler staples are used.
If when installing wooden and MDF cladding, in addition to corner ceiling and floor plinths, often no other fittings are used, then a whole arsenal of auxiliary fittings is produced for plastic. In many ways, it is for this reason that plastic is easier to install.
Types of accessories for plastic.
As a rule, only the walls and ceiling are covered with clapboard. I personally don’t see any point in laying the lining on the floor. From a purely practical point of view, due to the presence of grooves and the special configuration of the strips, the coating is not even.
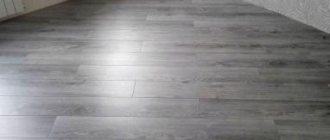
As a result, you will get tired of sweeping such a floor, and debris will get stuck in all the cracks. For flooring, the best options are laminite or regular floorboards.
Balcony with wooden floor.
If plastic and MDF do not require any additional processing, then with wood everything is different. It is impossible to leave the wood in its original form; it will quickly darken, begin to crack and eventually completely lose its attractiveness.
A lot of questions immediately arise here. If you paint, then what paint to choose, if to varnish, then what varnish to cover it with. To be honest, there are so many masters, so many opinions. Therefore, I will talk about my own experience, decide for yourself whether to accept it or not.
Finishing of wooden lining
The best way to paint or cover the lining should be decided before installing the planks. The fact is that each fresh cut of the plank must be immediately treated with some kind of protection. The wood begins to deteriorate at the ends, so they need to be given special attention.
Untreated wood.
Personally, I do this:
- During installation, I place next to a jar with the selected protective composition, it doesn’t matter what it is, varnish, paint or primer;
- And immediately, before fixing the plank, I paint its ends.
When the bar is fixed, you will no longer be able to get to the ends and, therefore, no matter how powerful and expensive the protective composition you use, the ends will remain unprotected.
Before painting or varnishing, it is advisable to go over the wood with a protective primer. The above-mentioned white PVA-based impregnation is good, but not suitable for the front surface. Now there are many transparent protective compositions, as well as compositions with a tinting effect.
Docking of planks.
- The Snezh Aquadecor brand has 16 shades of wood tinting in its line. It reliably protects against all biological hazards and can actually be used as a topcoat. This is an excellent solution for people who want to leave the wood in its original form, that is, without paint or varnish;
Stain "Snow Aquadecor".
- The Aquatex composition is pure primer. It is used to treat wood before applying the finishing coat;
Primer "Aquatex".
- The Finns supply us with “TIKKURILA VALTTI-POHJUSTE”. This soil is certainly good and of high quality, but it only protects against mold, mildew and insects. In the case of a balcony, this composition has a big disadvantage, it does not protect against ultraviolet radiation, but as you understand, on a loggia or balcony this is very important;
- Our industry produces high-quality impregnation. It goes under the brand name “U-409”. This composition is in no way inferior to imported analogues, and costs much less.
Products of the Usadba brand.
How to paint the lining and whether to paint it at all is a controversial issue. Personally, I am against solid wood staining. What's the point in installing natural wood and then hiding its natural beauty under a layer of paint? Here it is better to immediately mount plastic or MDF.
If you want the wood texture to be clearly visible, then you should choose water-based actyl paints. Oil paints are durable, but take about three days to dry. For the balcony you can use nitro enamels - they have a bright shine and look great. True, nitro paints stink very strongly, although this is not critical for a balcony.
I am often asked the question which varnish is best to use for lining on the balcony. If you want to get shine and at the same time durable and reliable protection, take urethane-alide-based varnishes, they are also called yacht varnishes.
Tinted paneling on the loggia.
Nowadays fashionable water-based acrylic varnishes give a matte surface and the lining underneath looks great. But if a three-liter jar of urethane-alkyd varnish now costs about 400 rubles, then you will only get 1 liter of acrylic varnish for the same money.
Of course, water-based varnishes are odorless, but who’s stopping you from opening the windows on the balcony wide, after all, you don’t paint every day, plus the volumes on the balcony are not so large.
Whatever varnish you choose, you need to apply it in at least two layers. In order to achieve an ideal glossy shine, the number of layers can reach up to 5 - 7. The task is, of course, quite tedious, but the end result is worth it.
Lacquered balcony.
Video 1.
Video 2.
Video 3.
Frame for covering the loggia
Frame for covering the loggia
Cladding always begins with the arrangement of the sheathing (frame). Actions for the initial stage:
- Check with a level the degree of evenness of all surfaces of the balcony.
- Install vertical slats, lay horizontal ones between them.
- Cut the guide rail to the required length.
- Mark marks for future fastenings, marking them with a pencil every 60-80 cm.
- Drill holes with a 6 mm drill (depth - 5-6 cm).
- Start work from the corner posts, laying three slats: at the level of the knee, hip, shoulder. Maintain an interval of 50 cm between them.
- Hammer the slats with dowels. Tighten with self-tapping screws, having first threaded plastic choppers onto the guides.
- Create a row of vertical slats.
- Pre-tighten the cord so that the sheathing subsequently lies flat.
- Mount and secure the remaining beams.
Do-it-yourself clapboard cladding: step-by-step instructions for preparation and installation
Preparatory work step by step using the example of eurolining:
- Seal joints, cracks, in external fencing and walls.
- Remove protruding pieces of reinforcement and significant bumps.
- Waterproof all walls, flooring, ceiling.
- Insulate if necessary by choosing foam foil or polyethylene.
- Make a sheathing.
- Place lighting fixtures, switches, sockets, i.e., at the required points. conduct electrical wiring, mount it on the sheathing.
- Place insulation between the frame slats.
- Additionally, lay a layer of membrane vapor barrier.
- If the frame and adjacent elements are wooden, then it is necessary to treat it with fire retardants and antiseptics to enhance the protective properties.
- Check the degree of dryness of the room, whether there are any risks of fire when finishing the balcony with panels of wooden lining, MDF.
If the room is prepared for cladding, restoration work has been carried out on the dilapidated balcony, all frame elements have been treated with a protective compound, then you can proceed directly to finishing the balcony with lining on your own.
It is more expedient to start the cladding from the ceiling
Step by step steps:
- Start installation from the ceiling. Attach the first lamella to the corner of the wall using screws and nails.
- Secure all subsequent slats with clamps. Connect tightly using a block of optimal length so that there are no gaps.
- Lay 5-7 lamellas, check the evenness with a level, tap with a hammer to avoid leaving gaps.
- Trim the last column so that it matches the width of the balcony (cut the slats if necessary).
- Secure with nails and self-tapping screws all the way through.
- After covering the ceiling, you can move on to the walls using the same technology, installing the first batch of slats from the corner, checking the vertical position with a level.
- Cover the entire area of the walls with slats, leading the wires under the socket of the lamp (switch).
- Move on to cladding door and window openings, adjusting the boards to size, aligning them using a level. If desired, use polymer or modular slopes to match the shade of the lining.
- Lay the floor, starting from the most distant wall, moving to the exit from the loggia using the same technology as for the ceiling with walls.
- Cover the laid eurolining with a protective tinting varnish at the final stage.
Installation of lining on walls
The eurolining is held well by clamps, fixed on one side to the ledge, and on the other to the sheathing.
It is important to adjust all elements with a hammer, tightly joining each other. Lastly, horizontal joints are covered with skirting boards, and vertical joints with corners.
How to cover a balcony with clapboard?
All stages of the operation can be considered using the example of vertical installation of panels.
Clamps or hidden fastening
- First, they are engaged in covering the area under the window frame. Cut the lining according to the required length. Remove the tenon from the first element with a jigsaw or hacksaw, apply it to the corner, and check its vertical position.
- Then the bar is fixed with clamps. Another option is to use nails driven obliquely into the groove. The first method has an advantage, since in this case the lining remains without damage. It will not be possible to learn how to drive nails correctly the first time.
- The easiest way to install it on clamps is to temporarily fix the panel with nails on both guides, and then insert the bracket into the groove, fixing it with screws or nails. After the operation, the temporary fastener is removed.
- The next panel is driven all the way with a mallet, then proceed in a similar way. The last plank is cut lengthwise so that it fits into place without any problems. Fix it with nails or self-tapping screws.
Fixing the lining on high walls is done in a similar way, but there is one exception. If the length of the lining is insufficient, then it is increased by extension.
- The long panel is fastened so that its edge reaches half of the beam. A short element is attached behind it.
- Using a similar scheme, they move on to the next stripes, but act “staggered” - they alternate (swap) long and short strips.
Open installation of lining
How to cover a balcony with clapboard quickly, simply, but efficiently? There is a simple method that does not require skills in working with clamps, or masterly handling of nails driven into grooves. This option is not very attractive, but it has a right to exist. In this case, no tricks are taken. The lining is fixed to the timber with nails or self-tapping screws: the former are driven in, the latter are screwed, but directly into the canvas, into its front side.
The big disadvantage is the attachment points that remain visible, but there is a way to mitigate this disadvantage. Hats deeply recessed into the wood can be hidden if you make the “correct” putty from PVA and tiny shavings that look more like dust. This “camouflage” allows you to hide unsightly holes from view, resulting in an almost perfect surface.
Technology for self-cladding a balcony with clapboard
Before you start covering a loggia or balcony with clapboard, you should immediately determine how much material will be needed. To do this, you will have to measure the perimeter of the room and its height. From this number you need to subtract the area of the windows. Keep in mind that, as a rule, trimmings remain. Therefore, you need to make some reserve in order to avoid repeated trips to the store or ordering delivery - which takes time + money.
Don’t forget to include guide rails (sheathing) in the estimate. As a rule, they are placed at a distance from each other - 60 cm. To correctly calculate the required number of slats, you need to divide the height, for example, of a balcony by 60, and multiply the resulting figure by the perimeter of the balcony.
Note: it is recommended to choose wooden lining from coniferous wood - it is more durable and stronger. Covering a balcony with clapboard is possible only if the balcony is glazed, otherwise sudden changes in temperature and high humidity will lead to unpredictable consequences.