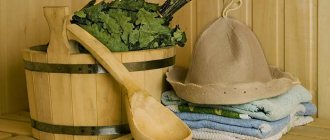
Features of heat transfer of a frame bath
Frame buildings belong to inertia-free thermal systems, that is, to houses with low heat capacity.
What is the meaning of this parameter? It reflects the ability of building components to accumulate thermal energy. Accumulated by the walls and foundation, heat is released into the room, ensuring, on the one hand, slow cooling of the space when the heating is turned off, and on the other hand, slow heating to the required temperature. Frame sauna is economical and prefabricated
A house built on the principle of a frame filled with thermal insulation heats up quickly and cools down just as quickly. There are no strong (in the traditional sense) walls, and the insulation for a frame bathhouse does not transmit energy well, but it also accumulates it in itself poorly.
During operation of the heating system, the level of heat saving of such an object is very high and is usually close to the standard of a “passive house”. However, the need for constant heating brings serious inconvenience to permanent residence in buildings of this type. But no one lives in bathhouses! The heating rate of the steam room is much more important here. It is for such objects that low inertia is rather a positive factor than a negative one.
Bath insulation methods
Insulation of wooden buildings is carried out using three methods: during construction, external and internal.
Insulation during construction
When building a bathhouse from timber, high thermal insulation properties are ensured by laying special materials between the beams. To do this, use flax, moss, jute tape or burlap.
When building a bathhouse from timber, high thermal insulation properties are ensured by laying special materials between the beams. To do this, use flax, moss, jute tape or burlap. After the structure shrinks and the logs dry, additional caulking is done. At the same time, the wood is carefully inspected and all cracks and cracks are closed.
External insulation
For external insulation, a frame system is installed (read about the insulation features of a frame bath here), in the spaces of which a heat insulator is placed. But this method is used relatively rarely, since a wooden frame has an aesthetic appearance, and when treated with special protective compounds, it is quite durable, fireproof and immune to parasites and rodents.
Internal insulation
Most often, internal insulation of a bath complex is carried out.
Most often, internal insulation of a bath complex is carried out. The frame method is also used for this. This is due to the fact that for interior decoration, wooden boards or slats are traditionally used, the installation of which requires the presence of a power frame.
When internally insulating a bathhouse, much attention is paid to the environmental friendliness and safety of materials, especially in places where the heat-insulating layer comes into contact with heating elements or stoves
Thermal insulators for internal insulation
Most often, when insulating the interior of a bath complex, mineral wool and polyurethane foam are used. This is due to the high performance characteristics and environmental friendliness of the materials. Regardless of the type of heat insulator, it is necessary to create a thermal energy shielding layer of foil. Some manufacturers produce special types of cotton wool with a layer of foil already applied. But cotton wool materials, due to their strong moisture absorption, require significant effort to create a waterproofing and vapor barrier layer.
Most often, when insulating the interior of a bath complex, mineral wool and polyurethane foam are used.
When insulating with polyurethane foam, there is no need to create a waterproofing and vapor barrier layer, since vapor and waterproofing is provided due to the properties of a heat insulator, the outer surface of which has the functions of a vapor barrier membrane (removes moisture from the inside, while preventing its penetration from the outside).
A very significant problem with wooden buildings is shrinkage and some shrinkage of wood. In this case, gaps may form between the beams or cracks in the beams themselves may appear. These cracks were sealed with additional caulking. But, if polyurethane foam is used as internal insulation, then this procedure can be omitted. PPU from Ecotermix is a plastic material that can stretch slightly even after hardening without disturbing the solidity of the heat-insulating layer.
We recommend finding out from our client the result of insulating a sauna and bathhouse with Ecotermix:
Why does a bathhouse need insulation?
A bathhouse needs insulation like no other room.
The greater the difference between the temperatures inside and outside the building, the greater the loss of thermal energy (the more often you have to run for firewood and let off steam). For comparison: the temperature difference in Moscow between an apartment and the street is only 50 degrees in winter.
To insulate a bath, it is preferable to choose penoplex material. Read more about choosing penoplex in this article.
Penoplex is a modern building material used to insulate almost all (except high-temperature) parts of a building, starting with the foundation and basement, continuing with the walls inside and the facade, and ending with the attic and roof.
Penoplex is a close relative of polystyrene foam, but it is made using a different technology, and its physical, mechanical and chemical qualities far exceed those of polystyrene foam.
Penoplex is stronger than polystyrene foam, which is especially important for insulating facades and floors. In terms of thermal conductivity, too - the lower the thermal conductivity, the better the temperature is maintained, and this quality is simply key in our case. In terms of temperature conditions, they are equal, but in terms of water absorption, penoplex loses, but there is no need to be afraid of the figure of 0.4% per day, because in 28 days this figure increases to only 0.5%!
Take note: for wet rooms, the manufacturer recommends choosing “Penoplex-Comfort” - this is a universal brand that is not susceptible to fungal infection. It differs from other brands of this insulation only in slightly less strength and reduced water absorption.
Floor installation and selection of tools
The work of arranging the floor in a bathhouse requires the use of a variety of tools. Since in most cases they are made of wood (this is especially true for steam rooms), you need to use a regular carpentry kit. The floor can be made with water passing through cracks or into one separate drain. This drain is directed in one direction, otherwise the stability of the water flow cannot be guaranteed. If the floor is formed without ducts, there is a permanent flooring underneath it, which must be replaced only at the end of its working life.
To make the surface warmer, the gutter and the drain leading into it are placed in the lowest place. The design of removable floors implies the possibility of periodic disassembly when the bathhouse is not in use. When forming the screed, you will need a cement trowel and special rakes, trowels and spatulas of various sizes. The evenness of structures is ensured using a level (hydraulic or laser).
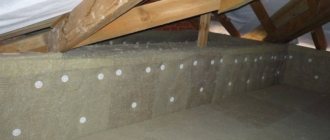
Insulation of ceilings and floors
There are practically no specific differences between the insulation of ceilings in frame baths and the work in buildings of other types. On flat ceilings, the main insulating layer is installed from the inside of the steam room, and in the case of hemmed ceilings - from above, from the side of the under-roof space.
On the inside, a reflective layer (foil material) and a thermal insulator located behind it (mineral wool or EPS boards) are used. Regardless of the type of insulation, there is an air gap between the infrared screen and the main layer. On the side of the under-roof space, the wool is protected by a waterproofing membrane.
When installing the bath floor, do not forget about the drain
False ceilings can be insulated with the same materials as floor ceilings, but bulk mixtures (most often eco-wool) are usually preferred for their installation.
Insulation of the floor in a budget frame bathhouse is carried out, as a rule, using cellular self-growing concrete. In more expensive buildings, options are possible for installing a heated floor on the ground, providing a concrete screed on top of an EPS layer. A finishing plank floor made from a jointed “magpie” is laid on the concrete, which is the subfloor.
Insulation of frame building walls
They begin to equip the thermal protection of a frame bathhouse building simultaneously with the construction of its walls. The fact is that the use of this technology assumes that the heat insulator is also a structural material. When building a panel bathhouse from insulation with your own hands, its layers are laid out between the load-bearing elements of the frame. A vapor barrier is installed on top of it.
At the end of the insulation work, you get something like a pie, in the center of which there is a heat-insulating material, lined with a vapor barrier on the inside, and waterproofing on the outside.
The outer layer of the cake will be represented by decorative finishing inside the bathhouses, and on the outside - by facade cladding. Both of these layers will not only provide additional thermal protection, but will also serve as a structural element that will enhance the strength of the entire building.
Among professionals, the best option is considered to be laying two layers of heat-insulating material into the bath frame. In this case, it is advisable to make the first of them from tile insulation, and the second from roll insulation. As a result, such a thickness of the walls of a frame bath can reliably protect the premises from heat loss.
Types of insulation
There are various types of insulation materials on the modern building materials market. And before you make a choice in favor of any particular one, remember that obtaining a healing effect will directly depend on the material you choose.
A fairly low hygroscopicity and thermal conductivity is an important requirement for finishing, because the lower it is, the less heat the material transmits through itself. All insulation materials available on the construction market are divided into several groups. All insulation materials available on the construction market are divided into several groups
All insulation materials available on the construction market are divided into several groups.
Organic
They have been known since ancient times. Our grandfathers and great-grandfathers also used this material at hand to preserve and retain heat in the bathhouse.
In the production of organic insulation, natural raw materials are used:
- regular flax or resin-treated tow;
- moss;
- sawdust from wood processing;
- felt or jute.
Their undeniable advantage is that they are all of natural origin, but the disadvantage is a high level of moisture absorption, fire hazard, difficulty in use and vulnerability to rodents and harmful microorganisms.
Semi-organic
In the production of this material, natural raw materials are used, but adhesives are used during the technological process. This insulation is not suitable for finishing steam rooms. These include chipboard and peat boards.
Synthetic
They are divided into several types.
Polymer, which includes polystyrene foam, polystyrene foam, penofol, polyurethane foam. It is strictly forbidden to use such materials when sealing a steam room or near a stove, because they can easily catch fire and emit harmful gases when burned. But when used in adjacent rooms, they are very suitable. In steam rooms, only penofol is allowed, which is covered with a layer of aluminum foil and prevents heat from escaping.
Currently, leading manufacturers of thermal insulation materials have found a suitable option for insulating baths and steam rooms. Now special mineral wool based on stone or fiberglass is produced. It is used for insulating surfaces made of any material. This product is produced using modern technology and is made from broken glass and sand.
In the production of stone wool, rocks similar to the gabbro-basalt group are used. This raw material is melted at high temperature and fibers are obtained from the liquid mass, which are then formed into slabs of various sizes. The resulting product does not smolder, there is no smoke, no toxic substances are released and it prevents the spread of fire.
Mineral wool, produced on the basis of glass fiber, has elastic and horizontally located fibers, due to which the product is firm and elastic. It is easily mounted in a structure and is able to fill all areas of empty space. The service life of this product is at least 50 years, but over time it shrinks. This happens due to poor quality work performed. Stone wool does not lend itself to deformation; with proper installation, it can last 50 years, and some types up to 100.
Currently, fiberglass mats from such manufacturers as Ursa, Isover, Knauf and stone wool insulation materials Rockwool and Technonikol are widely used on the Russian market.
When insulating steam rooms, the material must withstand high temperatures and not be affected by fire, so it is better to use foil plates. The surface on which the layer of aluminum foil is applied must be directed indoors. It will insulate the material, reflect heat and prevent the material from getting wet. When installing it, there is no need to use a vapor barrier.
It is worth noting that today bathhouses made from blocks are most often insulated with mineral wool, penoplex, foam glass and ecowool. You can choose the option that suits you best.
Useful tips
The walls and ceiling of a bathhouse building must be insulated according to the following principles:
- Thermal insulators must be in close contact with the wall surface to reduce the risk of internal moisture and cold air entering.
- A ventilation gap is needed on top of the insulation to dry it.
- All floors and other wooden elements must be treated with an antiseptic composition to prevent premature destruction of the material.
- Materials with a low level of heat and moisture resistance cannot be used in the steam room.
- Insulation materials should be selected from those that do not deform under the influence of moisture and high temperatures and do not emit hazardous chemicals.
Necessary properties of insulation for a bath:
- heat resistance;
- moisture resistance;
- environmental friendliness;
- Fire safety.
Natural insulation materials require special treatment before use. Otherwise, mold, mildew and harmful insects may soon appear. In this case, it is more advisable to use artificial insulation.
Instructions on how to insulate a bathhouse with foam plastic
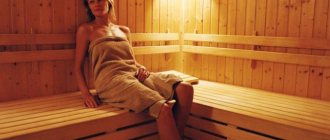
The Russian bath is a tradition of the entire nation as a whole. It not only serves as a place for washing the body, but is also used as a place where a person rests his soul and clears himself of various thoughts. Besides, visiting a bathhouse has a great effect on human health. In order to make visiting the bathhouse as comfortable as possible, it is necessary to carefully take care of the structure of the entire structure as a whole.
Moreover, special attention must be paid to the stage of insulation and waterproofing. In this article we will talk about this type of insulation, such as polystyrene foam.
The photo shows an example of insulating a bathhouse with foam plastic.
Can I use foam?
If it was decided to insulate the bathhouse with polystyrene foam, then this type of insulation should be used when installing external insulation of the walls. Only in this particular case will this type of insulation work one hundred percent. But, it is worth considering the fact that this type of insulation almost completely loses its properties due to humidity. This influences the fact that the outer side of the building is insulated with polystyrene foam, although it is also often humid outside, therefore, you will need to take care of waterproofing the material.
Polystyrene foam is available on the construction market in several versions:
Experts say that insulating a bathhouse with foam plastic is harmless, but only if the foam plastic is not used to insulate the steam room. When the material is exposed to high temperatures, it releases toxic substances that can have a negative impact on human health. Consequently, polystyrene foam can be used, but only as external insulation or for insulating the dressing room. Read an overview of the types of doors for wooden baths.
Insulating the foundation with foam plastic
Since polystyrene foam has excellent thermal insulation properties and is not afraid of moisture, it is successfully used for thermal insulation of foundations. True, to protect it from mechanical loads, a protective partition is needed. It is made either from boards, a cheaper but also much less durable option, or from brick (a half-brick wall).
Insulating the foundation with foam plastic
For loams and clayey soils, insulating the foundation with polystyrene foam is an almost ideal option. Due to the fact that polystyrene foam almost does not absorb water, it protects the foundation from winter and spring heaving: it simply does not allow water to seep through and be absorbed into the foundation material. It is not recommended to use polystyrene foam only if flooding often occurs with a high groundwater level: water can seep under the insulation layer, because perfect tightness is almost impossible to achieve.
Scheme of foam insulation of a strip foundation
With simple foundation geometry, foam slabs are most often chosen. For central Russia, their thickness should be at least 5 cm. But for better thermal insulation in the corners of the foundation, it is better to lay slabs 10 cm thick - in these places the heat loss is the most significant.
Preparatory work for insulating the foundation with foam plastic
The soil around the foundation is removed to the freezing depth (preferably a little lower), the walls are cleaned and primed. You can buy a primer on the market, or make it yourself: you will need molten bitumen, to which you need to add the same amount of diesel fuel or gasoline. Apply the resulting mixture to the foundation and wait until it dries (about 1 hour). A layer of waterproofing must be applied to the primed foundation. This can be liquid rubber (applied with a brush) or rolled bitumen materials (fused using a torch). Then they begin installing the foam.
Installation of foam plastic slabs on the foundation
It is better to lay the bottom row of slabs on a rigid base. If you are just planning a foundation, you can make a special ledge on which the foam plates will rest. If the foundation is already in place, but there is no protrusion, the gravel pad on which the foundation itself stands can serve as a stop.
Foam boards must be secured either with bitumen-polymer mastic or with polyurethane glue. But the glue should not contain acetone, gasoline and toluene, as they destroy polystyrene. The adhesive is applied pointwise or to the entire surface of the slab, but the joints must be glued. Some manufacturers make slabs with an L-shaped lock (this also needs to be lubricated with adhesive), which makes the connection of the slabs more airtight and reliable. With this connection, cold bridges practically do not form and the tightness of the entire insulation becomes almost ideal.
Grooved foam (with selected quarter) - avoids the appearance of cold bridges
Sometimes it is recommended to lay the slabs in two layers, shifting the seams relative to each other - in this way, losses through the joints of polystyrene slabs are also reduced. But this method has its opponents: they say that water will leak between the two layers of foam. Then the thermal insulation properties will deteriorate significantly. This possibility, of course, exists, especially with vertical soil displacements (shrinkage), but how great it is is difficult to judge.
After the foam has been laid around the entire perimeter to the required thickness, you need to apply another layer of waterproofing material on top (the same bitumen roll materials or liquid rubber). You can already build a protective brick wall on top. Sometimes boards are used. A good option is geotextiles. It also copes very well with loads from soil (it is laid under asphalt when constructing highways). Other options are possible. The main thing is to protect the foam from soil loads.
The last stage of thermal and waterproofing of the foundation (this is exactly how the result turns out if you use polystyrene foam) is the installation of a blind area. In general, thermal insulation of the foundation with foam plastic is quite a troublesome task, but as a result, your foundation is protected from moisture, and you don’t have to worry about soil heaving, and you spend much less on heating.
Technology
No matter how good the material is, failure to adhere to the accuracy of the installation technology can, over time, negatively affect the quality of heat conservation.
Therefore, having prepared the necessary material, carefully study the step-by-step instructions.
Frame installation
Required:
- foam sheets;
- metal profile or wooden blocks 50x50;
- film for vapor barrier.
Stages:
- Clean the ceiling from dirt and dust, eliminate unevenness, if any. Treat the surface with an antiseptic.
- Remove electrical wiring. To do this, use a special protective corrugation.
- Attach beams or a profile to the ceiling at a distance of 50 cm. Make sure that the shape of the attached beams takes on the appearance of a large cage, each cell of which should correspond in size to the foam sheet.
- Install foam plastic using dowels or glue.
- Treat joints and cracks with polyurethane foam.
- Attach a vapor barrier layer to the insulation.
- Finally, start installing drywall, wood or other material that matches the overall interior.
Adhesive mounting option
Required:
- sheets of foam plastic in an amount corresponding to the total area of the ceiling;
- adhesive composition.
Stages:
- Clean the ceiling, treat it with an antiseptic and prime it for a better bond between the glue and the surface.
- Prepare an adhesive composition or use a ready-made one.
- Apply glue to the foam sheet (in continuous lines along the edge and in splashes in the center of the board). Press the foam sheet as firmly as possible against the ceiling and hold for a few seconds.
- If you are insulating the ceiling using polystyrene foam, then all the sheets should be prepared in advance: scratch with an iron brush along the working side (the one on which you will apply the adhesive).
- Start gluing the sheets from the middle of the ceiling in a checkerboard pattern.
- For greater reliability, the foam sheets can be additionally attached with dowels after the glue has dried.
- Glue the reinforced mesh on top of the foam and putty.
Insulation under the screed
If the bathhouse is built of brick, most likely the ceilings are made of reinforced concrete. Also, sometimes there is a need to make a floor on the ground. In this case, insulation is performed under the screed. When using this technology, the load on the insulation increases, so you should follow the following recommendations:
- choose material grade PSB-S 35 (foam plastic) or EPPS 35 (penoplex);
- the thickness of the screed is prescribed 30-50 mm (when using the “warm floor” system - more);
- when using polystyrene foam, the screed is reinforced with wire mesh with a diameter of 3-4 mm and cells of 50 by 50 mm.
If it is necessary to insulate the floor on the ground, then the base is not only leveled, but also compacted. The floor pie in this case looks like this:
- compacted soil;
- sand-gravel mixture or medium-sized sand (20-30 cm);
- concrete preparation from lean concrete B7.5—B12.5;
- waterproofing;
- insulation;
- vapor barrier;
- screed with reinforcing mesh.
The concrete floor consists of the following layers:
- reinforced concrete slab;
- waterproofing;
- insulation;
- vapor barrier;
- screed (with or without reinforcement).
Insulation of a bathhouse begins with clearing and leveling the base. All cracks in the concrete floor must be covered with cement mortar. After this, special leveling mixtures can be used. A line is drawn on the wall to mark the finished floor. This is required in order to control evenness.
Waterproofing is placed on the prepared base. It is mounted with an overlap of 10 cm (including on walls), gluing the joints with a special film.
Polystyrene foam or polystyrene foam is laid on glue. The solution is applied only along the edges and to several points in the center
When purchasing glue, it is important to check that it does not contain solvents or other substances hazardous to the insulation. The slabs are mounted with bandaging of the seams (in a staggered manner)
A gap of 1-2 cm is provided between the polystyrene and the wall, taking into account the expansion of the material during operation; this space is filled with damper tape. Before pouring the screed, the slabs are secured to the base using disc dowels.
Features of insulation products
Manufacturers offer various membrane films that protect materials from high humidity. Experienced builders recommend purchasing vapor barrier upholstery with a reflective foil layer that does not allow heat to escape. The following types with a foil layer are distinguished:
- polypropylene;
- kraft paper;
- roofing felt;
- membrane;
- foil;
- coating
This film is installed with a large overlap (10-15 cm), and the joints are taped with foil tape for construction work.
In specialized departments of stores there is a wide selection of waterproofing products - foil-coated kraft paper, construction membrane and other products. Although you can save money and purchase regular plastic film or roofing felt.
We take rolled foil polystyrene foam approximately 3-5 mm thick. and shoot it with a furniture stapler on the ceiling from the side of the steam room. We install the foil with an overlap of 5 centimeters. All joints must be glued with foil tape. Be sure to lower the foil onto the walls, 10 centimeters down. The foil will protect the ceiling well from the effects of steam.
You need to sew bars onto it, and then on them some kind of decorative finishing (for example, lining). It is imperative to make a gap (1.5-3 cm) between the foil and the final finish, since the air in this gap is a very good heat insulator.
"TechnoNIKOL" on top of penoplex
The final point in insulating the ceiling is waterproofing. What is it and what is it for? And it is needed in order to release into the attic that steam or moisture that nevertheless got into the insulation and not let it in from the outside. For this purpose, there are special anti-condensation films, as well as polymer films - membranes (a topic for a separate discussion). An example of such material is isospan. You can view and navigate prices here.
We spread such a film over the TechnoNIKOL insulation and shoot it with a stapler around the perimeter and at the bases of the trusses. We seal the joints with tape. Well, the very last stage - this film must be protected. To do this, we lay down edged boards so that you can safely walk around the attic without damaging the waterproofing. All.
What is the conclusion from this? Insulating the ceiling of a bathhouse with your own hands is not such a difficult task. The main thing is to have a desire, a certain amount in your pocket, hands growing where they should be and... I’ve said a lot of things, I’ll finish. And finally, an interesting video about another method of insulating a bath ceiling...
We suggest you familiarize yourself with How to remove water from the floor in a bathhouse - My site
Wisdom Quote: Verbosity usually breeds boredom.
Foundation
Principles of work
To insulate a bathhouse, you do not need to have any practical skills. It is enough to study the theory and perform the work as indicated in the instructions.
Thermal insulation of walls
Peculiarities:
- Thermal insulation must be carried out at the construction stage, when the supports are erected.
- Mineral wool slabs are located in the central part of the frame walls, covered on both sides with layers of vapor barrier.
- At the last stage, the surfaces are sheathed with OSB boards and undergo decorative finishing.
The best option for thermal insulation of walls in a bathhouse is the use of two layers of insulation
It is important that one is in the form of slabs, the other - a roll.
Insulation of walls near the stove
Insulation features:
- Surfaces around the oven must be protected from high temperatures.
- You can lay a stainless steel sheet on the floor.
- The oven should be located at a distance of 1 meter from the opposite surface.
- The protective layer can be installed over decorative trim or over thermal insulation.
Asbestos boards can be used to protect surrounding surfaces, but many bath attendants believe that this material is harmful to the body. It is better to choose an analogue - basalt fabric. A reflective sheet of metal can be attached on top of it, which will screen thermal energy.
Thermal insulation of ceiling and floor
Floor insulation process:
- Fill the soil with a screed.
- Roll out a roll of roofing material on top, cut it across the entire area of the screed.
- Lay out thermal insulation plates.
- Spread a layer of waterproofing on top.
All that remains is to pour the last layer of screed and wait for it to dry completely before performing the next work.
Ceiling insulation:
- Use a construction stapler to secure the vapor barrier layer to the ceiling.
- Lay insulation.
- Secure the final layer of vapor barrier.
All that remains is to fill the decorative lining for the ceiling in the bathhouse.
Protecting insulation from moisture ingress
For protection you can use:
- foil;
- special film made of fabric.
The most important thing is that there is ventilation inside the wall. Without it, condensation will accumulate, which will lead to the destruction of thermal insulation and the formation of mold on the wood.
Doesn’t burn in fire and doesn’t sink in water: simple insulation of the floor in a bathhouse with expanded clay
Ceiling insulation with expanded clay is used in bathhouses that have under-roof spaces (attics, attics). The properties of expanded clay are in many ways similar to those of mineral wool. The same advantages: environmental friendliness, resistance to high temperatures... and the same disadvantage: the material absorbs moisture too well. From below it must be protected from the penetration of steam, and from above - from the effects of atmospheric and condensation moisture.
In addition, the fired granules of this heat insulator have much lower resistance to heat transfer than mineral wool. For this reason, the required thickness of the effective embankment is at least 30 cm.
This option is suitable for large steam rooms. Since the floor beams above spacious rooms have a significant vertical section, deep natural niches are formed for filling the required amount of expanded clay.
What to consider when buying insulation?
Having weighed all the pros and cons, it becomes clear that insulating a bathhouse with foam plastic is the best option. The amount of insulation you need to purchase will depend on several factors. Firstly, the climate zone: in a warmer climate, much less material will be required than in regions where the thermometer can drop to -20 degrees or below. The material of the walls is also an important factor: stone structures retain heat worse than wooden ones, which means they will require more insulation.
In addition to the material of the walls, the baths differ in type: in addition to the Russian “black” and “white” baths, there are the Finnish sauna, the German “Sanarium”, the Turkish “Hamam” and the Japanese “Ofuro”. Each of them has its own specifics, which must be taken into account when insulating a structure.
Regardless of the type of bathhouse, its geographical location and wall material, foam insulation must be purchased with a slight excess (10-15% of the calculated quantity), the same rule should be followed when purchasing materials for securing the insulation. This approach will allow you to avoid shortages of material in the event of defects or damage that occur during the execution of work.
After you insulate your steam room with polystyrene foam, you will be able to feel from your own experience how much the quality of the bathing procedure has improved, since it will be possible to heat the steam room to 100 degrees and higher much faster than before (the exact time depends on the area of the room). At the same time, much less fuel will be spent on kindling. Owners of bathhouses insulated with foam plastic can only wish for light steam!
Types of ceilings and their insulation
Construction and protection of the ceiling structure should be done after the walls and roof have been erected. This way you will protect the building from the effects of unfavorable atmospheric conditions, the appearance of fungus and mold.
Before you begin, pay attention to the structure of the ceiling itself. He can be:
- flat (in small buildings);
- hemmed (for baths of large areas and volumes);
- panel (has superiority over the previous two).
In any case, the ceiling must have high-quality heat and vapor insulation - without cracks and with well-taped joints.
Bath roof installation
Flat ceiling
A flat ceiling is the best option when you need to insulate the ceiling in a small bathhouse without an attic. It can be easily and quickly installed, but in the long term it has a significant drawback - when you go to the ceiling, you can easily damage such thermal insulation.
The maximum span width that can be covered with this ceiling is 2.5 meters. Flooring boards (their thickness should be at least 5 cm) are placed with emphasis on the walls. Vapor barrier material is spread over them, and then loose or mineral insulation.
Flat ceilings are made in small baths
Hemmed construction
This type of ceiling assumes the presence of an attic space and is therefore considered more practical. The name says that this ceiling must be hemmed or attached to something. For this purpose, it is planned to create a load-bearing frame from ceiling beams.
Further work is carried out in the following order:
- Using a stapler or additional slats, attach the vapor barrier material to the bottom of the beams (the main thing is to do it on the right side). The canvases should be overlapped and the seams should be taped with special mounting tape. Don't forget to make an allowance for the walls along the edges of the film (15-20 cm).
- Along the vapor barrier layer, sew the beams from below with an edged board or clapboard.
- On top of the vapor barrier (from the attic side), lay insulation between the beams on the bathhouse ceiling.
- Cover the thermal insulation on top with waterproofing film.
- Lay edged or unedged boards over the beams. This will give you the floor of the attic space.
False ceiling with sawdust insulation
Panel option
A panel ceiling is a structure consisting of identical panels. In the process of connecting them, a solid warm ceiling is formed. The complexity of installation means that several people must participate in it.
So, we insulate the bathhouse ceiling with our own hands in the following order:
- First you need to make shields. To do this, choose a flat place and take three template measurements in advance (length 50 cm). To make one panel you will need 2 beams and boards 60 cm long.
- Lay the beams parallel to each other at a distance of 50 cm.
- Nail or screw the boards to them with self-tapping screws. Make sure that their ends protrude 5 cm above the outer edge of the beam on each side. When joining the shields, such “visors” form a pocket that will need to be filled with heat-insulating material.
- Turn over the knocked down panel and lay a waterproofing film over its surface on the inside. Fastening is done using a stapler. You can nail two slanting slats on top of the shield, so it will be easier for you to transport it.
- Assemble the panels on the walls of the bathhouse. Place the bathhouse ceiling insulation and vapor barrier layer into the boxes and the pockets formed between them. Secure the panels at the top using cross-section boards of the subfloor. They are nailed to the bars of the shield. The first board should cover all the laid panels with its length. The second and third boards can be composite, then a solid board is nailed again, then a composite one, etc.
- Install the roof rafter system.
- Cover the inner surface of the ceiling with decorative finishing material, such as clapboard.
Panel boards are prepared in advance
Types and design features
First you need to find out what kind of roof you have - with or without an attic. Structurally similar options for buildings made of logs and panels. They have:
- steam insulation;
- insulation;
- hemming boards;
- beams
- sheathing
Vapor barrier is applied to the wall and ceiling, then timber, then insulation. You can use basalt wool in the form of mats, then again a layer of vapor barrier, then a block and fastening the lining. As an option, respectively, 40 mm timber and 40 mm insulation. You don't need too much insulation. Excessive consumption of materials in this case is inappropriate.
On the ceiling, the structure must be made with a slope to collect condensation. As a result, there remains space under the lining, allowing the bathhouse to dry out. The power of a modern stove is enough to warm up a bathhouse well. Ideally, the steam room is dried by ventilation and a fuel-processing furnace.
If there is no attic, then you need to perform additional steps:
- coat the entire lining with clay with a layer of up to two centimeters to reduce heat loss;
- sprinkle the coating with a mixture of cement and wood chips (you can use slag up to 15 cm - this measure helps eliminate condensation).
If you want to make a properly functioning steam room, then you first need to take care of vapor barrier (not waterproofing with vapor permeability) of the ceiling to create a steam pocket up to the level of the top edge of the door to retain steam and create humidity in the region of 60%.
Vapor barrier of floor beams and the entire ceiling pie is a consequence, not a cause. Ceiling insulation without foil is completely irrelevant, since the steam room will not perform the functions that are assigned to it. If you need a steam bath, and not a sauna, you will have to open the casing and do a vapor barrier on the ceiling. If this is not done on time, then after a season or two you will have to replace damp insulation and rotten beams.
To protect wall structures, regardless of what they are made of, it is necessary to insulate the outside to prevent moisture from entering in the form of condensation at the dew point into the material. For the Russian type of bathhouse, insulating the walls from the inside is not necessary, since it is possible to create a regime of 60° and 60% even with leaky walls, but with a well-waterproofed ceiling and a voluminous brick stove with a powerful thermal core inside.
Flat ceiling
He is not seen as often as before. The use of hewn round timber is common. This method was previously considered the most profitable - people only had to go into the forest and chop everything they needed for construction themselves. This is currently the most expensive option.
There are several installation options.
- Along the crowns of the log house, if the room area is small (length no more than 2.5 m). Boards of small thickness (50 mm) are used as flooring; an even more economical method is edged tongue-and-groove options (25 mm).
- There is an interesting option for covering with unedged sanded boards. They are laid in 2 levels. Gaps and irregularities of the first level are covered by the second level.
- On the floor beams. With this option, the area of the room can be larger. An accent on the beams will add flair and look great.
- On a supporting frame made of slats. Suitable for small spaces and used less frequently. Make it easier. But if the room has an attic, then it cannot be used. The roof may not be able to handle the heavy load.
We suggest you familiarize yourself with How to insulate the ceiling of a bathhouse with earth
The process takes place in several steps.
- The attic is lined with a vapor barrier film (PIP) with an overlap of 10-15 cm (foil surface down).
- Mineral wool is placed on top of it (instead, the surface can be covered with expanded clay or covered with a mixture of sawdust and clay).
- The work is completed by laying a waterproofing film (WIP) - roofing felt or polyethylene.
False ceilings
They have load-bearing capacity, are often used as an attic, and their installation will cost you much less.
To make this coating, you need to install the beams in advance. Then boards or panels of tongue-and-groove boards are evenly laid on them. This structure is insulated with fibrous material. The installation process will take place in stages:
- The GIP is taken and laid on the beams from the roof side. This is done overlapping.
- Boards or sheets of plywood are placed on the waterproofing.
- Mineral wool is laid between the beams. Its thickness varies from 150 to 250 mm (depending on the climate of the area). All joints must be covered with another sheet.
- We attach a vapor barrier to the bottom of the beams.
- Then we attach the wood slats.
- At the last stage, the lining is attached.
Having completed all the work, you will receive additional storage space - an attic or attic.
Panel ceiling
It's difficult to do on your own. To begin with, a special structure is made from panels. Then it needs to be fixed on top of the cross beams or on the top of the wall. How the installation works:
- Boards are placed closely on the supports (perpendicular).
- Then we attach narrow boards to the inside of the PP, they will be the sides.
- The next step will be laying the PIP.
- We put ecowool (or any other) into the resulting space of the panels.
- Then you need to put a film of polyethylene or roofing felt.
- The final stage will be the installation of the boards; they will be the future floor.
Our production
Single wall chimneys
Double wall chimneys
Mounting elements
Three ways to insulate a bathhouse
After reading on the forums, I identified three ways for myself to insulate a bathhouse from the outside, on top of the timber.
Method No. 1. Insulating the walls of the bathhouse from the outside with basalt wool. A foil vapor barrier is placed between the timber and the layer of wool. It prevents steam from the bathhouse from saturating the basalt wool and prevents the timber wall from being blown through.
Next comes a layer of basalt wool. For Khanty-Mansi Autonomous Okrug, you can use 100 mm of cotton wool for a bathhouse; this is not a permanent home. There is no need to apply waterproofing over the wool. You just have to take thicker cotton wool, maybe 60 or 85 density. Then it won’t crumble and won’t absorb much moisture from the air.
Insulate the bathhouse from the outside only with non-flammable insulation.
Then the sheathing is sewn onto the slats. I want to cover the outside of the bathhouse with clapboard. My neighbor's house is trimmed like this and painted on top with dark brown paint, and the trim is white. Looks great. I will also paint the bathhouse in different contrasting colors, it won’t be a bathhouse, but a picture.
Method No. 2. Insulating the bathhouse from the outside with polystyrene foam. A neighbor suggested this method to me. His brother has a frame bathhouse, so he insulated it with polystyrene foam. In response to this, I gave him several examples from the experience of forum members when bathhouses with such insulation burned. To which he replied that all the baths are on fire, they are made of wood.
Sooner or later the bathhouse will burn down anyway. Therefore, it should be as cheap as possible, so that later you can build a new bathhouse without large financial costs. To my question about how to insulate a bathhouse with polystyrene foam, since it is a flammable material, the neighbor replied that everyone had nothing. That's the whole conversation.
I will not insulate the bathhouse with polystyrene foam; this is not the kind of material whose vapors I would like to inhale while sitting in my own steam room.
Method No. 3. Insulating the bathhouse from the inside. Many forum users, in response to my question about how to insulate a bathhouse more cheaply, wrote in my thread on the forum that it is possible to insulate a bathhouse from the inside. Everyone agrees on one thing - it is necessary to insulate the bathhouse from the inside with non-flammable material, basalt wool, for example. You cannot insulate a bathhouse with foam plastic from the inside; when heated, it will stink and may even catch fire.
It’s good if you can save the old casing of the steam room and washing room made of hardwood paneling. This will significantly reduce the cost of the internal insulation process.
Therefore, before insulating the bathhouse from the inside, you need to remove the inner lining, do it carefully, and put all the boards in a dry place.
Next, insulation – basalt wool – is installed on the inside of the timber or log. You can mount it in a frame made of wooden blocks 50 by 50 mm. Just insert the sheets of basalt wool tightly, without gaps between the insulation and the bars.
The thickness of the insulation can be made the same as on the outside, 100 mm.
Next, we staple a foil vapor barrier on top, which will protect the basalt wool from steam from the steam room and washing compartment. In addition, the foil reflects part of the radiant energy from the sauna stove back into the steam room.
When insulating a bathhouse from the inside, use a foil vapor barrier on basalt wool.
The main question is, is it possible to insulate a bathhouse from the inside? Of course you can. Because this is not a permanent home. You heat the sauna two or three times a week, why keep it warm all the time?
And if the bathhouse is insulated from the inside, then when the steam room is heated, a good temperature will be reached very quickly, and the outer walls do not need to be heated.
If the bathhouse is insulated from the outside, then during heating it will be necessary to warm up the walls made of logs or timber, only then will the normal bathhouse temperature be established in the steam room.
I have not yet decided which way to insulate the bathhouse - from the outside or from the inside. I have only just decided on the choice of insulation. I will insulate the bathhouse with basalt wool.
I hope that the results of my search will help someone else in the matter of insulating a bathhouse made of logs or timber, like mine.
Victor Naydenov, Lyantor, Khanty-Mansi Autonomous Okrug.
How to choose insulation
Insulating the bathhouse ceiling with penoplex
Let's proceed to the second stage. A logical question arises: what is the best way to insulate the ceiling of a bathhouse? There are many options, but I am describing a specific example. I will talk about how it really is.
Between the bases of the rafters (in the attic) we spread “penofol” (it was simply left over from the warm water floor). Then we lay sheets of extruded polystyrene foam on top. It is not afraid of moisture, has very good thermal insulation, much better than polystyrene foam. We seal all joints between them with polyurethane foam.
We lay Technonikol board insulation on top of the polystyrene foam. It is also an excellent insulation material, which is used to insulate walls, roofs, basements, etc. It is made of mineral wool using basalt and is non-flammable. That's all, the ceiling insulation is done. Go ahead.
Not all products are used for insulation. Plastic products will deform from high temperatures. If you use plywood or fiberboard, then from the hot air they will begin to expand and change shape, accumulating moisture. These products are definitely not suitable. The best way is to finish in several layers:
- The first step is to use an insulating material that prevents water from penetrating.
- Place a second layer of insulation (for example, mineral wool).
- The third level is aluminum foil.
This “multi-layering” holds heat well and does not allow steam to escape for a long time, so heat losses are reduced.
Insulation materials can be divided into the following types:
- fibers;
- plates;
- blocks;
- wall slabs;
- backfill.
And depending on the composition they distinguish:
- Organic such as ecowool.
- Inorganic - mineral wool.
- Expanded polystyrene.
- Other insulation materials are such as technovent and technoblock.
High-quality insulation material must be:
- heat-resistant to prevent fire;
- environmentally friendly (should not emit harmful fumes);
- “breathe” so that water does not collect and condensation does not accumulate;
- resistant to moisture.
Previously, it was customary to use natural raw materials such as moss, clay, sawdust, straw or earth.
Now people have begun to use the most effective coatings. They make all the work easier, even if you are not a professional builder. For example, it is widely used:
- basalt wool;
- expanded clay;
- penoizol;
- ecowool and others.
You can also use polystyrene foam and glass wool. But when heated, the former emits harmful gases and can ignite. A good protective suit is recommended for working with fiberglass.
The question is whether or not to insulate the entire building only inside or on both sides. There are many opinions on this matter, but the truth is in the middle. There are many additional factors you need to know:
- this is a Russian bath or sauna;
- what material is the bathhouse built from?
- what kind of stove does it cost?
To keep the steam inside and not escape outside, you need to achieve a “thermos” effect. Insulation must be both inside and outside the building. To achieve this effect, you will need insulation for the ceiling in the bathhouse. There are different options:
- waterproofing film;
- expanded clay;
- mineral wool or others.
Extruded penoplex, which is most often used in construction, has the following advantages:
- Absolutely does not absorb moisture - using this material as insulation, you save on additional waterproofing equipment. This is especially important when insulating a bath;
- The low coefficient of vapor permeability allows the use of penoplex to insulate the ceiling, especially the section of the roof above the steam room;
- The material retains its original properties even when exposed to critical temperatures - it can withstand differences of more than 125 degrees (from minus to plus);
- The material is very durable and easy to install.
Short-lived and ineffective materials have been replaced by modern, new-generation insulation Penoplex. This is extruded polystyrene foam, which has a dense cellular structure that does not allow moisture to pass through. As a result, the material does not lose its thermal insulation properties in extreme conditions with high humidity and temperature, which are typical for baths, saunas or hammams for 50 years or more.
Penoplex is ideal for insulating the walls of a bathhouse from the inside, as it does not contain harmful toxic substances. Unlike natural materials, insulating a bathhouse made of timber and a log bathhouse using Penoplex® is easy and simple.
Interesting fact: the only bathhouse built in 2006 in Antarctica and included in the Guinness Book of Records is insulated with Penoplex® slabs. On a continent where the thermometer drops below –50 °C at night, a bathhouse can warm up to 120 °C. To insulate the walls, floor and ceiling of the bathhouse, only 25 m3 of Penoplex® slabs were needed.
In order to carry out thermal insulation of a bathhouse yourself, you need to prepare the following set of tools:
- construction tape;
- screwdriver;
- building level and plumb line;
- axe;
- chisel;
- saw or hacksaw;
- hammer;
- jigsaw;
- wire cutters or pliers;
- sharp technical knife;
- electric drill or hammer drill.
We invite you to read: Build a bathhouse from timber with your own hands
In addition to the insulation itself, for work you will need:
- vapor barrier film;
- wooden beam;
- metal rail;
- screws and nails;
- adhesive tape.
The bathhouse usually has: a dressing room, washing rooms, a steam room, a dressing room, and a relaxation room. These rooms have different levels of humidity and temperature during washing. Therefore, how you can insulate a bathhouse inside is determined for each room separately.
According to their mechanical characteristics, insulation materials are divided into bulk, block and tile, matte and fibrous materials.
Plastic-based heat insulators are best used for insulating rooms with low levels of moisture and temperatures. They are not used in the steam room due to their easy flammability and deformation when heated. Cheap and safe organic heat insulators can be used in a steam room only after fire prevention treatment.
Inorganic heat insulators are considered the most practical. These materials are fire resistant and non-hygroscopic. They do not rot and can serve for a long time without losing their basic technical properties.
General rule: the bathhouse is insulated from the inside
When building residential buildings, the main thermal insulation is installed outside, but when building a bathhouse, the situation is exactly the opposite. And the whole point is that the bathhouse is used (heated) periodically, while the house is heated almost all year round.
Therefore, for a bathhouse it becomes important to preserve the generated internal heat given off by the stove, without transferring it to the outside.
If you make external insulation, then the structures of the structure (walls, floor, ceiling) will first warm up, and after they are heated, the air inside the room will begin to warm up. In this case, it will take a very long time to heat the bathhouse, which in turn entails increased consumption of firewood. Read more about insulating a bathhouse from the inside.
Scheme
Insulating a bathhouse from the outside with your own hands (if you still decide)
If you think that internal insulation will not be enough, or you simply want to extend the service life of the bathhouse as much as possible, then you can also do external thermal insulation. External insulation will increase the time the high temperature is maintained inside the bath and reduce the cost of maintaining it.
Due to the fact that when installing external thermal insulation, finishing materials will be required, you will additionally protect your building from the effects of natural phenomena: fog, rain and snow. This protects the bathhouse from excess humidity and extends its service life.
The material from which the bathhouse is built affects the choice of insulation and the nature of the upcoming work.
Baths built from logs (calibrated or regular) require meticulous processing (caulking) of all cracks and cracks. To do this, you can use: sphagnum, jute or tow, flax as natural and environmentally friendly materials, or you can use a special wood sealant.
Inter-crown insulation – flax
If the wall material is timber, then such a bathhouse requires quite serious insulation: for example, mineral wool on a frame made of slats, using wind and vapor protection and subsequent finishing (lining, siding, block house, etc.).
Brick baths or baths made of foam or cinder blocks, foam concrete, etc. must be insulated. All these materials have high thermal conductivity, which in cold climates can cause high heat loss.
The requirements for insulation are similar to baths made of timber, but the final wall thickness must be at least 80 cm. Polystyrene foam boards, polystyrene foam or foam glass can also be used as insulation.