Natural wood
The cut of the log is covered with stain or varnish, after which a clock mechanism is installed on it.
The basis can also be ordinary boards, tightly joined to each other - such a basis is sawed off along the edges to obtain a square, oval or traditionally round shape.
Some craftsmen can make beautiful wall clocks from sheets of ordinary plywood. Arabic and Roman numerals are cut out of it on a machine.
No less interesting are models that have thick branches or pieces of wood at their base. You can make a chronometer that looks like a cuckoo's house from sticks and small branches.
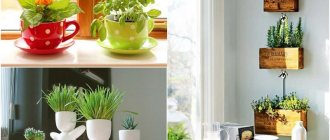
Kitchen decor
An indispensable attribute in the kitchen is a wall clock. It is advisable to make such a clock original, cheerful and in the same style as the apartment’s interior.
Coffee beans, pasta, beans and similar products will decorate the kitchen in ethnic styles, Provence, vintage and the like.
Operating procedure:
- Prepare a base - a circle or rectangle.
- Find the corresponding image in a color magazine or on a plastic napkin.
- Cover the base with primer, paint and dry.
- Apply glue diluted half with water.
- Lay out and level the image, dry.
- Mark the places where the products will be glued.
- Lay out and secure with stained glass paint.
- Apply clear acrylic varnish.
- After drying, it’s time to digitize and mount the mechanism.
Wall clock with cutlery
The dial, with forks and spoons glued to a plastic circle (disc box), is an interesting and fashionable model in a new kitchen.
A hole is drilled in the cut out circle and painted. Washed and degreased utensils are glued to the back side, preferably closer to one another. Then they paint it from a spray can.
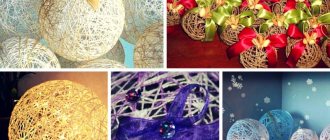
Flower or sun made from plastic spoons
On a circle or oval made of cardboard or plywood, with a center cut out along the diameter of a round clock, spoons with cut-off handles are glued with ceiling or other glue. The first row goes along the outer edge, so that only the hemp of the handles is glued to the cardboard.
The next rows are placed in the spaces between the items of the previous row. The finished product is spray painted with the chosen color, dried and the watch is inserted. It is worth preparing a foam blank for the mechanism.
Tea clock
A bright and elegant design is obtained from 2-3 different light tea sets. Sand a round piece of plywood with a hole in the middle with sandpaper and paint it. Glue the saucers using silicone glue, and later they are added with cups.
Old vinyl records
With the help of beautiful drawings using the decoupage technique it is easy to transform old records. How to properly decorate a wall clock and prepare the surface?
First you need to sand it down with very fine sandpaper to remove any remaining stickers, making the surface as smooth as possible.
Using a jigsaw, the necessary silhouettes are cut out of the plate.
The original “flowing” form can be obtained in a simple way:
- the plate is heated in the oven at 180 degrees for 2 minutes;
- the heated material is placed on a flat wooden surface, then the vinyl is pulled out and bent, giving the desired shape;
- install the clock mechanism in the center.
Wood clock
It’s even easier to make original and stylish wooden clocks for ethnic interior styles:
- take a cut of wood of a suitable shape and size, no more than 3 cm thick;
- clean the bark and unnecessary parts, if necessary, adjust the shape of the future dial;
- make a hole in the center to install the hands and clock mechanism;
- Apply varnish to the surface and let it dry;
- install the mechanism and secure the numbers.
Sea stones, shells
There are often photos of unusual decor of wall clocks made of sea pebbles or shells. To fix such material to the base, use a silicone gun or transparent thick glue.
This product will decorate not only the dining room and kitchen: it looks elegant in a bedroom or living room decorated in a marine style.
Stones and shells are usually glued to the bottom of the base; the edging of the chronometer is made using a thick cord, which can be laid out in waves and decorated with small knots.
We recommend reading:
DIY polymer clay jewelry: review of the best master class with step-by-step instructions for beginners (150 photos of original ideas)DIY polymer clay flowers (120 photos of the best ideas) - simple instructions with full description + master class and video tutorials
Quilling for beginners (200 photos) - step-by-step instructions with description. The best master class on creating quilling crafts with your own hands
Plastic spoons
Original wall clocks are made from plastic spoons - using them, you can easily get the shape of a flower that will frame the chronometer.
Step-by-step instructions for decorating a wall clock will help you quickly assemble such a model:
- a circle with a central part suitable in size for the chronometer is cut out of plywood 5-8 cm wide;
- handles are removed from plastic spoons (at least 250 pieces are needed to work);
- placing the cut tails towards the middle, glue them over a plywood circle (use a silicone glue gun);
- cut out a circle from foam plastic, creating a recess in it for the clock mechanism;
- plastic spoons can be painted with special paint or left white.
Decorating a wall clock
Clock decor.
The idea for the master class was born spontaneously; relatives bought a simple plastic clock for an outdoor fireplace, but dropped it and it cracked in several places. I decided to decorate them, hiding the cracks and at the same time giving them a more suitable look.
Here is our clock from Ikea. So, we will need: 1) acrylic paints of three colors (silver, brown and black) 2) craquelure varnish (in my case, one-step varnish “CRAQUELLE MEDIUM”) 3) beads 4) distressing ink (can be replaced with a tea bag) 5) pendants for dial decorations 6) glue gun and/or glue moment CRYSTAL universal (transparent) 7) sandpaper (zero grade) candle 9) finishing varnish 10) tools (screwdriver, brushes, sponge, scissors)
Difficulty level: easy. Time - 2 hours.
Paint the rim with silver paint in two layers. After drying, take the candle and randomly rub the rim, the main thing is not to overdo it. We do this so that later in places covered with wax it is easy to remove subsequent layers of paint. Then we take a one-component craquelure varnish and a sponge. (Or any other one you have) You can even use egg white, I can’t tell you anything about the technology for working with it. And we quickly clean the painted surface. While the varnish dries to a slightly sticky state, mix the acrylic paint. To give it a richer color, I’ll add a little brown to the black paint and apply a layer of paint to the stickiness with wide, confident movements with a soft brush, try not to go over one place several times. Everything needs to be done quickly enough. Here's a small digression. Both varnish and paint can be applied in two ways, both with a brush and with a sponge, but experimentally it was discovered that in order to obtain beautiful, uniform cracks, it is better to apply varnish with a sponge. This will also allow you not to overdo it with the amount of product applied, but it will be easier and faster to paint with a brush. If we do everything with a brush, we will end up with ragged, horizontal, very deep cracks, which we don’t need (unless, of course, we specifically achieve such an effect). That’s it, let’s set our case aside to dry, let’s work on the dial for now. Using distress ink, we will tint the edges.
Then we will decorate our dial with the available accessories. In this case, these are small metal pendants for a month and a star. You can use sequins, buttons, do not forget that the decorations should be flat so that the arrows do not touch them, you can paint them to your taste, as you please.
In the meantime, our craquelure cracks are ready. Now we take zero-grit sandpaper and carefully go over the paint, getting stripes of silver paint that imitate abrasions. (I couldn’t find my own sandpaper and sanded it with the felt side of a dish sponge; it turned out a bit rough, of course, but for lack of a better option, that’s also an option) Then I took the groove on the body and painted it with silver paint. It’s as if it was specially created to decorate it with beads or a beautiful cord. Which is exactly what I did. For decoration, I looked at plastic pearl beads at a sewing and knitting store for some ridiculous money. We put them on a glue gun. All that remains is to coat the watch with protective varnish. In my case, this is acrylic glossy varnish ACRYL - GLANZLACK from Hobby Line Germany. It is water resistant and dries instantly. That's all! All that remains is to put our watch back together! Voila, let's admire our watch!
Success in creative work!
I hope you liked my master class.
Cups and saucers
You can make original products yourself using serving cups and saucers. Bright products will become an accent element of the kitchen or dining room interior.
Making such a model is incredibly simple - the work will take no more than an hour:
- a base circle is cut out of a sheet of plywood, a hole is cut in the center for installing a chronometer;
- the plywood base is painted with paint in a matching color, after it dries, the dial marks are placed;
- using silicone glue, fix it on the saucer marks;
- After waiting for the glue to dry (after 20-30 minutes), glue the cups to the saucers.
Places for gluing cups are pre-treated with fine sandpaper for more reliable fixation. For work it is better to use light cups.
Craft clock with hands
In order to make a craft clock with hands with your own hands, we will need the following materials:
- Colored paper;
- Glue;
- Scissors;
- Hole puncher;
- Small button;
- Threads with a needle;
- Templates in the shape of a circle made of paper.
- The first template is a regular circle, and the second template is 2-3 centimeters larger in diameter and has a border.
Now let’s begin the creative process of making crafts:
- Place the colored paper face down and trace the second template on the inside;
- Draw a circle on a white sheet;
- Cut out both options;
- Glue two templates by placing them on top of each other
- You will need 12 circles to indicate numbers. To do this, fold a strip of paper into an accordion and draw a circle on the base.
- We cut it out and what we need appears before our eyes;
- Glue and draw numbers;
- Cut out the arrows;
- Thanks to the buttons we will fix them.
The product is ready and can be pleasing to the eye!
Textile
Textiles for decoration can have bright colors, interesting patterns or textures. The work involves linen, satin, cotton, jacquard, organza and even burlap. Gluing three-dimensional decorative elements to textiles is easy. Usually these are clay figurines, twigs, dried flowers.
Sometimes the fabric is pre-embroidered with acrylic thread, beads, satin ribbons, sequins, large beads are sewn on, and rhinestones are glued on.
In addition, jute thread, thick cords, weaving and knitting are used in decoration, based on the general style and structure of the fabric. The finished base fabric can be quite dense or delicate, openwork.
We recommend reading:
DIY paper orchid - a review of the best ideas and tips from craftswomen. Step-by-step instructions + master class (photo + video lessons)- DIY paper hyacinth: the best master class for beginners with step-by-step instructions and diagrams from A to Z (130 photos)
Paper stars - instructions on how to quickly and easily learn how to make beautiful stars with your own hands (100 photos of finished works)
To maintain their shape, it is recommended to starch or coat openwork products with glue. Dry them on a flat surface, fixing them with a press if necessary.
Watch base – what is it?
Be sure to go through all your bins, chests and pantries. It is quite possible that you will find something that can be used in further decoration. Namely:
- Buttons that have been lying around for a long time, ribbons and pieces of fabric (great for decoration)
- Old records of different sizes (why not a base for a watch?)
- Clippings from magazines, newspapers, old photographs.
- Dried flowers and leaves.
- Pieces of plywood that remained after repairs, wood cuts, hemp (can also serve as a good base)
- Thick cardboard (pay attention to whether there are any boxes of equipment lying around - an excellent consumable material for the base)
- Shells, pebbles and various small parts.
Jute thread and leather
You can make some kind of twigs from jute - after immersing the threads in PVA glue, they are laid out in interesting patterns with ornate weaves. The frozen imitation of branches is decorated with beads and rhinestones.
You can also create an original frame for a chronometer at home using a voluminous cord woven from strips of leather. This design perfectly combines wooden elements and a variety of textiles.
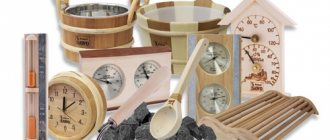
Features of watches with mechanical contents
Such devices are works of art, because they are created by true masters of their craft. All expensive and elite chronometers today are mechanical.
The principle of their operation: all gears and elements are controlled using a gradually unwinding spring. Disadvantages include moodiness.
The accuracy of this type of watch depends on the temperature conditions, the position of the product itself, etc. As a result, a slight lag is considered common.
When creating a chronometer on their own, lovers of mechanical components can, of course, try to make it on their own. But it is much more effective to order a mechanism from a master.
Old newspapers and magazines
Old magazines and newspapers are great for decorating watches.
Individual sheets are rolled into a thin tube in a spiral, fixing the ends with glue - an original artificial vine is obtained, which can be woven into a frame in the form of a square or circle.
Geometric shapes cut out from magazines are glued into abstract patterns to decorate the watch mechanism, the edges are fixed with glue.
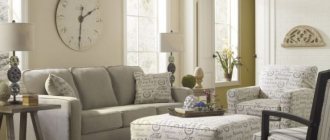
Large clock as an interior element
Large clocks are used as a decorative element where several interior styles need to be balanced. A clock mechanism in a beautiful frame can become a link between classic and eclecticism, between modern and gothic. Modern interior styles also involve the use of massive wall accents.
An impressive designer accessory solves several problems in the interior of a room:
- Decorates an empty wall.
- Helps keep track of time.
- Creates comfort.
- Helps to combine other interior items.
Imagine a wall with a fireplace underneath. On the fireplace are framed family photos and porcelain figurines, while the wall above the fireplace is left empty.
If you hang a picture there, it will begin to distract attention from the fireplace and beautiful photos. A watch, in this case, is more appropriate.
Quilling
An original background for decoration is obtained using ready-made paper strips - this greatly simplifies the work. The decor turns out to be voluminous, which must be taken into account when fixing it under the mechanism.
You can place patterns collected from quilling in the places of the numbers. Small paper figures are also placed outside the base.
We recommend reading:
A paper crown is a simple instruction for creating original jewelry with your own hands. Templates, diagrams, master class, exclusive design (110 photos)- Weaving from newspaper tubes for beginners: the best free master class, with step-by-step instructions. Photos, diagrams, unusual ideas, videos
Paper rose - how to make it yourself? Step-by-step instructions, original ideas, photos, videos, master class
This way you can create an original watch frame or even a full-fledged painting. These can be images of people, animals, musical instruments.
Decoration methods
Before making a watch with your own hands, it is useful to study possible techniques for decorating it. The following basic methods of decorative finishing are distinguished:
- Decoupage. It involves attaching a picture or ornament to the surface of an object and then coating the resulting composition with varnish.
- Quilling. The art of paper rolling, which is based on the production of 2D or 3D drawings from paper twisted into spirals, cut into long, narrow strips.
- Scrapbooking. The method involves using family photographs and children's drawings to create collages.
- Embroidery. A variety of techniques can be used.
- Painting with acrylic based paints. Can be produced in any style.
- Use of wood blanks.
- Using stamps to imprint a pattern.
- Working with epoxy. The method consists of filling the mold with resin with the addition of various decor (sparkles, beads, dried flower heads).
You should decide which decorative design option is closer to you - maybe you have already mastered something. On the other hand, creating watches is a good reason to try to learn a new style.
Butterflies
The idea with butterflies is good for creating a new mechanism. A large butterfly is cut out of a vinyl record, and small insects are glued around the perimeter as a frame.
Several moths flying into the distance look fascinating. The smallest ones can be placed under the chronometer, larger moths can be glued diagonally or vertically above it.
Colored or metallized cardboard is also suitable for making butterflies.
Photo of watch decor
Did you like the article?
1+