Purpose of decorative pillows
Homemade pillows look great on sofas, will serve as an excellent addition to the interior of a child’s room, living room or bedroom, and will make a set of country furniture more comfortable.
A variety of pillows will find their place in any living space, on vacation, and even in a car.
A stylish hand-sewn pillow will be an excellent gift for a loved one, and making interesting options for interior pillows can bring additional income.
Sleep pillow
It often turns out that the purchased sleeping pillow is not satisfied with something: the zipper quickly fails, the quality of the fabric leaves much to be desired, or the filling falls off and becomes a hard stone. Therefore, I propose to sew a sleeping pillow with your own hands, and do everything to your taste.
On my website you can not only see different decorative pillows, but also watch a video on how to sew them. For example: an unusually shaped star pillow, which can be easily sewn in 20 - 30 minutes, or a decorative rose pillow in the shape of a flower, and I am sure that you have never seen such an unusual pillow composition anywhere else. There is also an orthopedic pillow for a sore or tired neck with the funny name bone pillow. I don’t change my tradition and show a video on sewing a sleeping pillow:
Choice of fabric.
In my opinion, the best fabric for a pillow cover is, of course, teak. And if you decide to use feathers or down as a filler, then you only need to take teak. For artificial fillers, calico, linen, polycotton or flannel are well suited - as desired. Natural fabrics are preferred. I do not recommend chintz for a pillow cover, as it has a loose structure, the threads are not tightly woven together, and the filler will seep through the fabric. To make the pillow have a beautiful shape, you can insert pillow piping into the seams and a zipper on one side. If necessary, you can replace the filling and wash the cover. Consumables. Two pieces of fabric the size of the desired pillow. I will sew a pillow measuring 50x70 cm. To do this, I take two pieces of teak measuring 51 cm x 71 cm. I’ll explain why: the finished pillow should be slightly smaller than the desired size - 48 cm x 68 cm. Everything else will go to allowances for seams (1 cm each). This is so that the standard pillowcase measuring 50x70 cm on my pillow is free. Finished edging for pillows – 2.40 m (50+50+70+70 cm). Single-sided (preferably left-sided, with the left half missing) foot on a sewing machine for sewing edging. The entire pillow is sewn using a single-sided foot. Zipper 20-25 cm long. Sewing a pillow. Sew a piping around the perimeter onto one of the halves of the future sleeping pillow. Make cuts along the edges on the corners, not reaching the stitching line. Sew one half of a zipper on one side in the center. Place the fastening teeth of the zipper directly on the edge. Stitch the sides from the top and bottom of the zipper on the cushion cover. Make the fastenings immediately behind the zipper. On the front side, make a tack stitch along the second half of the zipper, covering it with fabric. Sew the pillow cover along all remaining sides. Turn right side out and fill with pillow filling. What is the best filling to choose for your pillow? – you will read the answer to this question in my article.
And if you want to sew bed linen with your own hands, but don’t know how to calculate the fabric correctly, then on my website you will learn how to make calculations for any size sets. That's all! As you can see, it was not difficult at all. The sleeping pillow is ready! Have a nice sleep!
Types of decorative pillows
Interior pillows are in demand and popular not only as an element of room decor, but as a convenient household item.
Types of decorative pillows are divided into:
- classically shaped products for sofas that make relaxation more comfortable,
- rollers for beds and upholstered furniture,
- special pillows for the kitchen or dining room,
- floor pillows for a children's room or recreation area,
- small camping pillows that you can take with you outdoors,
- car pillows that make the trip more comfortable.
Pillows can have a classic or non-standard shape, depending on the purpose and imagination of the master. The size and design depend on the application of the decorative product.
How to decorate decorative pillows, ideas and tips?
You can decorate an interior pillow:
- embroidery or braid with embroidery;
- decorative sewing;
- bows and flowers made from ribbons;
- lace and openwork inserts:
- elegant draperies, decorative ruffles, puffs;
- applications made of foamiran, velvet or other suitable fabric;
- ornaments made of beads, buttons, rhinestones;
- decorative silk cords, tassels, fringe;
- inserts made of gabardine fabrics, etc.
Some ideas for beautiful design of decorative pillows:
Fabrics
To make decorative pillows, it is better to take dense fabrics:
- natural cotton and linen materials,
- denim or knitted fabric,
- different types of fur and satin,
- furniture fabrics for upholstery.
To create a good pillow with your own hands, it is important to choose the right material in terms of properties, color and texture, so that the decorative product complements your home interior.
- Do-it-yourself bead brooch - 105 photos and video description of how to quickly and easily weave a brooch
DIY bird feeder - step-by-step master class and ideas for beginners and schoolchildren (155 photos)
Do-it-yourself beads: 120 photos and video description of how to weave beads
Choosing an idea for a pillow
Its shape will also depend on the purpose of the pillow.
Cushion cushion
Do you want to make a tight roll under your back? The ideas of a dachshund dog, a snake or a train will suit you.
Pattern of a toy pillow in the shape of a dog
Travel pillow
Want to make a pillow for the road? Choose semicircular shapes: such a pillow can be placed under the child’s neck:
Pattern of the toy pillow “Giraffe”
How to make a pillow in the shape of a sweet donut, watch the video master class:
Sleep pillow
If the pillow is intended for sleeping, then you should not make hard, noticeably prominent eyes and nose. It is difficult to press your face against such a pillow and fall asleep. It is better to give preference to soft fabrics: fleece or flannel.
Pattern of a toy pillow in the shape of a sheep
Scops owl pillow
There is even a separate category of scops owl pillows. Next to such a pillow, the child will probably fall asleep quickly.
Pattern of a scops owl pillow
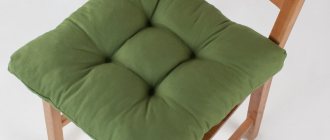
Seat cushion
Do you want your pillow to be able to sit on? Try to make it flatter.
Floor pillow
If your child loves to play or read while lying on the floor, then make a larger pillow.
A long pillow can be placed on a window or on the floor to protect from drafts.
Pillow patterns in the shape of a cat and a dog
Filler
To fill pillows, natural, synthetic non-woven materials and natural raw materials are usually used.
Natural padding includes:
- down and/or feather of a bird,
- animal fur.
Such a filler requires high-quality care, since small parasites can appear in it.
Herbal filling involves the use of various aromatic herbs. The service life of such a pillow is short, it must be protected from moisture. Plant content has a positive effect on human health.
Synthetic fillers include non-woven artificial materials:
- Do-it-yourself dolls made of fabric - 145 photos and video description of how to sew a beautiful doll quickly and easily
- How to sew curtains for the kitchen - a detailed description of how and what to sew curtains for the kitchen from (video + 135 photos)
Do-it-yourself felt toys: ideas, patterns, templates and felt patterns (135 photos and videos)
- holobiber,
- foam rubber,
- padding polyester,
- small silicone beads.
The advantages of synthetic padding are ease of maintenance and long service life.
Beginning of work
The first step in creating an interior pillow is to think about its purpose and appearance.
Having decided on the application, design, color and size of the future product, it is important to choose the right fabric for sewing.
The material should be in harmony with the rest of the home furnishings and correspond to the intended sketch.
DIY pillows: materials, fillers and shapes
Things made with your own hands acquire special value. They are a pleasure to use and become a source of pride. Moreover, this is a practical and economical approach. A sleeping pillow is an item that you can make yourself if necessary. And although it is easier to purchase a ready-made pillow, a homemade analogue can compete with it in some respects. For example, if we are talking about a product with special parameters and individual preferences. First, let's discuss what materials are best to use. Then we’ll talk about which models can actually be made at home.
Features of work
When sewing pillows, it is important to take into account the small nuances of working on this decorative item. The product consists of a pillowcase, filling and decorative cover. The top cover is made so that it is easy to remove for cleaning or washing.
When cutting, the size of the cover should be made a couple of centimeters larger than the pillowcases.
When considering how to sew decorative pillows with your own hands, it is worth considering these features of the work.
About buffs
Puffs on a suitable fabric, smooth and glossy, are another matter. When done correctly, they can be vacuumed and hand washed without any problems. And making all this splendor is not as difficult as it seems. First you need to learn how to read the diagrams for assembling puffs (assembling them, as sewing makers say).
As an example, diagrams for assembling simple puffs are shown in Fig. below. All puff patterns are built on an orthogonal-diagonal grid, the module of which (the side of the square) is 2-7 cm, depending on the size of the product and the density of the fabric. The grid in the diagram can be shown explicitly, as on the right in the figure, or its nodes can only be marked with dots, as on the left. The mesh is applied to the back of the workpiece with a textile marker in a mirror image.
Further, areas that are contracted (collected, assembled) into a buffer are marked either with converging arrows (on the left) or red lines (on the right), and those that are not contracted are marked with simple thin lines. The puffs can be assembled either with one thread or separately. The first method is for the lazy, because... a web of threads is formed from the inside. In any case, each puff is assembled with at least 3 stitches 4-5 mm wide, unless otherwise indicated in the notes to the pattern.
Examples of puff patterns for pillows
Then, the assembly sequence. It is produced in horizontal or vertical rows, again, unless otherwise indicated in the description of the pattern. In the case where the rows are indicated explicitly (on the left), they are displayed in numbering order and the buffs in the row are also assembled by numbers; here – Row 1 1-2, 3-4, etc., then Row 2 and so on. In the absence of an explicit indication of the rows (on the right), the puffs are assembled simply in numerical order; according to the diagram on the right - 1-2, 3-4, 5-6, 7-8, etc.
Try to assemble any scrap of fabric into puffs according to these entry-level patterns, and you will see that it will take little time, even if you assemble one at a time. And then watching a selection of master classes on making pillows with puffs that are much more spectacular and complex won’t seem like a nightmare:
Video: DIY buffalo pillows, master classes
Work on creating a decorative pillow
It’s better to prepare everything for work in advance.
In addition to the fabric, you should stock up on:
- scissors,
- life-size patterns,
- a piece of dry soap or chalk,
- needles,
- threads,
- sewing machine,
- decorative elements.
Decorative pillow-cushion, step-by-step instructions
What to prepare:
- fabric for the outer cover of the pillow;
- fabric for sealing the side ribs (doublerin);
- medium density padding polyester;
- foam rubber, holofiber, other filler;
- large decorative buttons - 2 pcs.;
- zipper lock or Velcro fastener;
- wax pencil or chalk;
- cutting knife, scissors;
- cord for tying the side edges;
- strong threads.
How to sew an interior bolster pillow:
Step one. Prepare patterns. Cut out the following elements of the cushion cushion: 2 fabric circles (diameter - 67 cm); 2 circles of dublerin (diameter - 67 cm); a rectangle made of main fabric (its width is 74, length is 50 cm); rectangle made of padding polyester (width - 74 cm, length - 50 cm), a piece of Velcro tape.
Step two. Circles of dublerin and fabric are folded in pairs. Sew along the contour. Marks are made in the center of both circles. Here, upon completion of sewing the pillow, a cord is pulled through to prevent deformation of the side ribs and large buttons are attached.
In the same way, rectangles from the main decorative fabric and padding polyester are connected and sewn together. This part of the roller can be additionally quilted if desired.
Step three. Pieces of Velcro tape are sewn along the length of the rectangle (with an indent of 1 cm). One part of the fastener is placed with the front side up, the other - with the wrong side. The firmware is done on both sides. At the end, the Velcro is fastened so that during further work it does not interfere or cling to the fabric.
Step four. Attach the side ribs of the bolster pillow. The parts are placed face to face. If desired, the side edges of the roller can be decorated with a voluminous twisted cord.
Step five. The finished roller is filled halfway with filler. A strong cord is then pulled through the center points of the side ribs. It is secured on one side with a decorative button.
Add the rest of the filler. The roller should be quite dense, without voids. Pull the cord and secure it with a button on the other side.
Two more lessons on making original interior pillows from You Tube video bloggers:
The procedure for making a simple interior pillow
It is recommended to wash new fabrics before cutting parts, as they may shrink.
- Having placed the pattern on the wrong side of the material, it should be traced along the contour. For convenience, the pattern should be secured with pins.
- The parts are cut with scissors, taking into account the margin for seams.
- Having folded the parts of the product with the right side inward, sew the seams. It is better to sew using a sewing machine, but you can do the work by hand.
- One side is not completely stitched; the product must be turned inside out and ironed.
- Decorate the pillow, fill it and sew up the seam.
A simple square pillow will not require much effort or time to work. A master class on making decorative pillows with your own hands can be easily found online and in video format.
How to sew a round pillow with your own hands
Step-by-step instruction:
- Draw a circle on paper.
- Determine the diameter using a pencil and cord.
- Using the pattern, cut two circles from the fabric.
- Turn inside out and stitch, leaving room for stuffing.
- Unscrew the cover and fill it with filler.
- Sew up the hole with a hidden stitch.
- Sew buttons on both sides in the center of the finished pillow.
You can also use scraps of fabric as a base. The pattern is divided into 12 equal sectors and one of them is cut out. Based on the template, 12 pieces are cut out for each side of the pillow. The cut out parts are stitched and assembled into a circle. The resulting circles are sewn together on a machine and stuffed with filler.
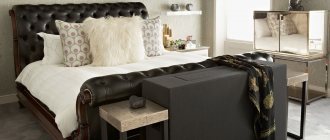
Cushion
The furniture cushion that complements the sofa usually has a simple geometric shape. Most often it is a rectangle.
Such items are subject to wear and tear during use faster than the sofa itself. The opportunity to buy a similar pillow is not provided by furniture manufacturers.
Therefore, there is a need to sew such a pillow yourself. This is a simple job, most of the success of which lies in the correct selection of material for the cover.
If possible, the fabric should be found similar to the upholstery of the sofa. If there is no such fabric, then you need to think through the design of a new pillow so that it fits organically into the interior.
In any case, the texture should match the upholstery of the sofa, and the color should be in harmony with the design of the room.
The easiest way to copy a factory copy is to rip open the old one and measure the cover.
Using these measurements, draw a drawing, cut and seam the parts of the new product.
Sew a pillow
At the beginning of my first MK, a small digression and a nod to three wonderful sisters-craftswomen whom I was lucky enough to meet in the late 90s.
Representing the working core of one small company specializing in sewing textiles for the home and aimed at wealthy fellow citizens of our country, these girls made bedspreads, curtains, pillows and other elements of bourgeois beauty of incredible beauty and amazing craftsmanship. Our office was located next to the workshop. Curiosity and a sense of beauty led me to them, made me friends and made me want a blanket for our bed. What is typical is that they gave me “not a fish, but a fishing rod” and step by step, stage by stage, I sewed a blanket, large, quilted with elements, processes inherent in luxury work - you, I believe, can imagine how dear and significant it is to me. From there, from those times, the legs, and I would say the hands, of this master class grow. This MK is more of a reminder and a lifesaver for those who are lucky enough to have pillowcases of non-standard sizes that cannot (!) be cut.
In my case, there are two pillowcases (more on them a little later and with love) - 38x38 and 42x42 cm.
The steps are given as an example of one of them, but I will give photos from both pillows. Stage 1: Cut out squares from padding polyester (I take the 300 brand, 300 is grams per square meter)
2 pieces - 38x38 cm. Next - 2 pieces. — 33x33 cm, 2 pcs. — 28x28 cm, 2 pcs. — 23x23, 2 pcs. - 18x18 cm. As you understand, I reduce on each side, each subsequent square by 2.5 cm. This value can vary from 1.5 to 4 cm depending on the final potbelliness of the pillow and your subsequent experience. I posted my experience)
It looks like this.
This is for another pillow - there were more layers, I wanted it a little thicker.
You have two pyramids, one of them now needs to be turned over and connected, like this...
Stage 2: We fix this structure around the perimeter.
.. and stitch it... I’m in my arms, it’s more convenient for me. Do you feel potbellied, lively, I would say? Like pillow candy.
Stage 3: This is the case. We are sewing a luxury pillow for you. From cotton fabric and cotton filling for quilts (M 100) I cut out two squares 40x40 cm (1 cm seam allowances on all sides). I draw stitch lines with a chalk pencil and fasten the materials together in pairs. /Cotton filling for quilts is a wonderful material, but you can also replace it with thin padding polyester if you have it on hand./
We sew along the marked lines as we please and as the machine allows.
Stage 4: We connect, adjust, sew (we left 1 cm on each side as an allowance!), leaving a distance unsewn that is convenient for further immersing the pillow in the cover, and trim the corners.
Wow...
We combine the ingredients... using a hidden seam we finish the job...
And now with those very custom pillowcases of mine, for which everything was started.
But the second pillow... it's still in progress, but it's already very beautiful!
I am a student of Olya Denesh quilthouse.livemaster.ru ... these are my course works ... Japanese patchwork ... everything with my hands, I would even say with my fingers.
Cons (-) - you can buy ready-made and not bother.
Pros (+) it is very convenient to care for such products - I unzipped the pillowcase, took out the “inside”, threw it into the machine, the machine produced an undeformed product for further use.
I hope you liked it and I was useful. I'm sure you will succeed! Best regards, Svetlana
Decorative design
The most fun part of the creative process of creating an interior pillow is thinking about its design.
The easiest way is to use plain textured fabrics, the color of which matches the design of the room.
Pillows for a children's room often serve as an element of games. They should have bright colors and interesting design.
In children's design, bright applications on cartoon and fairy tale themes, original pillow toys in the shape of stylized animals or famous cartoon characters are appropriate.
You can make your own children's decorative pillows from a bright T-shirt with an original design that is too small for the child. Patterns for sewing funny children's pillows can be easily found online or drawn yourself.
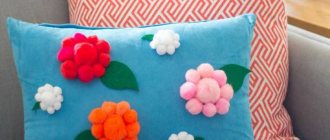
You can complement the interior pillow with stylish appliqué, embroidery, satin ribbons, additional details in the form of an overhead bow or animal ears, fringe or frills.
External design depends on the skill and imagination of the craftsman, as well as on the purpose of the product.
Popular design trends allow the use of appropriate decorative methods: patchwork, stylized ornaments, thematic embroidery, tassels, bows, and so on.
The main thing is that the result of the work is a comfortable decorative pillow that harmoniously fits into the interior design.
Pillow decor options
Decorating is the most creative part of the process. Here you can fully express your imagination and create both laconic options for strict interiors and playful solutions for original furnishings. To decorate the case, both available materials and specially purchased fittings are suitable. Let's take a closer look at the popular ways of decorating pillows and analyze them step by step.
Color selection
First of all, you need to decide on a color scheme. Covers can be plain, variegated, or combine a moderate number of shades (two or three), selected according to the principles of analogy (ombre effect) or contrast. The latter option can be easily implemented in modular cases, the two parts of which are not sewn together, but connected by an insert. The shade must be selected based on the color scheme of the room in general and the furniture in particular. If textile decor should become a bright accent on the calm palette of the interior, then catchy colors are chosen: red, orange, yellow, green. Shiny golden, bronze, and silver cases that are covered with continuous rows of sequins will look stylish and original. If the pillow is just a neutral touch, then choose a calm shade: white, gray, blue, pink, brown, pastel colors. For outdoor decor (patio, gazebo, garden bench) choose more natural colors. For example, covers of crimson and brown tones with color gradation are in perfect harmony with the autumn landscape. They are complemented by a checkered blanket, picturesquely laid out on a bench, and now a cozy place in the open air is ready for reading a book with a cup of hot tea.
Patchwork technique
The patchwork technique, or patchwork, as it is sometimes called, allows you to create unusual decor from old things. These cushion covers will look homely and cute, but will only suit country-style interiors. For the work you will need pieces of fabric of different colors, decorated with ornaments and images. They are cut into squares of the same size, which are calculated from the parameters of the future pillowcase and the expected number of segments. These pieces are then sewn to each other to form strips. They are also connected to each other, resulting in a finished canvas.
Using the patchwork technique, you can not decorate the entire pillowcase, but only a separate part of it. For example, a combination of scraps of fabric with a variegated checkered pattern on one half will be organically combined with embroidery on a plain burlap on the second.
Application
The appliqué technique involves sewing individual pieces of fabric onto a canvas so that the result is a picture. The decoration method is somewhat similar to putting together a puzzle. The master has a large number of parts that need to be put together. The application is:
- Flat. This is a simple technique in which pieces of fabric are placed on the cover and sewn completely.
- Volumetric. A more complex technique, which is characterized by the presence of convex elements. For example, on a ballerina’s dress there are flounces, ruffles and bows with ribbons. Sometimes, to get additional volume, a soft filler is placed under a piece of fabric.
When working with fabric, “reverse” appliqué is encountered. A detail is cut out on the pillowcase cover according to the template. The edges must be stitched. Preferably by typewriter. Then a similar part is cut out from a piece of another fabric and sewn on the wrong side. It is best to work with a template prepared in advance.
Printing on fabric
Printing on fabric can be ordered in specialized salons, which, using special equipment, will accurately transfer the image onto the material. However, you can design a pillow cover yourself. You can try to transfer an image using a hot iron from a regular photograph, but the result will be dull and short-lived. It is much easier to work with a set of markers or spray paints and stencils. Drawings, as a rule, are chosen to be laconic, since only a master artist can display complex color transitions. The fabric must be laid out on a flat horizontal surface. For reliability, it is better to secure it with pins or press down the edges with something heavy. The area that should remain untouched is isolated using masking tape or cling film. Now apply the stencil and secure it. You can start coloring the image.
Lace
Covers with lace look very gentle and touching. This “feminine” option is perfect for shabby chic, Provence and blends seamlessly into children's bedrooms for newborns. As a rule, only a separate part of the cover is decorated with thin lace: a strip in the center, on one side, or paired openwork ribbons that “close” a neat pattern in the middle. Due to its special sophistication, this decoration is combined with covers in pastel shades. Contrast is appropriate in double pillowcases. They are sewn from a bottom plain layer of regular fabric and a top lace layer. This piece can be knitted by hand using a crochet hook and special yarn.
Knitted pillowcases
Knitted pillowcases bring warmth and comfort to the interior. To work, you will need yarn (about 500 grams for a medium-sized case), buttons, knitting needles or a crochet hook. We must not forget that natural threads will shrink a lot after washing. To prevent the pillowcase from becoming too small for the pillow, it is better to use mixed yarn. Mass knitting technique. Some prefer the laconic “braids” and “bumps” that are usually used to decorate homemade sweaters, while others prefer complex “web” patterns and, again, the patchwork technique, but in a slightly different guise. A pillowcase can be made from separately crocheted (usually crocheted) scraps of yarn of different colors. To keep the cover closed, they use buttons rather than zippers that blend seamlessly with the yarn.
Embroidery
The cover can be decorated with continuous embroidery or only part of it can be decorated. For the first option, the techniques of embroidery with threads (floss), cross and half-cross (tapestry) are suitable. You need to work either with burlap or with regular fabric on which the canvas is fixed. After the embroidery is completed, it is unraveled along the thread. For partial decoration, embroidery with ribbons, chenille or work using the satin stitch technique is suitable.
We use old clothes
Wonderful pillowcases are made from old jeans, shirts and sweaters. In the last two cases, the sleeves and lower part of the garment are cut off, leaving only the collar and the “chest” piece of fabric. There is no need to cut a shirt or sweater along the seam. The second part will become the back side of the case. Then the remains of the shirt are sewn together on both sides. A zipper is sewn to the bottom. The upper part, on which the collar is, is additionally decorated with a piece of fabric previously cut from the bottom to cover the empty neck. This detail can be sewn to the back of the shirt and simply smoothed out, since the seam on the front side will not look very aesthetically pleasing. You can put a scarf in the breast pocket. Covers are sewn from jeans using the same principle, only both legs are cut off.
Painting on fabric
Clothes (mainly sweaters and T-shirts) are increasingly being decorated with fabric painting. This is an excellent replacement for photo printing. In addition, the drawing will not be stamped; it can be “taken from your head.” For beginners, it is better to purchase special stencils. In any case, you will need a template, since it is difficult to correct errors with such a picture. This is not a pencil that can be easily erased with an eraser. The movements of the brush must be precise. Fabrics are painted with acrylic paints. They are presented in a wide range in artist shops. Different compositions are suitable for certain types of fabrics (thick, delicate). Before use, the material must be soaked in cold water for at least 1 hour and washed. Then the material is dried and laid out on a flat surface. Be sure to place a film under the fabric so as not to spoil the table. It is better to work with natural brushes of different sizes, so that it is convenient to paint both large and small details. Usually start from the top of the picture so as not to smear the drawing with your hand. After applying the image, it is fixed with a warm iron.
Buffs
Puffs are a special type of cover, the surface of which is decorated with a pattern of folds. The texture of the pillowcases just seems very complex. In fact, even a beginner can do the job. The main thing in the process of making puffs is the preparatory work. To get a beautiful symmetrical pattern, you need to correctly mark the points on a piece of fabric where the material will be collected and secured with thread. The markings are applied on both the back and front sides. In the second case, the places where the fabric tightens are masked with beads or buttons. Schemes of “grids” of buffs can be found in specialized magazines or on the World Wide Web.
Pillow decoration
To decorate pillows, they use the entire “arsenal” of needlewomen:
- Bows and ribbons. They combine beautifully with embroidery, openwork and look good as laconic decorations for plain cases.
- Buttons. Combined with knitting, applique, painting and puffs. Images painted with acrylic paints look original, where accent areas are filled with sewn buttons.
- Fringe. It is an integral part of Turkish pillows. As a rule, it is sewn along the contour of the cover and combined with tassels.
- Frills, ruffles. Combined with embroidery and openwork.
- Sequins. They are used in the same way as buttons to highlight accent areas. You can make a whole picture out of sequins. To make a continuous fabric, you will need parts of different colors and an embroidery pattern.
- Beads, beads. Used in embroidery.
In addition to the above decorations, cabochons, metal inserts, zippers, and decorative chains are used.
Photos of decorative pillows with your own hands
Tell your friends