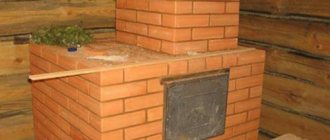
When you want to build your own bathhouse on the site, you need to understand that if you carry out the work yourself, you will have to solve a number of very diverse issues. One of them will be the manufacture and installation of a stove. There are quite a lot of options. For example, you can build a brick stove or make it out of metal. How to cook a sauna stove with your own hands will be discussed below.
general description
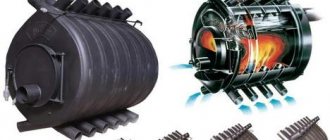
The principle of operation of a metal stove
A metal stove is a special device designed to heat water and air inside a bathhouse. Among the main characteristic features are:
- versatility of use;
- compactness;
- variety of forms;
- high efficiency;
- fast heating;
- possibility of self-production.
As for assembly options, the stove can be based on either sheet metal or a large-diameter thick-walled pipe. In order for the matter to proceed, basic skills in working with a gas burner and an electric welding machine will be required.
Preparing the base
To achieve the best result, it is recommended to carry out the work in stages. This approach will allow you not to lose sight of important nuances. You need to understand that, despite the fact that a metal stove will weigh less than its cast iron or brick counterpart, the load on the floor surface at the installation site will be quite significant. Therefore, before starting work, it is necessary to make a strong and level base. If you plan to use an electric version of a boiler or stove without a grid with stones, then perhaps it will be enough to reinforce the area with several logs. But if we are talking about a full-fledged version, then you cannot do without a foundation. Usually its laying is carried out during the construction of the main structure.
- In the case where the bathhouse is installed on stilts, only one pile can be provided under the stove. This will be enough to support her weight.
- If the base is a strip foundation, then a hole is dug in the place where the heating device will be located. Its dimensions should be 10 cm larger on each side of the future unit. Depth from 50 cm. A 10 cm layer of sand is added to the bottom. It is compacted well. The formwork is being exposed. Its top point should reach the level of the future floor. A sheathing of reinforcement is laid inside. Concrete is poured and compacted using a vibrator. Otherwise, you don’t have to make such a high formwork. It is enough for it to rise 10 cm above the surface. After the poured foundation has completely hardened, the remaining distance can be laid out with brick.
Making the main compartment
The first option described will be made from a piece of metal pipe 8 mm thick and 60 cm long, with a diameter of about 50 cm. To make it easier to imagine the whole process, the pipe will act as a firebox and will be in a horizontal position.
- At a distance of 10 cm from one of the ends, a rectangular cutout of 20x30 cm is made in the pipe wall. Several steel rods with a diameter of 10–12 mm are welded to the cutout at a distance of 1 cm, which will serve as grate bars.
- The ends of the pipe are covered with pieces of sheet metal with a thickness equal to the thickness of the walls. In the upper part, the metal is cut along the circumference of the pipe, and at the bottom you can leave protrusions that will serve as supports.
- A piece of pipe about 50 cm long is welded diagonally from the grate. This will be the main element for making the stove chimney.
- Next, in the plate that covers the end of the stove from the grate side, a rectangular hole of 30x30 cm is cut out, which will serve to load fuel inside the stove. It is necessary to close the stove entrance with a door made of the same sheet metal. You can hang the door on improvised hinges made from welded hooks and nuts.
- Under the hole with the grate, you need to weld a special box with a wall height of about 10 cm. It will serve as a collector for ash from the combustion chamber. To access it, in the plate covering the end, you need to cut a hole of appropriate size into which you need to insert a box without a back wall, reminiscent of a scoop. This element will have a dual purpose - collecting ash and regulating draft. The more the ash pan is extended, the more powerful the air flow into the combustion chamber will be.
- A water tank is welded to the second end. For its manufacture, you can use sheets 5 mm thick. Tank sizes should be selected based on need. A hole is made in the bottom plane of the tank into which the drain valve is welded.
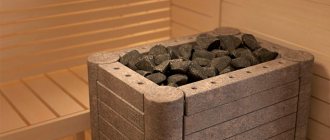
- If you decide to make a stove-heater, then you need to weld a series of rods about 35–40 cm high to the surface of the stove, which need to be tied together on top with strips of metal. The result will be a compartment for laying stones.
Sheet metal oven
Sheet metal
To make this version of the furnace, we will need sheet metal with a thickness of 5 mm. The overall dimensions of the final unit will be 80 cm in height, 60 cm in width, and 90 cm in length.
- Using a grinder or autogen, we make blanks. The dimensions of two of them should be 70x90 cm, another two should be 70x60 cm. These are four walls. The bottom, partition and upper part will have dimensions of 59x89 cm (this is provided that a material with a thickness of 5 mm is used, if more, then you need to subtract double the thickness to get the final result, this is true, because the walls will be welded around the base ).
- Place the bottom on a flat surface. We substitute the side wall and secure it with tacks. Using a square, we check the consistency of the angle. We proceed in exactly the same way with the back edge and the second side wall. After the structure is standing, you can thoroughly weld the seams along the entire length.
- The next task will be to divide the entire internal space into three compartments: the ash pit, the firebox and the area on which the stones can be placed.
- In order to best secure the partitions, we need a metal corner with a size of 30x30 mm. We make four sections of 89 cm each.
- We weld two of them to the side walls at a height of 14.5 cm, the other two - at a height of 44.5 cm.
- In one of the blanks, which will serve as a partition 59x89 cm, we retreat 5 cm from the edge and make a window measuring 20x30 cm. We weld reinforcement rods with a diameter of 10–12 mm into it. They will serve as grate bars. The distance between them must be maintained at 1 cm.
- Using an autogen, we cut a 10x30 cm hole in the sheet that will act as the front wall, stepping back 3 cm from the bottom. This will be the door for the ash pan. Setting aside another 5 cm from the finished hole, we make a cutout measuring 20x30 cm. It is necessary for laying firewood.
- We weld the front wall into place.
- We place a partition with grates in the middle on the prepared corners and scald it along the entire perimeter.
- We make a hole in the lid for the pipe. Its size will depend on which sleeve you plan to use.
- Place the lid on the corners and boil on all sides.
- We fix the pipe in place and weld it around the circumference. If you want to install a water tank on a pipe, then it is better to make it longer; if not, then you can immediately provide an adapter to the chimney.
- We install the doors. To do this you will need 4 M8 nuts, a metal rod that will correspond to the inner diameter of the hole. The nuts are welded to the body, the pieces of rod are bent and attached to the doors. After which the doors are hung on the hinges.
- The space above the firebox is filled with stones.
- The final touch is the legs. They can be made from a 5x5 cm corner. The length should be 10 cm.
Preliminary metal preparation
When making iron stoves for a bath, during preliminary preparation of the material, those parts that heat up more than others (sides, top and door) should be released. To do this, we take the material for the parts of the firebox and heat it until red (for heating, you can use any method convenient for you).
Cool and trim the sheets with a hammer (they may bend after heating and cooling) and double-check the dimensions. If they have changed a little, they need to be straightened. We will avoid this effect (warping of the metal) directly during operation.
Design features of a metal furnace firebox
The next task that worries many: how to make sure that the temperature is maintained evenly and the stove does not produce maximum heat at the very beginning, when the wood burns best? Often you need to constantly add new firewood to raise the temperature again to the desired level. Otherwise, it will be very hot at first, and then it will become completely cool in the bathhouse.
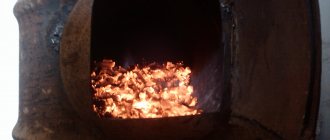
Grate bars are most often installed in the furnace. These grates allow air to pass through well and are designed to heat up the oven quickly. They are made in different ways: by welding metal rods or drilling holes in a sheet of metal.
Firewood is placed on the grate, air draft increases and the combustion process noticeably accelerates. Due to this, the heat is also distributed unevenly. As mentioned above, the top, door and sides of the stove heat up the most. At the same time, the bottom of the structure and the rear wall do not heat up so much.
Often you have to manually regulate the heat - either fill the fire with water, or add wood. And instead of resting, we constantly run back and forth.
What solution? It is simple - place the firewood not on the grate, but on the bottom of the stove. High-quality sealing with mineral wool will also help. You can also make several holes in the firebox door, which will be closed with an additional damper. This way we will regulate the flow of air that gets inside.
One stack of firewood is enough for an hour of heating, plus we get the opportunity to independently regulate the heating level of the stove surface. In this case, there is no need to make grates and an ash pan.
Water heating oven
Made of metal
Thanks to the design, which will be described below, it becomes possible to heat water located in a separately installed tank. We will need the same material as in the previous version.
- We make two blanks measuring 60x39 cm - this will be the base and the top cover. The side walls will measure 60x57 cm, the back - 60x40 cm.
- We make a cutout in the side walls - it will be 20 cm from the top, 17 cm from the edge. This way we will constructively highlight the firebox.
- We weld the side and back walls around the base.
- In the upper plane we make a hole for the pipe, stepping back 5 cm from the back wall. We weld a sleeve into the middle for the chimney.
- We make a shelf from a 30x30 cm corner at a height of 39.5 cm. We install the top cover on the profile and carefully process the seams.
- We weld the front wall, its size should be 40x40 cm. We cut out a door for the firebox in it, its width and length are 26x23 cm (it should be at a height of 7 cm from the base of the stove). We attach hinges to it, as in the previous version, and a locking mechanism.
- Under the door, we drill holes with a diameter of 8 mm in two rows. They will serve to bring in fresh air.
- We cut out a blank 20x40 cm and cover the front wall of the stone compartment with it.
- We make a container in which the water will be heated. To do this, you need to cut a side with dimensions of 43x35 cm, two of 10x44 cm and two of 10x35 cm. A metal box is assembled from them. All seams are carefully welded so that there are no holes and liquid does not leak out.
- Two ¾” pipes are welded into one of the 10x35 cm walls at the top and bottom; at the base of this module, another ½” pipe is attached to drain water.
- Now the entire box is welded onto one of the side walls of the stove. A careful approach to the quality of the seam is also important here.
It is better to approach each stove as an individual project. Only in this case can all wishes be taken into account. Now you have some idea. You can add something of your own to the above diagrams. We will be interested to know what happened for you. Share your ideas in the comments to the article.
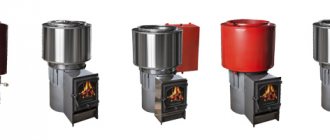
Design features and types of furnaces
Each oven has its own characteristics.
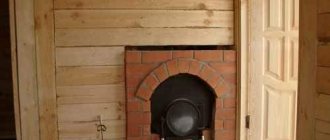
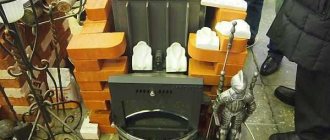
Types of stoves: Wood-burning sauna stove. This is the most popular oven option. It consists of a firebox, chimney, ash pan and grate. Such stoves are made of metal or stone. They so often become the choice among bathhouse fans because they have advantages: even the small dimensions of the device can provide enough heat to warm up a large room. Such furnaces are used even when there is no gas supply at the site. This type of oven is the easiest to use. It also has a calming effect - the sound of crackling firewood.
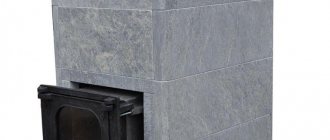
Cast iron stove. They, in turn, are divided into temporary and permanent combustion furnaces. In the first case, firewood is used for the firebox. You can use the sauna when all the wood is burned. For a continuous combustion furnace, liquid fuel or gas is used as fuel. In the second option, the steam room is suitable for use already when the stove is just being heated. This type of stove will warm up the rooms faster and distribute the steam more evenly throughout the entire area of the room.
Electric oven. It comes in different sizes, has different characteristics in terms of efficiency and power. Like the previous one, it heats up quickly and lasts a long time. The advantage is that an electric stove does not require a chimney. They are also not expensive.
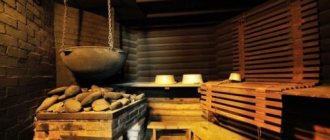
Finnish sauna stove. They produce dry steam combined with high temperature. Such stoves come in both electric versions and those using wood as fuel. You can make such a stove with your own hands. All you need is special drawings and instructions.
In order to use the stove to its maximum, it is advisable to know some features. For example, a wood-burning sauna stove can also be heated with other solid fuels. Coal and briquettes are allowed. If you approach the task of making a stove for a bath correctly, it will serve for a long time and will delight you with its reliable operation.
Cast iron stoves are connected to a central gas supply for operation. The use of gas cylinders for these purposes is not recommended due to the increased risk of explosion.
Stoves that use liquid for combustion emit a specific odor.
When choosing an electric furnace, it is better to check the wiring first. Such stoves are not very economical for large rooms, which is also worth considering.
The cost of assembling the stove itself will depend on many parameters, primarily its size.