Some people think about brightening up their time in country houses and try in every possible way to improve the living space and the area around it. In addition to aesthetics, you also want to benefit from functionality, and here a swimming pool comes to mind. However, a swimming pool is not a cheap pleasure, especially if you order a completely ready-made option in one of the campaigns. But it is quite possible to make it yourself, and this is a completely feasible task. First of all, you should decide on the material that is best suited for making the container. One suitable material is a polymer - polypropylene.
PVC film 2 in 1 – waterproofing and finishing
PVC film for swimming pools
Polyvinyl chloride film (PVC), in addition to looking aesthetically beautiful, has another important advantage - it can act as a waterproofing material. Water will not pass through such a film, so you can save your money on waterproofing the pool bowl itself. The nice thing is that even if there are cracks in the concrete, and all the work was carried out without waterproofing, appropriate waterproofing putties and primers, the PVC film will be able to hold all the water in the pool, despite the enormous pressure of the water column.
Due to this property, the film is often used in the restoration of old swimming pools, the bowl of which is cracked and problems with waterproofing have arisen. Covering the pool with PVC film will help save the situation. And what’s most amazing is that this can be done even without removing the old material, for example, mosaic. In this case, it is only important to take care of the tile’s strong adhesion to the surface so that it does not peel off. Thus, by choosing PVC film as a finishing material for the pool, you can kill two birds with one stone.
Features of polypropylene
This material does not absorb water, has various resistance to oils and some other liquids, and is safe for humans. Not only swimming pools, but even dishes are made from PP, and it is considered one of the best in terms of quality and safety among plastic varieties. In other words, the variety of uses of polypropylene also makes it possible to build swimming pools from it. Here are some key features of the material:
- Easy to process with simple tools
- When welding seams and joints, no additional waterproofing is required, as they have a reliable connection.
- When welding a pool bowl and installing it in a pit, no additional holding frame is required; it will be enough to reinforce the sides of the bowl with a concrete mixture.
- A polypropylene pool will have a pleasant, bright and beautiful surface, and therefore does not require additional external finishing inside the bowl. This simplifies and reduces the cost of creating a pool.
- The strength of the seams is so great that it allows the use of small PP pools even without installing them in a pit (consult a specialist regarding the size and water pressure on the pool walls).
- Polypropylene is not only pleasant to the touch, it is also well suited for swimming pools, as its smooth surface is easy to clean.
- High-quality polypropylene sheets (which, for example, are sold here) are also resistant to temperature changes. If the material is not stable, it may burst in the cold.
- The cost of a polypropylene-based pool can be up to three times cheaper than purchasing a ready-made, stationary solution.
- Installation and welding work is unlikely to take more than 7 days
Varieties
Blue mosaic
Manufacturers took into account the various preferences, financial capabilities of people and the purposes for which the film will be used. Thanks to this, you can choose a pool cover from several types of PVC film:
- Simple unreinforced film. It is an economy class material that anyone can afford. This is the cheapest material of the three types of films. Its thickness varies from 0.65 to 0.85 mm. This film cannot be called very durable, but it still copes with its functions. It is impossible to make a frame pool from such a film, but it is quite possible to cover the bowl of a small pit pool.
- Reinforced film. The most common option. The price/quality ratio is completely justified, since this film not only has a thickness of 1.5 mm, which is 2 times more than the usual one, but it is additionally reinforced with polyester threads, which gives it greater strength. A pool with such a finish can withstand significant mechanical loads without deforming. This property is especially useful for those who want to make a frame pool, where the film serves as the walls. It takes on the entire load, being a load-bearing structure, so it must withstand enormous pressure, which it copes with.
- Anti-slip film. Its difference from all others is its ribbed surface, so it is often used to prevent slipping on the surface of the pool. Families with small children cannot do without such a film.
Reinforced film
Please note that there is also a material that has an acrylic coating. What does it give? Thanks to it, the film is protected from bacteria and algae that can colonize micropores. As experts say, with such a coating the film will last twice as long and will better retain color and elasticity. But what are the advantages of PVC films compared to other finishing materials?
Basic models of mini swimming tanks
Most often, a small pool in a country house can be made from:
- ready-made inflatable models;
- ready-made frame models;
- concrete;
- wood;
- car tires;
- old cast iron bathtub;
- metal containers or containers;
- reinforced concrete ring (used for wells);
- finished composite bowl.
You can use almost any materials that you find at the dacha. The main thing to remember is the purpose of the pool - so that at least an adult can take a dip there.
Mini metal pool
Advantages and disadvantages of the material
One of its main advantages is its affordable price. Building a pool in itself is an expensive proposition, so finishing with PVC film is a salvation for some. Another important point is that, as already mentioned, it acts as both a waterproofing and decorative material. Moreover, this material is hygienic, resistant to ultraviolet rays and sudden temperature changes. The material is easy to care for, because it is not afraid of chemical care products.
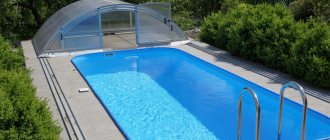
Work on the installation of a pit pool
Pool pit
If you want to make a pit pool at home or in the country, you need to follow this sequence:
- First, decide on the design and shape of the pool. After that, choose the optimal place where it will be located. It should decorate your site and serve as a suitable place to relax. You should not choose a place where the pool will often be polluted. Please note that the structure must be close to the water supply system.
- Now you need to choose the size of the future tank. Typically, such pools are made no less than 4x4 m. Choose the depth according to your preferences, it can range from 1 m to 2 m. The average depth, suitable for everyone, is 1.5 m.
- When everything has been figured out with the dimensions, the appropriate markings must be made at the site of the pool using pegs and rope. The pool can be rectangular, round or square.
The formwork is installed and poured.
Now dig a pit of the required depth. This can be done either independently or by calling a special technique. Keep in mind that the pit itself must be made slightly larger than the size of the pool itself. For example, make the dimensions of the walls larger by 40–50 cm, and the same with the bottom, since waterproofing work, pouring, etc. will then be carried out. The bottom of the pit must be compacted.- Next, the finished pit is leveled and waterproofing work is carried out. Pour 30 cm of sand onto the bottom and compact it. Then lay roofing felt in 2-3 layers and bitumen mastic.
- At this stage, it is necessary to carry out all the work to ensure the drainage of water from the pool.
- To make the walls, build formwork along the edges of the pool.
- Now pour concrete between the soil and the formwork. In order to strengthen the walls, make a mesh of reinforcement in advance and install it.
- After the concrete has hardened, the formwork is removed.
- All that remains is to make the bottom. Pour another layer of crushed stone, install a reinforcing mesh and fill the bottom with hydraulic concrete. Now, after the concrete has dried, you can begin finishing the pool.
Types of pools
In order to have plenty to choose from, you need to know about the features of various solutions and their relevance for specific conditions.
Inflatable
Inflatable pools. These products can be installed in less than an hour. The pool is usually a container made of PVC film. To ensure that there are no breakthroughs and that the pool lasts long enough, it is reinforced with additional polyester fibers. Only one part is inflatable - the top edge. The whole circuit operates on the float principle. Water begins to fill inside, the side floats up. As the level rises, the walls are leveled and a full-fledged bowl is formed. The kit usually includes a pump, filter, ladder and assembly instructions. Among the positive qualities we can highlight:
- high assembly speed;
- relatively light weight;
- affordable price;
- the ability to deploy in any conditions (the only requirement is sufficient rigidity of the base and its evenness).
An inflatable pool usually meets all the expected requirements. But it is worth knowing about certain disadvantages: a high probability of water contamination, the relative fragility of the material (a fallen heavy branch or sharp object can damage so much that a complete replacement will have to be made). The price of such products cannot be called low; for some samples you will need to pay 30 thousand rubles or more.
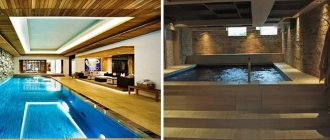
Frame
Frame. Among pools of this type, there are a large number of different solutions. The support can be metal tubes, which are assembled into a closed structure, and a PVC bag is placed inside. When it fills with water, the walls rest against the racks and their expansion is limited. Panel frames are assembled from separate sheets of metal, which have an anti-corrosion coating, which prevents its damage. The internal space is organized in the same way as in the previous version.
Installing a frame pool usually takes a full day. At the same time, it also needs a good foundation so as not to deform it with the weight of the flooded water. Seasonal containers will have to be dismantled in the fall and installed again closer to summer. There are those who can easily spend the winter. Usually they have additional stiffening ribs mounted, and the main racks are large. This is necessary to resist the action that will occur when water freezes. Such pleasure will cost more than inflatable analogues.
Fiberglass
Made from fiberglass. In most cases, this design is a ready-made cast container. It has specified parameters: depth and capacity. There is no need to invent anything. You only need to dig the appropriate pit, install the container and provide the required communications. One of the advantages is the high strength of the product. In some respects, it even surpasses concrete. Due to the properties of the components, the bowl is not subject to linear expansion due to temperature fluctuations. This means that the service life can be very long with proper maintenance. Fiberglass is highly repairable. The walls are so smooth that debris simply cannot linger on them, which means they are very easy and simple to clean. A large amount of additional equipment is available, for example, you can purchase a variety of slides or diving boards. This will delight not only children, but also adults. The low level of thermal conductivity prevents rapid cooling of the heated liquid.
Polypropylene
With polypropylene bowl. By itself, this polymer material has sufficient strength. It does not need an additional layer of waterproofing, which will impede the outflow of liquid. Most often, blanks in sheets are used to make such options. They are blue or cyan in color. You can do the assembly yourself, but this will require certain tools. Most often this is entrusted to professionals. The construction of the entire structure can take from several days to weeks. Such pools have a recessed design, so large-scale excavation will be required, as well as the laying of a concrete base slab. The material is resistant to ultraviolet radiation and chemically active substances. Thanks to this, it can be safely placed outdoors.
Concrete
With concrete base. To put it simply, this is a pit of arbitrary length, width and depth chosen by the user. It is filled with mortar. The walls and bottom can be lined with special ceramic tiles or mosaics. Almost anyone can implement such a project in any suitable location. For such a pool, it is important to think through all the required communications so that it lasts as long as possible.
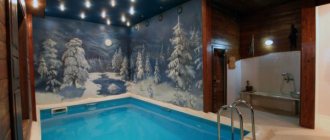
Dome
Dome. This could be any of the options listed. The special thing is that they all have a roof. It can be made from various materials. The main highlight is that the bowl is closed on all sides, which prevents wind from blowing through and also contributes to the rapid heating of the water inside.
In addition to differences in the method of construction, subtypes are also distinguished according to the filtration option. It can be:
- Skimmer. In this case, water is drawn from the pool through technological holes located on the side walls. Moving through the channels, it enters the filter device. There it is cleaned, disinfected and partially heated. Return to the container is carried out through nozzles.
- Overflow. This method is more effective, but is also somewhat more expensive in construction. The water mirror reaches the very top of the pool. Water flows through the drain hole or the top side and enters a special gutter, and from it into the tank. The latter contains a pump with a water sensor, which pumps the liquid into the filter, where it is cleaned. The liquid flows back through the holes located at the bottom of the pool.
Skimmer
Overflow
Finishing work
Finishing the pool with film
To install PVC film, it is important to follow the instructions. The process itself is simple, but requires attention. Even if you are a layman, the tips below will help you deal with this matter.
- First of all, you need to prepare the surface: remove all debris, leaves and everything unnecessary. If the poured walls and floor are not level enough, they must be leveled with plaster. A flat surface is necessary, since under water pressure the PVC film will repeat the relief of the bowl; if the surface turns out to be curved, after installation it will be very noticeable.
- To finish the pool with film, a fastening strip or corner is laid around the perimeter, which must be secured with screws. On one side, the strip has a plastic coating, to which the film will eventually be welded; if it is a corner, then the film must be secured with screws. When the pool is large, stripes are additionally fixed to the walls.
- Now lay a special insulation over the entire surface, thanks to which the friction of the film on the concrete will decrease, it will not wear off, and the service life of the material will increase. When the pool is placed indoors, geotextiles can be laid instead of insulation. The substrate is attached with fastening strips, and in difficult places it is fixed with glue.
- After this, a film is spread on the surface with an overlap of sheets of 8 cm and a distance of 1–2 cm from the wall. To ensure that the film adheres well to the corners, use a corner.
- Using special equipment for gluing PVC films, weld the drain seams and additionally seal them with sealant.
- At the last stage, the PVC film must be connected to the mounting profile on the side of the pool.
Side mounting
You can see how this work is done in the video below:
All that remains is to fill the pool with water and test the new coating. Your pool is now ready for full use. To complete the job you will need the following tools:
- perforator;
- sharp knife;
- sealant;
- equipment for gluing PVC film;
- silicone roller;
- corner;
- the PVC film itself.
Installation of film material
When the pool bowl is finally prepared, the installation of PVC begins. We suggest using a step-by-step guide - it will greatly simplify the work and clarify unclear points:
- Step back 1-2 centimeters from the wall, making an overlap of 5-8 centimeters.
- Check all sheets for debris, twigs and other contaminants. They shouldn't be on film.
- First, each sheet is tacked using low temperatures. This way you can fix the panels and they won’t move anywhere. This will also prevent the formation of wrinkles that cannot be smoothed out even when filled with water.
- After laying the PVC on the bottom, hang the panels on the walls. The overlap for a vertical seam is from 5 to 8 centimeters, for a wall-to-wall or wall-to-bottom seam - 15 centimeters. Lay the PVC sheet on the vertical sections of the pool, welding it to the fastening strip. Be sure to weld before doing this.
- During the welding process of the material, all carbon deposits formed are removed with a brush. The material at the corners is welded last.
Since stretching when making a wall-bottom seam is performed in a horizontal plane, we advise you to move the sheet from the edge by 3 centimeters.
Installation of PVC film in the pool
Frame pool made of PVC film
Frame pool
If you don't have the space or ability to build a pit pool, you can make a PVC frame pool that will be installed on the ground. We will look at a homemade pool made of wood and PVC film, which will have dimensions of 4.5 × 2 m and a wall height of 1 m. It can be made in a day.
- To install an in-ground pool, it is important to ensure a level and stable surface. Choose an ideal location to avoid labor-intensive excavation work.
- Prepare the site by removing the top fertile layer of soil, removing roots and unnecessary plants. The surface must be clean, free of pebbles and protruding solids.
- After this, make a sand cushion that will level the area. The layer of sand should be 5–10 cm. To simplify the leveling task, install level beacons, which will serve as a CD profile and stretch the sand to obtain a flat surface.
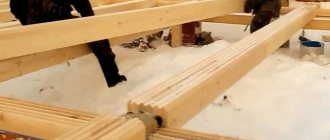
- Now we need to assemble the frame of the future pool. It can be made from wooden beams with a cross-section of 100×50 mm, half-edged and unedged boards 25 mm thick. Lumber should be cleared of bark and treated with an antiseptic. Dry wood, or at least dried wood, is better suited for this work.
- To make a frame, mark the corners of the structure. Check all dimensions to ensure everything is equal and even. After that, you need to make holes, manually with shovels or a drill, about 50 cm deep. To strengthen the structure, two additional posts are installed on the long sides, and 1 between the short sides.
- Vertically install the pillars, which will be wooden beams. To ensure waterproofing, the part that will be in the ground is covered with molten bitumen. The space in the pit is covered with crushed stone and compacted well.
- After all the pillars are securely fixed and leveled, they are tied with boards.
- Since the support pillars will bear all the pressure of the water column, they must be additionally strengthened with jibs.
- When the frame is ready, you should make a staircase. You can buy it in the store.
First you need to solder it.
Now the pool is lined with PVC fabric. But first you need to cook it. Cutting and soldering of the film is carried out on a flat surface in a spacious room. It is important to be careful not to damage the material. So, take your welder and select a temperature that is acceptable for the material you purchased. Cut the material and lay it with an overlap of 2-3 cm. Heat the film at the joint until it melts slightly so that the material softens, and press it tightly with a silicone roller along the line, gluing the film together.- Watch the quality of the seam, because this is the weak link of the pool, which must be reliable and airtight. For best effect, seal the seam with sealant. In order not to spoil the canvas, you can practice on pieces of film to check the temperature, speed of movement and fill your hand.
Processing the edge of the canvas
When everything is ready, fold the film 5–7 cm around the perimeter on top and boil it again. Now in this side you need to make holes in increments of 50 cm and install metal rings (eyelets) into them using a special press or flaring tool. Through these holes, the pool sheet will be attached to the frame with ropes or screws.- Finally, you need to connect the canvas to the frame. It is better to fix the film to the wood using self-tapping screws with a 35 mm press washer and additional large washers, which are larger than the holes made in the canvas. It is important that the fasteners are galvanized. Stretch the fabric well and perform all work carefully.
PVC Wooden Frame
That's all, all that remains is to check the tightness of your new pool by filling it with water. You can make such a pool quickly and inexpensively, but there will be many benefits from it.
Making a concrete pool
Pit for a concrete pool
The main task for this option will be excavation work. Having decided on the location and marking the territory, a hole of the required depth is dug. The bottom is formed in accordance with the recommendations listed above.
- The next step is to dig a trench. It must connect the pit to the groundwater drainage site.
Construction of a concrete pool
A pipe is laid inside the recess made in the middle of the pit. It is discharged through a trench to the liquid collection site.- The surface is covered with a layer of gravel.
- Drains are installed at the location of the planned drain holes. They are supplied with a liner made of polypropylene or other pipes. They are wrapped in oilcloth to prevent concrete from getting into the middle.
- A reinforcing mesh is placed at the bottom. It is made of reinforcement with a diameter of 12 mm. It must be raised a little so that all the rods are subsequently completely immersed in the solution. To do this, you can hammer in posts from scrap materials.
- Additionally, it is necessary to install vertical rods, which will later ensure a good connection between the bottom and the walls.
- Mortgages are made - these are wooden boxes, thanks to which technological holes can be left.
- It is better to order ready-made concrete mortar from the manufacturer. This is necessary in order to simultaneously fill the entire space. If preparation will be done manually, then several large concrete mixers will be required. Cement must be used at least grade M350.
- The area is carefully filled. After this, it is necessary to compact it with a vibrator. The final touch will be leveling using a vibrating screed or rule.
- In this state, the resulting slab must be left for 2 weeks.
Pool made of foam blocks
You can start building walls. They can be poured as monolithic ones, but a lot of effort will have to be made to place the formwork. Another option would be to use hollow polystyrene foam blocks or foam blocks. They need to be laid in such a way that the reinforcement, which was installed vertically, passes through the holes in the stone. Subsequently, concrete solution is poured inside. Along the course of the masonry, it is necessary to provide for the presence of technological holes for lighting fixtures, as well as for a skimmer.- Next, apply plaster in a layer of 1 cm.
- After drying, all surfaces are thoroughly rubbed. In this case, you need to be careful so that there are no large scratches that could subsequently damage the waterproofing.
- If the walls were made of stone, their outer side must be covered with foam plastic and also covered with waterproofing. The latter will not allow moisture from the outside to destroy the material, and the insulation will serve as a compensator for thermal expansion.
Waterproofing the pool
The entire internal space is covered with a special waterproofing compound. Next, a polymer composition is applied, which will ensure complete tightness. It needs to be cleaned as soon as it sets, because... then it will be much more difficult to do.- Mosaics or tiles are being laid. It should be glued to a special polymer mixture, and not to regular tile adhesive.
- The pool is being filled. In this condition it should stand for 2 weeks. If the water level remains stable, then you can clean it, connect all the required elements, add an antiseptic and use it.
Video
To make your task easier, you can use wooden pallets as a frame:
A DIY PVC pool is a very real and inexpensive implementation. If you are not a fan of special beauty and are not obsessed with bringing your site to perfection, then you can make a homemade pond from available materials at minimal cost, for example, from a PVC banner. But for lovers of everything beautiful, there are also DIY PVC options. Making a PVC pool - DIY construction tips. Stages of building a pool from PVC film with instructions - read here.
PVC film for finishing a pool can be purchased for 1,000 - 1,500 rubles. (Russia). The cost of the same material with patterns from imported manufacturers will cost twice as much.
Stages of building a frame PVC pool with your own hands.
- Choosing a location.
- Surface preparation.
- Construction of a platform or ditch for a future swimming pool.
- Construction of formwork.
- Laying with polyvinyl chloride.
- Installation of a filtration system.
Useful tips
To make caring for the font easier, it is located closer to the vegetable garden or garden. Water is pumped out to water plants. Since in hot weather this is done after 1-2 days, the pool will not have time to become dirty.
If there are problems with water drainage, a tarpaulin cover is sewn for the bowl. It will prevent debris from entering the water when the hot tub is not in use. The shelter will additionally retain heat. The water will warm up faster during the day and cool down more slowly at night.
Selecting a location
In order to make a PVC pool, the first thing you need to do is choose the right place for the future reservoir. It should be level, without slopes or holes. In a well-lit area, away from bushes and trees. To prevent additional debris from spoiling the water. Accessible to local water supply and electricity. It will be more convenient to collect water and connect the filtration system.
Site preparation
- The area for the pool needs to be prepared. Make markings for the future bowl using pegs and thread. If the pool is round, then a peg with a thread is installed in the center, and a bottle of paint is tied to the other end of the thread. It turns out to be a homemade compass, which is convenient for drawing a circle.
- Remove the fertile layer of soil. If the pool is above ground, remove stones, grass, and sharp roots.
- A wooden podium or concrete pad is constructed. As a last resort, the area under the frame pool is covered with sand. The pillow will help avoid deformation of the PVC material.
- If the bowl of the PVC pool is planned to be semi-buried, then you need to remove the fertile layer of soil from the edges of the marking, towards the middle. Moreover, the walls should be made at an external angle. This will help avoid soil shedding.
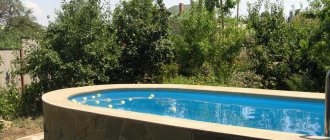
Features of stationary mini pool tanks
Stationary are those types of structures that are installed for several years. Such pools can consist of separate sections or of solid material (for example, if an old bathtub is used for the pool) . The materials that are used can also be very different: metal, plastic, wood, fiberglass. The only requirement for the material is the ability to withstand temperature changes and exposure to external factors.
The operation of such a pool in the country has no restrictions. It can be used as a pond in summer and as an ice skating rink in winter. Typically, such reservoirs are installed for 10-15 years.
Installing a purchased PVC frame pool with your own hands
- Remove the PVC film covering from the packaging. Carefully place on the prepared sand cushion.
- Lay out the frame elements. These could be plastic pipes for a seasonal pool. Or metal plates for a pool intended for conservation.
- It is advisable to lay out the frame and number and sign all the parts. In the future, when installing and dismantling, it will be convenient to work and not get confused.
- Polypropylene pipes are assembled like a construction set. The kit comes with clear instructions. The material is immediately attached to the side elements and assembled in a circle, fastened with tees. Pipes from the base are attached to the board, in tees.
- The bowl is gradually filled with water and the film coating is smoothed out.
Which pipes to choose and in what cases?
Polypropylene and metal-plastic pipes are used to make the frame for the pool. Lathing made from these materials is durable and flexible. The elasticity of the pipes allows joining in hard-to-reach places.
The frame is made of profile metal and is reliable. Welding ensures rigidity of the structure.
The choice of pipe material depends on:
- complexity of the frame,
- dimensions,
- types of installation.
For a large pool, a metal profile is better suited, which will provide reliable protection of the bowl from rupture. For the submersible method, polypropylene or metal-plastic pipes are preferable.
They are not afraid of contact with a damp environment. Under such conditions, the metal profile will quickly fail. And for outdoor structures it is very useful.
Installing a skimmer in a PVC pool
A skimmer for frame pools is usually mounted.
- It hangs on the side of the pool, and the kit includes fastenings for a frame pool.
- And it is connected to the pump using adapters and a hose.
If the reservoir is large, then it is advisable to have several skimmers around the perimeter for more intensive work. Skimmers are also necessary for the operation of a water vacuum cleaner. The hose from the vacuum cleaner is inserted into this device.
Features of seasonal models of mini pools
Seasonal structures have certain restrictions and can only be used in the summer season. In mid-autumn, such a reservoir must be dismantled and stored in a warm room.
If we talk about frame mini pools, they include:
- hollow tubes made of plastic or metal to create a frame;
- belts, fasteners, connecting parts;
- PVC film 1-2 mm thick.
Such country tanks can accommodate 2 adults or 4 children. The disadvantage is the short service life - up to 5 years.
Installing a filter in a PVC pool
ADVICE!
The maximum effect is achieved by comprehensive cleaning - an earthen filter plus a floating trap for surface debris. The earthen filter is cleaned at approximately the same frequency, disposing of the filler that has become toxic, as recommended by the instructions for the finished pool filter.
As for the filter, the choice of power is based on the volume of your pool. It is better to use a pump power several times greater than the volume of water in your pool. The throughput in liters per hour is indicated in the instructions. Such a filter can drive all the water out of the pool several times in a day, and accordingly, the cleaning properties will be higher. But the quality of clean water will also depend on the filter model. A more inexpensive option that comes with a frame pool is a cartridge filter. Other models are sand filters. They clean better by passing water through sand and are not very expensive. But the most reliable and high-quality cleaning filter is a diatomaceous earth filter. It not only mechanically cleans dirt, but also saturates the water with beneficial properties.
- The filter is installed on a flat, dry area. At a distance of 1 meter from the side.
- The hose for water intake, if there is no skimmer, is attached to the upper edge of the side. This is where most of the garbage accumulates.
- The water outlet hose is installed closer to the bottom, on the opposite side of the pool. Then the circulation of liquid in the pool will be better.
- The filter must be washed daily.
Methods of filtering and purifying water
If the pool does not have a special cleaning system, after a short period of time the water will become dirty, smell unpleasant, and plaque will appear on top. To completely drain and fill with clean water, you can use a pump designed for this purpose. However, in this case it will take some time for it to heat up again.
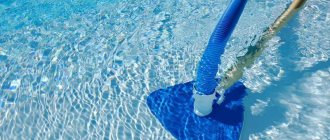
In addition to the filter pump, brushes, hoses, and testers are used in pool care. There are electrical devices used to catch debris - pool skimmers. You can use nets. They are easy to remove debris floating on the surface of the water. If the pool is large, then it will need a strong telescopic handle. But nets and skimmers cannot remove small debris, which is why flow filters are needed.
You can use a special installation with a filter pump 8000. Two pipes are connected to the pump, one is used for draining, the other is for supplying purified water passed through a filter to the pool. Filters are produced:
- sand;
- cartridge;
- diatoms.
What you will need when installing a pool liner
- Hair dryer. Moreover, it is special, construction (it is also called industrial). Without it, it will not be possible to properly glue individual fragments of the film. There should be several nozzles for the electric tool - with different widths of the outlet pipe and directions of the hot air stream.
- "Metal" brush. To remove carbon deposits on the working part of the hair dryer.
- Pressure roller. It is necessary for rolling the joint after welding the film strips.
- Electric drill (perforator) with a set of drills or drill bits for concrete. Will be needed when installing the substrate.
- Screwdriver. Installing fasteners using a screwdriver is not only time-consuming, but also ineffective. There is no guarantee that all screws will “go” strictly perpendicular to the plane of the base. This means that there will be distortions in the fastening tapes, and this will cause difficulties when forming the joints of the pool film strips.
- A cutting tool (scissors or a sharp knife) for cutting the coating material.
- Plumb (for leveling vertically installed fragments).
- Solvent, glue (but only elastic after drying).
Technology of finishing the pool bowl with film
Preparatory activities
Cleaning the surface of the bowl. It is advisable not only to remove all debris from the pool, but also to literally “lick” it. This will reveal all defects in the base on which the film will be laid.
Elimination of defects. What could it be?
Firstly, the unevenness. This is typical for concrete pools. The slightest bulge will eventually cause abrasions, scratches on the film or its damage, and therefore leaks. The same goes for shells. If the “bumps” are easy to knock down and sand with your own hands, then the “notches” just need to be sealed with cement mortar, putty and leveled.
Secondly, partial peeling of the tiles, if they were used in the initial design of the pool, and the film is supposed to be laid on top. And such defects are also relatively easy to eliminate.
If necessary, in case of obvious damage to the bowl, it is advisable to lay a leveling screed on it. The technique for this work is simple, and there is a fairly large assortment of appropriate dry mixtures or liquid formulations on sale. There are plenty to choose from.
Laying film in the pool bowl
Cutting PVC sheets
This is one of the most important points when finishing an artificial reservoir. It is necessary to take into account that after filling it with water, the film will stretch, and the stronger the steeper the walls of the bowl. Therefore, when determining the geometry of the fragments, it is necessary to take into account that the strips are laid with an overlap (about 6 ± 2 mm, depending on the thickness), and they must lie freely in the bowl, without excessive tension. For corner joints (for example, at the junction between the bottom and the wall of a pool), the value of this parameter is doubled. That is, at least 12 mm.
Film installation
- You should start by finishing the bottom of the pool. The quality of all other operations depends on how accurately this work is performed.
- Installation on walls is done from bottom to top. The main assistant at this stage is the plumb line. It is along this that the film fragments should be aligned.
Welding of film sheets
One of the most difficult aspects of installing a film in a pool. It will no longer be possible to transfer something by correcting the mistakes made - you can only replace a piece of coating material.
- Adjacent strips should be laid first. After alignment, they are “tacked” to prevent their possible shift during the welding process. This can be done in two ways. If the film is thin, then it is enough to organize “point” connections with a solvent. It will melt at the places of application, and their gluing is ensured. The second option is to briefly heat the film with a hairdryer in certain areas and fix it. The work is painstaking, but everything else depends on its quality.
- After such preparation, direct welding of the film pieces is carried out. The strips at the joints are heated by hot air. Depending on the location of their installation, the appropriate nozzle for the hair dryer and its operating mode (jet temperature) are selected.
Processing the seams of the installed film
Since pools are not finished with your own hands every day, therefore, most of us have no practical experience. Therefore, small defects in welded joints are inevitable. To seal them more reliably, it is advisable to treat them with a special composition of liquid consistency - seam sealant (available for sale). It’s easy to choose the shade to match the film, and it’s easy to work with. “Jelly” is squeezed out of the tube, and after application along the joint it hardens in about half an hour (at room temperature), maintaining its elasticity.
The quality of the seam largely depends on the uniformity of heating. Therefore, a number of conditions must be met:
- try to maintain the distance between the cut of the nozzle and the seam being processed;
- ensure that the voltage supplying the hair dryer remains constant. In the private sector, this is one of the problems of power supply, so when installing the film in the pool, it is advisable to switch it on through a stabilizer;
- during the welding process, it is necessary to periodically remove carbon deposits from the nozzle (the brush has already been mentioned), otherwise the jet will gradually “play” (deviate), which will affect the reliability of gluing the film;
- Lastly, the inner corners of the pool are treated with a hairdryer. At this stage, you can make some adjustments - straighten the remaining strips, trim off the excess, and then glue them together.
It remains to add that after installing the PVC film, you need to fill the pool bowl gradually, and always with warm water. Under such conditions, the material becomes more elastic and stretches better.
Laying geotextile backing
Typically, finishing begins with the installation of a base covering and a fastening strip. Why is backing material so important? It will protect the film from touching the surface of an artificial reservoir.
- Lay the strip tightly. On one side you will see a plastic coating - the film will be welded to it. For fastening to the bowl, the screws are screwed into pre-installed dowels. The drilling step is from 10 to 15 centimeters.
- If the bottom has steep slopes, the strips are attached to it. When the shape is pyramidal, the strip is laid along all adjacent faces.
- Make sure that no seals are created during the fastening process. In pools with stairs, the film is secured using a fixing angle.
Pool underlay
Recommendations for choosing a film for a pool
By thickness
The geometry of the canvas does not matter, it is standard (in cm): length - 2,500, width - 240 or 680. But with thickness, not everything is so simple. To optimize material costs and ensure sufficient strength (and therefore durability of the coating), it is necessary to take into account the depth of the pool bowl.
- If it is within 2 m, then you can install a film thickness (in mm) in the range from 0.7 ± 0.2.
- In other cases – no less than 1.0.
- The bowls of large pools of complex configuration (embossed) are finished with a thicker, two-layer film - from 1.5.
By execution
- Regular film. The cheapest modification, which is not characterized by high strength, is therefore used to a limited extent for finishing bowls. As a rule, they are purchased for installation in prefabricated pools.
- Film with reinforcement. The most popular product modification in the private sector. Such canvases can withstand significant loads, so they can be used for DIY installation with virtually no restrictions.
- Film with anti-slip coating. It costs significantly more, but in terms of safety of using the pool (due to the ribbed surface) it significantly outperforms its analogues.
- Acrylic coated film. The main purpose of this layer is to provide bactericidal protection of the water in the pool. It does not bloom, bacteria, rot, and the like do not multiply in it. The service life of such canvases in an aquatic environment is 1.8 times higher than samples without acrylic painting.
If you understand all the features of installing the film in the pool bowl, then doing this work yourself will not cause much difficulty. The main thing is accurate calculations, extreme accuracy, attentiveness and strict adherence to the recommendations of specialists.
>
Comments (2)
Antonina
03/04/2018 at 03:15 |
An inflatable pool is, of course, very cheap and convenient. But it seems to me that a slightly better option would be to build a small but real concrete pool. It has more space and looks better. and I think it is better to install it in a sunny place.Answer
Yulia Expert Plodogorod
07/19/2019 at 01:07 |
Hello Antonina! Of course, swimming and relaxing by the pool in the sun is very pleasant. But this choice of location for an artificial reservoir has its own nuances. The fact is that with an abundance of heat and sunlight in the pool, the water will begin to bloom very quickly. These are the factors that are required for the growth of certain algae. Therefore, additional measures need to be taken to prevent this from happening.
The easiest way to keep the water clean is to put a bag of peat in the bottom. Using this technique, you can delay flowering in the pool for some time. As soon as the water begins to become cloudy, you need to replace the peat with a new one. Also, there are special tablets against water blooming.
If the pool is large enough and divided into zones, water lilies, lilies and other similar plants are sometimes planted there. Their presence also inhibits the development of blue-green algae.
You can use specific filters. They come with silver ions, with built-in ultraviolet lamps, and some move along the surface of the water and collect debris.
Another way to prevent blooms is to keep the water from standing. For this purpose, fountains and other devices are used. We would like to note that a pool with such a device can be used in a very original way in terms of landscape design. Add different stones or arrange a real waterfall.
If your pool is large enough, we recommend combining several methods.
In addition to what has been described, you can protect an artificial pond from blooming and debris by stretching a scattering mesh over it. It is not necessary to use a material with a strong percentage of dispersion, creating a thick shadow.
We would like to note that even if the pool is just concrete, it is better to make a smooth transition between it and the rest of the area. This can be achieved by using stones of different sizes or by planting ornamental moisture-loving plants.
If the described pond is intended primarily for swimming, then it is better to place the decorative elements on one side, and the area from which it will be convenient to enter the water on the other. This way the pond will be beautiful and functional.
Answer