General provisions
Any paint is classified according to the type of material, gloss and washability. Depending on the reflective properties of the surface, painting materials can be glossy or matte. Glossy painted ceilings are characterized by the presence of shine and high decorative characteristics. However, to apply such a coating it is necessary to carry out careful preparatory work to eliminate the slightest irregularities and defects.
As for matte paint, due to its lower reflectivity, it is able to mask minor flaws in the base base. This reduces the time and effort required for plastering or putty by an order of magnitude. An intermediate option is also available for sale - the so-called. “semi-gloss” paints: they are able to impart a certain shine to the ceiling surface, simultaneously masking minor defects and irregularities.
Depending on their ability to withstand wet cleaning, paints are either washable or non-washable. The selection of a specific option depends on the operating conditions. For rooms with a low level of pollution (bedrooms, children's rooms, living rooms), inexpensive non-washable options are quite suitable. It is better to paint a kitchen, hallway or bathroom with a washable material that can withstand regular wet cleaning with a sponge, rag and detergents without loss of decorative characteristics.
Features of water-based paints
The main option for painting the ceiling in an apartment is water-based compositions. In another way they are also called water-dispersed. Plain water is used as a solvent here. Among the ingredients there are also film-forming materials - pigments that impart covering properties to the substance. To give the paint the necessary performance properties, special additives are introduced into its composition.
The result is a liquid suspension consisting of solid components (base, pigments and additives) suspended in the liquid. A very important point is that these particles do not dissolve and do not mix with water. As a result of application to the base to be decorated, water evaporates, after which only the polymer layer of the desired color remains.
Water-dispersed paints have a number of strengths, which makes it possible to decorate not only ceilings, but also walls indoors for various purposes:
- High adhesion
. This allows the material to fit well on almost any base, forming a reliable “adhesion” with it. If the surface preparation technology is carried out correctly, there is no need to worry about peeling or swelling in the future. - High drying speed
. Usually after 2-3 hours the painted surface can be used. - No unpleasant smell
. This makes the work much easier, because... there is no need to use personal respiratory protection. This is especially appreciated when finishing large areas. The absence of harmful toxins makes the material environmentally friendly. It can be used without restrictions in any room. - Easy to apply
. Working with water-based paint usually does not cause difficulties even for a person without painting experience.
Compositions of this type also have some disadvantages:
- Temperature requirements
. Water-dispersed paints must not be used in unheated rooms where the air temperature can drop below +5 degrees. Otherwise, small cracks will appear on the finishing surface. - Humidity restrictions
. If the humidity level in the room is high, then water-based paint simply will not be able to dry: the water in its composition will have nowhere to evaporate. - Requirements for the quality of foundation preparation
. It needs to be well leveled and sanded, because... Painting this type of slope will further highlight any imperfections in the surface.
Water-based paints are acrylic, silicate, silicone, mineral and polyvinyl acetate.
Choosing the color of the ceiling in a country house
Bagretsova Irina Aleksandrovna content manager, photographer
The ceiling in your home should not be taken for granted. Consider it a kind of sky at home. After all, it has a huge impact on the appearance of the entire space. While many don't pay enough attention to the sky above, you need to take its design seriously.
There are many ways to do this. You can add caissons, false beams and other decorative elements that will make the ceiling stylish and fill it with life. Some might just paint it, but even that needs to be done well. Even simple painting can change the interior of your home.
What will you learn about in the article?
- White will never be a mistake...
- Use light colors to make a room feel bigger...
- Be careful when choosing dark colors...
- The ceiling matches the color of the walls...
- Change the color of the walls a little...
- Paint a low ceiling...
- Use a color that is different from the walls...
- Ceiling painting...
- Try using patterns and stylish painting...
- Paint your textured ceiling...
White will never be a mistake...
The most common ceiling color is white. It can be called a safe choice as it never fails and looks good in any room. A simple white paint will allow light to reflect, making the room feel larger and larger. White looks good with any wall color, but there is no need to stick to just this option.
Photo 1. White ceiling
Teknos SatuSaunaSuoja paint will help you paint beautifully in a translucent (glazed) white color. Even a person who has picked up a brush for the first time can use this product. If you want to cover it tightly with white paint, then Nordica Eko from the same Finnish manufacturer would be an excellent option. It is easy to work with these materials and their cost is not high.
Use light colors to make a room feel bigger...
You can try choosing a different color. A light tone will be a good solution, as the ceiling will become higher, making the space wider. These shades will help balance the dark colors in the interior, adding a touch of calm to the room. There are a variety of light colors available, so you can choose the one that will look best in your home.
Photo 2. Glazing white shade of the ceiling
To select light, calm shades, we have prepared NCS, Ral, Teknomix catalogs. We also produced a huge number of colors in our office. There is no customer who has not found the right option for his home with us.
Be careful when choosing dark colors...
In an interior of a neutral shade, a dark ceiling looks good, as it can become the center of the room. Don't be afraid that the color will make the space smaller, but it is better to use it for a ceiling with a height of 2.5 m. If it is lower, it is better to go with a light shade.
Photo 3. Dark shades of wooden ceiling
Dark colors are more difficult to work with than light ones. This is especially true for glazing, translucent paints, oils, and azures. Here, preliminary and intermediate processing (grinding) will play an important role, and you can’t do without priming, otherwise it will stain and ruin the aesthetics. A good option is to use the services of our paint shop. Experienced specialists will complete the task efficiently and on time.
The ceiling matches the color of the walls...
If you want to create a luxurious atmosphere, the color of the ceiling and walls should be the same. This will allow the eye to easily move from the wall to the ceiling, since their junction will be blurred. Using the same color for the walls and ceiling can be soothing to the eyes.
Photo 4. Ceiling and walls in the same color
It is important here not to create a “box” of identical materials. For example, lining walls and lining ceilings... Combine profiles, for example, the walls are a wide imitation of timber, and the ceiling is a narrow lining. They will look amazing in one shade.
Change the color of the walls a little...
If you want the ceiling to be a slightly different color than the walls, try changing the color of the walls. You can use a lighter or darker tone. This will still create a unified space, but it will have more depth. Lighter shades will make the room feel more spacious. Dark colors will create a more intimate space.
Photo 5. Slight difference in the shade of the walls and ceiling
Choosing a color is never an easy task. Sometimes customers spend several hours in our office, and sometimes they order dozens of colors. But all that effort pays off when your dream home is in the finish line. After all, it’s so nice to be the one who makes your dreams come true.
Paint a low ceiling...
If you have a low ceiling, choose a light paint color. You can use a lighter shade of the color in which the walls are painted. Another option involves using a shade a shade or two darker than the walls. This will make the ceiling appear higher. It is worth painting the ceiling in a contrasting color, but you can also use white.
Photo 6. Contrast of walls and low ceiling
In our store's assortment you will find brands such as Teknos, Renner, Tikkurila, GNature. The line of these manufacturers has their own unique paints, and the interaction of our consultants and the paint shop allows us to pass on to you our many years of experience working with this or that composition. This will avoid many mistakes.
Use a color that is different from the walls...
You can make the ceiling even more interesting by using a different color. This will not only highlight the ceiling, but also add attractiveness to the room. Simply using a different color can give a graphic look to your interior.
Photo 7. Imitation of timber walls, lining ceiling
We often work at the customer's site. For this purpose, several teams of painters were trained through our paint shop. Now these are real fighters, capable of solving complex complex problems. We can handle any painting.
Ceiling painting...
The pattern on the ceiling will look unusual. This is usually done in children's bedrooms, but looks good in the living room and other rooms of the house. Be creative and choose a design that will add more visual interest.
Photo 8. Painting in the “Rustic” interior
In this photo you can see how the painting on the ceiling and the wooden paneling on the walls look. The performers liked the customer's taste.
Try using patterns and stylish painting...
Try painting stripes on the ceiling, which can create the illusion of space. Applying patterns can be challenging, but it's a lot of fun. Think of the ceiling as a blank canvas that you can work with.
Photo 9. There are also such tasks
Yes Yes. It also happens. With the Tikkurila line of interior paints, painting, even such an extravagant one, will turn into a pleasure.
Paint your textured ceiling...
Some rooms can have textured ceilings; for this we offer a wood aging service. Brushed lining or plank will decorate your home.
Photo 10. Aged gray lining on the ceiling
Go for it. This is your home. You can create an exceptional and stylish interior just for you and your family. Come up with an idea, and together with you we will bring it to life.
Call. We will be happy to answer all questions. Your "LesoBirzha".
See how we can
May 27, 2019 1926
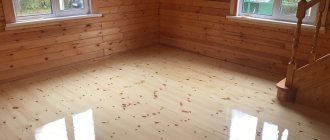
Ceilings made of Angara pine in the Extra grade under white covering paint
97 m2 388 000
14 days CP Romanovskie Dachas
May 27, 2019 1833
Vertically mounted lining made of Angarsk pine in color TV 34
230 m2 828 000
20 days CP Romanovskie Dachas
05 December 2018 1505
Lining made of Angarsk pine in the interior of a country cottage
310 m2 1 085 000
28 days checkpoint Sapronovo
View other works
Acrylic paints for ceilings
Compositions of this type are made on the basis of acrylic resins: it is they, together with various additives, that form a decorative film on the surface of the ceiling. Among other options for painting the ceiling in a room, acrylic paint is the most popular. With its help you can decorate concrete, wood, polymer, steel, glass and plaster bases. The material dries very quickly, without emitting unpleasant odors or toxic substances.
Acrylic compounds are known for their durability. Once applied to the ceiling, they can last a long time without losing their decorative qualities. Such a surface is not afraid of sunlight, abrasion, peeling and crumbling. The created layer of paint allows steam to pass through, which is very convenient when decorating rooms with high humidity levels. The high adhesion of the material should be taken into account: once applied, it will not be easy to remove. Therefore, you need to decide in advance for what time this finishing is designed. In the process of preparing the base, it is recommended to use special antiseptic impregnations.
A special type of acrylic paint stands out - acrylate. Along with the standard set of components, latex was introduced into its composition. This makes it possible to impart additional unpretentiousness and durability to the material. Acrylate compounds adhere very well and adhere to the surface, masking various minor flaws in the form of cracks, crevices and base defects.
To enhance this effect, it is recommended to apply the material in two layers. In the future, the finished finish can be washed using delicate detergents. According to the manufacturers of acrylate paints, the base decorated with their help is able to withstand many washing cycles, with full preservation of the original decorative characteristics. The high performance characteristics of acrylate paints are expressed in the fairly high cost of this type of material.
What can you paint with?
Ceiling painting can be done with several types of paints; the technology for painting the ceiling also depends on them.
- Water-based paint is suitable for any ceilings. It has a mild odor. After using such a base as a putty, you can carefully paint the ceiling with any material, and it will adhere much better than without a water emulsion. In the future, the question of how to repaint the ceiling will not arise, since the material lends itself well to this procedure.
- Acrylic is better suited for rooms with high humidity. The material makes it easy to wash, while the painted ceiling will retain its color.
- Latex painting of the ceiling makes the surface resistant to moisture. Among the disadvantages, one can highlight the resistance to fading - slightly lower than in the previous version. Ideal for painting a relief ceiling or wallpaper.
- Ceilings painted with silicate base look better if the base is mineral, for example, concrete. The basis of this paint consists of liquid glass.
- The best paints for painting ceilings are silicone paints. They are characterized by high elasticity. Thanks to its safe composition, there is no harm to the health of the body. No pungent smell.
- Painting the ceiling with enamel is better suited for wooden bases. The enamel has excellent protection and does not cause any inconvenience in future care.
Although there are many options for paintable bases on the market, inexpensive water-based emulsions are more popular. This option does not require complex technology, so those who do not have much experience in this area can easily cope with it.
In the video: preparing the ceiling and painting with water-based emulsion.
Tips for choosing paint
Professional painters recommend choosing an acrylic-based mixture. If you are interested in how to paint the ceiling in a bathtub, you need to pay attention to a more expensive option and purchase a latex base - it is characterized by maximum resistance to moisture.
Do-it-yourself ceiling putty will be ideal if you follow a few recommendations:
- It is better to choose a matte paint - it allows you to hide surface unevenness and flaws that the painter made;
- The paint must be fresh. Only a good, non-expired and non-frozen emulsion can be used to paint ceiling surfaces;
- If possible, whiten only with a light color. The whitewashed ceiling only emphasizes the imperfections of the surface.
Before you paint the ceiling with your own hands, you need to carry out the preparatory stage. According to the instructions, the paint can be diluted with water; the rest just needs to be mixed using a special mixer.
Silicate
The basis of silicate paint is a mixture of liquid glass, talc and chalk. After application, a very hard and durable coating is formed on the surface, the service life of which reaches 15-20 years, even in the presence of unfavorable external conditions. Indoors, where there is virtually no aggressive impact on the finish, silicate paints can last an order of magnitude longer.
An important advantage of this finishing material is its high vapor permeability. As a result, water molecules can circulate freely in any direction, providing a microclimate that is favorable for humans indoors. In addition, the decorative layer will not peel off or become damp. It is still not recommended to use silicate paints in very damp rooms. But when choosing which paint is best to paint the ceiling in a room for water procedures or cooking, you need to pay special attention to silicate paints.
However, the specificity of liquid glass is such that due to its low elasticity, silicate paint is prone to cracking. This must be taken into account when looking for an option on what paint to paint the ceiling in an apartment in houses where walls and ceilings tend to shrink. Before applying this type of material, it is necessary to very carefully remove all traces of previous paint from the base (primarily this applies to organic finishes). In terms of moisture resistance, silicate paint is very similar to acrylate paint: it can be washed with a damp sponge and household chemicals.
Additional recommendations
Painting the ceiling has some tricks. Even when using high-quality materials and tools, without knowing the tips, the desired result will be difficult to achieve. Among the main secrets are:
- The finishing layer must be applied to the window, since due to the incidence of light, the joints of the strips will be less noticeable.
- If an area has been missed, you cannot paint it separately - there is a risk of getting a spotted ceiling. To remove this effect, you need to paint the ceiling again with a whole layer.
- To replace all unpainted areas, the surface must be inspected from all angles. It is recommended to have an assistant monitoring this.
- You can't skimp on priming. In this case, the surface will quickly absorb the paint, and in the future it will peel off after a short interval of time.
- We paint the ceiling as quickly as possible so that the paint does not dry out and stick to the pile on the roller - this will ruin the whole process.
Now you know how to paint the ceiling correctly. This is a simple procedure if you use a roller for the job. But here you need to listen to all recommendations and advice. Be sure to purchase only high-quality materials and tools. If you follow all the secrets, success in creating the perfect surface will become a reality.
The best ways to paint a ceiling (2 videos)
Paint for walls and ceilings (25 photos)
Silicone ceiling paints
This type of paint became freely available relatively recently. Silicone resins are used as the main binder here. As a result, the resulting composition managed to combine two very unusual characteristics - hydrophobicity and vapor permeability. After drying, the decorative layer created on the ceiling will allow moisture vapor to pass through well, without causing the formation of a damp, stuffy atmosphere. In this case, excess moisture will not affect the ceiling material or thermal insulation.
Silicone compounds are superior to their silicate counterparts in terms of elasticity. At the same time, the finish continues to be durable and resistant to ultraviolet radiation. The good elasticity of the film formed on the ceiling allows you to protect the finish from the appearance of cracks in the event of shrinkage processes. In addition, the material smoothes out small cracks or defects in the base well, filling them flush with the surface. Silicone paint fits perfectly over the old finishing layer. The ceiling finished in this way can be periodically repainted, refreshing or changing the color of the finish.
Like other types of water-based paints, this material demonstrates excellent characteristics in terms of durability, environmental safety, fire resistance, antiseptic characteristics, drying speed and the complete absence of unpleasant odor. Among the disadvantages of silicone paints, one can highlight their high cost, which imposes additional responsibility on calculating the required amount of material.
Mineral and polyvinyl acetate
These compositions are made on the basis of cement (slaked lime) and polyvinyl acetate (this is the well-known PVA glue). Mineral paints are usually used to decorate ceilings made of concrete panels: the service life of such a coating is not very long. The scope of use of PVA-based materials is dry rooms, because... The decorative layer created with their help is not hydrophobic.
Oil and enamels
Along with water-based compositions, ceilings are sometimes decorated with oil paints and alkyd enamels. In the first of them, the role of a binding component is played by organic oil or drying oil. The latter contain alkyd varnishes and organic solvents. It should be said that materials of this type are gradually being forced out of the market for compositions for painting ceilings in a room.
The reasons for this process are as follows:
- The ceiling coating created using alkyd enamel is characterized by strength and durability, but during application it is necessary to overcome a number of difficulties. We are talking about long-term drying and the presence of an unpleasant noxious odor. The enamel layer formed after drying does not allow steam to pass through easily, which leads to the effect of blocking the room. As a result, in the bathroom or kitchen this is fraught with condensation on the ceiling.
- Oil paints have even lower performance properties. In addition to slow drying, unpleasant odor and lack of vapor permeability, the resulting finish is fragile and weakly elastic. This often leads to the appearance of cracks on the surface. The only advantage of oil paint is its low cost.
Adhesive compositions
These materials also fall into the budget category. They are an aqueous mixture of chalk, pigment and glue.
There is the following recipe for making it yourself:
- Dry mix chalk and pigment in a ratio of 1000:35. It is important to achieve complete homogeneity of the dry mixture.
- Pour water into the dry powder (3 liters of water per 1 kilogram of mixture). It is better to do this gradually, mixing the ingredients well. The result should be a viscous liquid, reminiscent of sour cream in consistency.
- Add glue in a ratio of 80 g of wood glue per 1 kg of chalk. Starch paste can be used as an additive.
- Strain the finished mass through a metal sieve, adding the required amount of water.
It should be understood that the quality of homemade material will be quite low: in this case you cannot count on long-term operation. Still, the best option is to purchase a factory-made version of paint for the ceiling in the room.
Materials and tools
The quality of finishing the ceiling with paint largely depends on properly prepared tools and materials.
To work you will need the following:
- Roller
. It is the main tool for applying paint to the ceiling. If the area of the ceiling to be finished is small, a lightweight model will do just fine. In other situations, it is recommended to arm yourself with a wide roller, which will require some skill when handling. These tools often come with telescopic extensions that allow finishing work to be done directly from the floor. For applying acrylic and oil paints, foam or plush rollers are more convenient; for synthetic paints, mohair rollers are more convenient. - Set of paint brushes
. They help paint hard-to-reach areas, giving the surface to be decorated a decorated look. The stiffness of the bristles is selected depending on the required thickness of paint application: the higher the stiffness, the thicker the layer.
- Plastic tray
. Paint is poured into it from a can or bucket before application. Such trays have dimensions convenient for soaking the roller and a special rolling surface. - Masking tape
. It allows you to separate sections of the ceiling of different colors or patterns from each other. - Step ladder or sawhorse
. The second option is more convenient. Instead of a sawhorse, you can use an old kitchen table or the already mentioned telescopic extension that fits onto the handle of the roller. - Set of spatulas and scrapers
. They are necessary to prepare the base. - Painting sandpaper
. It is used to treat putty surfaces before painting. - Protective clothing
. Plastering and painting work is accompanied by a lot of dirt, so you should prepare special clothing for the work. These can be old things that can protect your head and body from paint and dust. It is also advisable to purchase safety glasses and a respirator.
DIY ceiling painting
Requirements that must be used when painting ceilings:
- The air temperature in the premises should not be lower than +15°C.
- Relative humidity - 70%.
- Surface humidity - ≤ 8%.
- Carry out work only with the electrical wiring disconnected.
- Each further layer must be rolled after the previous coating has gained strength.
Using a roller
When painting ceiling structures, professionals consider a roller to be the most productive tool. It provides minimal paint consumption, coating density, the ability to apply fine texture and easy adjustment of the thickness of the applied layer.
Depending on the chemical composition of the material and the decorative requirements for the coating, rollers of the following designs are distinguished:
- foam;
- velor;
- fur;
- rubber for rolling relief.
Included with the roller, for ease of work, you must have a ditch with a grid for squeezing paint or a plastic bucket with sides and a polymer mesh for the same purposes.
Please note: How to remove oil paint?
Work begins by marking the boundaries of the surface to be painted. To do this, at the junctions of the ceiling and walls, a continuous strip 3-5 cm wide is drawn with a brush along the entire length of the room. The applied line saves workers from labor-intensive painting of corners with a relatively large roller and at the same time protects the surface of the walls from dye getting on them.
The tool is then immersed in the liquid, lifted and rolled over a plastic grid to remove excess and distribute the dye over the surface of the roller. Using smooth movements back and forth, draw a line corresponding to the size of the roller on the base of the ceiling. Subsequent painting is carried out by overlapping the previous layer by 2-3 cm; the entire surface is treated in this way.
To create the required covering density, the emulsion is applied in 2-3 mutually perpendicular layers. Moreover, the last pass is carried out in the direction of incidence of the light rays (from the window). This technique allows you to avoid the appearance of shadows in areas of overlap.
Painting with a spray gun
An important step in the preparation phase is diluting the paint. The suspension must be of the consistency specified in the operating instructions for the spray gun.
Then you need to adjust the nozzles and configure the tool. To do this, pour paint into the tank and apply a layer of material to any selected surface (sheet of plywood or cardboard). The shape of the spot obtained on the control samples should be an elongated ellipse. If it is not possible to obtain such a result, then the essence is diluted by another 10% and checked.
Painting with a spray gun.
Then they start painting the surface. Take the spray bottle and bring it perpendicular to the working base. The distance to the intended plane should be 15-20 cm. The tool must be moved smoothly, at a constant speed.
To avoid the appearance of stripes and spots, each further layer should overlap the previous one by 3-5 cm. The paint coating should be applied in 2 layers with a technological exposure of at least 20 minutes between passes.
Preparing the base
Before painting the ceiling in an apartment with your own hands, it is important to prepare the rough base as thoroughly as possible.
Operating procedure:
- Investigation of the condition of the ceiling
. Determine the scope of future work by visual inspection. On a concrete floor, it is important to notice all the gaps, cracks and joints between the slabs. Wooden ceilings must be sanded and primed, plasterboard ceilings must be sealed. - Cleaning the base from old finish
. The floor slab must be completely cleaned of the previous finish. If it is whitewash, it is washed off with water; if it is old putty or paint, it is removed with a strong spatula. It is advisable to pre-wet the wallpaper and then remove it with a spatula. Any traces of glue found must also be removed. - Priming
. For this, deep penetration impregnation is used to increase adhesion and create a waterproof film. A good option is acrylic primers. - Sealing cracks, joints and cracks
. You will need a starting putty or mortar for laying tiles: the adhesive it contains will make the seam stronger. - Continuous alignment
. If the base is more or less even, you can putty immediately. If there are defects and differences, a leveling layer of the starting mixture is laid. Putty is usually applied in 2-3 layers, which makes it possible to obtain a smooth surface. - Grinding
. The purpose of this procedure is to remove all sagging and small scratches on the putty layer. The tool used is a grater and painting sandpaper No. 120. It is better to protect the respiratory organs with a mask or fabric bandage. - Final priming
. For this, an antiseptic composition is usually used to create protection against mold and mildew.
Preparing the ceiling for painting
Preparatory work is required when installing any ceiling structures. They take a relatively long period of time.
It works faster if you install tension systems that do not require pre-treatment of surfaces. But this approach has its drawbacks, and not all owners are satisfied with this technology. The most popular are classic ceilings for painting or multi-level structures made of plasterboard, which facilitate the preparation of the base, but do not exclude painting work.
If the task is to repaint existing ceiling coverings, then for this you need to know the minimum set of conditions and stages of the procedures.
The surface to be painted with water-based compositions must meet the following requirements:
- The ceilings of the premises are cleaned of decorative coatings, greasy stains and liquid drips.
- The bases must be level and smooth, without roughness. Height differences within 1.5 mm are allowed on an area of up to 4 m².
- Cracks must be expanded, primed, filled with putty, and sanded.
- Irregularities and cavities are treated with a primer and smoothed with leveling mixtures.
Pay attention to: Painting the garage floor
The number of stages and sequence of preparatory activities depends on the type of surface, category of finish and type of dye. Only with strict adherence to the rules of painting work is a durable and aesthetic coating guaranteed.
Ceiling cleaning
Surface treatment methods depend on the cause and type of contamination:
- The remains of old alkyd paint can be treated with a solvent or a special liquid, wait a little and remove with a spatula. The second method is a hair dryer. When the surface is heated, the paint will curl and separate from the base. At this point, it should be removed with a scraper and the defective area should be cleaned.
- Dirt and greasy stains are removed with detergents or soda solution.
- Places of cold and hot water drips are treated with bleach, dried, and coated with white oil paint. A layer of putty is applied to the painted areas. After the composition has dried, the surface is sanded.
- The remaining putty is removed gradually. Moisten the contaminated area with water and wait until the coating begins to peel off. Using a scraper, remove the solution and move on to the next area.
Cleaning the ceiling from whitewash.
Removing whitewash
Whitewash can be removed using two methods: dry and by wetting the surface. According to the first scheme, lime paint is removed. Using a small spatula, pry up the swollen areas and clean them off. Those parts of the coating that are tightly connected to the base are treated with a grinding machine.
The chalk whitewash is removed using the wet method. This procedure can be performed using the following means: washing solutions, paste - or using wet newspapers.
To prepare a soap suspension you will need:
- water - 8-10 l;
- 250-300 g of laundry soap;
- 100-200 g of soda.
You need to wash off the whitewash using a sponge and spatula.
Removing the coating using paste:
- Prepare the solution. To do this, dilute 3 tablespoons of flour in one liter of water.
- When the flour softens and turns into a viscous liquid, apply the mixture to the chalk surface.
- We wait until the whitewash begins to peel off.
- Then we scrape off and wipe the area with soapy water.
The newspaper method is similar to wallpapering, only old periodicals are used instead of canvases. Moisten the ceiling and paper with paste. Glue the sheets onto a damp base and wait until the surface dries. Then they take the edge of the newspaper and tear it off along with the adhering and peeling parts of the covering.
Removing water-based paint
There are 2 ways to remove water-based paint. The first is using a wire brush or grinder. The second, less labor-intensive, method is to treat surfaces with special compositions for removing paint and varnish coatings.
The mixture is applied to the painted base using a roller or paint brush. After some time, the coating will begin to curl and peel. At this point, use a scraper to remove unnecessary parts. Wash the finished surface with soapy water.
The technology for removing old coating by using special solutions depends on the manufacturer and the chemical composition of the suspension. Therefore, when purchasing and using, carefully read the instructions and recommendations located on the back of the package.
Removing tiles from the ceiling
Decorative foam ceiling tiles are initially attached to a durable layer of special glue. Therefore, to remove the coating, you will need the following set of tools and tools:
- putty knife;
- metal brush;
- trowel;
- polyethylene;
- garbage bags;
- special chemical composition for removing glue;
- soap solution.
Pay attention to: Which façade paint to choose for exterior concrete work. Types, characteristics, how to use it correctly.
Sequence of work:
- Take a spatula in your hand and, starting from the far corner, begin to remove the tiles.
- The coating breaks off into small pieces. Therefore, part of the foam continues to be held on the ceiling along with the remaining glue. These areas are treated with a wire brush.
- Then take the composition for washing. Using a paint brush, apply it to the base.
- Leave for the time recommended by the manufacturer and scrape off the softened mass.
- Wash areas with soapy water.
- Places where islands of coating remain are treated with a grinding machine.
- They clean the room and begin the next stage of work.
putty
Putty composition is a thick mass consisting of a binder, pigments and fillers. A good mixture should be easy to smooth out, adhere firmly to the base, and not shrink or form cracks after drying.
Ceiling putty work consists of the following operations:
Ceiling putty.
- bridging cracks;
- base primer;
- partial lubrication of defective areas;
- cleaning repair areas with abrasive meshes;
- continuous alignment of the starting lineup;
- grinding;
- finishing putty;
- fine grinding by hand or mechanically.
Starting putty is used to seal joints between floor slabs and to eliminate large differences in surface height.
The final leveling is done with a metal spatula measuring 350-500 mm. The instrument is held at different angles to the base. Moreover, the smaller the angles of inclination, the thicker the putty layer. Each subsequent wiring begins by overlapping the previous strip by 2.5 cm.
After the coating has dried, the surface is treated with sandpaper or abrasive meshes. Dust is swept away with a large brush or hair brushes.
Surface primer
Primers are liquid solutions designed to reduce the porosity of the base and provide strong adhesion to the surfaces to be finished. Suspensions can be applied with a brush, spray gun or roller.
The primer is carried out before puttying and painting surfaces with painting compounds. The base should be coated with a continuous, homogeneous layer - without stripes, gaps or breaks. The dried primer layer must have reliable adhesion to the base and not delaminate when stretched.
Processing of the ceiling by mechanized method is carried out over large areas using a spray gun with a flat dispersion torch at an air pressure of 0.25 MPa.
Painting the ceiling in the apartment
You can proceed to applying the paint composition only after the ceiling has completely dried:
- Prepare the paint
. This must be done in strict accordance with the instructions on the bucket. As a rule, for the first layer the material is diluted with water in an amount of 10-20%. For convenience, part of the diluted paint is poured into a painting tray that has recesses along the width of the roller. - Application
. It is recommended to start from the corner in the room farthest from the door. First, areas along the ceiling friezes and corners are painted, for which it is better to use a brush. Next comes the roller: after soaking, it must be rolled out to remove excess paint. If this is not done, it will spill onto the floor. It is most convenient to work from a construction sawhorse or an old table. So, step by step, the entire room is gradually painted. - It is recommended to apply the first layer perpendicular to the light
. In places where one area transitions to another, you need to carefully roll out the paint border so that no sagging remains. Each time you move the goat to a new place, you need to inspect the painted area from several angles. If a leak or gap is detected, it must be promptly eliminated before the paint sets. - The second layer is applied only after the first has completely dried
. Usually this takes 3-4 hours, but it’s better to take a longer break. During the second application, the roller should move perpendicular to the direction of the first layer.
How to paint - technology features
Experts are sure that the quality of finishing depends on the quality of the material. Choosing a good paint is very important, however, that's not all. Obtaining a beautiful and durable coating depends on the correct choice of painting tools and careful adherence to repair technology.
Let's take a closer look at these three aspects.
Selecting Tools
You will need a lot of tools for the job. To paint the ceiling, you need a stable stepladder and special clothing - safety glasses and a helmet, as well as a wide paint brush. But the bulk of the work is performed with a roller, so the quality of the work and the speed of repair depend on its correct choice. The question of which roller to paint the ceiling with is very important. And that's why.
The wrong tool will hinder rather than help you work. Agree that drops from the ceiling, stains and shedding of bristly pile are unpleasant and, as a rule, cause negative emotions. However, this can be avoided at the initial stage.
Roller size and diameter
Assortment of rollers
Experts recommend paying special attention to the size and diameter of this tool. It all depends on the area of work. The larger the ceiling slab, the wider the bead. But you definitely need to calculate your own strengths. It is easier for novice painters to work with a small tool.
Note! With a longer length, the roller takes more paint, which means it becomes much heavier.
The small roller, which is only 20 cm long, is quite comfortable to hold in weight. For comparison, pick up a tool 30 cm long - it will turn out to be much heavier if you soak it in paint. The painter's hand will quickly get tired, and work efficiency will decrease. But for convenience, a long stick is attached to the large roller, then you can work with both hands. In addition, the stick will allow you to eliminate the need for a stepladder, and you won’t have to constantly climb on and down.
By really assessing your own strengths, you can easily make the right choice. And one more circumstance. Often when painting a ceiling, craftsmen encounter hard-to-reach places.
It’s good if the ceiling design is simple and even. Then, in addition to the roller, you will have to purchase a wide brush that allows you to paint the corners. And if the structure is multi-level, and there are boxes for lighting or canopies on it, then small-sized rollers with a non-standard handle will come in handy. They are ideal for such work.
Roller types
Types of material
Studying the assortment, you understand how great the variety of rollers is. A fur coat for him can be made:
- Made from natural sheepskin.
- Foam rubber.
- Nylon plush.
- Mohair, velor and polyamide.
Which to choose? It all depends on what paint you decide to paint the ceiling with. For oil-based materials and enamel, rollers with a coat of velor and mohair are perfect. In this case, there is no difference between faux fur and synthetic fur, so for one-time work you can purchase cheaper options - polyamide rollers. However, if the amount of work is large, then natural fur coats are more preferable.
Note! Velor rollers absorb a lot of paint, so they will need to be dipped into the tray more often. But the quality of the layer is beyond doubt. The velor roller applies the paint evenly, so the layer is very smooth.
MATRIX Velor
Experienced painters prefer to use polyamide tools. It copes with the assigned tasks perfectly and does not leave lint on the surface. A polyamide coat lasts a long time, but you need to remember that such a roller leaves a lot of splashes. Therefore, it will be difficult for an inexperienced master to work with such a tool.
As for natural sheepskin, such a fur coat is ideal for painting work, but it is very expensive. It can and should be chosen in order to paint over the relief texture. It is easier for a roller of this type to penetrate existing unevenness, which allows you to paint a rough surface well. The principle of choice in this case is the same - the more complex the terrain, the longer the pile of the fur coat should be.
What are foam rollers for? For working with water-based primers and paints. This tool is the most affordable, but its service life is very short.
Summarizing all that has been said, we can draw several conclusions.
Some conclusions
Splash protection
- The choice of coat material depends on the type of paint.
- When purchasing a tool, do not forget to check its quality. The roller should look secure - no protruding threads or unfinished seams. The seam on the fur coat should be straight, smooth and even. Otherwise, when working, such a roller will leave streaks.
- Don’t skimp on purchasing a quality tool, because the result of your work largely depends on it. A roller with long pile is considered the best. And the rougher the surface, the longer the pile should be.
- Having chosen a suitable model, try to squeeze the roller forcefully - it should not be deformed. Pull the pile of the fur coat - if there are lint left in your hands, put the model aside.
And one last thing. In addition to the roller, you may also need brushes. Their choice is also not easy. A high-quality tool has a cone-shaped shape. It is this that allows you to evenly distribute the paint in hard-to-reach places, which is extremely important when painting corners.
Note! For complex ceiling designs, different brushes may be needed. Cone-shaped ones will help paint corners, and wide ones will allow you to paint the lines connecting walls and ceilings.
We've sorted out the tools, now let's talk about choosing paints.
Ceiling paints - features of choice
Color palette
Not everyone knows what paint is best to paint the ceiling, and what materials even exist today. The construction market is characterized by a large assortment of water-based paints. They all have different technical features and characteristics.
Experts recommend using the following for interior finishing work:
- Acrylic latex.
- Silicate.
- Silicone paints.
Which ones are better? A detailed analysis of their characteristics will help answer the question.
Acrylic latex paints
These materials are the most popular and in demand. And all because they are very convenient to work with. Both acrylic and latex are special ingredients that are added to regular water-based bases. Acrylic increases the durability of the coating, which can maintain its newness and originality for 10 long years.
Latex paint
Latex adds plasticity and water resistance to paint. Modern acrylic latex materials are more resistant to abrasion than conventional water-based materials. At the same time, they have excellent vapor-permeable properties, allowing the surface to “breathe”. Acrylic latex paints can be diluted with water and added color to achieve the desired color, creating interesting shimmers and enhancing the decorative effect of the coating. These additives are environmentally friendly and do not affect human health, which is their main advantage.
Acrylic and latex paints dry quickly, so a second coat can be applied literally a few hours after the first. This greatly simplifies repair work and saves time. While the paint dries, midges will not be able to stick to it or dust will settle. When applying several layers at once, there is no need to worry about the formation of blisters and bubbles, since the uppermost layers allow air to pass through them. Fresh drops, stains and stains can be easily removed with a damp cloth, and the dried layer is resistant to abrasion and retains its color for a long time without fading in the sun. Acrylic latex paints are odorless and can be applied to any surface.
But this material also has disadvantages:
Painted ceiling
- If the room has high humidity, acrylic latex paints will become an excellent basis for the formation of mold.
- Such material quickly loses its attractiveness at too low temperatures.
- It will be very difficult to get rid of the old coating, so it is irrational to use these materials for cosmetic repairs of the ceiling.
- The variety of latex paints can, to some extent, also be considered a disadvantage.
And that's why. Only specialists are able to understand the features of using acrylic, vinyl, dense, textured and dripless bases. It is difficult for the average person to understand that they are all designed for different jobs.
Therefore, when giving preference to acrylic latex paints, do not hesitate to ask the sales consultants the necessary questions. They will tell you that it is better to choose vinyl paints for finishing walls, dense paints for ceilings, pure latex paints for painting wallpaper, and textured paints for creating a relief pattern. Acrylic materials are ideal for working with wood, while dripless materials are ideal for working with cracks and irregularities.
Thus, acrylic latex paints are good where major renovations are being carried out, and it is necessary to create a surface resistant to dirt in conditions of a high humidity threshold. For finishing bathrooms and swimming pools, and for painting ceilings in saunas and bath complexes, it is better to choose silicate or silicone materials.
Silicate paints - advantages and disadvantages
Silicate paint
Silicate paints are materials created on the basis of potassium liquid glass, water and coloring pigments. A small amount of a special polymer is also added to the composition, which increases the shelf life of the paint. This material is used for painting mineral-based surfaces. It is chosen to paint over a ceiling treated with mineral putty or previously painted with limestone, cement or mineral paint.
The advantages of such materials include good vapor permeability. The surface treated with silicate paints “breathes”, so moisture quickly evaporates. The base of the material is unfavorable for the development of pathogenic microorganisms, therefore, before painting, the ceiling surface does not need to be additionally treated with an antiseptic.
Silicate paints create a smooth matte surface that is very smooth to the touch. The ceiling painted with them can be easily washed with a damp cloth.
Note! Silicate paints are divided into regular and moisture-resistant. To paint the ceiling in the bathroom, it is better to choose the latter. When purchasing, it is important to pay attention to the material consumption, since different types have different properties. They will have to paint the ceiling surface twice.
It is important to know that when choosing silicate paints you cannot use foam rollers. The next layer of material is applied only when the previous one is completely dry. The layers are applied in a strictly perpendicular direction to each other. The latter is applied on the side opposite to the window, and the previous one is laid across. Silicate paints should dry without drafts or bright sunlight. Otherwise, the finish will be of poor quality.
Silicate paints have one drawback - they are inelastic, so painting cracks or potholes with them is extremely problematic. This means that before performing final repair work, the surface will need to be more carefully prepared and leveled.
Silicone paints
Long handle roller
Silicone paints are ideal for finishing rooms with high humidity. They differ from the materials already listed in that special silicone resins are added to the base of the water emulsion. Like silicate materials, silicone materials have good vapor permeability, but are hydrophobic, which prevents the adjacent surface from getting wet.
After drying, such paints form a durable film that does not deform the substrate. Therefore, you can safely choose silicone materials for painting plastered surfaces.
Unlike acrylic, silicone does not have thermoplasticity, so when the surface temperature increases, the paint layer will not soften. The material practically does not get dirty, and little dust accumulates on it, because silicone resins have a neutral electrical charge. But experts consider the main advantage of this paint to be resistance to alkalis. And the only drawback is the high cost of the material.
Where and how are silicone paints used? Most often they are used to repair building facades. The material prevents the proliferation of various microorganisms and provides a durable, reliable and very aesthetic coating that perfectly withstands the vagaries of nature.
You can work with such material without following the rules and safety standards. After all, unlike silicate paints, it is not aggressive. Experts consider it reasonable to choose silicone materials for painting ceilings inside a building. But it is advisable to use them only in those rooms where the ceilings are exposed to increased moisture.
Note! On sale today you can find acrylic and latex paints that contain silicone resins. However, experts do not recommend the use of such compositions. Practice has shown that the fewer properties a material has, the higher its reliability and strength. Paints based on pure silicone resins have the highest consumer properties.
Painting technology
Surface cleaning
So, we have figured out the principles by which tools and paints are selected, so we can begin to figure out how to properly paint the ceiling.
Painting technology consists of several stages:
- Preparing the base.
- Ceiling primer.
- Working with corners.
- Ceiling painting.
- Error correction.
Before starting work, the room must be completely emptied of furniture - remove everything that is possible and what cannot, and carefully cover it with polyethylene. If you are not planning to renovate the floor, you should also take care of protecting the floor covering. It also needs to be covered with film or old newspapers and magazines. You can use rags or sheets, which you won’t mind collecting and throwing away later.
Then you should remove all lighting fixtures and turn off the power to the room. Use masking tape to cover the areas that need to be protected from paint. Before starting work, experts advise making sure that the purchased material is enough to finish the expected ceiling area. It is very easy to calculate consumption - as a rule, the initial data is indicated on the packaging. A lack of material can lead to the creation of low-quality and uneven coating.
And one last thing. The packaging always indicates the recommended temperature at which paintwork can be carried out using a particular material. It is worth taking this circumstance into account.
Preparing the base
Surface priming
You cannot apply a new coat of paint without first preparing the base. This will cause the layers to begin to crumble quickly. To avoid this, you will have to carefully prepare the ceiling slab.
First, the old layer of paint is removed using a spatula, and the whitewash is simply washed off. If necessary, the sanded ceiling is repaired, cracks and potholes are covered and leveled with a finishing layer of putty.
Ceiling primer
To reduce paint consumption and ensure better adhesion to the base, the ceiling slab is pre-primed. If this is not done, when applying a layer of paint, the slab will instantly absorb moisture from it, thereby causing the layer to dry out.
The paint will not be able to stay on the surface for long and will begin to crumble quickly. After applying the primer, the base should dry thoroughly. Then the darkest spots of the base are painted over, and when they are dry, the ceiling is primed again and allowed to dry. Only after this can you paint the entire canvas.
Note! When priming, there should be no excess material left on the ceiling. Therefore, it is recommended to monitor work with the primer.
Working with corners
Primer corners
The one who starts painting the ceiling from the corners farthest from the entrance does the right thing. To do this, use a tuft-shaped brush. The paint is applied to the very end and then carefully rubbed into the base of the corner. Then the first strip from the wall is painted with a wide brush, since the edge of the roller does not cope well with this task. The paint is first applied to the ceiling using a brush, and then gently rubbed along its entire length.
Do not skimp on paint and even paint the place that will later disappear under the ceiling cornice. This way you can achieve an even, smooth and consistent finish.
Painting the main surface of the ceiling
After the far corners are painted, you can proceed to the next stage - working with a roller. To begin with, the coat of the instrument is thoroughly saturated with paint. To do this, you do not need to completely dip the “drum”, but you can rub it on the cuvette tray using a small amount of paint. Spinning the roller prevents the formation of drips, which means it saves material.
Note! The roller should be soaked evenly. If excess paint needs to be removed, use a wide brush.
Applying paint with a brush
The roller movements should be the same, and the paint should be applied evenly and not too thickly. Therefore, periodically you need to lower the instrument into the ditch and act confidently, making intense sweeping movements.
If the paint is too thick or thin, unsightly streaks will form, so it is important to mix the material correctly, as directed on the package. And if such defects are discovered, immediately correct the mistake and repaint the defective strip.
Note! The paint is applied in stripes parallel to each other. The width is chosen so that the edge of the fresh layer does not have time to dry out. Each subsequent strip is applied overlapping the previous one. Experts recommend sometimes getting off the stepladder and looking at the result of the work from a different angle. This makes it easy to identify unpainted areas.
During operation, it is better to curtain the windows with dark rags and try to completely protect the room from drafts. Under no circumstances should heating devices be used to speed up drying - they will cause overdrying of the finishing layer.
Work on mistakes
After the layers of paint have completely dried, it is worth inspecting the work during the daytime - this will help identify existing defects.
What can you find?
Direction of roller movement
- Roller marks that remain after improper shading. Fixing the defect is easy. Simply rub the area with sandpaper and paint over it again.
- Joints between painted areas. They are formed when repair technology is not followed. There is only one way to eliminate them - clean the ceiling, prime it and paint it correctly.
- Too noticeable streaks are formed when the paint is not well mixed before work. The defect is eliminated in the same way as marks from a roller - the defective area is cleaned with sandpaper and repainted.
- Wrinkles on the ceiling appear when too thick a layer of paint is applied. They are removed using the same technology as stripes.
- Stains after painting on the ceiling do not always appear, but quite often. The main reason for their occurrence is poor quality initial work. There may be tar or grease left on the ceiling. Applying another coat of paint will only make the situation worse. Therefore, the problem area is cleared of the already applied material, treated with special acidic compounds or alkali, primed and repainted.