How to create an original panel for the kitchen with your own hands?
A comfortable, beautiful kitchen, where it is pleasant to be and even the atmosphere is conducive to work, is the natural desire of every modern housewife. A unique interior design or a recent renovation helps to cope with this problem, but due to the fact that quite a lot of time is spent in the kitchen, it soon gets boring and again you want something unusual and new.
And since making repairs every three to four months is a very difficult and absurd task, you can refresh the room in simpler ways. One of them is to create a kitchen panel with your own hands, which will decorate any interior and give it an attractive look.
This technique is extremely common; most often such decor can be found on the plane of the wall above the stove. This is perhaps the most advantageous place for him. At the same time, you don’t have to go to the store in search of something special - you can create a kitchen panel with your own hands.
Expert opinion
Smirnova Ekaterina Anatolevna
7 years of experience in interior design, professional architect
Moreover, such a decoration will become truly original and unique, and from simple improvised means that every housewife has at her disposal, unique masterpieces are often obtained.
DIY kitchen panels for different interior styles
Kitchen decoration should not only match the theme, but also fit into the style of this room.
Handmade items can often be found in Provencal or country style kitchens. In this case, it is better to depict something rustic or wildflowers.
If the room where food is prepared is decorated in a Scandinavian style, then the frames should have some bright geometric patterns, and you can also use natural themes. You can use pictures of animals or insects.
For modern kitchens it is better to make panels in a minimalist style, and for retro ones you can choose black and white and delicate floral motifs.
Options for creating a kitchen panel
To decorate your kitchen, you don’t have to resort to financial expenses. Handmade work will not only be cheap, but will certainly bring pleasure.
There are a lot of ideas for panels in the kitchen, and implementing them is not difficult at all. In addition, in addition to the usual landscapes and still lifes, you can show your own imagination, experiment a little and get a result that will please not only the housewife, but also all household members.
Panels with paints
Anyone can paint a simple picture, even someone who has absolutely no skills in painting. For example, you can use regular tape to divide the canvas into equal sectors, and then paint each of the resulting parts with bright colors. All you need is a little care and patience in your work, because you need to apply the paints so that they do not overlap each other.
It is also necessary to think in advance how organically such a picture will look. After all, in a Gothic or minimalist style kitchen, a bright, cheerful panel will become an inappropriate spot on the wall. Therefore, it is very important that all colors not only combine with each other, but also that there is harmony with the overall style of the room.
Collage of photos
Relatives and loved ones in the photo always instantly bring a smile and create a great mood. So why not use this to make panels for the kitchen? In addition to photographs, you will need paints, colorful cardboard, tape, scissors and a window frame made of small glasses. The whole process is carried out in four stages:
- First, the size of each photo must be adjusted to the size of the glass;
- then the photo is placed on cardboard of a suitable color and attached to the frame using tape;
- under each photo you can make beautiful signatures with paints;
- The last stage is the decoration of the frame itself.
So simply and quickly, and most importantly, at no cost, you can create an original kitchen wall panel with your own hands.
DIY kitchen panel using decoupage technique
For rooms designed in styles such as Provence, country or shabby chic, you can make a painting using the decoupage technique.
To create such an item you will need eggshells, so you need to set aside several halves of broken eggs, wash them and dry them.
Also, for decoupage you will need a suitable picture - it can be any image on rice paper, you can also use napkins.
In addition, you need to purchase:
- base (this can be a piece of fiberboard, or a thick sheet of cardboard);
- PVA glue and special glue for decoupage techniques;
- brushes;
- primer;
- film on which the prepared picture will fit;
- sponge or sponge.
First, the base for the future painting must be coated with a primer and left for some time.
Then you need to add texture - for this you need to apply PVA glue and glue pieces of eggshell over the entire area.
To make it easier to glue the pattern, you need the parts to be located at a short distance. After this, the decorative item must be put aside again until the glue dries. Then another step of priming will be required.
When the panel is dry, you can apply the picture. To do this, the selected image must be laid out on the film with the wrong side up.
After this, you need to use a brush to apply water to a napkin or rice paper and attach the image to the surface covered with primer. The drawing needs to be straightened and the film removed.
When the liquid evaporates and the image becomes dry, you need to cover the panel with special glue, which is used for decoupage. After the glue has hardened, the picture can be hung.
Let's use buttons
Another unusual option is a kitchen panel made of buttons. To make it, you will need to determine the location in advance and paint the selected part of the wall with water-based paint of the desired shade. After this, the frame should be attached along the edges of the paint using universal glue.
And then we use buttons. In this case, they are used in a way that is not quite standard for them - they are not sewn on, but glued.
You can fill the prepared space in any way: chaotically stick buttons of various colors and sizes, or lay out some pattern with them, as your imagination dictates. The main thing is that all the space in the frame is filled as much as possible, since empty spaces will not look very attractive.
Crafts from cutlery for the kitchen
In this case, we will not talk about standard paintings for the kitchen , but more about panels.
Paintings from buttons and plates
The more buttons, the much better. They will be the basis for the paintings. They will need to be sewn onto thick fabric. After that, they are inserted into the frame and glued with glue. Interesting plates are hung in the center and on the sides and painted with acrylic paints. The masterpiece is ready!
Paintings from spoons and forks
You can also sew forks and metal spoons onto thick fabric. They will need to be painted with enamel, after which you will get a wonderful still life.
Their plastic materials can make more interesting pictures in the kitchen. Plastic forks and spoons are easy to paint and can be glued to any surface.
Before making a picture-panel from metal cutlery, you must first lay out the design on the fabric
A picture of nickel silver cutlery covered with enamel to match the frame will be a wonderful addition to a French-style kitchen
Disposable plastic utensils can make a magnificent masterpiece that will please the owners for many years
For a picture of buttons and dishes, the number of buttons is important: there should be as many of them as possible
Sand panel
You can buy regular sand at any building materials store. It is inexpensive, but allows you to create a real masterpiece. This type of panel in the kitchen will look unusual and can even be an excellent option for an original gift.
Before starting work, the sand must be sifted through a sieve, making it uniform, clean and beautiful. The fabric is stretched onto the frame and the image previously selected for the panel is transferred using a stencil. Then this area of fabric should be coated with glue and covered with sand.
To ensure that the edges of the pattern are as smooth as possible, excess sand is removed with a regular toothpick or any other pointed object. After the glue has dried, you can simply shake off all unnecessary sand and all that remains is to place the decoration in the chosen place.
Other options
One of the most successful materials for creating panels is coffee beans. Most often, burlap is glued onto cardboard, then a cup is outlined and, after covering it with a layer of glue, a pattern of coffee beans is laid out. The frame can be decorated with bows made of thick threads.
The easiest way to make a panel for the kitchen is a piece of foam plastic, wrapped in a beautiful ironed fabric, attached with double-sided tape.
The creation of this type of decor is limited solely by your own imagination. After all, completely different materials can be used for panels. Sometimes even spoons or forks on the wall attract attention and give the kitchen a special originality.
Sand panel
Sand for panels in the kitchen can be collected on the beach or bought at any hardware store. Also, to make panels for the kitchen with your own hands you will need:
- textile;
- base frame;
- a stencil with a design you like;
- glue.
In order for the sand to become clean, homogeneous and look beautiful on the panel, you must first sift it through a sieve . Making sand panels for the kitchen will consist of the following simple steps:
- We stretch the fabric onto the base frame.
- Transfer the design from the stencil to the fabric.
- Apply glue to the fabric where the pattern is located.
- Pour sand onto the taped areas.
- Using a knitting needle, toothpick or other pointed object, we correct the contours of the design - we remove the sand that has fallen beyond the boundaries of the stencil.
- After the glue has dried, shake off excess sand.
DIY kitchen panels: 9 original ideas
There is no more functional room in the apartment than the kitchen. Here they cook, receive guests, greet the morning with a cup of coffee and brew tea before bed. It is not always possible to make this room stylish and cozy, since this requires large sums of money. A DIY panel can be a wonderful and inexpensive decoration - this is just the thing for the kitchen.
Do-it-yourself kitchen panels - choosing materials
Nowadays you can find a lot of materials for creativity in stores, but it is much more interesting to create works of art from the most ordinary objects and improvised means.
Since the decor item is created specifically for the kitchen, you can use various products. You can post a picture of several types of cereals or tea.
You can also use the entire legume family and pasta. Interesting compositions can be made from various spices, using cinnamon sticks, nuts and dried fruits.
In addition, old cutlery, kitchen napkins, corks and caps from various bottles can be useful in your work. If you want to use other things, then you should take a closer look at nails, keys and other small metal things.
You can decorate paintings with yarn, fabric, lace, buttons, pebbles, scraps of book pages or pieces of travel maps.
The basis for all these items can be chipboard sheets, cardboard, boards nailed to each other, as well as canvas or fabric stretched over a frame.
A panel for interior decoration can be not only a decorative item, but also a useful thing. This way you can make pockets in the picture where you can store bags of spices or other small items. Or you can make something that will not only please the eye, but also serve as a board for notes and photographs.
Here are some interesting ideas that will be useful for those who have no experience creating such things.
Determining the scope of work
A panel is a painting made with paints or three-dimensional elements. It has a special use for the kitchen - it can hide repair errors. The best housewife cannot always save her workplace from cracks, grease stains, and drips. If your goal is to hide a problem, then the size of the panel is chosen based on the scale of the problem.
If the task is simply to decorate the room, then the choice depends on the size of the kitchen. A huge painting covering the entire wall will not suit miniature rooms, and one small applique will be lost against the backdrop of a large space. Choose something in between.
A universal option is small paired panels. Moreover, there may be more than two, but always on the same topic. The kitchen is decorated with triptychs - three paintings that continue each other.
Interesting: a panel can not only decorate the kitchen, but also divide it into functional zones. Above the coffee table there are images and photos with mugs, and near the work surfaces there are various fruits and vegetables.
Selecting a topic
In the kitchen, it is important that the details match the design concept. The panel should decorate, stand out, and match the color scheme, style and functionality of the room.
- A modern kitchen is decorated with various vector images with clear lines and metal details.
- Wood textures, photos and art still lifes, panels with dry plants and cereals are suitable for an interior in the Provence style.
- Panels made from aged paper, wine corks and three-dimensional images will organically fit into a loft-style kitchen.
Don't worry if your kitchen doesn't have a specific theme or style: you can set the tone with decorative elements.
DIY kitchen panel with prints
Interesting pictures can be made with hand or fingerprints, and fruits and vegetables can be used for kitchen decoration.
Printed apples or pears cut in half, orange or lemon slices, as well as onion rings will look interesting. You can also use parsley or lettuce.
You will also need paints. Suitable for use with gouache, acrylic and oil paints. And you can put prints on wooden planks, canvas or fabric stretched on a frame.
The base surfaces need to be degreased; you can also coat them with primer or paint. Then you need to pour the paints into some containers and dip the fruits in there one by one, and then put the stamps in a chaotic order.
You can also cut out various patterns on halves of raw potatoes and add them to the picture.
Materials for creating panels
In fact, panels can be created from anything! The main thing here is to take into account the relevance of the plot and not overload the image. It must also be remembered that many materials absorb odors, so compositions made from them should not be placed near stoves.
To create a panel for the kitchen with your own hands, any kitchen utensils (spoons, plates, cups), spices, magazines, photos, scraps of fabric, threads, bottle caps, paper and various little things can be used. The main thing is inspiration and an evening to create a masterpiece.
DIY kitchen panel with spices, tea and coffee
A master class on creating a kitchen panel with your own hands with spices consists of just a few steps. You can create such a thing in one evening.
First of all, you need to stock up on various products. The creators of this item chose several types of peppers, tea, as well as coffee beans, cinnamon sticks, bay leaves, cloves, other spices and a dried rosebud.
To create a kitchen panel with your own hands, you will need:
- frame with cardboard base;
- kraft paper;
- book clippings and other paper items;
- small bottle with a cap;
- paper glue and superglue;
- scissors;
- acrylic paints and brush.
First you need to separate the cardboard base and use a brush to paint the frame in the desired color. You can use white paint to give the surface a worn look.
Then you need to cover the cardboard base on one side with kraft paper, and then glue various pieces of paper on top.
When the glue dries, you can decorate the picture with spices. For this it is better to use superglue. You need to mentally divide the base into several parts and place a small amount of prepared products in each of them.
A few spices can be placed in a bottle, and you can also add dried rose to the composition. All that remains is to connect the base to the frame.
Panel of prints of fruits and vegetables
Even a child can create this image, and your creation will look simply wonderful.
Will be needed:
- hard fruits or vegetables (apples, pears, citrus fruits, Chinese cabbage);
- paint (oil, acrylic, gouache);
- base (canvas, wooden board, cardboard).
Expert opinion
Smirnova Ekaterina Anatolevna
7 years of experience in interior design, professional architect
Everything is done simply: pour the paint into a plate, cut the fruit into halves, dip it in paint and make a stamp on a previously painted and degreased surface. The color can be matched to the color scheme of the room.
You can make prints anywhere on the canvas, but symmetrical images look better.
How to create a kitchen panel using mosaic technique
The most beautiful paintings for the kitchen are made from natural materials. Rhinestones, glass, pieces of broken tiles, shells and cereals, laid out on cardboard and secured with glue, result in amazing patterns, unique and original, emphasizing the style of the kitchen.
Algorithm of actions:
- We select the necessary material. It is important that the mosaic elements are clean and not too large (in our case, pieces of broken tiles are used).
- On a base (thick cardboard or chipboard sheet), pre-treated with glue, a pattern of small tile particles is laid out. It's good if the tiles are multi-colored. For monochromatic fragments, the mosaic is laid out fragmentarily in the form of a specific pattern.
- The finished panel is coated with a protective varnish or inserted into a frame under glass.
Related article: Where does the Kostyushkin family live? [stellar interior review]
Beautiful and functional
If you have wine stoppers or cork lying around at home, create a small board on which you can pin notes, recipes, or photos.
To create a panel from corks you need:
- 20 wine corks;
- scissors;
Cut the corks lengthwise and glue the halves onto the base. If you want to use the other side of the cork, it is important to cut it into equal parts.
Horizontally, vertically, in a pattern - you can lay it out in any way you like, the main thing is to cover the entire base. The panel can be framed, or hung on the wall without a frame. You can attach notes, photos, recipes, pictures and little things to it using pushpins.
DIY kitchen panel made from wine corks
Wine lovers, or people who work in a bar, can make interior decorations using bottle caps.
If there are not very many of them, then they can be added to some composition. But if there is a sufficient quantity, then you can make a continuous panel.
In addition to the plugs, you will need a rectangular piece of plywood and liquid nails for the job. If desired, the finished piece can be covered with mastic.
A very beautiful picture is obtained when corks of different sizes are used, so some can be cut into two or three parts in advance.
To attach the plugs to the plywood, you need to apply liquid nails in strips. Then you need to press the plugs tightly to the surface.
They need to be positioned so that there is no free space left. Some parts may be intentionally attached incorrectly. It would be better if traces of wine were visible, it would look more interesting.
You can also make other panels with corks, for example, you can lay out a frame and glue a photograph or picture in the middle.
This panel can also be supplemented with hooks on which you can hang various kitchen utensils.
New life for old kitchen utensils
You can even make a DIY kitchen panel from unnecessary forks, spoons, scoops and frying pans. The idea can be easily realized with cutlery, base, paints and glue. If you are not sure that the composition will stick well to the glue, then use small nails.
The base for the panel can be anything, but it is important that it can withstand the weight of all the parts that you want to attach to it.
Reflection of the hostess’s character in a decorative panel
a DIY kitchen panel will reflect the character of the hostess
Each person is unique, subconsciously loves his individuality, is proud of his unique features and natural abilities. People around you don’t always notice these highlights and appreciate your personal qualities. You can tell about yourself by creating panels in the kitchen with your own hands. The complete freedom of creativity that this type of decor provides guarantees the maximum realization of your own aspirations and preferences. Using the panel you can:
- talk about your dreams;
- reveal the secrets of home masterpieces;
- instill good manners in your household;
- create a certain atmosphere in the kitchen, etc.
DIY kitchen wall panels made from boards covered with textiles
Creating a wall panel for the kitchen will not require much expense. To bring a unique creative idea to life, you can use objects that no longer find practical use.
Images and inscriptions with threads
Designers have been actively using the String Art technique for a long time. It does not require any special skills, but you can create a designer panel with threads in an evening.
Required:
- wooden or fiberboard base;
- nails;
- pliers;
- hammer;
- dense acrylic threads;
- pencil.
First, a drawing is applied to the base. You can choose any, but the ideal options for the kitchen are inscriptions, mugs, cups, fruits. You need to choose an image with clear outer lines.
After the design is transferred to the base, nails must be driven along the line at a distance of 0.5 - 2 cm from each other. For convenience and so that all the nails are at the same level, it is better to hold them with pliers.
When the nails are hammered, you need to take a skein of thread and tie the end to one of them. The thread is caught in all places in a certain sequence or in random order. If the pattern is round, it is better to move from one edge to the other. Do not pull the thread too tightly; it may break.
Advice: if you don’t like the color of the base, then apply a layer of paint. You shouldn’t do more than 2-3 layers: when you hammer in nails, cracks will appear.
What can be done
Here craftswomen have a lot of scope for creativity. In fact, a panel can be made from literally anything, using only what is available in the house. If you lack skills, then a master class viewed on the Internet will help you cope with the matter.
A hand-made wall panel will give the kitchen a cozy atmosphere
The panel can be:
- in the form of a collage of photographs and drawings;
- salt dough compositions;
- dried flower compositions;
- cereal compositions;
- textiles;
- clay;
- from wool for felting.
And this is not a complete list of what can be used to create panels. So, a master class of the simplest panels to make.
Preparing panels for the kitchen
Beautiful and voluminous paintings are created from salt dough. It is easy to prepare, dries quickly, paint adheres well to it, and most importantly, you can create anything from it. It is better to coat the finished product with colorless varnish so that it is preserved for a long time. It is important to think in advance about how you will attach the panel to the wall - make a hole or insert a hook.
For the salt dough you need:
Mix everything, add water to achieve the desired consistency. While making the panel, keep the dough in a closed bag and store for up to two days.
The finished mixture replaces ordinary clay. The product is dried in the oven or at room temperature. You can color the finished panel or the dough itself using dye.
Three-dimensional still lifes, various flowers, and fruits are suitable for the kitchen. They are glued to the base or ready-made signs are made from them, as in the photo.
If modeling is not your thing, then create small panels with plant prints. If desired, they are decorated with ribbons and threads.
Glue+base
Traditionally, coffee, pasta and cereals are used in the kitchen to create panels. It's not always cheap and far from original.
If you want to create an unusual panel, and not just a picture of pasta, then use other materials: dried fruits, spices, nuts, buttons, broken dishes, bottle caps. They are laid out in random order or following the selected design/pattern.
The main thing is that the material used is hard and durable, the base is strong, and the glue is quick-drying and reliable.
Paper kitchen panel
A panel made of paper “scales” can be of any size and color. We will need:
- Chipboard for the base of the panel;
- circles cut out of paper (the same size, choose the diameter to your liking);
- glue (can be replaced with a stapler);
- spray paint of the desired color.
On the chipboard base we glue (or fasten with a stapler) paper circles in rows, so that one row overlaps the other, like fish scales . Then we’ll spray paint our panel and let it dry.
Pallet decorations
Palettes are a popular material for handicrafts today. They make a lot of things: furniture, shelves, walls, gazebos. They are also suitable for kitchen decor.
Important: before decorating the pallets, the surface is thoroughly sanded using a special machine or sandpaper, all elements are degreased and dried.
Expert opinion
Smirnova Ekaterina Anatolevna
7 years of experience in interior design, professional architect
Pallets make original small shelves for plates or photos. They will fit well into the Provence interior and are suitable for apartments and summer country kitchens.
If you insert pots with plants into them, you will get a hanging flower stand. Plants that hang from the structure look ideal.
Pallets are also used as a canvas for drawings - for example, as in this photo.
Soft parts
The kitchen is associated with comfort and warmth, so fabric panels will decorate such a room.
Moreover, even small pieces of material will do. The scraps are cut into equal pieces and sewn together using the patchwork technique. The finished product is stretched onto the canvas or loops are made on top and the finished panel is hung on a wooden stick or miniature cornice.
This is how textile mugs are also sewn, attached to the wall separately or together on one surface.
Master class: DIY modular paintings for the kitchen
Photos of such products really evoke genuine delight. Try to create such a miracle yourself. To create a modular painting, you will need a canvas, which can be either on a stretcher or regular. You can buy such canvases in special stores for artists. Buy as many canvases as you want to have modules. By the way, their shape and size may be different from each other.
Then find a sketch in different sources (magazines, the Internet, etc.) or come up with one yourself. After this, you need to transfer the picture to the canvas. This can be done in several ways:
- Paint the picture yourself using acrylic paints and brushes. To do this, place the canvases in front of you in the same order and form as they will hang on the wall. Transfer the sketch onto the canvases with a pencil, then work with paint. When the painting is completely dry, coat it with varnish.
- Print the design on self-adhesive film or any paper. The pre-selected picture must be divided into parts in a special graphic editor (for example, Photoshop) in the way it should look on the wall. If you printed it on paper, then you can glue it to the canvas with regular PVA glue, and at the end varnish it so that the canvas is not damaged over time. Self-adhesive does not need to be varnished; as a rule, it has a water-repellent surface. Remember that you need to print the picture with a margin so that the edges can be wrapped on the back wall of the canvas.
By the way, you can make the canvas yourself. To do this you will need:
- four wooden slats (for one canvas);
- textile.
Connect the slats together using special glue or nails. After this, stretch the fabric over the resulting frame and attach it to the inside of the slats. Apply the image to the canvas using one of the suggested methods.
DIY modular paintings for the kitchen are ready!
Compositions from dishes
If you have unnecessary plates lying around at home, then they are suitable for creating an original panel for the kitchen with your own hands.
You will need:
- 3-5 plates;
- paint for ceramics;
- glue;
- printed images.
A common pattern is created on several plates. It is arranged like triptych paintings, where together the canvases create one picture, or 3-4 separate drawings of the same theme.
The image is applied manually or using the decoupage technique. For the latter, you need to print the image in advance on thin paper or buy special sheets for decoupage.
Place the image on pre-degreased and dry plates. Apply PVA glue to the dishes in a thick layer, and tightly place the printed design on top.
Then apply another thin layer of glue on top of the paper.
When everything is dry, cut off the excess and coat the plates with varnish.
Tip: to make the construction of ceramic dishes easier, use disposable paper.
The panel can be made from anything, but for the kitchen it is important that the materials are easy to clean and do not absorb odors. This must be taken into account when choosing those decorations that will be placed near the work surfaces and stove.
What exactly you want to hang in the kitchen depends on your personal preferences, design features and desires.
Paper painting (video)
Decorating with posters
Posters are large images that can convey someone's image or idea. Black and white posters are considered the ancestor of posters.
There are several types of posters:
- depicted on canvas;
- printed on paper that imitates canvas;
- printed on photo paper
Making them for the kitchen is absolutely easy. All you have to do is find the image you need.
Polystyrene foam can be used to make paintings
Foam painting for the kitchen
Many blocks of foam plastic remain after purchasing various household appliances. Many people throw it away, and do it completely in vain. After all, if you get creative, you can use it to make a kind of picture for the kitchen.
Initially, you will need to prepare some image. It will need to be glued to the surface of the foam. The sides of the block are also covered with paper of the desired color. To hang the resulting picture in the kitchen, all you need to do is attach a small loop to the back of it.
Painting panel drawing Applique Light panels for the kitchen master class
I would like to bring to your attention three panels for the kitchen. They are very light because they are made from simple cardboard. They are done very easily and simply.
Panel No. 1 (57x20 cm) - “Mom’s Kitchen”))) I discovered the Fix-Price store. There are so many inexpensive cool little things that my imagination tries to use.))) This time I came across decorative wooden pendants for the kitchen - “Mom’s Kitchen” and “Kitchen is the Heart of the Home” (in English)
Take a piece of cardboard. We cover the edges with craft paper with inscriptions (to cover the cardboard sections). This is the back side of the panel in front of you.
On the front side we glue a piece of fabric (with Moment-Crystal glue, only along the edges of the fabric), turning the edges at the top and bottom onto the back side. There I covered the edges of the fabric with paper single-sided tape - for neatness. (See photo 3)
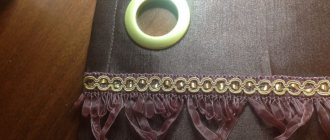
I seal the top edge of the fabric with white lace trim. And I also paste a thin brown ribbon on top of it. The tones are brown, because the panel will be coffee themed.
I decorate the bottom of the panel with a piece of lace. I glue with a thin line or. drops, I don’t use a lot of glue.
I choose a more suitable pendant based on tone.
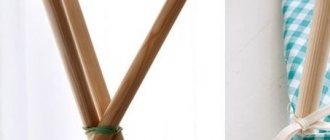
I glue the pendant at the top, and then, marking it along the ruler, I glue skewers at an equal distance. Each stick has a bow made of jute rope.))) To glue it evenly and tightly, I press down the parts temporarily with some weight.
I use an awl to pierce holes all the way through and use a small screwdriver to thread a silk ribbon through. This will be our hanger. Simple and fast.))) Please note that I don’t throw away the scraps of rope, but use them as decoration under the saucepan.
We hang it vertically, check how it is glued - is it straight?
We lay out the future elements of the panel. Two pieces of burlap and two squares of old white hand knitting (there was once a tablecloth or napkin) will be our basics.
Expert opinion
Smirnova Ekaterina Anatolevna
7 years of experience in interior design, professional architect
Strainer for 25 rubles. from the Fix-Price store was very useful. I sewed it on with thread by hand, as well as a cinnamon stick. Then I glued this entire blank onto the panel.
Coffee beans are glued and framed with toothpicks.
Here are my favorite mini bagels. Everything is covered with acrylic varnish. Although mice also eat with varnish, as I was told.
This is the first panel we came up with. It is convenient because it can be hung on the side of kitchen cabinets.
Panel No. 2. "Coffee Heart"
Here I covered the entire cardboard with a piece of fabric and secured the edges at the back with glue. A brown straw ribbon from a summer hat, again from my favorite store, is glued to the edges in front.))) The heart is a photo frame disassembled into two parts.
Here is the base of a photo frame in the shape of a heart, and I use the frame itself in another coffee panel. Economical and beautiful.))) We used corks cut into pieces.
The third panel (38x25 cm) here everything is done in the same way.. The materials are the same.
Kitchen panel made of spices
This decorative element is probably best suited for the kitchen. After all, its components are spices used in cooking. So, let's take the following components:
- frame;
- coffee-colored paper (or baking paper);
- cardboard;
- glue (PVA is best);
- double-sided tape;
- decorative paper;
- all kinds of spices and other culinary ingredients (tea, coffee beans, bay leaves, allspice, beans of various colors, cinnamon, cloves, various cereals, etc.).
The process of creating such a “culinary” masterpiece is simple and will not take much time.
- Let's prepare the base - cut out a rectangle from coffee-colored paper that matches the size of the frame, and crumple it a little to give it softness . To strengthen the base, glue the resulting sheet onto a piece of cardboard of the same size.
- In accordance with the intended composition, we paste pieces of light and dark decorative paper, as well as pieces of double-sided tape, onto the base. Dark paper will highlight the colored and dark elements of the panel well, and we will place large details of the composition on double-sided tape.
- Alternately, we will thickly spread glue and sprinkle generously with spices on the designated areas. After drying, be sure to carefully shake off the excess so that the panel turns out neat and the elements of the composition do not mix with each other.
- We glue the allspice peas and bay leaves separately, carefully pressing each element to the base or to the sticky part of the double-sided tape.
- After all the spices and grains are securely glued into place, we insert the finished panel into the frame and hang it in the chosen place.
Where to start creating a decorative panel for the kitchen
Before you rush to do something, you should try on the size, application and placement, i.e.:
- Location of the craft in the kitchen: on the table, wall or door.
- What material will it be made from?
- Purpose of manufacture: aesthetic value or practical application.
- Choosing the direction and technique of execution.
- Product size.
A panel made by yourself for the kitchen should not get lost in a large space and not stand out too much if the room is small.
Cross-stitch
With the help of cross stitch you can create incredibly beautiful pictures for the kitchen. Such paintings are considered simply stunning decor for this room. All drawings and pictures can be made from:
- various products;
- colors;
- dishes.
You may not have paid attention to many items before. Now, thanks to the paintings, you will be able to feel all their beauty and charm. In order to make such a picture with your own hands, you need the following materials and tools:
- fabric (canvas is best);
- two scissors (large and small);
- threads (preferably floss);
- marker for marking;
- special warmed needle;
- hoops (suitable in various shapes, sizes and from any materials).
All these materials are most often included in a general embroidery kit.
Options for decorative panels for kitchens made of fabric
The easiest thing to make is a patchwork panel. Various pieces of fabric come together for the job. You can find them at home or go to a studio - there are a lot of them left there, they are usually thrown away, so you can get them for free.
To make an abstract craft, you need to cut out various shapes from scraps and sew them together. The joints can be draped with braid. The finished product is placed in a frame and takes its place on the walls in the kitchen.
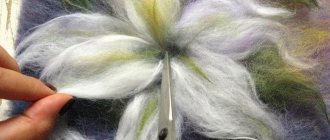
A felt landscape panel will be a wonderful accent. How to make such a decoration for a room? Very simple. First you need to make a sketch of the future painting. Then cut out the component parts from felt. Each part is glued into place, according to the drawing. After this, the craft is placed in a photo frame.
Implementation of creative ideas in panels
DIY kitchen panel made from wine corks
The attractiveness of using panels on the wall in the kitchen is the ability to create decor using any available means. You only need:
- develop your own exclusive sketch that meets all requirements;
- choose materials that will retain their qualities in difficult conditions;
- be patient and be careful.
Spice panel
This decorative element will not only highlight the individual style of your kitchen, but will also give a spicy aroma. Where does a master class on making panels begin? First you need to prepare all the materials and tools.
For this you will need:
- wooden frame;
- base - paper or burlap;
- cardboard;
- glue (PVA is suitable);
- Double-sided tape;
- herbs and spices - vanilla sticks, cinnamon, cloves, coffee beans, bay leaf, pepper.
The process of making such decor is very simple, so it will not take much time:
- First you need to prepare the frame. Wooden is best, but plastic can also be used.
- We cut out the base of the picture - a rectangle of cardboard, which will correspond in size to the frame.
- Glue paper or burlap onto the cardboard. You can take baking paper and crumple it a little.
- Then you need to glue several pieces of paper in a contrasting color - for example, coffee color. We will apply larger details of the composition to these areas. In order to attach them, you need to stick double-sided tape.
- Next, we place the spices as our imagination tells us. Sprinkle small parts - peppers, cloves, coffee beans - onto areas thickly coated with glue, and glue larger ones - bay leaves, vanilla pods - with double-sided tape.
- After the glue has dried, hang the composition in a pre-designated place.
Of course, such decor is not durable. However, you can make a different interpretation of such a panel after some time.
Here you can read the review about the MLM platform.
Panels for the kitchen: photos and ideas
The kitchen is the most visited room in the home. Food preparation takes place in it; the whole family sits at a common table for a meal. When guests come, there is a feast or simple tea parties with friends while looking at photos. Therefore, you want this particular room to look wonderful, be cozy and contain a wonderful zest.
You don’t have to go shopping and spend crazy amounts of money to achieve results - just browse the Internet and find great options that you can make yourself. For example: making a decorative panel for the kitchen will not be difficult, it will not take much time, and a minimum of funds is required.
Where to start creating a decorative panel for the kitchen?
Before you rush to do something, you should try on the size, application and placement, i.e.:
- Location of the craft in the kitchen: on the table, wall or door.
- What material will it be made from?
- Purpose of manufacture: aesthetic value or practical application.
- Choosing the direction and technique of execution.
- Product size. A panel made by yourself for the kitchen should not get lost in a large space and not stand out too much if the room is small.
- Options for decorative panels for kitchens made of fabric
The easiest thing to make is a patchwork panel. Various pieces of fabric come together for the job. You can find them at home or go to a studio - there are a lot of them left there, they are usually thrown away, so you can get them for free.
To make an abstract craft, you need to cut out various shapes from scraps and sew them together. The joints can be draped with braid. The finished product is placed in a frame and takes its place on the walls in the kitchen.
A felt landscape panel will be a wonderful accent. How to make such a decoration for a room? Very simple. First you need to make a sketch of the future painting. Then cut out the component parts from felt. Each part is glued into place, according to the drawing. After this, the craft is placed in a photo frame.
Ideas for making decorative panels for the kitchen from various materials
After the holidays, there is usually a sufficient number of wine corks left, and drinks from plastic bottles are also consumed daily; their caps can also be used for a wonderful panel. Such a panel can become the basis for a craft or an accent for the place where a flowerpot with a flowerpot is placed. Also, such a product can be used as a hot stand or placed on the table as an addition to it.
A DIY kitchen panel made from dishes is a wonderful option for decorating a room. It is suitable for a dacha, a house where a family lives permanently, as well as for an apartment.
This composition will be especially relevant for a kitchen in the Provence style. The plates can be placed on the wall itself or you can make a wooden base where the dishes will subsequently be placed.
A small master class on making decoupage panels.
To work you will need a small amount of materials:
- Large napkin with colorful patterns.
- PVA glue.
- Sanding materials.
- Base (glass, wood or plastic).
- Scissors.
- Thread and ribbon with needle.
- Varnish.
- Several brushes.
- Since the panel is made for the kitchen, it is better to choose a regular wooden cutting board.
The first step is to drill a hole so that the craft can be placed on the wall.
To make the surface smooth, it must be sanded using sandpaper. You should choose based on the surface.
After this, the napkin is laid out on top of the sanded side. Then it needs to be glued using PVA. The glue should be applied with a brush or sponge using gentle movements.
After the napkin sticks, the work is varnished.
A braid is made from tape, which is threaded through a hole in the board.
You can hang a finished panel on the wall, made with your own hands, and admire your work.
A wonderful decorative panel for the kitchen made from products and photos
A variety of cereals, pasta, coffee, and beans are in this room. All the cabinets are occupied by some kind of utensils, food or small items. You can also use them to create your own kitchen masterpiece.
For example: White and black beans will make a beautiful black and white photo of cats watching the sunset. Coffee beans and spices can create charming designs. Dried fruits and walnut shells are also suitable for these purposes. They can be an addition to a photo frame.
If one of their walls is very wide, its accent will be a beautiful panel of their photos, which are hung in the form of an apron or a new fashionable style in decor - butterflies.
It's not just the walls, tables and cabinets that require accents. You can make a panel for a kitchen backsplash. This will allow you to hide any shortcomings after repairs or during the operation of the premises. Especially if it is plastic or the wall is simply painted - such drapery will be a godsend for any housewife.
Themes of kitchen panels in different interiors
A wall panel is a thematic decoration designed to emphasize the style of the interior, divide the space, and create a special mood. It is important that the thematic panel matches the overall style of the room.
Thus, images of plants and collages created from dried flowers and leaves are ideal for a rustic style.
The interior in the Art Nouveau style will be emphasized by panels in a minimalist frame with graphic motifs.
Scandinavian style is successfully combined with paintings in bright frames with images of animals and insects. Collages with texts or just letters are appropriate.
The loft style will be emphasized by panels made from old posters or yellowed book pages, or compositions made from wine corks. Three-dimensional images that match the shade with the facing tiles look advantageous.
Creating a kitchen panel is a fascinating process that helps you look at familiar things in an unconventional way, from a new perspective.
How to make a panel with your own hands. Beautiful decor idea (1 video)
Related article: Nautical interior design