Today, kitchen furniture manufacturers produce a whole arsenal of various products. However, this abundance does not always satisfy the consumer. In this case, a do-it-yourself wooden kitchen set will be an excellent alternative to purchasing ready-made kits.
DIY wooden kitchen in a modern style
The kitchen is one of the most functional corners of the house, which means that increased operational requirements are placed on its furniture. When making kitchen furniture yourself, you should consider the following nuances.
– Small area. In old-built apartments, all the rooms are quite compact, and therefore it is important to carefully plan the rational organization of the workspace.
– Exposure to temperature changes and high humidity. Resistance to these factors is mandatory.
– High degree of exploitation. All coatings must be wear-resistant.
Do-it-yourself compact corner kitchen made of light wood
The benefits of making it yourself
DIY wooden kitchen for a country house
Personal participation in the furniture business provides a number of significant advantages.
– Personal quality control of products at each stage of production. Employees of furniture companies do not always show proper responsibility, and therefore their products often contain various defects. This can be avoided if you do the kitchen yourself.
– Freedom in choosing shapes, models and designs. You can design a kitchen set taking into account all your wishes.
– Selection of quality materials and fittings. The owner is interested in purchasing high-quality components for his future furniture.
– Cost savings. Labor costs are excluded;
– Pleasure from the process. Creating a kitchen out of wood with your own hands is a creative and exciting process.
Unusual kitchen in rustic style, made by yourself
Advantages of making kitchen furniture yourself
Making furniture yourself, despite all the difficulties, has many important advantages:
- An original design that will never have any analogues.
- Suitable sizes, no need to adjust finished elements.
- Saving money.
- Possibility of using scrap materials.
Making furniture yourself is an ideal option for kitchens of non-standard shapes and sizes. In addition, handmade products will harmoniously fit into a small apartment. The main thing is to take the dimensions correctly; at this stage, inexperienced craftsmen can use the help of specialists.
Making kitchen furniture with your own hands from chipboard or wood allows you to abandon the standard design and come up with your own . Decor options can be anything. It all depends on the specific interior and individual preferences of the master. Today, some of the most popular trends are Provence and country - a set made in these styles will suit a city apartment or a private house.
Deciding on design and construction
Simple and reliable wooden kitchen frame
Particular attention should be paid to the design of the kitchen frame. Kitchen cabinets come in frame and frameless varieties. In frame ones, the frame serves as the basis, making the structure quite stable and durable. It should be noted that the frame is not the most common type of facade for wooden furniture. For a DIY kitchen set, a frameless façade is more suitable. In this design there is no base frame, and the doors are fixed directly to the frame. The absence of a frame significantly expands the cabinet space, making it more convenient and functional. It is important to remember that the appearance of such a kitchen set will be a little unusual. Therefore, adherents of traditional forms are better off opting for frame furniture.
The process of assembling a frame kitchen on site
As for the frames themselves, they also have different variations. The most common are prefabricated and glued. Prefabricated frames are cheaper, but lower quality. A responsible master will not skimp on quality and will opt for a glued frame.
DIY installation of a finished kitchen frame
Choosing the right design is also very important. It must be carefully considered, taking into account the placement of the stove, oven, sink, dishwasher and washing machine. The main design highlight of DIY wooden items is the emphasis on naturalness, simplicity and environmental friendliness. By embodying this idea, the product acquires its true meaning, uniqueness and character. Since the entire composition is a complex and intricate system, it is better not to overload its individual parts with decorative delights. The cozy texture of wood more than compensates for such minimalism.
Original DIY wooden kitchen in rustic style
Manufacturing of kitchen furniture ↑
At this stage, you already have everything you need - a sketch of a kitchen unit and a set of individual parts. All that remains is to prepare the tools and you can start assembling the wooden kitchen set. If you have all the necessary holes, you will need a screwdriver, hammer, level and screwdriver.
Frame assembly ↑
First of all, the main frame-box is assembled. It is better to make all components for it from sheets 18 mm thick.
Work algorithm:
- The guides (or closers) necessary for the project for installing drawers and boxes are mounted on the inside of the sidewalls.
- The side walls are placed horizontally (the bottom is attached first) at a right angle and fixed with wood screws. For reliability, the joints are coated with wood glue or silicone sealant. More experienced craftsmen can use other fasteners, for example, minifixes or confirmations, but this is not a prerequisite.
Assembly of furniture boxes
Attention! When using self-tapping screws, do not forget to order chamfers from the workshop for the caps on the outside of the workpieces. And after tightening the fasteners, the caps themselves must be covered with decorative and protective plugs.
Plugs for self-tapping screws
- After fixing all horizontal lines, the geometry of the resulting box is checked. To do this, both diagonals are measured. If they are equal, then the frame is assembled perfectly.
- The next step is to install the back wall. For a cabinet under a sink, oven, dishwasher or washing machine, this element is not necessary due to the need to connect communications. The part itself is made of thin plywood or fiberboard and is fixed to all ends using galvanized nails or staples.
- Fastening elements for hanging on the wall are installed on the boxes of the upper cabinets. Legs are mounted on the bottom of the bedside tables of the lower tier.
Kitchen frame
Hanging facades ↑
With all the richness of the range of kitchen furniture, there are only 2 types of facade structures - hinged (doors) and retractable (drawers). Considering that these components do not affect the strength of the furniture, they can be made from thinner plywood, for example, 10-12 mm thick.
For the retractable version, the fastening does not raise any questions - we place the facade on special strips for purchased boxes or screw it with self-tapping screws to the front wall of a homemade box.
Drawers in the kitchen
The door is hung on a plywood cabinet according to the following scheme:
- Installation of quick installation hinges (so-called furniture hinges) is carried out in specially cut round recesses. The fastening is secured with galvanized self-tapping screws.
- The unfolded door is placed against the end of the box through a regular wooden ruler to ensure the required clearance for proper operation.
- The second part of the loop is fixed to the side of the frame with the same galvanized screws.
- If geometry violations are detected, you can adjust the position of the door using a special hinge adjuster screw.
Important! Before installing hinged facades, it is necessary to set the furniture clearly in level, then it will be easier to track the geometry of the hanging.
Installation of facades by level
Installation of a common tabletop ↑
After assembling the facades, we install the worktop, which will simultaneously act as a cover for the lower cabinets. First, we connect the adjacent elements of the set with intersectional ties, check the evenness, and then install the tabletop on the monolithic frame. There are several ways to fix it to the base box:
- place on self-tapping screws;
- use mounting angles;
- purchase special fastenings for tabletops, one part of which is installed on the frame, and the other on the underside of the lid.
A solid worktop will become a spectacular accent and practical decor for a wooden kitchen.
Of course, a lot here depends on the material from which the countertop is made. For it, you can use the same plywood as for the frame, buy furniture board, plastic-coated MDF, or order an acrylic structure.
Important! It is better to round the upper end corners of the tabletop - this will improve its appearance and reduce the risk of injury due to awkward movement. If the countertop consists of several elements (for example, for a corner kitchen), the joints must be treated with silicone and covered with a connecting strip to prevent the penetration of moisture and small debris. By the way, you can also use special protection for the ends.
Protective and connecting strips for worktops
Required Tools
Tools for assembling a kitchen set with your own hands
To work independently on an array, you will need the following equipment:
– hacksaw for cutting;
– tape measure for taking measurements;
– confirmations;
– screwdriver, emery sheet, hexagon, primer;
– a manual router – you will need it in order to efficiently profile the edges and holes for fittings;
– Forstner drill;
– level for accuracy of placement of parts;
– iron – it helps to glue edge tapes well;
- electric drill;
– jigsaw;
– plane (preferably electric).
What is the best way to make a kitchen set?
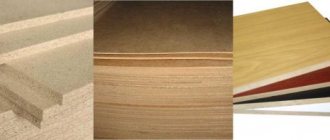
Choosing the right material for a kitchen unit is not enough to remain completely satisfied with its functions. Today, manufacturers can offer cabinet furniture options from various materials, ranging from budget chipboard to exotic wood species. I would like to give advice to all buyers: do not consider headset models made from the cheapest or most expensive materials .
Even with all its availability, chipboard is an unsuitable material for the kitchen due to its impracticality. Since the material will be constantly exposed to moisture, furniture made from it will not last long and will very soon lose its original appearance. In this regard, it is best to choose kitchen unit models whose façade elements are made of MDF. I would like to immediately dissuade those owners who want to make a kitchen set out of wood with their own hands. If this is your first experience, then you will probably make a lot of mistakes and end up wasting your money and time.
It is much better if you order the production of MDF facades from the manufacturer, telling him the desired dimensions, texture and color . This material is excellent for the manufacture of kitchen furniture due to its excellent performance characteristics. It is especially worth highlighting its high resistance to moisture, so it will not be difficult for you to maintain it in proper form. All you need to do is periodically carry out regular wet cleaning. You can even use mild cleaning products to remove stubborn stains. But keep in mind that MDF boards are noticeably more expensive compared to laminated chipboards.
The most suitable material for cabinets and cabinets is laminated chipboard. It is popular due to:
- affordable price;
- attractive appearance.
Manufacturers offer it in the form of slabs, but if you have a sawmill in the store, you can always bring the lumber to the size you need and glue an edge to it . Among the advantages of laminated chipboard, it is worth noting the wide selection of color options, so you can easily choose the best option for yourself, taking into account the characteristics of the project that you decide to implement.
Laminated chipboard is perfect for making the back walls of cabinets and cabinets .
- The next most important piece of kitchen furniture should be called the countertop. It can be made from a variety of materials, from natural granite and marble to wood with a special polymer coating. The first option may scare off most buyers with its high cost, but do not forget about their excellent performance characteristics. At the same time, they are quite heavy, so they can only be used in conjunction with a durable frame that must support such a massive work surface. If you have made a choice in favor of a kitchen made of chipboard with MDF facades, then it is better for you to give preference to a wooden countertop.
- Washing. Don’t forget about washing, which can affect the appearance of your set. It is necessary to select this element of kitchen furniture taking into account its performance characteristics. So you will be confident in its long and trouble-free operation. Today, manufacturers offer various models, including those made of granite. These designs are distinguished by their diversity: in stores you can find mortise and overlay models, round, square, teardrop-shaped, with and without dryers. But most often, buyers choose mortise models made of stainless steel. To ensure that you are completely satisfied with your choice, pay attention to the length of the working surface of this element, then after installation you can use part of the free space for other operations.
- Accessories. We advise you to pay attention to the mechanism for opening drawers, door hinges and handles. It is very important that they are of high quality. In the kitchen, these elements are subject to much greater stress than other furniture. I would immediately like to advise you to forget about buying pneumatic closers from German and Italian manufacturers, which you plan to install in the kitchen yourself. This hardware is quite expensive. It would be a mistake to buy “Chinese consumer goods” that will last you a month at most. It is advisable to choose products in the middle price range. Then you won’t overpay and won’t be disappointed with its quality.
- Fasteners Modern kitchen furniture is assembled using confirmats, which are special screws with a head that are tightened using a hex key. Please ensure that the fasteners are the same size. This way you won’t have any difficulties installing them.
Manufacturing process: step-by-step instructions
- Preliminary preparation
Before you begin assembling it yourself, you need to prepare all the components and parts of the future array. They are cut out from the selected material using a jigsaw. Their saw cuts need to be sanded. Sandpaper works well for this purpose. To prevent moisture and mold from entering, a melamine edging tape is placed on each of the cuts. In order for the dimensions of all elements to be clearly verified, it is advisable to create a cutting map. There are special services for this on the Internet. This preliminary work will allow you to avoid errors in cutting. In addition, this diagram will take into account the size of the saw cut.
The initial stage of the kitchen furniture manufacturing process
- Assembly of elements
Assembling upper cabinets in the kitchen
After taking into account all the measurements, individual parts and elements have been prepared, they need to be laid out in order of assembly. This will make the assembly process more streamlined.
Kitchen cabinets are assembled according to the following algorithm:
- If there are drawers, then the guides are installed first. In this case, be sure to use a level.
- If shelves are provided, you need to drill holes to attach them.
- Separate holes are drilled for inter-wall fastening.
- Its side walls are attached to the bottom of the cabinet.
- The top part is attached.
- The legs are attached.
Once all the products are assembled, you can begin their installation.
Kitchen furniture assembly
- Installation
If the kitchen assembly process coincides with the renovation, then all construction work should be completed before installation begins. The walls and floor of the room must be prepared for fastening furniture. You can take a piece of MDF as an apron. Installation usually begins with the lower elements. To do this, use a level. After all the products are connected to each other (Euro-ties are used for this), a common wall is fixed behind the entire array.
DIY kitchen installation and assembly
In the countertop you need to mark the location of the stove, work surface and sink. At each section, corresponding holes are cut out and treated with construction sealant. The tabletop itself is attached with self-tapping screws to the finished cabinets.
Installing a countertop is a responsible process
After this, the upper elements are installed. The most optimal distance between the tabletop and the bottom of the upper cabinets is 650 mm. In order to determine the height of the canvas for fastening the upper elements, it is necessary to add to the indicated distance the height of the cabinets and 10 mm occupied by the fastening structure. The upper tiers are secured with special canopies installed on the rear walls.
At the end of the kitchen installation, you fix the doors in the open position with your own hands. To do this, the door hinge is fixed on the door, and then mounted in the wall.
Installed doors in open position
After installing the headset itself, electronics, built-in elements and various accessories (handles, rails, dryers, etc.) are installed.
Installation of an oven and built-in hob
Design and measurements of a wooden kitchen
The first important step is design and measurements. To make your own wooden kitchen set, a sequence of certain steps is required.
Kitchen table diagram for self-production
First you need to decide on the shape of the kitchen furniture, whether it will be located in one line or have a U- or L-shape. If the kitchen is spacious enough, you can make an island or a multifunctional table in the center of the room. Next, we draw a plan for the future kitchen, where we must indicate the dimensions of the walls, width and height. Here we also display communication diagrams: switches, sockets, wiring location, gas, water and sewer pipes. We plan our design - we distribute places for sections for food and kitchen utensils, we place a gas stove and sink, and a refrigerator. The convenience of using the room depends on the correct installation of all elements.
Drawing of the future kitchen set
Know! We place kitchen appliances, a sink, and a hob close to the corresponding communications. This will be much more practical than extending pipes and moving household appliances.
DIY wooden kitchen
After the location of all kitchen objects and their purpose has been determined, a detailed drawing must be drawn up, where all dimensions must be indicated. The following parameters are taken into account here:
- Height of the lower and upper tier of cabinets;
- Distance between tiers;
- Dimensions of each cabinet, cabinet;
- Location of switches and sockets.
Based on the drawn up drawing, they calculate the amount of material, additional glass or mirror inserts, and the necessary fittings (brackets, hinges, handles, etc.).
DIY kitchen furniture assembly