Surface preparation process
Let's look at step-by-step instructions on how to prepare a wall for wallpaper.
How to choose wallpaper and wallpaper glue?
We recommend reading: Calculating the amount of wallpaper
What experts recommend paying attention to when choosing the designated materials:
- Manufacturer - renovations are not done for a year (although there are those who like frequent changes), there will be people in the room all the time, so the quality of the wallpaper and glue must be at a high level. Only from well-known manufacturers can you get a quality guarantee and be sure of safety for health.
- Purpose - for each type of wallpaper you need to select a special glue, and you can find the markings on the packaging.
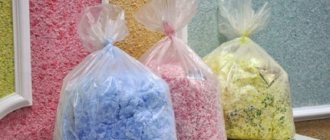
- Possibility of changing the design of the room - if you are a fan of frequent dramatic changes in styles, then it is better to hang wallpaper intended for subsequent painting. These are glass wallpaper - a relatively new finishing material, characterized by high quality, ease of application and long service life.
But even if the most expensive and high-quality wallpaper is purchased, and the glue is provided by the manufacturer itself, there is no guarantee of a successful final result. Everything will depend only on how the walls were prepared for wallpaper - following all the above steps, or ignoring some of them.
( 89 votes, average: 4.80 out of 5)
We combine a bathroom with our own hands
How to remove a stain on a ceiling
Related Posts
Stages
The step-by-step process includes:
- Removing boring finishes.
- Cleaning the surface from dust, debris and other contaminants.
- Initial application of the primer layer. This stage involves treatment with a special compound to disinfect and prevent further absorption of moisture.
- Repairing defects. Elimination of visible defects is carried out with a mixture of gypsum, after which the surface is puttied.
- Alignment. To carry out this stage, you will need a special abrasive mesh material. You can level it with sandpaper.
- Final priming. The final stage of preparing the wall for wallpaper. Necessary to ensure good adhesion of the surface to the finishing material. In addition, re-priming will additionally treat the walls with an antiseptic.
Between the main stages of preparing walls for wallpaper with your own hands, there are intermediate ones, such as treating the surface with an antiseptic, wetting, collecting tools, preparing a solution, etc.
Important! The listed steps must be performed strictly in order; the sequence of work cannot be changed!
Primer before wallpapering
It was described above why priming is so important during preparation. But since putty was applied after the first priming, it should also be carefully primed immediately before gluing the wallpaper.
Priming is an intermediate stage between wallpaper glue and canvases. And if you use glue and primer from the same manufacturer for gluing, you can achieve the most effective result at the preparation stage. The primer is still applied with a brush and roller, with a break for the previous layer to dry. It is important that the wall is cleaned of dust and dirt. After the soil has completely dried, the trellises are glued.
Although preparing to decorate walls with wallpaper will require additional time, effort and money, such manipulations will make the surface ideal for gluing wallpaper. They will look great and last as long as possible.
We looked at the technology for preparing walls for wallpaper, as well as the order of work. All that remains is to put everything into practice and enjoy the results.
But if something goes wrong, we recommend that you read: What to do if the wallpaper comes off.
Materials and tools
To carry out high-quality repairs, you first need to acquire important tools and various mixtures:
- putty, gypsum mortar to level the wall plane and apply the base layer;
- primer for initial surface treatment;
- finishing putty to complete the preparatory work.
For information! It is better to choose a universal primer that can penetrate deeper into the wall.
A product purchased in a store contains instructions that must be followed unconditionally in order to carry out the repair efficiently.
Puttying walls under wallpaper
It is necessary to putty the walls under the wallpaper to level the surface of the walls. We’ll tell you how this is done now, but for now we need the following tools and materials:
- spatulas of different sizes;
- putty for wallpaper.
To reduce surface roughness, apply two thin coats: one in a horizontal direction and the other in a vertical direction.
If, as a result of the inspection of the walls, not many cracks and chips were revealed, then you can get by with puttying only the problem areas of the surface. However, experts advise leveling all the walls. Particular attention is paid to areas where metal reinforcement is exposed. It must be thoroughly hidden so that there is no hint of rust stains on the new wallpaper.
When puttingtying walls under wallpaper, any spatula will leave quite noticeable stripes. To reduce surface roughness, it is recommended to apply two thin layers: one in a horizontal direction and the other in a vertical direction. Diagonal movements will also help apply the putty more evenly. When applying putty diagonally, each new layer should overlap.
For the most convenient application of putty, it is better to choose a device with a width of 30 to 40 cm, and hold the spatula itself at an angle of 30 degrees relative to the wall surface.
Now you need to wait until the putty layer is completely dry, and then begin leveling it with sandpaper. After the second layer of putty has dried, it must also be leveled, and then a layer of finishing putty must be applied. It will completely smooth out all possible smallest irregularities.
Tools
You will need to prepare the tools in advance so as not to waste time and simplify the process. The availability of tools depends on the nature of the old finishing layer and the quality of the coating.
Note!
Glass wallpaper - what is it? Pros and cons, types, features, characteristics, photos of design and combinations in the interior
Plain wallpaper - 150 photos of modern design. Rules for choosing and combining wallpaper in the interior: kitchen, bedroom, living room, hallway
Wallpaper framed on the wall in the interior: photos of original design and beautiful decor
Need to purchase:
- floor protection film;
- knife, it is better to choose a stationery knife, sharp;
- tape to avoid dirt;
- container for diluting mixtures;
- a brush for priming in difficult places;
- roller for applying the mixture to the wall;
- spatulas for leveling and applying the mixture;
- construction drill mixer for kneading.
Getting rid of old wallpaper layers
Before gluing new material, it is necessary to get rid of outdated finishes, be it paint, decorative plaster or faded wallpaper. Without this process, the preparation of a concrete wall for wallpaper is considered incomplete.
Several arguments why it is necessary to clean the surface and remove the old layer:
- Wallpaper that has been in the house for a certain time has practically no adhesion. If you apply glue to such a layer, it will soften and fall off. Even under slight pressure or weight, old layers cannot withstand the load.
- When gluing wallpaper onto an old coating, you will have to wait a long time for it to dry.
- After waiting for drying, unevenness will be revealed, the appearance will be spoiled and the work will simply go down the drain.
- The clutch will not be of high quality, which means you won’t have to dream of a long service life.
- Under the old layer, dirt, dust, and microbes that have accumulated over the years of operation will remain.
Once again about removing old wallpaper
You can use different methods to remove old wallpaper. The simplest and most reliable method is to moisten the surface with a warm cleaning solution. The solution is applied to paper wallpaper using a sponge, roller, or sprayer. After a pause of 15 minutes, you can carefully remove loose and swollen wallpaper with a spatula. This method is good for removing thin paper wallpaper.
Do not forget that multi-layer wallpaper cannot be removed this way. They are removed by using a steam generator or ironing them with a hot iron through a damp cloth. Multilayer wallpapers include non-woven, vinyl, and washable wallpapers, since they have a top protective layer that prevents water from reaching the surface.
About the most important thing
To obtain a high-quality surface for wallpapering, it is necessary to perform final sanding. To prepare walls for wallpapering, follow the basic steps:
- Install proper side lighting. The light source must remain in one place throughout the entire work.
- Grind the walls from top to bottom using circular movements of the tool.
- Treat strips no wider than 1 meter. Once the strip goes all the way to the bottom, sand the next strip the same width.
- Check the surface for clearance using a level or rule applied to the surface being treated.
Never attempt to sand down pits or depressions. You will only ruin the surface. It is better to putty the identified defect. Followed by surface cleaning
When preparing walls for wallpaper, minor scratches are allowed on the polished surface.
A few words about mechanization of the process
The use of mechanical devices is advisable when removing old paint, plaster, and rough grinding.
At the finishing stage, it is best for a beginner to use hand tools. This is both more reliable and cheaper, although it takes longer. For more advanced builders, we recommend using random orbital sanders.
Removing paint
You will also have to get rid of outdated paint if you need to thoroughly prepare the walls. The process is complex and will take a lot of effort and time.
Important! Painting will not interfere with the installation of the selected wallpaper, without preparation: primer, putty, etc. If the surface requires leveling, i.e. carrying out preparatory work, you will have to remove the paint.
Experts advise using one of 4 methods to thoroughly clean the surface:
- Manual - using available tools.
- Electromechanical - using electrical devices and tools, such as a drill, hammer drill, etc.
- Chemical - using special compounds.
- Thermal - using hot air. This is a burning method.
Primer
An important step in preparing walls is priming. The essence of this action is that the applied composition penetrates inside the layer, gluing its particles and forming a film on top that does not allow liquids to be absorbed into it. Thanks to this, the liquid component of the next layer is not absorbed into the previous one, but performs its function - the glue holds the wallpaper, the water from the cement mortar ensures its slow drying, etc. Without priming the layers, the quality of plaster, putty, and wallpaper will be very low, so neglecting this procedure is strictly not recommended.
Attention! When applying a primer, it is important that the layer on which it is applied is thoroughly dry.
In this case, the primer will be well absorbed and will perform its task efficiently. Sometimes it doesn’t hurt to apply 2 layers of primer. You can continue working with the primed surface only after it has dried.
Primer of walls
Priming before gluing is a process that helps get rid of cracks, pits and other defects. The primer is suitable for all surfaces. It can be used to prepare a wall made of plasterboard, concrete, or other material. The mixture strengthens adhesion, eliminates excess moisture, and gets rid of debris.
There are several types of primer. The choice largely depends on the financial capabilities and requirements of the owners of the premises. When selecting, the characteristics of the surface and its properties are taken into account. Sellers from specialized stores or instructions that come with the product will help you with your choice.
There are many primer compositions on the market, but there are mixtures that have proven themselves and are popular. They are recommended to be used in repairs by professionals:
- Acrylic solution (universal). It tends to penetrate deep into the wall. Dries in 5-6 hours, has no odor, and can be used on any surface.
- Contact composition. It has all the properties described above, but in the contact type they are more pronounced. Thanks to quartz particles, the solution penetrates deeper, and therefore seals unevenness and other defects more efficiently.
- Griftal solution is recommended for treating walls in rooms with high humidity. Drying time is a day.
Regardless of what kind of wallpaper you plan to use on a surface, priming is a mandatory step. It prepares wall surfaces for wallpapering for painting, non-woven, paper and other types.
To apply the mixture you will need a roller. They can easily cover the entire surface, but for the corners it is appropriate to use a brush.
Priming the walls before wallpapering
Before starting this work, the primer solution must be prepared for work; the preparation technology depends on the type of solution purchased:
- The finished solution just needs to be mixed well. But experts often dilute the solution with water if an acrylic primer, or white-spirit, is used for an alkyd mixture;
- Concentrates are prepared according to the recommendations indicated on the label;
- To prepare a primer from a dry composition, take a container where the solution, water or white-spirit will be diluted, add the mixture to the water in the amount that is written in the instructions, mix everything thoroughly until smooth. And it is advisable to use a mixer to get a completely homogeneous mixture; doing this with your hands will be very difficult and time-consuming.
The finished solution just needs to be mixed well.
The procedure for priming is as follows:
- The floor is covered with film or other material to protect it from contamination;
- The solution is poured into a special container for working with the roller;
- The roller is lowered into the container, completely soaking it with the solution, and rolled along the ribbed surface of the container to get rid of excess;
- The primer is applied from bottom to top;
- Apply in a thin layer, make sure that there are no drips; if they form, you need to go over them again with a roller;
- Corners and other hard-to-reach places are treated with a brush;
- Move on to the 2nd layer after the first has completely dried.
Apply in a thin layer, making sure there are no drips.
Leveling the plane
After the primer has dried, proceed to the leveling stage (plastering). This process is not necessary if, despite its “old age,” the plaster layer lies flat and does not crumble.
When leveling is unavoidable, the walls must be plastered before gluing. This is done with a high-quality gypsum composition. It is used to fill recesses, pits and other surface imperfections. To begin with, apply a centimeter layer with a spatula and level it. You will have to wait until it dries, and then, using sandpaper, sand the surface.
Next comes puttying. The solution is prepared and applied with a spatula. The putty must be given time to dry. It is then carefully sanded to ensure a smooth surface.
Need to know! If you plan to prepare the wall for liquid wallpaper, then puttying can be skipped. They will be able to withstand uneven surfaces, but will definitely brighten up dark spots. Before applying liquid wallpaper, it is better to cover the wall with a light water-based emulsion.
The entire preparatory process completes the stage - re-priming. This is a mandatory intermediate procedure between gluing and puttying.
You should know! One of the important preparatory stages is disinfecting the wall and treating it with an antiseptic. It can be carried out together with priming, which will protect the surface from mold, fungi and other unpleasant formations.
Leveling the surface using gypsum mixtures
As soon as the wall is dry, you need to start leveling it using plaster. With its help, you can remove all minor defects - chips, cracks, pits, etc. and make the walls even and smooth.
- It will be very comfortable and pleasant to glue wallpaper onto such a surface in the future.
- Each wall is covered with diluted gypsum mortar and leveled using different sizes and shapes of spatulas, after which it is left to dry completely.
- On average, this can take a day.
It is worth remembering that the thickness of the plaster layer should not exceed one centimeter. After the product has dried, it is sanded using sandpaper.
Now you can start puttingty.
- For this, putty is used, which is also diluted and applied to the wall with a spatula, leveled and also left to dry.
- Here the layers will be much thinner - only a few millimeters.
- Using this layer you can remove subtle irregularities that formed after plastering the wall.
- After the putty has dried, the wall is sanded again until it is perfectly smooth.
After this, you can begin the final stage of preparing the walls for gluing both paper and liquid wallpaper - this is re-priming.
This stage should never be skipped, as it will help the wallpaper stick better to the wall and guarantee that it will last for quite a long time, until you get tired of it and want to replace it again.
