In order to create beauty and comfort in your apartment, there is no need to spend a lot of money on purchasing expensive furniture and household appliances. As a rule, in order to radically change and refresh the interior of a living room or bedroom, the simplest and most affordable materials available in any hardware store are sufficient. Such a material is drywall. It can be used to make arches, columns, suspended ceilings, walls, partitions and all kinds of shelves. The combination of various unique properties has made it an indispensable material for DIY repairs and construction.
Shelves made of plasterboard will give an individual design to the room, and will also help you get rid of furniture that takes up significant space.
Properties of plasterboard sheet
A plasterboard sheet is a product consisting of two strips of thick mounting paper and a solid gypsum-based plasticizer between them. GCR has many unique features.
So, it has the following advantages:
- environmental Safety;
- flexibility allowing the creation of curved structures;
- affordable price;
- ease of processing and installation;
- no thermal expansion;
- water resistance after appropriate treatment;
- non-flammability;
- possibility of equipping with lamps of various types;
- strength to withstand significant loads.
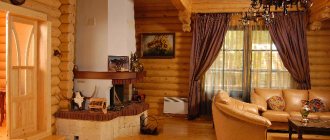
By installing plasterboard shelves in the hall, you can not only decorate it, but also hide some defects and unevenness on the wall.
Benefits of drywall
Of course, you can order or make such a piece of furniture from traditional materials: wood, chipboard and others, but plasterboard sheets are practically in no way inferior to them, and in some respects they are even superior:
Design option for plasterboard shelves in a room Design and design of plasterboard shelves
- gypsum plasterboard shelves on the wall can be finished with various types of artificial or natural stone, wood, and textured plasters. Moreover, it is quite possible to change the appearance after time;
- shelves assembled on a frame are not inferior in strength characteristics to traditional options, such as chipboard;
- using plasterboard, you can assemble products of almost any configuration, with non-standard curved contours;
- When renovating a bedroom using plasterboard, you can assemble a whole complex of beautiful shelves, stands, and cabinets made of plasterboard built into the overall structure with walls made of gypsum material;
- such material will cost much less than classic furniture ordered from a factory or from craftsmen.
The only drawback is the inability to move interior elements without completely dismantling them. However, even in this case, plasterboard shelves are superior to furniture because they can be easily disassembled into small parts and thrown away or transported.
Option for designing shelves in the bedroom
Niche with shelves and semi-arch
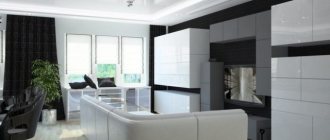
Room interior in red colors
So, how to make plasterboard shelves in the bedroom above the bed or in another chosen area?
Place of plasterboard shelves in the interior
Scheme of a plasterboard niche with lighting.
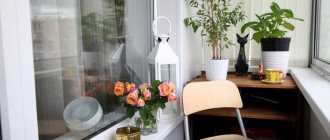
With the help of gypsum plasterboard products, you can not only get rid of furniture that takes up significant space in the room, but also create an individual design of both color and shape. Shelves on the wall can be used to display photographs, souvenirs, vases and flowers. Larger wall shelves can be used to display books and magazines, or as a stand for an aquarium or household appliances.
Related article: Installation of plasterboard walls in rooms with high humidity
Shelves can be made from plasterboard in a wide variety of shapes. The most common options are:
- niches in the wall for a TV or related equipment;
- protruding volumetric frames;
- corner straight and curved structures;
- arches;
- vertical and horizontal bends.
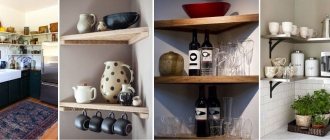
Shelves made of plasterboard, located on the wall, can perform both practical tasks, serving as a basis for placing various objects, and purely aesthetic ones, being a decoration and an integral element of design. So, in the hall, semicircular shelves located below similar suspended ceiling structures will look very good.
In order to install plasterboard shelves on a wall or partition in the hall, basic construction skills and tools that are found in every apartment are sufficient.
How to make shelves from plasterboard with your own hands (video)
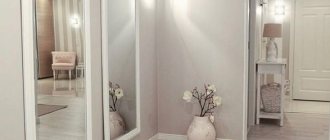
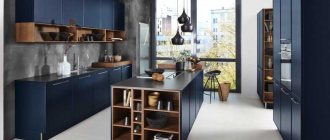
Modern interior design often does not welcome the use of familiar wooden cabinets, cabinets or shelves in the interior. In many cases, it is more rational to use less cumbersome solutions that fit organically into the environment. Drywall shelves, photos of which can be seen in catalogs of construction companies and on the Internet, will help you achieve maximum functionality in combination with decorativeness. With the right choice of their design and design, you can create an interesting and unique interior and make the room convenient and comfortable.
Tools and materials
Before starting work, a drawing of the shelf is drawn up. The drawing can be executed on a sheet or used for this on a personal computer.
The project determines the location of the plasterboard shelf on the wall so that it looks harmonious against the background of the interior of the room.
When the project is completed, materials are calculated and tools are prepared.
To make a shelf for wall or floor mounting, you will need the following tools:
Tools for making plasterboard shelves.
- perforator;
- screwdriver;
- Bulgarian;
- hammer;
- belt grinder;
- building level:
- knife;
- metal scissors;
- roulette;
- pencil;
- spatulas 8 cm and 20 cm;
- sandpaper;
- paint brush.
The instrument must be checked and completed.
The list of materials required for the work is relatively small.
It includes:
- galvanized steel CD and UD profiles;
- arched profile;
- GKL thickness from 8 mm to 12 mm;
- reinforcing mesh;
- metal screws;
- dowels or anchor bolts;
- aluminum or plastic corners;
- starting and finishing putty;
- liquid primer;
- finishing material.
If the shelf is backlit, then the calculation and purchase of electrical wiring, lamps and switches is carried out.
Related article: Making a compost bin
Types of plasterboard shelves
There are several main parameters by which such designs differ. Before choosing one option or another, you should familiarize yourself with them.
Table No. 1. Types of gypsum plasterboard shelves
| View | Description |
| Open | Such shelves mainly have a decorative appearance; they are placed to display various souvenirs, cups, photographs and other decorations. |
| Closed | These are already more functional shelves, so they are often made deep to accommodate many items. |
Table No. 2. Types of shelves by type of placement
| Accommodation | Description |
| In the center of the room, a large structure consisting of many shelves is most often installed. This option will best fit into the interior of the living room. | |
| Such plasterboard structures will fit perfectly into the interior of a small room. Moreover, they are not only decoration, but also perform a functional task. Quite often, a bookcase is placed in the corner. |
Position of shelves in the corner
In this case, any plasterboard structures can be designed as follows:
LED lamps are often used for lighting
Shelves made of gypsum plasterboard are:
An unusual version of plasterboard shelves
Video - Shelves made of gypsum plasterboard: original ideas
Installation of a steel profile frame
The frame must withstand not only the weight of the finishing material, but also the weight of the objects that will stand on it. This must be taken into account when mounting it on the wall.
The frame for the shelf in the hall is installed in the following order:
Scheme of assembling the frame by installing a galvanized profile under plasterboard.
- Lines for placing load-bearing profiles are drawn on the wall (floor, ceiling).
- Load-bearing elements of the required length are measured and sawed off. Holes for fastening are drilled in them every 25-35 cm.
- The load-bearing profile is applied to the load-bearing and supporting surfaces, and places for dowels are marked.
- Holes are drilled into which dowels are inserted.
- The supporting profile is attached to the wall (floor, ceiling).
- The frame structure is assembled from the CD profile, side and T-shaped connectors. The parts are fastened to each other using special metal screws.
Upon completion of installation, the strength of the frame is checked by pressing on it from different sides. If the structure meets the strength requirements, then electrical wiring is installed inside it in a special protective box.
Frame covering
Diagram of the correct joining of drywall sheets.
In order not to make mistakes when preparing blanks from gypsum plasterboard, it is recommended to make a pattern for each of them. Newspapers, sheets of Whatman paper or wallpaper are suitable for this. Only after careful fitting can you apply the pattern to a sheet of finishing material and cut out the part.
You can do this using:
- sharp knife;
- hacksaws for wood or metal;
- jigsaw.
The finished fragment is placed on the frame and screwed to it with metal screws. Their caps need to be recessed into the surface by 1-2 mm. Curvilinear gypsum plasterboard fragments are wetted and, after achieving the required flexibility, attached to the profile. After drying, they can be processed.
Excess material protruding beyond the edges of the frame can be sanded off using a belt grinder. Finer sanding of the edges is done by hand with sandpaper.
Related article: How and how to insulate a house made of aerated concrete from the outside
Surface finishing
To ensure that the surface of the shelf is smooth and durable, it is finished.
It consists of the following:
Scheme for filling drywall joints.
- The entire surface is treated with a liquid primer.
- Holes from screw heads and joints between individual parts are sealed with starting putty.
- The edges and corners are covered with plastic or aluminum corners. A reinforcing mesh is glued over the joints between individual gypsum plasterboard fragments.
- Finishing putty is applied to the entire surface. Allow at least a day for it to dry completely.
- Grinding and polishing are carried out using fine-grained sandpaper.
- A liquid primer is applied to the treated surface.
The finishing touches are complete, you can move on to decoration.