Types of floor repairs
In general, wood floor repairs can be classified into minor, medium and major repairs. Filling cracks in a wooden floor is a minor repair.
There are also the following types:
- Coverage update. Conducted every 2-5 years. It all depends on how worn it is and the condition of the boards underneath it. Renewal is carried out partially - in places of severe abrasion, or during planned procedures.
- Simple repair. It is necessary when the floor creaks or serious gaps form between the boards.
- Major repairs - carried out in cases of rotting of the floor or during the restoration of the entire apartment.
- Complete replacement of outdated flooring. Performed during larger renovations. The finish is being replaced with a new one.
Solid boards that are regularly maintained and made from quality wood (no knots, well-dried) can last more than 150 years. In the case of other topcoats, repairs may be required after several seasons.
Repairing cracks with cord or twine
Another affordable way to solve the problem, which allows you to hide defects in wooden floors and walls. To do this, you need to prepare a thick cord, twine or rope, adhesive and putty.
Restoration is carried out as follows:
- The cord or twine is coated with glue along its entire length.
- Next, mix the putty mixture, sawdust and glue to obtain a viscous composition.
- The cord is placed in the cleaned cracks and slightly deepened.
- The top of the gap is filled with the finished composition, leaving a small margin for shrinkage. After drying, the surface is carefully sanded.
Methods for sealing cracks
Before sealing cracks, you need to find their source. The main reasons for the formation of gaps between boards:
- Drying of wood. For the floor, it is better to purchase boards processed by vacuum drying. Repair of cracks in this case is carried out by re-laying the coating. In a new house, this should be done every year for 3 years.
- Small rodents. It is useless to eliminate cracks caused by the active activity of mice until the very reason for their formation is eliminated. You can get a cat, set mousetraps, scatter dry peppermint in the underground. Sealing cracks with a solution of cement and broken glass works well.
- Builder mistakes. If the boards “walk” as a result of improper installation, they must be nailed to the joists at an angle. Then you can use putty.
- In case of poor ventilation. The boards rot, turning into dust. Only a complete re-flooring of the flooring will help here.
- Incorrect type of wood for floorboards. The most quickly deformed floors are made of ash, maple, beech and cherry. Softwood or oak boards are the best options for creating a beautiful and durable floor.
- High load on the floor during operation.
If floor ventilation is carried out only through cracks, then if they are clogged, the boards will quickly begin to rot. To avoid this, you will need to make special vents or ventilation grilles. In country houses they are usually hidden, they need to be found and opened.
Sealing cracks can be done in many ways. Basic tools and materials that may be needed:
- plane
- saw
- hammer
- putty knife
- sandpaper
- hard brush
- wood glue or PVA
- silicone antibacterial
- epoxy
- nylon cord
- plumbing tow
- wooden slats
- special solutions
- paper, sawdust, paste
It is possible to choose a method that will be optimal for a particular case only after finding out the causes of the problem.
Causes of formation and types of defects
Main reasons:
- Problem base. For example, thin and unable to support loads or lacking interface between layers (including different thicknesses or temperatures in different areas), as well as external loads transmitted from other building structures.
In such situations, repairing the floor screed is impossible. Cracks will appear again and again. The solution is to dismantle the coating, find out the reasons and carry out qualified work on a new one;
- Low quality screed. Most likely, the process technology is broken. It is quite possible that low-quality cement was used or the proportions of the ingredients for the solution were not observed. The solution is to repair cracks.
So I thought, sealing cracks in the screed is like dental treatment. There are several causes and names of the disease, but in any case the doctor knows what and how to do. What causes defects?
Cracks
- — they did not provide expansion joints and did not glue the edge tape;
- - too small or, on the contrary, too large thickness of the screed;
“A small thickness provokes the risk of destruction under the pressure of an external load, and a large thickness becomes covered with cracks due to the resistance of moisture evaporating from the concrete.”
- - too liquid or, conversely, too thick cement mortar for screed;
“Novices usually tend to add water to make application easier and faster. The amount of water is indicated on the packaging of the mixture. Maintain proportions, this is important!
- - poor reinforcement;
- - drying out.
“Water plays an important role not only in human life, but also in concrete screeds. The more often the screed is moistened, the stronger and better the solution. To do this, it is recommended to cover it with plastic film and lightly sprinkle it during the drying period (for example, from a regular household spray bottle).”
Small holes
— the screed was poured onto a surface that was not primed;
- did not mix well, air bubbles remained in the solution;
“Tip: Do not knead by hand, use a stand mixer or a hammer drill with an attachment running at low speed.”
Are you weak?
Delamination
- the screed was placed on an uncleaned surface;
— violation of technology in preparing the base;
Dust
- low quality concrete;
“In addition to the above, there may be hidden voids (well, just like teeth). They are not visible, but can be detected by carefully tapping the end of the block. The sound should be equally dense and sonorous. You will notice a “pleasant” booming sound – this is emptiness. If more than 1/3 of the area sounds like this, change the screed.”
Damper tape
Cracks flowing along an expansion (or temperature) seam are a special issue. Here it is necessary to coordinate the design organization that developed the object.
A few words about expansion joints. More often than usual, the appearance of cracks caused by increased loads is observed near doorways. Due to adjacent pressure, the door areas dry out a little earlier than the rest.
The absence of expansion joints near the walls is one of the causes of cracks.
“If there are columns in the room, they also need to be covered with compensation tape, since they will experience the pressure of the concrete layer.”
Gaps at the junction of walls and floors
During the construction of a house, gaps under the baseboards are left specifically for ventilation. However, over time they expand, creating problems in the form of growing colonies of insects or constant drafts.
Advice! In the case of wooden parquet, completely sealing the cracks can lead to its rotting.
Sealing gaps between walls and floors
To find out the scale of the problem if a gap appears between the wall and the floor, you need to dismantle the baseboard.
The easiest way to cover a small gap is with jute.
If it is no more than 2 cm wide, putty should be used.
At the end of the work, a new baseboard is installed.
If the distance from the wall to the floor is more than 5 cm, the entire floor surface or part that is adjacent to the problem area is moved.
To seal cracks without disassembling the floor covering, polyurethane foam or polystyrene foam is used.
Work process:
- careful dismantling of the baseboard
- cleaning the crack from dirt and dust
- sealing the gap with foam with preliminary addition of polystyrene foam
- cutting off excess foam
- treating seams with putty - necessary to avoid dust getting into the formed pores
- after the putty has dried, install the baseboard in place
In addition to polyurethane foam and polystyrene foam, the following materials are also used:
- Colored silicone. The color can be varied, which makes the seam invisible. For large gaps, silicone treatment will become expensive.
- Acrylic sealant. After applying the material, the seam is tinted to match the color of the baseboard. Sealing cracks in wood floors with sealant is one of the most reliable methods.
- A mixture of wood grout and regular PVA.
Sealing cracks in a wooden floor with polyurethane foam requires great care - the floors may lift slightly as it dries.
Advice! The grout mixture is used to seal any hard-to-reach cracks.
Why can gaps appear between floor boards?
There are several reasons for this problem. The most common of these is drying out of the boards. Often, wood that looks thoroughly dried out is not dry. It is damp inside, which leads to cracks appearing over time. Therefore, when choosing boards, preference should be given to those that have been vacuum dried in production.
Gaps between boards can be a real problem
Another reason could be various installation errors. If the joists are laid incorrectly, the floor will “walk”, which will lead to the appearance of cracks.
Room humidity is too low. Typically, this problem occurs in winter, when the heating radiators are running at full capacity and the windows are closed. In this case, sealing the seams is not recommended. When the normal microclimate in the room is restored, the boards will begin to expand, which will lead to their arching - the floor will go in waves.
Only complete dismantling and refurbishment of the floor can help here.
You also can't ignore rodents. But there is no point in sealing holes and cracks until the root cause is completely eliminated.
Sealing with sawdust and glue
Floor repairs in any area can be carried out using a special composition. It is prepared in two ways.
First option:
- You need to prepare small sawdust. They are placed in a small container and filled with boiling water. The resulting mass must be mixed until smooth.
- Leave the sawdust to swell for 2 hours, then stir again.
- Add glue to the sawdust, mix the resulting composition well until a viscous consistency is formed.
- Then the floor covering is prepared - the cracks should be cleaned with a brush to remove dirt and dust, and if necessary, widen them from above.
- Apply the adhesive mixture with a spatula, compacting it thoroughly.
- Smooth the mixture on top and remove excess.
- After 3 days, the cracks are cycled. Can be used for sanding
Sealing cracks in the floor with sawdust and PVA is a cheap and environmentally friendly way. You can also carry out repair work using a mixture of sawdust and glue, to which cement is added.
Second way:
- Take 2 parts of wood glue, add 15 parts of water (it is important to heat it until warm), mix well. Sprinkle 5 parts of sawdust and the same amount of cement into the resulting solution. Mix the mixture and leave for 10 minutes. If desired, you can give the mixture the selected color - oil paint is added to the solution.
- Clean the gaps between the boards and coat them with the glue used to create the mortar.
- Heat the mixture and apply it to the cracks with a spatula.
- Complete drying will occur after 2 weeks. To give ideal evenness, the cracks are treated with abrasive materials.
This method can be used both for sealing large cracks and for minor leveling of the floor.
How to seal cracks in the floor with sealant and putty: step-by-step instructions
First of all, you will need a composition based on acrylic or silicone. In this case, an important point must be taken into account: if the room is heated, then acrylic sealant is best suited. In other cases - silicone.
Defects are repaired in the following sequence:
- We clean the floor from dirt (especially the joints of the floorboards, which are now clearly visible).
- We prepare the sealant and insert its tip into the slot.
- We squeeze it out, filling the space between the floorboards with it, since there should be an even, continuous strip.
- Level with a narrow spatula.
- Wipe off excess with a dry, clean rag.
- Pour parquet oil onto the floor (a small amount).
- We fill the recesses with it.
- We level it with a large spatula and also fill the recesses.
- We wait for it to dry.
Sealing cracks with putty is not much different from using sealant. All work is carried out according to the above instructions. Only instead of sealant, a special putty composition for wood is used. There is no need to use parquet oil. After complete drying, the surface is sanded with a grinder or manually.
Putty
Putty made from sawdust and glue
You can seal cracks with putty only if the gaps between the boards are small.
If the discrepancy is large, you will have to use strips.
The best way is to seal the cracks in the wooden floor with putty obtained by mixing wallpaper glue and sawdust.
The sawdust is poured with boiling water and swells for an hour.
Wallpaper glue is poured into the cooled solution until a viscous consistency is achieved. The resulting composition is pressed into the crack using a spatula.
The cracks treated with this putty are left to dry for 2-3 days. The finished surface must be sanded.
A special water-based putty is often used. The odorless paste can be easily sealed into any cracks. Along with it, various sealants are used.
Often when repairing cracks with putty, you need to find nails that are under the old layer of repair material. A regular needle will do for this purpose.
First you need to tie it to a thread and magnetize it. To do this, the needle is temporarily brought to a simple magnet.
Then the needle, like a pendulum, sweeps over the areas where the nails should be. Leaning in one direction or another, it will point to the right places.
Wax with oil
Our Top methods for sealing cracks closes with an option not known to everyone, but no less effective. This is done like this: small cracks are covered with a composition of linseed oil and wax, pre-mixed and melted in a water bath. Thanks to its liquid consistency, the wax will pour into all the cracks and crevices, and when it hardens, it will form an even coating.
New publications are published daily on our channel in Yandex.Zen
Go to Yandex.Zen.
Paste and paper
This method does not require large expenses. To implement it you will need paper, a little copper sulfate and paste. Copper sulfate is used against fungus and to repel small insects.
Repair procedure:
- The paper is torn into small pieces and filled with water. You need to wait for it to get wet.
- During the preparation of paper pulp, a paste is made. It is cooked from starch or flour and water. The water must be brought to a boil and the selected ingredient must be gradually poured into the container. Stirring is necessary to prevent the formation of lumps.
- Vitriol is added to the paste that has cooled to a warm state in a ratio of 1:10.
- The paper is wrung out, crushed with fingers, added to the paste and mixed. The result is a thick consistency.
- Then the cracks are prepared for sealing. The main thing is to clean them of excess dirt.
- The prepared mass is placed in the gap and compacted. The top needs to be leveled with a spatula and sanded. You should not put extra effort into the leveling process. With gentle movements, the solution is simply distributed throughout the entire gap.
- The last stage of processing the sealed gap is painting.
So, with the help of old newspapers and starch, you can reliably close all the cracks, without losing the aesthetics and functionality of the floor covering.
We use modern means
The choice of such funds today is huge!
Remedy No. 1. Special putties
Let's be honest: factory putties for cracks are not the best option. Firstly, they often crack, and secondly, the number of colors is limited, which is why the seams then stand out on the floor. Although some are quite optimistic about this point - after all, this method produces a good imitation of a deck.
Remedy No. 2. Silicone sealant
Wood is a living material, and therefore gap fillers must also be elastic. Wood sealants today are sold mainly in two types - acrylic and silicone.
You need to use silicone sealant to seal cracks correctly:
- We carry out thorough dry and then wet cleaning of surfaces.
- Dry the floor well.
- We fill all the cracks.
For ease of insertion of sealant, use a mounting syringe - it not only saves material, but also makes it possible to reach the most inaccessible places.
Remedy No. 3. Acrylic sealant
We buy a special sealant for wood. It is sold in all modern hardware stores, in special tubes and in a wide variety of colors. One of the best brands is Kimtec Laminat. This sealant tolerates changes in humidity and temperature well, and is easy to sand and varnish. There are also good reviews about the Sikaflex-11FC sealant - even with an expansion of up to 200% of the thickness of such a gap, no cracks or tears will occur.
Unlike silicone sealant, acrylic does not smell like vinegar, is absolutely transparent (it is water-based), and is easy to wash off hands.
Remedy No. 4. Foam gun
Place a thin cocktail tube over its spout, flatten it and stick it into the slot. It is convenient to compress the tube using simple pliers. Adjust the gun to low feed. Work quickly because... the foam hardens quickly, so it’s better to have several of these tubes with you. If the gap is too narrow for the flattened tube to even fit through, then just lean it against the hole. You need to press the foam with a flat object - a wet, soapy bar. Don't worry about environmental friendliness: dried polyurethane foam does not release anything into the air.
Just don’t try to remove it with a spatula while it’s still damp - it will smear everything around, and it will be difficult to clean later. Just after drying, carefully cut with a sharp knife. But even when dried, it is quite sticky and porous; all the dirt that can be found will be drawn to it. In addition, the foam is destroyed by sunlight, so be sure to paint over such cracks in several layers.
Polyurethane foam as a material for sealing cracks is also good because it creates additional thermal insulation.
Remedy No. 5. Reinforced tape
If the aesthetic moment is not at all important, or there is carpet on a wooden floor, then simply cover the cracks with gray reinforced tape, 5 cm wide. Secure it around the edges with a stapler, and you can forget about drafts or odors.
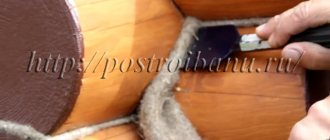
Cord
Putty is widely used for filling holes in both walls and floors. The product is selected according to the width of the hole.
This technology helps get rid of the annoying squeaking of floorboards. For the procedure you will need a cord of any material or string, as well as wood glue, putty and sawdust.
- The cord should be completely lubricated with glue
- then mix the solution with sawdust, glue and putty
- deepen the cord inside the crack so that 2-4 mm remains to the floor surface (this is important)
- pour the prepared mixture over the cord, leaving a small margin on top
The putty will definitely settle, so there is no need to skimp on the prepared composition.
Repairing cracks using putty
It is possible to cover the cracks with putty, provided that the gaps between the individual elements of the wooden covering are small.
For restoration work, you can use a homemade or ready-made composition for wood.
The putty can be filling (up to 6 mm) and finishing (up to 1 mm). The only drawback of this method is the possible cracking and scattering of the composition due to excessive heating. Therefore, putty to eliminate cracks is used only when a decorative coating will be installed on top of the floorboards.
Puttying defects in the floor is quite simple: the finished composition is distributed over the problem area using a spatula with a rubber tip and thoroughly compacted. After the putty has dried, the surface is leveled and sanded.
Slats and wedges
A more complex method is to eliminate cracks using slats and wedges. These parts need to be adjusted in advance - they should not push the boards apart.
Floor preparation includes cleaning the cracks and slightly widening them upward. Then a rail is prepared, narrowed downwards. The rail and the gap need to be thickly treated with PVA.
Then it is placed in the gap between the boards and hammered with a rubber (or wooden) hammer. If the rail cannot go in completely, you need to wait until the glue dries and cut off the protruding part with a plane.
You can match the color of the floor and the slats with stain. A hair dryer will help remove a thick layer of paint from cracks. It can also be cleaned using a drill attachment or a grinder.
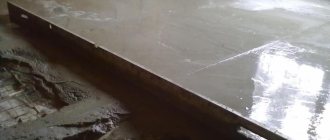
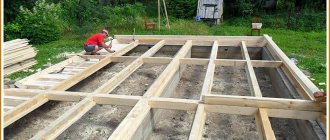
How to repair cracks in a concrete floor
A disclaimer must be made right away: repairing a concrete floor in a warehouse or industrial building is very different from restoring the surface in your own garage or on the site in front of the house. The difference lies precisely in the materials used. At home, cracks in concrete can be filled with what is at hand - repair mixtures based on liquid glass, cement, sand, or use any available filler.
This option is not suitable for loaded concrete floors; the patches are too weak. Therefore, for conventional screeds, repair mixtures based on ED20 epoxy resin with a fiber mineral filler are used.
More complex damage, up to a depth of 60 mm, can be repaired with special self-leveling compounds with granite and basalt filler, such as Whitemix. Their characteristics in the cured state are noticeably higher than homemade mixtures:
- Ready for use in no more than 72 hours;
- No shrinkage and high fluidity, the settling of the test cone is 270 mm;
- Excellent adhesion to broken concrete – 2000 kPa;
- High contact strength -8000 kPa.
This is approximately the level of the new concrete screed M300 B (22.5).
Mixtures for industrial repairs are expensive; on average, restoration of a concrete floor costs 2500-2800 rubles/m2. Therefore, their use is justified only for the restoration of loaded concrete floors in the floors of multi-story buildings or staircases.
To restore joints and holes in concrete floors in parking lots and garages, you can use more traditional cement-sand mixtures filled with polymer and metal fibers.
If the crack is very long and deep, then it is quite possible to repair it using a repair expanding cord, which is used to repair damage to the walls and bottom of the concrete bowl of swimming pools in sports complexes.
Other repair methods
There are many other ways to quickly and effectively seal cracks in a wooden floor.
Alternative ways to effectively seal cracks:
- Tow. Today it is more often used in plumbing, but it is also quite effective for filling cracks in wooden floors. You just need to wet it along the entire length with glue and place it in the gap between the boards. After drying, the surface is ready for painting.
- For small gaps - about 1 mm, the floor surface is treated with special solutions. For example, BONA ParketGrunt is suitable for filling small gaps between boards. Varnish or paint is applied on top.
- Epoxy is one of the most reliable methods. Epoxy is mixed with a hardener, and cement is added to the resulting solution in a 1:1 ratio. As soon as the consistency begins to resemble sour cream, the mixture can be poured into the cracks. Large gaps are pre-filled with rope cord.
- The old-fashioned way. One of the oldest methods of dealing with cracks in the floor is to plug them with synthetic rope dipped in glue. PVA is excellent for impregnation. After drying, you can cut it with a knife.
- If the floor is covered with carpet, you can use gray reinforced tape. It is attached to the floor using a stapler and reliably protects the room from unpleasant odors and drafts.
Small cracks can be covered with wax and linseed oil. It must be brought to a hot state - this will make it easier for it to flow into the cracks. The only condition for this method is that the floor is perfectly clean. Otherwise, dirt will get into the cracks along with the mixture.
Plywood will quickly hide all the cracks
Sheets of plywood are often used to cover old floors.
This method is useful in cases where it makes no sense to seal numerous cracks.
Plywood can cover all the defects of the floor covering and provide it with reliable service for many years.
The sheets are attached using self-tapping screws.
The sealant, which has a convenient nozzle, allows you to quickly close cracks and get rid of squeaks.
It is able to close all holes without additional effort. It is one of the most reliable materials. Silicone and acrylic based compounds are most suitable for wooden floors.
Methods for eliminating defects
The choice of sealing method should be approached carefully, taking into account the cause of the damage, the location of the cracks, as well as the labor costs and time it will take to repair. The financial aspect is no less important, because the larger the work, the more funds you will need.
| Sealing method | Description |
Sealing with tape | Used to eliminate small gaps and cracks in the floor. You need not simple tape, but reinforced tape, 50 mm wide. The floor is cleaned of dirt, degreased and dried, after which the cracks are sealed with tape, the edges of which are fixed to the floor with a stapler. The method is very simple and inexpensive, takes a minimum of time. Disadvantage: a floor with stripes of adhesive tape does not look aesthetically pleasing, so carpet, carpet or other rolled covering must be laid on top |
Foam blowing | It is used to eliminate gaps between the floor and walls that appear as a result of wood shrinkage. This is carried out after dismantling the baseboards and cleaning the gaps from debris and dust. If the cracks are too wide, pieces of foam plastic are placed in them before blowing the foam. After the foam has dried, its excess is cut off at the level of the floorboards, the sections are puttied so that dust does not accumulate in the pores of the material, and the baseboards are installed back. The method is convenient, does not require much physical effort, and takes little time. Cons: high foam costs, fragility |
Sealing cracks with putty | This option is suitable for small gaps between floorboards. Only special wood putty is used. The composition is applied with a spatula, carefully filling all the recesses and gaps, and after drying the surface is sanded. The method is fast, does not require special skill, and is quite affordable. The downside is its fragility - putty tends to crack and crumble, especially with intense loads on the floor |
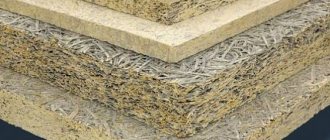
Use of adhesives | Homemade repair compounds are often used to seal wide gaps and cracks in the floor. Traditionally, a mixture of wood glue and sawdust is used, which is applied with a spatula to problem areas, compacted into the recesses, and sanded after drying. To seal cracks gnawed by mice, add cement and broken glass to the adhesive solution. To speed up the hardening process, use epoxy glue instead of wood glue. This method of sealing is very affordable and durable, and also simple to implement. |
Sealing with sealant | Wood sealant can easily seal both narrow and wide gaps between floorboards. The syringe-shaped nozzle allows you to effortlessly distribute the composition evenly and fill all the recesses. Thanks to its elasticity, the sealant will not come off the boards during temperature deformations and will reliably serve for many years. To mask the repaired areas, putty is applied over the sealant to match the color of the coating. The method is convenient, simple and durable, material costs are low |
Cord termination | This method allows you not only to eliminate cracks, but also to effectively get rid of creaks in the floors. Construction stores sell special synthetic cords of varying thicknesses, which are selected according to the width of the gap. Instead of a cord, you can use regular hemp rope. To seal the defect, the cord is generously lubricated with wood glue, laid on the floor and firmly driven into the crack with the corner of a spatula so that 2-3 mm remains from the cord to the floor surface. This recess is filled with a mixture of sawdust and glue, leveled, and sanded after drying. Plumbing tow can be used in a similar way. The method is reliable, inexpensive, although a little labor-intensive |
Wedge driving | Used to eliminate wide gaps in the floor. Wooden slats are hewn into wedges to fit the gaps, thickly coated with glue and hammered into the gap with a rubber or wooden hammer. After the glue has dried, the part of the wedge protruding above the floor is removed with a plane, the working surface is sanded and painted. One of the most practical methods is inexpensive and durable. Disadvantages: trimming and fitting take additional time; the work process requires some effort and skills in working with carpentry tools |
Floor tightening | Used when floorboards have significantly dried out and wide cracks appear in the floor. To do this, the boards are carefully dismantled and then laid again, compacted using wooden wedges, clamps, a jack or a special lever. As a result of tightening, additional 2-3 floorboards will be needed, depending on the degree of shrinkage of the floor. The method is characterized by high reliability, durability and low costs. Disadvantages include the length of the process and its complexity |
Plywood flooring | It is used in cases where there are many cracks and the appearance of the floor leaves much to be desired. The plywood is laid on the floor so that there are 1-2 mm gaps between the sheets, and the joints in each row are offset by at least a third of the sheet. The sheets are fixed with self-tapping screws, recessing the caps into the wood, then the recesses are filled with putty, the flooring is sanded and the finishing coating is laid. This method allows you not only to repair all damage, but also to insulate the floor, as well as level the base for a decorative coating. Cons: high costs of materials, labor-intensive work |
Prices for reinforced tape
reinforced tape
All the described methods have been tested many times in practice and are widely used by home craftsmen. Now let’s take a closer look at the most popular options for sealing cracks: what tools to use, how to properly prepare the surface and workflow technology.
Prices for silicone sealant “Moment”
silicone sealant moment
What do heat losses in a bath lead to?
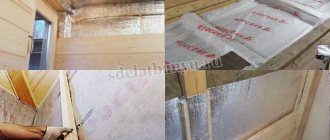
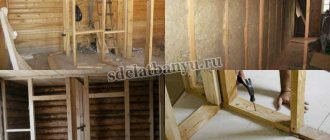
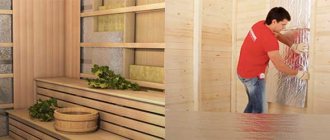
Poorly insulated seams and joints of wood are cold bridges, heat loss through which can be up to 35%. A third of the resources spent on kindling will go to heating the street!
But the penetration of cold air from outside and heat leakage from the inside are not the only problems that can result from insufficient sealing of walls and ceilings.
- In conditions of high humidity, condensation will collect in seams and cracks; it will lead to the appearance of fungus and accelerated destruction of the wood.
- Over time, an unpleasant putrid odor may appear in the room. The unique microclimate for which we so value wooden baths and saunas will be lost.
- The power of a stove designed for a certain volume of the room, with large heat losses, may simply not be enough to heat the air to a comfortable temperature. This will be especially difficult to do in a steam room, where you need to create and maintain a temperature in the region of 60–90 °C for a long time.
Sealing the external and internal seams in the log house will help reduce heat loss.