I cordially greet you, dear readers!
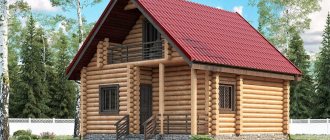
Have you finished building your bathhouse? Congratulations! Now imagine yourself as a great maestro of design art, sketch out a sketch of your dream interior and start turning your dreams into reality.
Are you looking confused at a blank sheet of paper? The wonderful thoughts that were in full swing yesterday have fled in all directions? The muse, with a capricious pout, went about her business? Well, what then? In this case, you need to put down your pencil, wander around the sites, look at photos of amazing baths, the design of which famous designers worked on, choose the work you like and start “plagiarizing”!
Don't you want it that way? Do you dream of exclusive interior design? In this case, I will tell you what facing materials are appropriate in a steam room, and based on this information you will create your own project called “Unique interior decoration of a bathhouse: photos and ideas - the envy of everyone.” How do you like this turn of events? Do you approve? Then let's get started!
Types of boards for finishing a bath
Boards can be edged or unedged:
- Edged board
. This wood is made from logs, the bark is cleared from the sides and carefully sanded. In most cases, its width is twice the thickness. Edged boards are used in almost all types of construction - to create finishing, frames, roofing and other building structures.
- Unedged board
. It is a sawn tree with bark on the sides. The surface is uneven and has jagged edges. The edges can be partially sawn off or not sawed off at all. Most often, such wood is used for external types of work, where the appearance of the lumber is not important. But it can also be used for the interior lining of a bathhouse - in this case, before installation, you will have to process the wood yourself.
Advantages and disadvantages
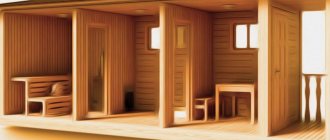
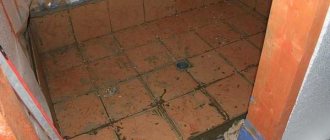
There can be two types of floors - wooden, concrete. The second type has many strengths, but pouring the base is more complex.
Advantages of wooden flooring:
- Environmentally friendly. The material does not emit harmful substances when heated strongly.
- Easy processing with power tools.
- Simplicity, speed of assembly.
- Easy dismantling. If damaged, individual parts of the wood flooring can be easily replaced.
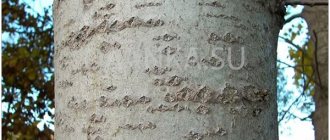
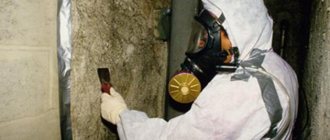
Checking humidity with a device
Flaws:
- Additional treatment is needed to protect the tree from fungus and pests.
- Strength and durability are lower than that of concrete.
- When laying near a stove, wood must be protected with non-flammable materials, reflective metal sheets.
With high-quality wood processing, most shortcomings can be eliminated.
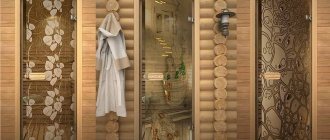
Choosing the type of wood for sauna cladding
Each type of wood has its own shade, texture and healing effects. Deciduous and coniferous trees are used to produce boards. It is recommended to decorate the steam room with hardwood, and the recreation rooms with coniferous wood.
Deciduous wood for a bath
The following hardwood species are used to cover the bathhouse:
- Linden
. Finishing the bathhouse with linden boards is the most popular option. This wood is easy to install and retains its beautiful color in high humidity conditions. You can touch linden even at high temperatures without the risk of getting burned. In addition, it smells pleasant and has healing properties.
Alder
. This breed is characterized by the presence of tannins, which provide clean air in the room and protect it from mold and bacteria. At high temperatures, alder releases substances that have a positive effect on the heart and vascular system, and also have an anti-inflammatory effect.
Oak
. Contains tannins, like the previous type of wood. It is very durable and flexible. When heated, it releases beneficial substances that help eliminate fungi and unpleasant odors. But oak has one drawback - its surface is difficult to sand to the required smooth state, since its wood is slightly rough.
Ash
. Ash wood is flexible and not very dense. However, it does not crack and has the best healing properties. In addition, ash is one of the most beautiful wood species. In various photos of finishing a bathhouse with ash boards, you can see that this wood is very light, clean and festive.
. This type of wood has low thermal conductivity, which prevents burns at high temperatures. It does not crack or dry out. Also, aspen has a pleasant color and is easy to process. The only drawback is the rapid loss of natural color.
Coniferous wood for baths
You can sheathe a bathhouse using the following coniferous wood:
Larch
. It is very durable and has low thermal conductivity, which is important for a bath. It releases a subtle and soothing aroma even at low temperatures. Larch has a beautiful color, but, like oak, it is quite difficult to process.
Spruce
. Endowed with a pleasant color and smell. Spruce wood is very soft and easy to work with. Spruce boards are recommended to be installed in rooms not intended for high temperatures. This is due to the release of a large amount of resin.
Cedar
. Perfect for finishing a shower stall or rest room. It has a unique color, specific aroma, and also has antiseptic properties. Cedar releases resins and essential oils that promote calm and relaxation. This type of wood is the most expensive.
. This wood is the most popular material for finishing a rest room. It is highly undesirable to install it in a steam room. It also has a pleasant shade and produces volatile substances that eliminate germs around.
Requirements
In order for bath floor boards to last longer and withstand aggressive external factors, they must meet a number of requirements:
- Wood is an environmentally friendly material. To protect it from moisture, fungus, mold, and parasites, various impregnations are used. It is important that these compounds do not emit harmful substances.
- The material must be smooth so that a person cannot get hurt.
- It is forbidden to choose boards with metal elements. They heat up quickly and touching them can cause burns.
- The material should not be destroyed by temperature changes or prolonged exposure to moisture.
Without additional antiseptics, it is impossible to protect wood from the formation of fungus, mold, and the destructive effects of moisture. It is important to choose formulations that are safe for humans.
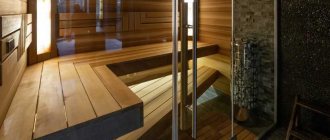
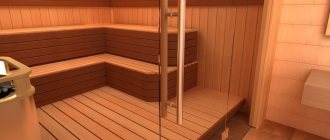
Interior decoration of the bathhouse with boards
The cladding process consists of several steps and does not take much time. First, it is necessary to carry out preparatory work, then install a wooden frame, lay insulating materials, and then install finishing boards. Finally, the surface of the boards is coated with a protective varnish.
Preparing to plank a bathhouse
Carefully inspect the surface of the walls. If you find large differences (more than 2 mm per 1 m), you will have to level it with putty or plaster. Then treat the walls and ceiling with a special antibacterial agent.
Next comes the stage of laying communications - electrics, water supply and everything that needs to be hidden behind the board panels. Only after this work has been completed can you begin to purchase boards, fasteners, wooden blocks, metal hangers, as well as steam and heat insulation materials. Take all metal parts from galvanized iron, otherwise rust and stains will appear on the walls over time.
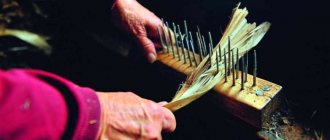
After purchasing the boards, bring them inside the bathhouse and leave them there for two days - they should get used to the climate of the room. If you purchased unedged boards, you will have to work with them a little before covering. Finishing a bathhouse with an unedged board requires preliminary cleaning of the bark, which can be done using an electric planer, and requires high-quality sanding of the material. Use 80 grit sandpaper first, then 120 grit.
Creating a frame for attaching boards in a bathhouse
To construct the sheathing, use wooden blocks. Before installation, treat them with antibacterial agent. Select the section individually, based on the thickness of the insulation. Cut the bars into lengths of 100 cm and 50 cm.
Place metal hangers in rows at intervals of 30-40 cm. Pay attention to the distance between the rows - it should be 40-50 cm. Mark places on the walls for mounting metal hangers. Drill holes, drive in dowels and secure the hangers.
Attach frame bars to the hangers. Start the first row with a long bar, the second with a short one. The sheathing must be level and in the same plane, so check each row with a vertical level. If you find large differences, place a spacer under the bars.
Attach the bars of the same row not too far from each other. This will allow air to circulate between the rows. Around windows and doors, secure the bars vertically along the perimeter of the slopes at a distance of 30 mm from the edge.
Installation of boards inside the bathhouse
Before covering the bathhouse with boards, heat and vapor barriers should be installed. Lay thermal insulation material between the rows of the frame. Mineral wool is often used for these purposes, but it does not tolerate high humidity conditions quite well. Foam glass is ideal - this material is not afraid of moisture, insulates the room well and creates good sound insulation. When using foam glass, a vapor barrier layer is not needed. But if you are used to doing everything according to the rules, you can install a vapor barrier. Let the sheets overlap and glue them together with tape.
If necessary, cut the strips to the required length. The material should be secured to the prepared frame using finishing nails or special clamps. The advantage of the latter is their lack of visibility. The installation of planks for a bath room should be done vertically or diagonally so that the water does not stagnate between the planks, but flows down. In this case, the frame bars must be perpendicular to the boards.
Finishing starts from the corner. Place the first plank with the cut in the corner and secure it. After this, move around the perimeter of the room being finished. Select the finishing board in the joint corner along the width and cut to size. At the end, do not forget to apply a protective layer of a specialized composition (varnish, stain, oil, protective wax) to the boards. In the future, care for the material carefully - do not use solvents or abrasives. Over time, it is necessary to renew the protective coating layer.
In my opinion, the bathhouse, lined with clapboard inside, has already become boring. An alternative way to diversify has been found. Longer, harder, no doubt. But it's more beautiful. » >
The author hangs the carrier on the street, it will give you an electric shock. But to the point, let’s go, you’re doing it for yourself, for my taste, so I wouldn’t plan the edges, but carefully clean off the bark. It’s more natural, or something.. Well, I don’t like it spruce under varnish.. I would like to emphasize the texture with an Iron Brush on a drill.. and tint.
Look for Sahara varnish for baths and saunas - it is not afraid of either heat or water. Easily holds a hot iron without consequences.
ussur wrote: The author hang the carrier on the street, it will give you an electric shock. But to the point, let’s go, you’re doing it for yourself, for my taste, so I wouldn’t plan the edges, but carefully clean them of the bark. It’s more natural, or something.. Well, I don’t like spruce under varnish..I would like to emphasize the texture with an Iron Brush on a drill..and tint it.
When I was sheathing the dressing room, I removed the bark with an ax and polished it. The fact is that fellow bark beetles gnaw passages in some places and sanding the whole thing is very problematic! And so, undoubtedly, it’s not for everyone
BV wrote: Look for Sahara varnish for baths and saunas - it is not afraid of either heat or water. Easily holds a hot iron without consequences.
The temperature in the dressing room and rest room is not high. I think it'll do. The main thing is that less rubbish stands out
Classification
Varieties:
- Unedged or regular. Simple boards with a rectangular profile, which are suitable for arranging a leaky base in a washing room. Before use, you need to level it on a jointer, run it through a thicknesser or sand it by hand.
- Profiled or grooved. When looking at the board in profile, you can see that there is a protruding tenon on one side and a notch called a groove on the other. You can make leak-proof bases from profiled boards.
- Spliced products. This is a combination of two boards glued together. The products do not have any irregularities or knots, which allows you to obtain a smooth wooden flooring without additional processing.
- Deck (terrace) boards for baths. Withstands temperature changes and constant exposure to moisture.
Bath terrace boards have an uneven surface. This is necessary so that a person does not slip when moving.