A lot of cheap counterfeit products have appeared on the construction market; unscrupulous manufacturers care little about compliance with GOSTs; the products do not meet either technical specifications or environmental safety standards. More expensive samples from reliable manufacturers are not available to many consumers in this time of economic downturn.
The population of the country, looking for cheaper solutions in the field of insulating their homes, and, more importantly, more environmentally friendly for health, are increasingly starting to make insulating mixtures with their own hands, one of the components of which is sawdust.
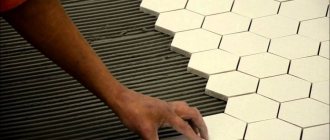
Sawdust as a reliable insulation for the surface of walls of frame houses
Why is sawdust not used for insulation in its pure form?
Clean, only obtained sawdust cannot be used for insulation of premises for the following reasons:
- walls made of sawdust are a wonderful place for arranging homes for rodents, as well as the appearance of various kinds of microorganisms;
- After some time, the wood material cakes, voids appear in its mass - it begins to rot and more of its thermal insulation properties are lost.
Of course, sawdust is a good solution for insulation - they have a low heat transfer value. However, they must be used wisely, correctly, and only in combination with other binders. This will avoid the negative consequences discussed earlier, and then such insulation will compete with industrial products.
Other questions on this topic
how mandatory is def. seam in the apartment? can it be made from a “SUBSTRATE”, which is usually laid under the laminate? The developer's representative assures that the seam in our apartment is arranged as follows: the tongue-and-groove walls stand on a backing (edges.
Hello! After the renovation of one room, there were a lot of bags of self-leveling floor left "Prospectors". work was planned throughout the apartment, they decided not to return to the store. More than three years passed, but the renovation could not continue for good reason.
Yesterday we went to buy mixtures for wall decoration - Rotband, Fuller. The seller in Leroy highly recommended a new product - super-elastic gypsum plaster weber.vetonit easy gyps. According to his explanation, this is something like two in one plaster and putty.
I really liked 2 types of decorative plaster, I want to make it myself, but I don’t know the name, please tell me
SEARCH DOES NOT WORK. URGENT QUESTION (CURRENT TODAY September 1): What is the best adhesive to choose for porcelain floor tiles and wall tiles? ceresit (what number) or UNIS PLUS or something else? in some places there will be warm electric floor devi
Gypsum plaster of walls has been known since ancient times. All kinds of Vetonites and Rothbands had not yet been invented. This building material was mainly used by Armenians, as a result of which it received the name “Armenian plaster”. It should be noted that only very rich people could afford to plaster the walls and ceiling of a house using this technology.
To this day, despite the huge variety of various plaster mixtures, “Armenian plaster” remains quite in demand.
Armenian plaster technology: preparing the mixture
First you need to mix gypsum with sawdust in a ratio of 3:1. The ingredients should be mixed dry directly on the floor. There is a second option: add sawdust to the already mixed plaster. The finished mixture should resemble sour cream in thickness.
Sawdust is the only filler that improves the sound and heat insulation of Armenian plaster. In addition, they significantly simplify the application of the finished solution to the wall surface. It is unacceptable to use shavings from a thicknesser or jointer instead - only from a circular saw (and then sifted through a sieve with five-millimeter holes).
Armenian plaster: application to the wall
Once the mixture is ready, builders only have five minutes to apply it completely. This does not mean that you need to cook very little at a time. As a rule, in the specified period of time you can use up one small bucket of plaster with some practice.
First, the solution is sprayed onto the wall. As soon as it begins to “set”, you can apply the base layer using a ladle or simply with your bare hands.
You need to work quickly, but carefully. Everything that falls to the ground can no longer be used for its intended purpose. As for the thickness of the applied layer, there are no strict restrictions: you can put as much as the base can support.
When the plane is drawn out, it is necessary to gloss it (wall putty). To do this, pure gypsum should be mixed with some kind of retarder (milk, CMC, etc.), apply the resulting solution with a trowel or spatula and smooth with strong pressure. You will get a smooth and shiny surface.
The main advantages of Armenian plaster:
1. Availability. 2. Environmentally friendly (the base consists of milk, gypsum, sawdust and water). 3. Speed of application (up to twenty square meters per day).
Unfortunately, learning the technique of Armenian plaster on your own (from books) is almost impossible. This requires extensive experience in working together with a highly qualified craftsman. It remains to add that the price for plastering work “using Armenian technology” ranges from 400 to 500 rubles per m2.
If you need a master in Rostov-on-Don to perform this or any other work, as well as advice from our managers, you can contact us by phone, +7-903-401-04-26 or call a master at home
Call a specialist
Share the link to this article on social networks and receive a guaranteed discount on the services of masters!
You can also use the following types of services in Rostov-on-Don:
Most people are increasingly choosing profiled sheets for fence construction, for its durability, reliability, sufficient strength, and low cost.
The cost of plastic double-glazed windows is quite high, and not everyone can afford to install them at home, but there is a way out - you can simply restore old wooden windows yourself.
The most popular types of binders
Astringent connectors for wood shavings can be substances that are well known to many, such as: Portland cement, clay, gypsum mixtures, PVF glue, as well as cow manure.
Binders in construction
- Clay is the most inexpensive material, and if you have access to nature, it is completely free. It is a completely natural substance, therefore environmentally friendly - during the drying process no chemical reactions are present, only moisture evaporates. Clay is light in weight, quite strong, but fragile and durable. The only drawback is the fact that unfired clay is not resistant to excess moisture - it begins to limp.
If we compare the clay composition with sawdust with others: gypsum, cement, then it is practically not inferior to them.
- Portland cement is the most common binder that is widely used in professional construction. The only negative is the long time it takes to harden (stand up).
Cement using wood chips is excellent for thermal plaster of walls, both internal and external. The risen cement perfectly resists high humidity. Backfill walls are a profitable and reliable way to conserve heat in your home.
- Gypsum is an ideal means for “high-speed” construction for interior wall decoration. This composition sets up almost instantly, and gains strength similar to cement. The hardened mixture is durable and environmentally friendly.
- Polyvinyl acetate is a hardened PVA glue, insoluble in water, very durable, even cruel.
For this reason, PVA is used in places with high humidity, as well as in places with direct contact with water. Cured glue has one remarkable property - it allows water vapor to pass through, so the treated walls will not only be insulated, but will also “breathe”. It should be noted that when the insulation is heated strongly, moisture will come out of the sawdust and it will dry out, but the deformation of the PVA is sufficient to retain the settled wood particles without loss of shape and overall strength.
- For lack of anything better, cow dung will do. It was widely used until the 19th century. The house was insulated using this natural glue. Today, few people use it to insulate their homes, but it is quite suitable for a barnyard. Its strength is certainly lower than that of all the above-mentioned means, but placed in the inter-wall space of an outbuilding it will work for many years.
Work order
So how should you build a workflow? When considering the question of how to plaster with clay, the concepts of “quality” and “quickly” are incompatible, you should immediately learn this simple truth.
Materials and tools
The first step is to collect all the necessary components and fixtures that will be used in the finishing process:
- The main material is clay; you need to stock up a fairly large amount of it, because the application layer will be quite large.
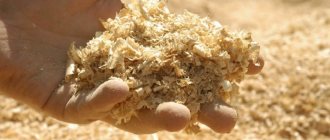
- The filler can be sawdust or straw, it all depends on which material is more accessible. With their help, the plaster solution acquires high thermal insulation properties. At the same time, remember that the sawdust should be clean and, if possible, approximately the same size without sticks and bark; it is best to chop the straw - this will make it easier to mix and the mixture will be more homogeneous.
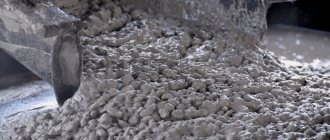
Sawdust can be found in any woodworking industry, and their cost is very symbolic
- It is best to use river sand or washed construction sand for the composition. It should not contain black soil, roots and stems of plants and other debris.
- For the final layer, you will need to add cement to the solution, so the surface will be much stronger.
- It is best to mix the composition using a drill and mixer - this will make your work much easier.
Important! For leveling, a spatula is best suited, and choose one with a thick, durable blade, otherwise the tool will very quickly become unusable.
The thick blade of the spatula will allow you to quickly and efficiently distribute the composition on the surface
- The final leveling is done with a polyurethane plaster float.
Preparing the base
There are just a couple of simple rules:
- The surface must be clean: free of dust and stains.
- Due to the density of the composition, there must be irregularities on the plane to improve adhesion. On brick bases, you need to select a seam of about half a centimeter to a centimeter, and on wooden bases, fill shingles from small slats.
Shingles are one of the oldest types of surface reinforcement
Preparation of the solution
First, you should consider how to dilute clay for plaster, since the preparation of the raw materials is very, very important. It must be soaked in water for at least several hours. After this, if necessary, add a little more water and stir the mixture until a creamy consistency is obtained.
Next, sand is added to the mixture, the amount of which depends on the fat content of the main component; usually the mixture contains from 50 to 70 percent sand filler. Another important element is sawdust or straw, they are used for the first layer, the finishing coating is done without them. The share of the thermal insulation part is about 30%.
Advice! Determining the correct consistency is quite simple: roll a ball with a diameter of 2 cm and flatten it slightly with your fingers - the absence of cracks along the edges indicates optimal plasticity of the plaster.
Application of the composition
Let's look at how to plaster with clay:
- The composition is applied in clumps, and due to its density, it must be pressed quite firmly onto the surface. Next, the plane is more or less leveled with your hands and a spatula.
- The layer should dry for at least a month in summer and at least two in winter. After this, the mixture is diluted without sawdust for final finishing (the ratio of clay, cement and sand is 1: 1: 3). It is applied more carefully and carefully leveled with a spatula.
There should be no filler in the second layer, otherwise the surface texture will be uneven
- The surface can be completely leveled immediately after application using a grater.
Many developers ask, is it possible to plaster on clay? Of course it is possible, but the composition should not be cement-based - it is vapor-proof, and the material under such a coating will begin to deteriorate. Plastering on clay is done with gypsum-based compounds, and a reinforcing fiberglass mesh will not interfere.
Application of various auxiliary components
The principle of operation of insulation is the same - the wood base, containing small inclusions of air in its structure, is mixed with a binder mass, which, after drying and gaining strength, forms a monolith.
Each composition has its own properties: rising time, viscosity, elasticity, which can be transformed with the help of additional substances. Each composition has its own nuances and its own solutions for specific tasks.
- So, to insulate the floor, sawdust is used instead of mineral wool. To increase their service life and reduce the rotting process, they are knitted with PVA glue with the addition of an antiseptic solution.
- If you need to pour it into a mold, add a small amount of Rotbant or TG to the cement-bonded mixture to speed up the setting. So, if you add a glass of gypsum to a bucket of the mixture, the cement will set within 1-2 hours.
- The same method works with lime compounds.
Methods for preparing the solution
To prepare a solution for plaster, first of all, choose the appropriate method. To do this, check out the most popular options below.
Important! The cooking principle for all methods is similar and not difficult. The main difference between each option is the recipe, or rather the proportions of ingredients.
Method 1: plaster from natural materials
Mix the indicated components in the given proportions:
- cement - 0.2 parts;
- clay solution - 1 part;
- paper pulp - 2 parts;
- sawdust - 3 parts.
Method 2: solution for interior work
Add the following materials sequentially to the container and mix thoroughly:
- cement grade M400 - 1 part;
- perlite or vermiculite - 4 parts;
- a plasticizer that suits your requirements in the proportion specified by the manufacturer, based on the total volume of your mass, or PVA glue - 50 g per 1 bucket of cement;
- water.
Important! Add enough dilution liquid so that the resulting solution has a paste-like, homogeneous consistency, convenient for application.
Method 3: mixture for outdoor use
Prepare all the ingredients by measuring the required amount with one tool in order to follow the recipe exactly:
- cement - 1 part;
- perlite - 3 parts;
- a ready-made plasticizer from the manufacturer that meets your criteria in the quantity specified in the instructions on the package;
- foamed polystyrene, the size of the fractions corresponds to 1-3 mm - 1 part;
- polypropylene fiber - 50 grams;
- water.
Method 4: preparing plaster from a dry mixture from the manufacturer
This option is the simplest. To perform work using this technology, do the following:
- Buy the required number of packages, based on the area of intended treatment with plaster.
- Prepare a mixing container with a volume of at least 50 liters.
- Pour dry mixture into mixing bowl.
- Gradually add water, stirring the solution with a construction mixer.
- Carry out this procedure until you obtain a homogeneous mixture of the desired consistency.
Important! To determine how correctly you have prepared the plaster, apply a small amount to the trowel and turn it over - if the mixture does not fall off, the composition is ready for application.
Binders and their proportions
To prepare the sawdust mixture there is no need to experiment, all the recipes have long been known, the proportions have been selected.
Gypsum
To fill, do the following:
- sawdust is placed in the prepared container (no more than 1/5 of the container);
- in a ratio of 1:10 or 1:5, gypsum grade 1 and gypsum grade 2, respectively, are added to the base and mixed;
- add water at the rate of 1 liter per 1.4 kg of gypsum and mix;
- the mixture does not need to stand; it is immediately poured into the prepared form.
For plastering work, the preparation of the working solution differs only in the amount of water: 1 part water to 2 parts gypsum.
The solution must be prepared in small quantities, since it rises quickly, and the prepared solution cannot be diluted. However, you can use a retarder; casein (carpentry) glue is used as the latter.
As an analogue of the casein retarder, you can use hide glue with lime. Retarder recipe: soak 1 kg of glue for 24 hours, add 2 kg of lime and cook in a steam bath for 4-5 hours. The resulting retarder is added to the mixing water at a rate of 1 to 50. The setting time of the solution increases by 20-30 minutes.
Video about super insulation:
Cement
For beginner plasterers, the most preferable option is “mud” with Portland cement. The solution lasts indefinitely, up to 2-3 hours, so you can plaster it slowly. It can also be reanimated, the main thing is not to let it completely dry out or settle. As it thickens, add a small amount of water to the prepared mixture and mix. Sometimes the unused solution is left overnight, filling it with water, but it depends.
To improve (preserve) the thermal insulation properties of the wood base, various plasticizers are added to the cement, which increase the plasticity of the composition. As the latter, use liquid soap, shampoo or inexpensive dishwashing detergent. Adding a soap additive can also reduce the amount of water used. The amount of additive is measured by eye: a cap will be enough for a bucket; after a couple of batches, even a child will figure out the amount of additive.
Insulation using a solution with sawdust and cement, as well as soap solution, is not recommended, since after rising the mixture does not allow moisture to pass through, and you will end up with damp walls, ceiling and floor.
For indoor work, it is better to use industrial additives such as polyplast, fort or superplast - they are more effective than soap or milk.
Milk is used in the same quality as other plasticizers, but it should be remembered that when using it, cement will lose strength.
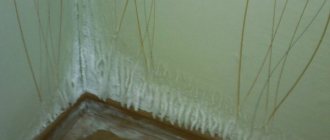
Plastering walls with a mortar containing sawdust
Lime
A very necessary and useful substance in the household. Lime is an alkali that is a natural antiseptic. However, it can not only wash clothes, but also disinfect shavings from various microorganisms and their larvae. In addition, the alkali will rid the base of the solution of rot and will protect it for a long time from the appearance of unnecessary organisms, including rodents (they are afraid of it like fire).
To use, you only need slaked lime (so as not to injure yourself). You need to mix lime with sawdust in the following proportion: 1 part lime to 10-15 parts sawdust.
Important! Wooden frame walls treated with lime mortar will be more durable. Neither bark beetles nor all kinds of aphids will grow in them.
After treating the sawdust with lime, you can add any other binder.
It is possible to use lime as an adhesive composition, but the performance will be unimportant, and besides, it is better not to use it inside a living room.
Lime will also work
Clay
Another folk forever young material. It has been used throughout human history. By mixing clay with straw you can build a mud hut. The properties of clay are unique, and, in addition, it is very affordable.
Clay as insulation for house walls
The following proportions are recommended for insulating a house:
- For the ceiling and floor - 1 part diluted clay and 10 parts wood waste;
- For insulating walls, for filling internal cavities, - 1 to 5;
- To plaster walls, you need a more viscous mixture - 1 to 2.
The readiness of the clay solution is determined by touch; it should be slightly greasy and elastic. If the pieces stick strongly to the trowel, then the solution must be combined with shavings.
Clay compositions are the most suitable for human life. They are environmentally friendly, durable, the main thing is to protect products made from unfired clay from direct exposure to water. Insulation with clay and sawdust is a common phenomenon.
The life of the prepared composition is endless; if the clay has dried, just add water, and it will be fine again.
You can buy clay at any hardware store, but you can also get it yourself. You should know that the best clay is located at a depth of at least 1.5 meters, since its upper layers may contain particles of plant roots, and this is not welcome.
To fill walls with clay, the composition should not be liquid or even creamy, otherwise drying will last indefinitely. Clay lumps with sawdust should be moist and slightly crumbly so that they stick together when compacted.
PVA glue for walls
To prepare thermal insulation material, you need universal or construction PVA; other brands of adhesive for thermal insulation are not suitable.
The wood raw materials for the mixture need to be dry and, if possible, fresh. There are no clear proportions; the solution is prepared by eye - approximately 1 to 5-10. The smaller the amount of glue used, the lower the heat transfer of the composition. But you shouldn’t be greedy either, because poorly processed shavings will rot and rot.
The process of pouring sawdust screed
The screed is performed in the same way as a regular cement screed.
But we maintain the correct concentration of sawdust in each layer:
- bottom layer - 6 buckets of sawdust per bucket of cement;
- the top layer should be made with less sawdust (3 buckets of sawdust per bucket of cement).
We level two guide rails, the distance between which is approximately 700 mm. We immediately fill the slats to secure them, then we fill the entire bottom layer, approximately 7 cm high (for a bucket of M400 cement, 2 buckets of sand plus 6 buckets of sawdust).
We make the second layer 3 cm high with less sawdust (3 buckets). We level the solution evenly along the height of the slats. After filling the first strip, you can remove one distant strip and move it further to the next section. We immediately fill the hole resulting from the lath with a solution of sawdust concrete and level it before the screed has time to harden.
Again, level the slats and fill the next section in the same order. Experienced specialists manage to use only one rail.
It is important to know that it is not advisable to pour the screed onto the ground. According to generally accepted standards, you should always make double ties, always using waterproofing to reduce possible dampness.
The first screed should be about 3 cm with the following composition: 1 bucket of cement, 3 buckets of sand and 2 buckets of fine crushed stone (if the soil is not disturbed).
If the soil is disturbed, immediately add a 3-4 cm layer of sand, compact it and fill it with water. Reinforcement 6 mm in diameter is placed on top, cells measuring 250x250 mm and filled with screed. Waterproofing is done on top of the screed using a primer, or sheets of regular roofing felt are placed with an overlap of 15 cm.
The screed in the second layer is made of wood concrete. If desired, it can be made thicker (up to 15 cm) for more warmth.
The most valuable thing about this screed method is the fact that it will cost as much as 60% less than a conventional cement-sand screed, plus many other advantages.
Ultimately, we get a strong and reliable screed. If you use it on the first floor, the floor will be much warmer than concrete. Application on the second floor will provide excellent sound absorption and a warm floor, much warmer than cement. With such a screed you can reliably insulate the attic if you pour it over slabs 15-20 cm high, putting 8 buckets of sawdust in the first layer. Such insulation will significantly save you money. The height of the screed layer may vary depending on the climate; these parameters are suitable for the region of Ukraine.
An interesting case was told by one builder who uses wood concrete as a screed. By mistake, he filled the heated floor with a (water) screed with sawdust instead of the usual one, 7 cm thick from the bottom of the pipe. When the heated floor was turned on, it turned out that the floor temperature did not change. We increased the temperature in the boiler to maximum - the result was the same! Arbolite has poor thermal conductivity and perfectly maintains a stable temperature. I had to disassemble the screed until the customer found out. And here again a surprise - the tie turned out to be quite strong, I had to use a hammer drill to remove it. As a result, too much time had to be spent on this work.
Advantages and disadvantages of sawdust
Sawdust, considered as a raw material for construction, has its advantages and disadvantages.
Insulating walls with sawdust: pros and cons:
- Price. This is the first thing for which this multifunctional raw material is valued. For many, the price is generally zero, whether there are any financial costs for delivery.
- An environmentally friendly material that, when used correctly, does not emit any harmful substances. Chemical contamination is completely excluded.
- Durable in use. This fact has been proven by human history - many generations of our ancestors used it and did not complain.
- Installation. In order to perform any kind of manipulation with these materials, qualifications are not needed; the work can be performed even by a person who is far from construction.
- Thermal conductivity. A very low score for this parameter. The wood structure itself has tiny air cavities, which is already a universal insulator, plus the fine-grained component of the sawdust itself.
House made from waste from shavings and clay
Disadvantages of wood waste:
- Flammable Increased fire safety measures must be observed.
- Prone to rotting.
It should be noted that the existing shortcomings can be solved in various ways, including those discussed in this article.
Cheap insulation from cement and sawdust - we make high-quality insulation with our own hands
Sawdust in its pure form is not recommended for use as insulation. There are 3 big drawbacks. After some time, the sawdust cakes and a void forms in some places. Rodents and insects love to make holes and live in sawdust. Cheap insulation is highly flammable.
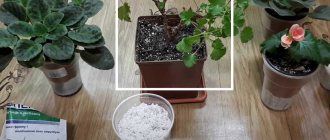
Therefore, clay, cement, lime or gypsum are always added to sawdust. A solution of copper sulfate is added to the mixture. After this, the insulation does not ignite and mice do not like it.
Finished materials are made from sawdust: wood concrete, wood blocks, sawdust concrete and sawdust granules.
Arbolit
– made from cement, chemical. additives and large sawdust. The lightness of the material, its processing, non-flammability, environmental friendliness, fire safety are its most important advantages.
Sawdust concrete
- a material made from lime, sand, sawdust and the addition of cement. Good at insulating walls, foundations and floors. The only negative is fragility.
Pellets
– granular insulation, which is made from antiseptic, sawdust, glue.
The finished insulation retains heat well and does not burn. The granules do not harbor rodents. Granules are a convenient material for insulating a house, without shrinkage.
Wood blocks. First, the sawdust is soaked in vitriol and then dried. Next they are mixed with cement (1:8). Insulation is used for walls.
Wall insulation technology
Regarding technologies, the following should be noted:
- backfill method. The mixture is poured onto a solid base or placed inside two surfaces where it is compacted;
- pouring. A relatively liquid solution is poured into a prepared mold, where, as it dries, it acquires the properties of a solid monolith;
- plastering. If the walls are plastered with sawdust mixture, they acquire thermal insulation properties.
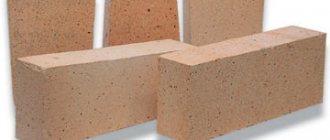
Thermal insulation blocks