Is it necessary to insulate the underground?
The path to a warm home starts from the basement. A warm and dry subfloor creates a microclimate throughout the house. If the lower part of the building is not insulated, neither strong walls nor high-quality windows will help maintain a comfortable temperature.
To create an optimal microclimate in the underground, it is necessary to ensure:
- Basement insulation;
- Foundation waterproofing;
- Organization of ventilation;
- Insulation of walls and floors.
The main goal of all measures is to create the correct operating mode for the basement, that is, limiting the access of cold into the room, ensuring the removal of moisture formed inside, and at the same time preventing heat loss. Compliance with these conditions will allow you to solve the following problems:
- Protect the foundation of the house from deformation.
- Reduce the rate of destruction of the foundation of an old house.
- Reduce heat energy consumption.
- Prevent the growth of fungus in the subfield.
- Make efficient use of underground space.
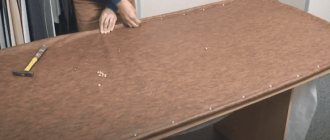
Methods for insulating the floor above the basement
To ensure that the basement does not cause trouble during further operation, the ceilings in the basement are replaced.
Next, insulation work is carried out, and the choice of insulation, as well as insulation methods, is approached very thoroughly. The process includes not only insulating the ceiling and floor on the basement side, but also insulating the floor directly above the basement. This is interesting: ways to insulate a basement ceiling from the inside.
In this video you will learn more about insulation: The process depends entirely on the design features of the building. A residential private house does not always have a basement. Insulation measures are carried out directly on the ground, since the thermal engineering calculation involves organizing a ceiling above the basement on the side of the house. During construction work, the quality and characteristics of the materials used should be taken into account.
What is the best way to insulate a subfloor?
Insulation is selected depending on the behavior of the basement at different times of the year.
The choice of material is also influenced by the following factors:
- Indoor humidity level;
- Availability of heating;
- Availability of drainage around the building;
- Purpose of the underground.
Construction stores offer thermal and waterproofing materials with various characteristics. The following are popular and available:
- Styrofoam. The cheapest insulation. It is distinguished by its lightness, resistance to rotting, moisture resistance, and low price. The combination of these qualities makes foam plastic the most popular material for insulating wooden houses. The disadvantage of polystyrene foam is that it attracts rodents, is fragile, is highly flammable and releases harmful chemical compounds into the atmosphere.
- Expanded polystyrene. A substitute for polystyrene foam, which is more durable and has a tongue-and-groove system for a seamless connection. The material is often used to insulate basements from the outside and inside.
- Polyurethane foam. A sprayed material that fills all cracks when applied to surfaces. Creates a completely sealed coating, does not burn, does not rot. Disadvantages of the material: high price and the impossibility of self-application without special equipment.
- Penofol. Flexible insulation. Provides decent thermal insulation. Fireproof and waterproof.
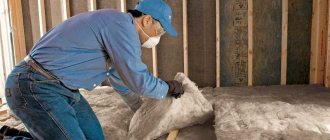
- Minvata. Soft insulation, suitable for use only inside absolutely dry rooms. Under the influence of moisture, mineral wool begins to rot and gradually decomposes.
- Expanded clay. The use of this bulk material is only possible for insulating the floor and protecting the foundation from the outside.
Ventilation device
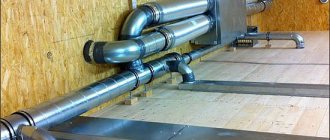
The first stage of insulation is the installation of a ventilation system in the underground, which will ensure air circulation inside the room and prevent the formation of condensation on surfaces.
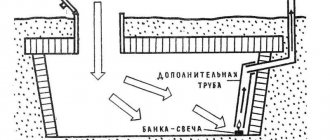
Underfloor ventilation consists of installing two pipes on different sides of the room. The optimal location of pipes is on the south and north sides of the house. The installation of pipes is carried out in accordance with the laws of physics, cold air tends downward, and after warming up it rises.
The supply pipe is located at a height of 20-30 centimeters from the basement floor, and the inlet pipe - 40 cm from the ground. The outer opening of the pipe is covered with a fine mesh - protection against rodents entering the basement.
The outlet pipe is placed 30 centimeters below the basement ceiling. And its upper end is brought out onto the roof of the house. The top of the pipe is covered with a protective cap. This arrangement of pipes will ensure optimal air movement in the underground and protect the room from mold.
How to arrange an underground space in a wooden private house For storing things and vegetables Photo
An underground is an empty closed space between the ground and the floor of a room inside the foundation.
The underground of the house is the place where various personal communications, water and sewer pipes, and electrical wiring are located.
It is also very common to set up a cellar underground to store supplies of vegetables and pickles.
The depth of the underground is 50-60 centimeters, a maximum of a meter, which distinguishes it from basements.
Excavation
First, the fertile layer of soil, the so-called turf, is removed, then a hole is dug. The recess is made 20-30 cm deeper than the planned depth. The surface of the earth is carefully compacted.
Next, waterproofing is carried out. Waterproofing is carried out only for wet soils. The waterproofing material is laid in two layers directly on the compacted soil. Most often, roofing felt or thick polyethylene film is used for this.
Fatty clay is also sometimes used: it is laid out as a top layer and compacted, thereby creating a kind of barrier to moisture.
If you plan to use the underground as a cellar, then it is advisable to concrete the base. Next the floor is laid.
Ventilation of a warm underground
To avoid the appearance of dampness in the underground, a favorable environment for the appearance of fungi and mold, the underground must be equipped with ventilation.
When building a warm underground, ventilation holes are made in the floor in opposite corners of the room and covered with gratings measuring 10x10 centimeters.
To ensure free ventilation and good air circulation, it is not recommended to cover the vents with furniture and floor coverings.
It is also possible to provide ventilation using skirting boards. To do this, they are fixed just above the floor level around the entire perimeter with a gap of 1-2 millimeters.
This will ensure the necessary air circulation. This method is not very popular. And this is due to the fact that the underground is partially open. Dust located underground will also enter the house.
There is also a method of ventilation through windows cut into the baseboard.
On the back wall of the plinth, a groove is provided along its entire length, 1 mm deep, 4-6 cm wide. Windows 4-5 cm long are cut into this groove. Two windows on opposite plinths will be enough to provide ventilation in an underground area of 20-25 m2. The windows are covered with bars. They are attached to the baseboards using screws.
In a room with water heating, holes are made in the baseboards under the heating radiators. From the underground, the air rises through the hole in the baseboard, passes through the radiator, heats up and rises, moving to the opposite wall. Then it cools down and sinks to the bottom and returns to the underground through the hole in the baseboard.
Cold underground ventilation
The basic principle of cold underground ventilation is the creation of vents at the base of the foundation.
Vents are located at a distance of 2-3 meters from each other. To prevent rodents from entering the subfloor, the vents are covered with bars. During the cold season, the vents are partially closed, leaving a small passage for air circulation.
In the case when vents do not help and moisture accumulates in the underground and fungus and mold appear, destroying the ceilings, it is necessary to increase air circulation. There are two methods: temporary (express) and permanent.
Temporary is suitable for one-time use and consists of installing ventilation fans on the vents. A permanent solution would be to install ventilation pipes in the vents on the leeward side of the house. Boxes can be made of tin or plastic pipes. The traction force and, accordingly, the efficiency of air circulation depends on the height of the ventilation duct.
Well-installed underground ventilation will ensure the durability of the ceiling, subfloor and the entire house. Repairing floors and ceilings is a labor-intensive and expensive procedure. To avoid this, it is necessary to regularly monitor the condition of the underground and prevent the appearance of condensation and moisture.
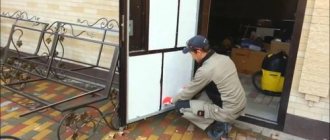
Foundation insulation
In wooden houses, the foundation most often fulfills the purpose of the base, therefore it protrudes relative to the walls of the house. When the groundwater level is high, it is important to pay attention to the freezing of the soil around the base.
If during the construction stage the foundation was not insulated and waterproofed from the outside, you will have to dig a trench around it to bury the insulation sheets. To waterproof the underground around the house, you will additionally need to make blind areas.
From the outside, the foundation is insulated with cement bonded particle boards 15-20 mm thick or foam plastic. The slabs are attached to the foundation with special glue. Then the insulation is reinforced and plastered, or covered with decorative stone.
To drain water around the base, a blind area of asphalt or concrete is made. The blind areas are mounted at a slope towards the outside of the walls of the house. The presence of a blind area will additionally protect the foundation insulation from moisture penetration through it and subsequent destruction.
Laying a blind area made of expanded polystyrene, penoizol, or polystyrene under a concrete screed will create an additional heat-insulating layer for the underground and protect the foundation from the effects of temperature changes.
Floor installation
Floor insulation is most often carried out by laying expanded clay. The sequence of work is as follows:
- A layer of sand - 5-10 centimeters - is poured onto the floor that has been leveled and cleared of the old coating.
- Lay waterproofing material: polyethylene film or roofing felt. The edges of the film, 10-15 centimeters high, are placed on the walls and fixed in any available way. When laying, strips of roofing felt or film should overlap each other by 20 cm.
- A layer of expanded clay 15 centimeters high is poured onto the surface of the film and leveled along the beacons installed along the perimeter.
- A cement screed is poured over the expanded clay with preliminary laying of reinforcing elements.
Thermal protection of the floor and upper ceiling
We can talk about high-quality insulation of the subfloor if only a full range of work has been completed, including, in addition to wall insulation, also thermal protection of the floor and upper ceiling. To achieve maximum effect, it is best to insulate the floor with extruded polystyrene foam (EPS), and the ceiling with mineral wool.
We insulate the subfloor
When choosing a material for floor insulation, you need to focus on the following points:
- high level of thermal conductivity;
- minimal water absorption;
- strength with low weight;
- minimum difficulties during installation;
- durability;
- safety for human health.
Most of all, these conditions correspond to Penoplex F slabs (in particular, Penoplex-Foundation) with an L-shaped edge for high-quality joining.
The work is carried out in the following order:
- select excess soil to create a floor of the required thickness;
- compact the base;
- lay sand on the base in a layer of about 10 cm and compact it too;
- lay lightweight reinforcement mesh (cells 100 by 100 mm);
- lay a rough concrete screed 5 cm thick on top of the reinforcing mesh and wait until it dries completely;
- lay the EPS slabs tightly, securing them on top with a reinforcing mesh with an even finer cell (50 by 50 mm);
- pour a clean concrete screed 6-7 cm thick.
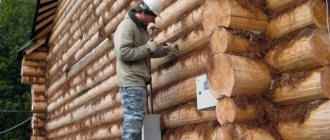
Thermal insulation of walls
The most commonly used sheets are foam or polystyrene. If there is heating, sheets 1 cm thick are sufficient, for an unheated subfloor - at least 5 cm.
The insulation can be attached to the walls using construction adhesive and additional fixing dowels. Before attaching the sheets, unevenness is smoothed out with cement mortar.
The second mounting option is to lay the sheets in a frame pre-filled on the wall. The work consists of the following stages:
- A sheathing made of metal profiles or wooden slats is mounted on the walls. The grid cells are made according to the size of the sheets.
- Glue is applied to the plates and placed in the grid cells.
- The top of the slabs is covered with sheets of OSB, plywood, moisture-resistant plasterboard, or a reinforcing mesh is attached and plastered.