Owners of personal plots use sheds not only for storing tools and equipment, but also for keeping animals. In the latter case, a capital insulated building is erected. Then, even in the most severe frost, there will be a stable above-zero temperature inside.
If there is already a barn, but it is too cold, additional insulation of the building is carried out. Detailed step-by-step instructions for thermal insulation of such outbuildings are given in this article.
How to insulate a shed from the outside step by step
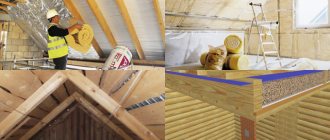
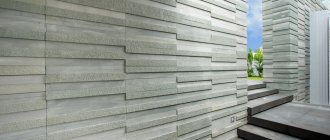
External insulation is the first stage of arranging a capital building for winter housing of animals (Figure 1).
Note: In such a barn you can keep any domestic animals and birds, from chickens and quails to rabbits and goats.
Insulation of the shed from the outside is carried out as follows:
- Frame on the walls: The surface of the walls acts as the back of the frame. The front is made of boards. If there are many cracks in the building, the boards are nailed overlapping. If they are not there, the frame is made simply from boards or beams.
- Laying insulation: insulation is laid in the resulting free space between parallel walls. The choice of material directly depends on financial capabilities. The most expensive option is mineral wool, but it can be replaced with cheaper polystyrene foam or polyurethane foam. You can also use dry sawdust.
- Finishing: to make the building look attractive, the outside of the frame is additionally sheathed or painted. The latter option is preferable, since it not only performs an aesthetic function, but also protects the wood from rotting.
Figure 1. Insulation begins from the outside of the walls.
It often happens that after completing the external insulation in the barn it becomes warm enough and no internal work is required.
But, if the temperature in the room has not reached the required levels, the barn is additionally insulated inside.
We insulate the floor
As you know, the coldest air is always from below (in this case we will not consider the principle of operation of a heated floor). If the barn is not permanent, then at best it is installed on a shallow, uninsulated strip foundation, and often this is not even visible. One can only guess how frozen the ground is. A blind area with insulation will seriously help, but not every person will consider it advisable to do it. Some people sprinkle manure, reeds or leaves around it and cover it with clay, and in the spring this structure is removed so that the walls do not rot. The method is peculiar, but when there is frost on the walls and floor inside the building, then at least something is better than nothing.
To insulate the floor, you can add soil along the entire perimeter of the building to raise the level by 10-15 cm, and then pour clay on top and compact it all. This floor can be sprinkled with sawdust, which must be changed periodically.
Making a clay floor
You can also knead clay with straw and make a clay floor.
More serious thermal insulation is performed in permanent premises made of stone, blocks or bricks. In this case, the foundation is insulated with penoplex, a thorough blind area is made, and from the inside (if there is a need) the floor is insulated, and then a concrete screed is poured.
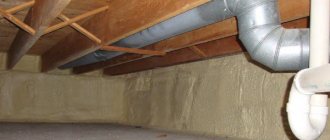
The situation is somewhat different with a barn built on stilts.
Selection of materials
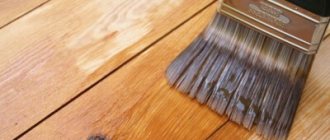
The modern building materials market provides a huge selection of insulation materials. But industrially produced products can be easily replaced with cheap organic materials that can be found in any household (Figure 6).
The most commonly used organic insulation materials are straw and sawdust. These materials must be dry. Otherwise, they will begin to rot and all work will have to be done again.
Note: For additional protection of such insulation from moisture and rodents, it is mixed with lime and only after that is poured onto the floor or the frame is filled.
The most popular industrial insulation materials are:
- Expanded clay: suitable for bulk insulation of floors and ceilings from the attic side. This is an inexpensive option that does not burn and does not allow moisture to pass through, but at the same time perfectly maintains the temperature inside the room.
- Foam plastic: suitable for both exterior and interior use. Its cost is low and its service life is long. In addition, this material weighs little and is very easy to work with. However, polystyrene foam is often eaten by mice, so you will have to carry out additional treatment of the walls or frame to protect it from rodents.
- Mineral wool: another good insulation material. Its only drawback is that it quickly absorbs moisture, so this material is usually used for interior work.
Figure 6. For thermal insulation, mainly industrial materials are used.
If you plan to keep birds or animals in the barn, it is better to give preference to polyurethane foam.
It does not allow cold to pass through, is resistant to moisture, and the material itself does not contain toxic substances that can harm the health of livestock. The only drawback is the high cost of the material.
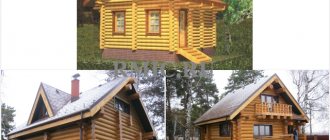
Building a utility block with your own hands: personal experience
A change house, a barn, a utility block - this is the first thing that any person needs when developing a site.
It is not surprising that with the beginning of the new construction season, interest in topics devoted to the construction of “sheds” with their own hands has increased among users of our portal throughout the entire space from Moscow to the outskirts. As practice shows, you can make a good change house at your dacha even without any construction experience, and the acquired knowledge can be used in the future when building a large house or other building.
We have already written about how to build a simple and reliable foundation for a shed, so in today’s material we will tell you how to choose material for a utility block and how to build a utility block measuring 4x6 meters.
Pankrat1975FORUMHOUSE user
In the summer of 2015, due to financial problems, I had to freeze the construction of my own house. Therefore, I decided to help my brother with the construction of a utility block, where we could move things and tools from the old barn, which we decided to demolish.
Pankrat1975 had no construction experience before the construction of the change house and, looking ahead, we will show what he did in the end.
It took our user about a month to build the outbuilding structure (almost alone), because... It often rained, which made construction very difficult. But the result was worth the effort.
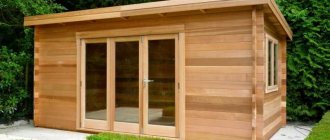
Like any construction, the construction of the utility block began with determining its size. Pankrat1975, for the sake of saving building materials and minimizing scraps from boards, suggested limiting himself to a small version with dimensions of 3x6, but his brother needed a workshop space with a full interior arrangement. As a result, after much deliberation, we decided to build a utility block measuring 4x6 meters.
As soon as warm days arrived, work began to boil. First of all, the site for construction was cleared. The old barn was demolished and the rubbish removed.
Then they laid out the foundation. To do this, we retreated 1.5 meters from the neighbor’s fence, drove pieces of reinforcement into the corners of the site, pulled a cord and drew right angles so that the foundation of the building would not end up in the form of a parallelepiped.
You can read more about the nuances of marking the foundation in the article on how to mark the foundation for a house.
Next, under the future foundation, we drilled the necessary holes with a diameter of 20 cm to a depth of 1.2 meters using a motor drill.
The user admits that such a foundation is redundant for a change house. But, because There is a height difference and a slope on the site; the height of the rear pillars turned out to be 40 cm, while the front ones are almost level with the ground.
To form square pillars above the ground, formwork was made from 15x1.5 cm boards. The boards were fastened to each other using 2 self-tapping screws. on one side. This is done to make it easier to remove the collapsible formwork from the pillars. In the future, Pankrat1975 plans to use the same ready-made formwork for the construction of a change house on its site.
The foundation was poured with self-mixed concrete prepared in a concrete mixer. For strength, a reinforcement frame, welded from three “tens” rods 1.2 meters long, was pre-inserted into each drilled hole.
After the concrete had hardened over the entire area of the foundation, the formwork was removed from the pillars, and the level of the top of the pillars was checked using a simple bubble and laser level. The discrepancy did not exceed 3 mm.
It's time for the next stage - making the harness for the change house.
Pankrat1975
While the concrete was setting, I went to the local construction market, researched prices and bought boards.
A 150x150 mm beam 6 meters long was used for the strapping, and a 100x50 beam was used for the frame posts. The user recorded all construction expenses in detail, which helped to keep track of funds.
The timber for the strapping was sawn into groove at the ends and secured together using reinforced corners and self-tapping screws. For greater strength, holes were drilled at the joints of the timber for wooden choppers made from mop cuttings.
Pankrat1975
The middle beams were connected in the same way as the corner beams, groove to groove, fastened to corners with self-tapping screws, crackers and choppers. I think we overdid it with the amount of fasteners. My brother joked that the utility unit should not be made of wood, but of metal.
The strapping jumpers were made from two pieces of timber, which were also connected groove to groove and secured with long self-tapping screws. To strengthen the knot from above, having previously selected 2 mm of wood, a metal toothed plate (MSP) was nailed.
Under the timber, on each pillar, Pankrat1975 laid several folded roofing felt, coating each layer with diluted mastic. To protect against rotting, the timber, like all purchased boards, was “from the heart” impregnated with an antiseptic composition.
After making the harness, the floor was laid on it. A 100x50 mm board was used for this.
Then it was time to assemble the frame. Assembly began from the back wall. To prevent the wall from falling after lifting, it was temporarily secured with slab slopes.
The walls were assembled on a “platform”, fastening the racks to reinforced corners, screwed onto self-tapping screws.
To connect frame elements, it is better not to use the so-called. “black”, hardened self-tapping screws. Due to their fragility, if you slightly increase the torque on the screwdriver, the head of the screw will fly off.
Also, “black” (phosphated, oxidized) self-tapping screws do not withstand impact loads and shear work. If you use self-tapping screws when assembling the frame, then use yellow (galvanized) ones.
The “correct” frame is assembled using nails, without the use of screws and metal corners, because fasteners in the frame work for displacement/cutting (for which nails are suitable), and self-tapping screws work better for tearing.
The cuttings of the boards were used for jibs.
If rigid board material is used for cladding the frame - sheets of plywood or OSB, then jibs are not required.
Having raised four walls, the brothers began to make a roof, for which they installed rafters. A 15x2.5 cm board was used for the roof sheathing.
Pankrat1975
We cut the rafters plumb at the front. The rafters were attached to metal corners. Next, we laid roofing felt, threw in a corrugated sheet and screwed it on with roofing screws. Now it was possible to continue working on the change house, not paying attention to the rain.
Before covering the external walls with imitation timber, a wind-moisture-proof film was pre-attached to the frame. Because The utility block will not be insulated; no vapor barrier has been installed from the inside.
At this stage, the work became more fun, and the utility unit acquired a finished appearance.
All that remains is to insert the windows and door into the openings and frames, paint the boards and add a little decor in the form of carved trim.
Pankrat1975
In my opinion, I managed to build a utility block with my own hands. The only retard is installing a porch-step and hanging decorative lanterns on the wall. If desired, the change house can be insulated. I will already be building a shed measuring 4x10 meters. I want to divide it into three parts: a workshop, a woodshed and a storage room for storing various things needed in the household. Only I don’t want a single-pitched roof, but a complex one - like a gentle slope on two sides with a pediment in front.
The total budget for the construction of the utility block, starting with the purchase of bits for a screwdriver, drills, a water level, cutting wheels for an angle grinder and ending with the purchase of hardware, cement, fittings and boards, amounted to about 56 thousand rubles. A detailed construction estimate can be found in the topic “Construction of a 4x6 utility block. Summer 2015."
By studying FORUMHOUSE topics, you can find out which fasteners are best used to assemble a frame: nails versus self-tapping screws, and how to learn how to choose self-tapping screws.
Our articles describe the correct frame wall pie and give advice on constructing a pile-grillage foundation.
And from our video you can learn how to turn a cabin into a comfortable house for year-round use.
Additional thermal insulation
Even if the shed is well insulated, it can still be cool inside. To fix the problem, additional work is carried out.
If a draft comes from the door, it can be additionally upholstered with an old blanket or pieces of foam plastic from the inside. It is advisable to insert double glass into the windows and place them on silicone. A platband is nailed onto the cracks from the outside, and the joints in the openings are filled with polyurethane foam.
You will find more useful information about insulating a shed with your own hands in the video.