Magnetic photo frames
- Necessary materials:
- Multiple disks
- Photos that fit
- Glue or double-sided tape
- Thick cardboard
- Small magnets
We cut out circles of the required size from cardboard and glue them on both sides to the disk, glue a photo on one side, and a magnet on the other side. To make photo frames last longer, you can laminate the photo and use a glue gun or superglue.
You can decorate an old photo frame with small pieces of disks, completely updating its appearance.
Coasters for glasses and cups
The easiest way to make crafts from a CD. We take the disk and decorate it with any materials that can be used to create a smooth surface. You can cover it with colored fabric, glue cardboard with beautiful designs, use felt appliqués, etc.
Stand for wine glasses made from discs
Using such a simple master class, you can create an unusual decoration for wine glasses with your own hands from disks for the New Year 2020 - a stand. A New Year's feast with such a craft will definitely be more interesting and fun.
To do this you will need:
- Disk;
- Colored paper;
- Glue;
- Scissors.
Progress:
- The disk must be decorated with colored paper using glue. It is best to stick unusual drawings on its surface. If you place a wine glass on such a product, you get a beautiful table decoration. If you wish, you can make several of these decorations for the New Year 2021 with your own hands. If you cover the disc with tinsel, you will get a wonderful craft in the form of a Christmas tree toy. For children, such an undertaking will be one of the easiest. They can decorate it in a childish way and then put their favorite cup.
Video: making a stand with your own hands
Candlesticks
Materials:
- Discs
- Glue gun
- Any decorations
- Candles
Place a candle on the shiny side in the middle; tea lights in an aluminum sleeve look beautiful. Various materials are used for decoration, these can be pine cones, shells, beautiful beads, we glue everything with a gun.
To use as a hot stand, cut out circles from foam rubber that correspond to the diameter of the disks. We glue the foam rubber and the disk together and cover it with thick fabric on top.
Application of discs for interior
Photos of crafts from disks are an extensive gallery of examples that confirm how wide the imagination of craftsmen is. A section of the wall is trimmed with fragments, which looks extraordinary, visually enlarging the space. The same applies to the ceiling, kitchen apron, and countertops.
Disc circles become organizers for jewelry and household small items, wall panels, and designer clocks.
This is the basis of complex geometric figures of mandalas, patterned with threads and equipped with musical pendants, non-standard window curtains of various configurations and screens.
- In the kitchen, hot mats lined with fabric and jars with a shiny coating for spices will be useful.
- Mosaics are used to transform the facades of old furniture, the body of a guitar, and turn an ordinary shoe box into an amazing box-casket.
The imagination of guests can be amazed by a lamp made of stacked circles with a thin lamp inside or a chic chandelier shimmering with all the colors of the rainbow.
Pincushions
Materials used:
- Disk
- Textile
- Sintepon
- Threads and needles
- Plastic cup (you can use a yogurt or fermented baked milk cup)
From padding polyester we cut out a circle the size of a CD (thickness from 1 to 2 cm) and the circle is one and a half times smaller in diameter than the disk (thickness from 5 cm). We apply a padding polyester corresponding to the size of the disc and cover it with fabric.
Cut off the bottom of a plastic cup, insert padding polyester, cut off the excess part and cover it with fabric. We sew them together to make a hat, and decorate them with ribbons if desired.
Curtains
To make them, we cut the disks into small pieces, make holes with an awl and connect everything with threads or ribbons.
What you can make from disks with your own hands - a general overview
Beauty is nearby and created with your own hands. All you need to do is take a disk, scissors and... imagination. From this material you can build an excellent designer lamp, panel, wall clock. Car wheels serve as a kind of decoration for garden plots or harsh men's garages.
DIY crafts from computer disks
For many, an interesting technique for working with CD discs was a discovery. They are easy to divide into two halves, each of which can be easily cut into small pieces with scissors. But with these shiny mosaics you can already make interesting crafts: decorate any piece of furniture, decorate a photo frame, or line a flower pot.
The shiny iridescent iridescent surface just begs to be remade
Most discs are easy to halve and cut into any shape you like.
Your imagination or our article will tell you what to do with such pieces.
In addition, shiny mugs are used entirely in crafts, covered with fabric or paper, and even made into chic lamps.
What can be made from car rims
People are not always far-sighted when it comes to using old items. Some of them can start a new life, giving the owner good emotions. The same applies to car wheel rims. They lend themselves well to polishing and painting and can turn into very useful products!
Unnecessary wheels can become a great table
Creative lamp? Easily!
A table with lighting will surprise many guests
A charming cauldron stand is an excellent solution for a country house
Crafts from disks for children
Old discs are indispensable for creativity with children; they are suitable for creating simple crafts with preschool children, as well as for older children and more complex crafts.
With the help of multi-colored dense fabric, or felt, discs can be turned into funny animals, birds, and charming ladybugs.
dream Catcher
If your baby often has bad dreams, you can make a dream catcher from an old disk; this is also an excellent option for decorating a child's room. Using a heated awl, make holes along the entire diameter of the disk, then the children can decorate it themselves. Multi-colored threads and beads are used for decoration; you can also additionally paint the disk with paints.
Christmas decorations
Necessary materials:
- Discs
- Christmas balls
- Glue
We cut the disks into small pieces of any shape and glue them to the balls. Bright garlands reflect beautifully on the shiny surface of the disc.
Crafts from glue: 150 best ways to use glue to create crafts + simple diagrams and photos of finished works- DIY crafts from matches: step-by-step master classes and DIY craft ideas + simple and quick photo diagrams
Crafts from tubes - unusual ideas, step-by-step master classes for beginners + photo reviews of ready-made DIY crafts
You can use old Christmas tree balls, or buy the most inexpensive ones. Disco balls are made in a similar way; in addition, you will only need a ball that fits in size.
Making a disco ball
Everyone who has ever seen a disco ball on a dance floor certainly wanted to have the same one at home. Now you have the opportunity to make a copy of it.
Making a ball is very simple. To do this, you need to prepare the following materials: a round balloon, two newspapers, about 25 disks, paste and water.
The work will take you almost 4 hours, be prepared for this so as not to be distracted during the creative process.
The procedure for creating a disco ball is as follows:
- inflate the balloon to the maximum,
- completely cover it on top with wet newspaper scraps,
- let them dry slightly
- Soak the next newspaper scraps in the paste and place them on top of the first, repeat the action,
- place the creation in a warm place, let it dry thoroughly and become tough,
- pierce the balloon with a needle and thread the fishing line to hang the product,
- Cut several disks into 1x1cm squares,
- cover the edges of the squares with colorless varnish,
- using glue, fix the squares with the mirror surface up on the prepared hard ball along the entire circumference so that the fishing line is on top,
- carefully paste over the bottom part of the product; non-format pieces can be glued at the top, since this part is not visible from below,
- hang a disco ball from the ceiling.
Read here: Military crafts - 80 photos of ideas for children's crafts from various materials on a military theme
Mobiles for cribs
Materials:
- Discs
- Colored cardboard
- Satin or nylon ribbons
- Awl
- Glue
Glue colored cardboard to the non-shiny side of the disk and cut out various shapes, such as the moon and stars. We make holes in the figures, thread the ribbons and attach them above the crib.
DIY CD crafts are a huge niche for creativity. With their help, you can decorate mirrors and pieces of furniture, create unique figures and toys.
The resulting crafts can last for more than one year, and if the plan doesn’t work out, you won’t mind throwing it away. This is a fun activity for people of all ages. A large number of photos with crafts from disks and other detailed master classes can be found on the Internet.
Application of material
They renew clothes with sparkling raw materials, attaching fragments to collars, cuffs, pockets, handbags and shoes. This is the basis for children's crafts for March 8 and February 23. It’s easy for a child to recreate the desired plot with plasticine or stick a thematic picture.
Craftswomen decorate dishes and flower pots with bright shards, creating unique items.
A fertile theme is frames for photographs or mirrors, which become the highlight of the decor.
Instructions on how to create a craft from disks in the form of an original napkin device:
- Part of the circle is cut off from two samples.
- They are glued in sections to a solid circle.
- After complete drying, decorate based on your own taste.
You can make an unusual family album, and fashionistas will happily wear spectacular bracelets, earrings, and pendants. A hat pincushion made from a box filled with foam rubber on a round base looks great. This entire structure is covered with fabric and decorated as desired.
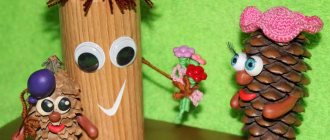
A delightful image for candlesticks with a candle in the center framed by pine cones, pebbles or shells. You can also connect three elements with their ends facing the fourth, forming a non-trivial device for a candle.