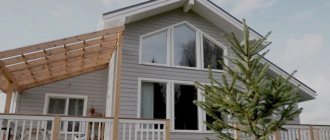
It is important for the owner of a private house to solve the problem of heat loss in order to reduce heating costs in winter. To do this, you need to take care of insulating the walls, floor, and roof.
For insulating the outside of a wooden house, mineral wool is one of the best solutions. The main thing when choosing material for such a building is to ensure air circulation. Due to this, moisture will not accumulate and spoil the wood.
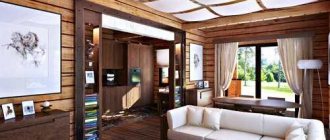
Wooden buildings must be insulated from the outside.
Characteristics of mineral wool
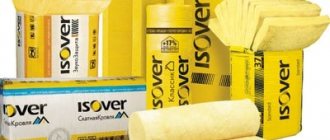
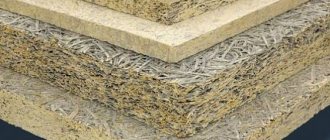
Mineral wool is a fibrous material with excellent thermal insulation properties. It is obtained by melting rocks (slag, dolomite, sand, basalt rocks), characteristics:
- Thermal conductivity - 0.03-0.07 W/(m*K). The coefficient depends on the density of the material. In this indicator, mineral wool is second only to expanded polystyrene. Due to the accumulation of moisture between the fibers, thermal conductivity can increase by an average of 50%.
- Density - 35-125 kg/cubic. m (depending on brand and type).
- Humidity - 1%.
- Water absorption - 6-30%.
- Vapor permeability - 1 (if you do not use a vapor barrier).
- Fire resistance. Mineral wool does not burn. Melting begins when the fibers are kept for more than 2 hours at a temperature of 1000°C.
- Sound absorption coefficient - 0.7-0.9.
- Toxicity - 3rd group of carcinogenic substances according to the IARC classification (not hazardous to health).
- Service life - 50 years.
Mineral wool is the most popular insulation.
Indicators of strength and frost resistance vary among different types and brands of mineral wool.
Benefits of use
The use of wool for insulation is justified by its following advantages:
- high thermal insulation properties;
- resistance to temperatures (does not deform, does not lose its qualities under the influence of heat, frost);
- immunity to bacteria, fungi, chemicals;
- fire safety;
- high vapor permeability, which is why the material does not create a “thermos” effect, allowing the wood to “breathe”;
- light weight, easy to transport and store;
- ease of installation.
Types of material
There are several types of mineral wool, the differences being in the raw materials used for its production. They have different densities, fiber structures and thermal conductivity properties.
Stone wool
Stone or basalt wool is the densest variety. It is produced from hard rocks: gabbro, diabase. They can add blast furnace slag and charge. To increase the astringent properties during melting, mineral components (clay, dolomite, limestone) are included in the raw material. Their content is up to 35%.
Stone wool is one of the most environmentally friendly and reliable heat insulators.
If we compare stone wool with other types, we can note that the former has a denser structure and less elasticity. It is produced only in slabs, not in rolls. It is less susceptible to shrinkage and more moisture resistant.
The thermal conductivity coefficient is low - 0.035-039 W/(m*K), i.e. its insulating properties are higher.
Glass wool
Glass wool is made from dolomite, limestone, sand, borax, soda, glass. The composition does not include formaldehyde. Acrylics are used as a binder. Thanks to this, it is considered environmentally friendly.
Glass wool is a fibrous mineral thermal insulation material.
The disadvantages of insulation include the ability to accumulate moisture and its long-term removal. This reduces the insulating qualities of the material. Glass wool is less dense, it can sag and shrink. Therefore, heat loss at home increases after several years of operation. The advantage is its softness and elasticity, which allows it to fill cracks. Thermal conductivity coefficient is 0.03-0.052 W/(m*K).
Slag
Slag is produced from waste from the metallurgical industry - from the slag left after smelting cast iron in blast furnaces. The material is as pliable as glass wool, but less dense. Compared to stone brands, it is less moisture resistant. The thermal conductivity coefficient is the highest - 0.04-0.07 W/(m*K).
Slag wool is a type of mineral wool that is used for insulation.
Criterias of choice
When choosing insulation for your home, you should be guided by the following criteria:
- Type. It is necessary to take into account the advantages and disadvantages of different types of wool, their properties, the chosen installation method, and facade finishing. For example, it is more convenient and faster to lay stone slabs into a frame on vertical and inclined surfaces. When cutting glass wool, glass particles are released into the air, which requires great precautions. Slag contains harmful substances. To insulate a wooden house, it is better to choose stone wool.
- Thermal conductivity. The lower it is, the less loss of heated air, i.e. heating will be efficient and cost-effective.
- Density. Manufacturers produce insulation of varying degrees of rigidity. Its indicator is marked on the label. For example, P-75 means that the density is 75 kg / cubic meter. m. This brand is used for laying in horizontal surfaces. For installation on walls, it is recommended to choose mineral wool with a density of 80-125 kg/cu. m. Rigid mats (over 125 kg/cubic m) are suitable for facades covered with plaster.
- Dimensions. Mineral wool is sold in mats, rolls, and slabs of different lengths and widths. The standard parameters of basalt insulation are 120x60 cm.
- Thickness. The higher this indicator, the better the insulating properties of the material. For a wooden house you do not need to choose such thick insulation as for concrete or brick buildings. If the walls are made of timber 15 cm, 10 cm mineral wool is suitable. For regions with a harsh climate, a thicker layer will be required. Installation can be carried out in 2 rows.
- Moisture resistance. The ability not to absorb condensation is important to protect the walls of the house from damage. When wet, the thermal conductivity of mineral wool increases by 50%. To improve hydrophobic properties, you need to install a vapor barrier.
Isover Warm Walls Strong - soundproofing boards with increased elasticity.
Price and manufacturers
The price depends on the popularity and reliability of the manufacturer, size, strength, thermal conductivity. Cost per package of mineral wool 10 cm thick:
- “Isover Warm Walls Strong” 1000×600 mm - from 599 rubles;
- “Rockwool Facade Butts Optima” 1000×600 mm - from 1,590 rubles;
- "TechnoNIKOL Technovent Prof" 1200×600 mm - from 975 rubles;
- “Stone wool Paroc eXtra” 1200×600 mm - from 1090 rubles;
- “Isoroc Isolite” 1000×600 mm - from 400 rubles;
- “IZOVOL St-50” - 1000×600 mm from 450 rubles;
- “Baswool Vent Facade 80” 1200×600 mm - from 660 rub.
Advice from professionals
When insulating a wooden house from the outside with your own hands, it is recommended to follow the advice of professionals:
- Use mineral wool as insulation, which allows air to pass through well and allows the wood to breathe.
- Use steam and waterproofing that protect the insulation from excess moisture.
- Make a ventilated facade so that moisture does not accumulate in the insulation, but evaporates in a timely manner.
- Before starting work, you need to think about insulating openings for windows and doors. After all, due to the insulation, they will go deeper into the building.
Insulating a house made of wooden beams with mineral wool can be easily done without outside help. The correct choice of materials and adherence to technology will help to obtain the highest quality results. Your home will be provided with good thermal insulation for a long time.
Differences between external and internal insulation
External insulation allows:
- protect wooden walls from temperature changes that lead to deformation;
- prevent exposure to moisture and mold formation;
- reduce heat loss and heating costs.
External insulation allows you to protect wooden walls from temperature changes.
Internal insulation in the absence of external insulation is ineffective. In this case, the cold penetrates through the walls, but does not enter the room. The negative impact on wood (freezing, condensation, moisture accumulation) remains. The walls will gradually collapse, become deformed, and under the layer of mineral wool, fungus and mold will form on wooden surfaces.
It is necessary to insulate the building from the inside if it is not physically possible to carry out installation work from the outside: the proximity of other buildings, a house for several owners. In most cases, the installation of insulating material on the inside is carried out as an addition to the exterior finishing.
For example, if the external insulation turned out to be insufficient due to the wrong choice of wool thickness.
Preparatory work
Before you start insulating the walls of your house, you need to prepare them:
- Clean from dirt and dust.
- Inspect surfaces to detect problems (destruction of timber, presence of cracks, large gaps).
- Treat the walls with an antifungal solution.
- Caulk the cracks and seal the cracks with wood sealant.
- Take measurements.
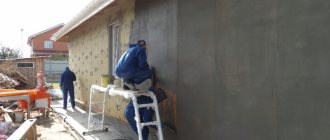
Before you start insulating the walls, you need to treat them with an antifungal solution.
Preparatory work includes calculation of materials and choice of installation method. The latter depends on the chosen option for facade finishing: plaster, siding, lining, panels.
When determining the type of mineral wool and its thickness, it is worth taking into account the features of the frame. For example, if it is made from 50 mm timber, you can use the same insulation. Otherwise, you will need to make more cuts or lay it in several layers. And if you determine the distance between the vertical bars of the frame with a size that is a multiple of the parameters of the wool, you can simplify and speed up the cutting and installation process.
Required materials and tools
To insulate the facade, you will need to prepare materials according to the chosen installation method:
- mineral wool;
- timber, ud and cd profiles for the frame;
- self-tapping screws, nails for fastening the sheathing;
- umbrella dowels for fixing mineral wool;
- antiseptic;
- hydro-, vapor barrier;
- tape for connecting the insulating film;
- brackets for attaching the film.
The tools you will need are a drill, a screwdriver, and a hammer drill for installing the sheathing and wool.
To cut timber for the frame you need a jigsaw or a hacksaw, for the profile - metal scissors or a grinder. The accompanying tools will require a stapler, tape measure, level, and pencil.
Methods for installing mineral wool
The choice of installation method depends on the type of facade finishing. If panels, siding, or lining are used for cladding, it is better to lay mineral wool into the frame. It will also serve as the basis for creating a ventilation façade or securing finishing materials. If you decide to plaster the walls outside, then you need to attach the insulation to the walls without a frame. Both options are suitable for finishing with siding.
Frame
The frame method involves building a sheathing into which insulation will be laid.
The frame method reduces installation time.
The disadvantage of this option is the high costs associated with the purchase of timber. Advantages of the method:
- ease of laying and fixing mineral wool;
- reduction of installation time (if the sheathing cells are multiples of the slab sizes);
- ease of fastening finishing materials;
- the ability to equip a ventilated façade;
- All work can be done by 1 person.
Frameless
If there is no frame, the insulation is glued to the wall and secured with umbrellas. The use of this method will allow you to save on the purchase of materials (timber, profiles) and their installation. Instead, you will need a reinforcing mesh and a mixture to create a protective layer, onto which plaster is then applied. If you plan to finish with siding, it is necessary to install a sheathing to secure it.
You can lay mineral wool in whole slabs, without cutting. This will speed up the process. The inconvenience is the need to carefully seal the joints and the inability to work alone (due to the large size of the sheets).
External insulation
The first thing that needs to be done at the construction stage is to carefully seal the seams between the logs. Inter-crown insulation is laid on the mounted crown, only after that the place is taken by a log located above. And so on along the entire perimeter and the entire height of the wall.
How to properly insulate a log house from the outside:
- equip a ventilated facade with mineral wool slabs with a thickness of 50 mm;
- spray with ecowool.
Attention to the sheathing
Rounded timber is a material with natural moisture, which must be taken into account when choosing exterior and interior finishes. The wall shrinks up to 10 centimeters! Accordingly, rigidly fixed guides will be deformed, damaging the finishing lining.
The sheathing in a log house must be floating. We offer several options for its installation:
Cuts in bars. In the places where the guides are attached to the wall, it is necessary to make through grooves 10-15 cm long. Mounting screws secure the block at the upper edge of the cut. As the log house shrinks, the fasteners in the sheathing will move, and accordingly, deformation of the finish will not occur. More details in the video:
Floating sheathing on special fasteners. It is rigidly fixed to the base wall; guide strips made of metal or wood are attached to the long grooves of the floating corners. In this case, it is important to fasten the sheathing with sufficient force - if the screws are not tightened, the movement effect will not occur, and if it is not tightened, the reliability of the sheathing will be low. More details:
Fastening the sheathing with galvanized steel brackets. This is an ideal option for external wall cladding with mineral wool insulation. The brackets are attached to the log with self-tapping screws through a vapor barrier membrane, insulation is placed on them and covered with waterproofing. Then metal guides are hung on the ends of the bracket and the finishing sheathing is performed. Clearly in the video:
Ventilated facades
This method of insulation is good because when creating multilayer systems, a ventilation corridor is formed through which air moves, which means that the tree actively “breathes”, moisture does not accumulate on the surface of the log and rotting does not occur.
How to arrange a ventilated façade:
- The timber must be treated with an antiseptic, preferably in 2-3 layers. It is ideal to use a solution with fire retardants to reduce the risk of fire and fire spread in the event of a fire.
- The wall must be covered with a vapor barrier membrane, which is secured with a construction stapler to the timber or directly with the lathing.
- Next, a floating sheathing of any type is attached. For the facade, it is advisable to choose metal brackets as in method No. 2 (see video). It would not be a mistake to choose a sheathing made of metal or antiseptic wood.
- Insulation is inserted into the installed frame (or placed on brackets) and pressed tightly against the wall for better thermal insulation.
- To prevent the insulation from getting wet on the outside and its fibers not being blown out, a windproof membrane with sufficient vapor permeability is laid on the outside of the sheathing and fixed to the wall with dowels with a wide head through the insulation.
- The final stage will be covering the wall. It will protect the thermal insulation from getting wet and give the facade an aesthetic appearance.
It should be noted that there must be an air gap between the windproofing and the finishing! This must be taken into account when choosing the sheathing material. In the case of wood, you can add additional slats 1-2 cm thick.
Any type of metal or vinyl siding can be used as cladding; a block house or imitation boards can be organically combined with a log house. Siding panels are attached to slats that secure the membrane. Thus, a ventilation channel is formed between the windbreak and the casing.
Sputtering
Ecowool insulation occurs through ready-made façade cladding. A floating sheathing frame is attached to the wall, the wall is protected with a vapor barrier, and the sheathing is protected with waterproofing. The result should be a hollow ventilated façade.
- Holes are made in the finished casing for the injection machine hose.
- A hose is inserted into the wall cavity and ecowool is supplied. The consumption rate for walls is 50-60 kg/m3.
- Injection occurs as long as the supply of raw materials is possible. When the cavity is filled, the cotton wool itself will push out the hose. If it was inserted through the nozzle, the car’s engine will begin to work hard, which will certainly be heard.
- In this way, all technological holes are worked out, after which they are closed.
The roof and floor slabs can be filled in the same way. The consumption rate for them is 45...50 kg/m3. The wet method of applying ecowool to logs is undesirable due to the formation of dampness.
Algorithm of actions for insulating wooden buildings
External insulation of wooden buildings is recommended to be carried out using the following technology:
- It is necessary to prepare the surface. Clean the walls from dirt, caulk the cracks, treat the wood with an antiseptic.
- Secure the vapor barrier film. The flooring should be overlapped, and the joints should be taped with acrylic tape. For installation you will need a stapler with staples.
- Arrange the sheathing. It is better to select the pitch of the vertical strips according to the width of the basalt slabs. Secure the timber with nails. If a metal profile is used, self-tapping screws will be required.
- Place insulation sheets into the frame. Seal the gaps with pieces of cotton wool. The slabs must be fixed using umbrella dowels.
- Secure the vapor barrier membrane.
- Install the lathing to secure the finishing material. Attach the beams to the frame.
- Secure the siding.
External insulation must be done in a certain sequence.
Some experts are against installing vapor barriers directly on the wall of the house. It is believed that it contributes to the accumulation of condensation inside the mineral wool, and this will lead to its wetting and increased thermal conductivity.
How to properly insulate with your own hands?
The technology for thermal insulation of timber walls will depend on the location of the system outside or inside, the type of insulation and the protection scheme.
Taking into account the characteristics of the wood and the shape of the log wall, the most preferable option would be to install sheathing to subsequently secure all the working layers of the wall to it.
It is more profitable to make the sheathing from beams, without additional hangers, which facilitates the assembly process. It is recommended to create it with a counter-lattice having perpendicular bars in relation to the base. Despite the fact that this makes the process somewhat more expensive and increases labor costs, in the future such sheathing is more reliable, since it does not allow the insulation to slip.
Vertical beams are placed with the necessary spacing in order to fix the insulation of the required size and secure the sheathing. In addition, such a system allows air flows to move from bottom to top in the ventilation gap between the counter-lattice elements above the heat insulator.
Since log walls shrink, especially in the first year of operation, the fixation points of the vertical beam will change, so a rigid connection is made to the lower beam, located horizontally with at least 2 screws , and a movable connection is made to the other horizontal elements of the sheathing.
As a rule, they are made with iron brackets encircling the vertical guide and fixed to the horizontal element with self-tapping screws. It is also possible to make such a structure movable if it is secured with long self-tapping screws with washers; for them, longitudinal cuts are made in the vertical beam, ensuring the longitudinal direction of movement.
The fastening of the sheathing for fastening the finishing material with the placement of thin wooden planks is carried out on special hangers. In this case, a monolithic layer of heat insulation is formed, which is fastened through with iron hangers, thereby pressing it against the wall, and with bars and dowels, therefore preventing it from slipping. In this case, vertical mobility of the sheathing must also be ensured.
Outside installation
It is necessary to insulate wooden buildings when other methods of thermal protection have not brought good results: caulking, the “warm seam” method, sealing windows and doors, thermal protection of the floor and ceiling.
External thermal insulation for log buildings is the preferred option. This is explained by the ability of wood to “breathe”, accumulate and evaporate moisture into the atmosphere. A ventilated facade is considered the best protection option, and work can begin no earlier than 18 months after the construction of the house, when the shrinkage processes in it are completely completed.
Technology for constructing a ventilated façade on log households:
- The walls are treated with an antiseptic against biological contamination and a fire-resistant fire retardant.
- On top of the walls, a vertical sheathing is filled with 50x50 mm timber in increments slightly less than 2 - 3 cm of the width of the heat insulation slabs.
- The best insulation is mineral wool slabs with a density of 50 kg/m3 and a thickness of 100 mm; installation is carried out from the bottom up.
- A superdiffusion membrane is installed on top of the heat insulator for wind protection and waterproofing. It is selected according to its vapor permeability, not lower than 1400 g/m2, lathing made of lumber 50x50 mm.
- Siding or another type of finishing material is mounted on it.
- The trim is installed so that there is a ventilation gap between it and the membrane.
- Ventilations are installed at the bottom and top for effective air circulation.
Detailed information about the work on thermal protection of walls made of logs from the outside is here.
Interior work
The option of internal thermal insulation of such a house is an extreme measure and can be taken only after all other insulation options have been exhausted. Perhaps traditional thermal protection measures will be sufficient, and there will be no need to worsen the appearance of the premises.
Experts advise owners
to initially try the following procedures as protective measures :
- thermal protection of floors;
- gender;
- roofs.
They absolutely do not agree with installing insulation inside the house, since the wood will accumulate moisture and rot.
You can also thoroughly caulk the crown joints from the outside and inside with modern sealants, after which the window and door openings are insulated. For these purposes, roll inter-crown insulation is used or, at worst, traditional mineral wool.
The only thing that is strictly unacceptable is to treat openings or seams with polyurethane foam. Since a log house is in constant vertical movement and foam is a fragile material, it will not last long.
In some cases, it is sufficient to simply cover the walls with clapboard ; in this case, the thickness of the wall increases, which increases its thermal resistance, and the air gaps between the wall and the cladding will interfere with the natural circulation of air and the removal of warm air flows from the premises to the load-bearing walls.
If all measures for external insulation are not enough, for example, with a very thin external load-bearing wall of less than 150 mm, then the internal thermal insulation is made of environmentally friendly insulation - ecowool, which is placed on a ventilated lathing structure.
Instructions for carrying out work in timber buildings
Internal insulation work must be carried out according to the following instructions:
- It is necessary to prepare the surface: remove old plaster, seal cracks and crevices.
- Treat the walls with an antiseptic and primer.
- Make a frame from a profile or timber. Provide clearance for ventilation.
- Cut the insulation to the dimensions of the sheathing. Stick to the walls.
- Secure the vapor barrier film.
- Make cladding (fix drywall to frame).
Insulating the walls of a wooden house from the outside with mineral wool
The walls must hold the material for a long time, so decent fasteners are selected. As the work progresses, larger screws will definitely be purchased. To ensure that the insulation is airtight, the cracks are sealed with film or roofing felt. Special attention is paid to the coating. It is recommended to select aluminum foil with a thickness of 2 millimeters. If seams are found at the finish line, tape will work to solve the problem.
Installation of mineral wool on the frame
If the preparation is completed, let's get down to business. To properly insulate a house with mineral wool, you must follow the basic steps:
- Drawing up a diagram.
- Application of antifungal coating.
- Preparation of waterproofing.
- Installation of sheathing.
- Take care of insulation.
- Installation of mats.
- Final cladding.
Ways to insulate log houses
To improve the quality of insulation, it is worth taking care that there are no cracks in the log house. Wood must breathe, so it is necessary to provide ventilation inside the layer of material.
Ventilated facade
A ventilated facade is needed so that condensation that accumulates due to insulation can dry out. This will increase the service life of the insulation and logs from which the house is built. The ventilated facade is created due to the space between the mineral wool layer and the finishing material. This distance corresponds to the size of the timber placed on the frame into which the slabs are laid.
Ventilated facade is a system for finishing the external walls of buildings.
Caulking log walls
Caulking the walls is a preparatory stage. You can place jute, tow, and bast fiber (hemp) in the cracks and gaps between the logs. You need to lay the materials as deep as possible, for which you use tools - caulking tools, chisels. Their flat, narrow surface facilitates working with crevices. Can be of different lengths and widths. On the reverse side of the tool there are strikers, which allows you to apply force using hammers or sledgehammers.
Internal insulation
This process consists of several stages. Before starting work, you must carefully examine the entire internal surface of the walls. It is especially necessary to pay attention to corners, floor joints, window sills and windows. Problem areas can be noticed by the presence of moisture or drafts. If cracks and gaps are found, they must be plugged with tow or filled with foam. The same examination should be carried out with the ceiling and floor.
There are several technologies for wall insulation. They depend on the materials used and options for performing the work. The “warm seam” technology is used when insulation does not involve finishing the walls with decorative plaster. Various sealants are used during this process. They are used on a synthetic or natural basis. The sealant is placed at the joints of the timber. It is worth noting that this reduces the thermal conductivity of the seams.
Mineral wool finishing
But when using mineral wool, you can achieve high thermal insulation performance. Typically used for insulation:
- glass wool;
- basalt fibers;
- slag fiber.
It is worth noting that mineral wool is an environmentally friendly and noise-absorbing material. When using this insulation, it is necessary to install vapor and waterproofing. This is due to the fact that the structure of the wool allows steam to pass through and absorbs water.
Stages of work
Just as with external insulation, it is necessary to treat the log walls with an antiseptic solution from the inside. Next, install the sheathing, which will consist of two components. As a rule, it is a transverse metal structure. It is stuffed onto logs at a distance of 80 cm from each other. Now the counter-lattice is being performed.
At the same time, it is made of the same materials, but is attached parallel to the first one. This sheathing serves for ventilation, removing excess steam, as well as installing insulation and preventing condensation. The next step is to install the insulation itself. Its joints are taped. The insulation is installed between the sheathing strips. It is better to lay the film overlapping and under no circumstances confuse the glossy and matte sides.
Now you can carry out interior decorative finishing of the room. Lining, fiberboard, chipboard, and plasterboard can be used as finishing materials. Installation of finishing is carried out to a metal profile. If wooden logs were used in the process, and the insulation was laid between them, then the decorative trim is attached specifically to them.
Regarding the ceiling: here it is necessary to ensure its tightness, that is, to exclude drafts and leakage of warm air. For this, ecowool or foil-isolon are usually used. Next, a sheathing is made into which the insulation is laid. After this, you can begin decorating the ceiling. We must remember that not only the preservation of the thermal conductivity properties of a wooden house, but also its service life depends on the quality of insulating materials.
Nuances of thermal insulation of a building with mineral wool for siding
When finishing a house with siding, it is important to preserve the advantages of a wooden structure - environmental friendliness, low thermal conductivity. At the same time, it is necessary to reduce the fire hazard, moisture absorption and the likelihood of insect exposure.
Mineral wool will solve these problems, but it is important to strictly follow the insulation instructions. In particular, ensure the possibility of air circulation to prevent the accumulation of condensation and the negative impact of moisture on the wood. To do this you should:
- install a frame made of wooden beams;
- choose insulation of such a thickness that will protect the walls from freezing;
- equip a ventilated façade (a metal profile can be used for lathing).
When thermally insulating a building with mineral wool for siding, it is important to maintain environmental friendliness.
Installation of material
Work on thermal insulation of building walls with mineral wool is best done using wooden blocks or galvanized metal profiles. Properly installed sheathing will allow you to perfectly level the wall surface. This will allow for high-quality fixation of the decorative finishing material (in our case, vinyl or acrylic siding).
Facade surface preparation
- The surface of the walls is thoroughly cleaned of protruding or hanging elements. When finishing an old log house, this could be old decorative finishing from boards, made once to protect the main facade and level the surface, followed by painting;
- Regardless of which building’s walls need to be insulated: old log or new timber, the surface must be treated with a special antiseptic. This will prevent the appearance of insects or fungal microorganisms in the wood. In addition, it is necessary to examine each crown for the absence of diseased areas susceptible to rotting. If such are detected, they must be immediately removed and replaced with uninfected ones.
Installation of sheathing
Using timber or a galvanized profile, a sheathing is made, which is necessary to secure the insulation inside it. It is recommended to make the distance between the guides 2-3 cm less than the width of the thermal insulation slabs, the average step is approximately 60 cm. Thus, you can quickly, and most importantly, correctly distribute and fix the mineral wool inside the resulting frame. The method of installing the sheathing under the siding depends on the material used for these purposes:
- The wooden beam is fixed to the surface of the facade using self-tapping screws of the appropriate size;
- The galvanized profile is attached to metal hangers that are firmly fixed to the surface of the walls and allow you to create a strong and even sheathing for the siding in a short period of time.
First, it is necessary to determine the extreme points of the guides. This can be done using a level, level or plumb line. The best way to do this is as follows: having visually determined the most protruding points on the surface of the wall outside the house, you need to set the two outer guides (right and left) plumb. By connecting the two upper and lower ends of the guides with a thread or fishing line, we obtain a plane along which it is necessary to align the subsequent profile or beam.
useful in work
Since siding is installed only horizontally, the sheathing must be designed vertically to the ground surface.
Fixing the insulation
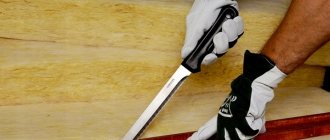
Before you start working with mineral wool, you need to prepare personal protective equipment. These include:
- Long sleeves;
- tight pants below the ankle;
- gloves;
- respirator;
- protective glasses.
Despite the fact that mineral wool is considered safe for humans, as a result of tiny particles coming into contact with the skin, especially in hot weather, it can cause irritation.
Depending on the number of layers of material required to create high-quality thermal insulation for a log house, you can use five or ten centimeter slabs. As an option, for better insulation of a timber building, two layers of mineral wool can be fixed under the siding. The number of rows depends directly on the thickness of the walls of the house and the climatic and atmospheric conditions of the region in which it is located.
In order to correctly insulate the walls of a residential building from the outside, you need to correctly position the heat insulator on the surface of the facade, placing it under the sheathing. All slabs must be firmly fixed; this can be done using special disc-shaped dowels, or as they are popularly called “fungi”. This will not only secure the sheets, but also reduce the pressure on the lower rows of material.
Siding fastening
The siding is fixed using galvanized self-tapping screws into special grooves in the panels. If metal siding is chosen as cladding, then it is necessary to take into account the temperature compensation of the metal. To properly understand the installation of the material, you need to watch the proposed video lesson.
Carrying out work from the inside and features of finding the dew point
The dew point is the temperature at which condensation appears. It can be located inside the wall or move to its internal or external surface. This depends on the effectiveness of insulation and weather conditions.
It is necessary to do external and internal insulation.
The optimal situation is when the dew point is located in the external insulation most of the time. This preserves the integrity of the wood and the wall, and reduces heat loss.
If you do only internal insulation without external insulation, the dew point will be located on the surface of the wall under the insulation. This is the worst option. Due to increased humidity, mold develops and the wood is destroyed.
To avoid such problems, when installing the material from the inside, you need to ensure good ventilation.
To do this, leave gaps between the wall and the vapor barrier, between the insulation and the interior decoration.
Algorithm of actions for external insulation of a wooden house under siding
The procedure is usually as follows:
- The walls of a log house must be repeatedly treated with antiseptic agents. Particular attention will need to be paid to the end parts of the building, since these areas often become places for active growth of fungus. These procedures are recommended to be carried out in clear, warm and dry weather, because you will have to wait several days to completely dry the antiseptic. Also, all corners and the lower crown of the building will require care.
- The vapor barrier must be secured to the wall surface using staples from a construction stapler. It is important to consider that the shinier part of the film material used should face the direction of the insulation. The junction points are arranged taking into account the overlap and are carefully insulated on top and connected with special tape.
- The lathing is attached to the vapor barrier, taking into account that the thickness of the timber used corresponds to the thickness of the selected heat insulator. When laying the base material sideways, you do not need to use additional fasteners.
- Heat insulation slabs are laid between the sheathing beams, slightly pressing them. If necessary, pieces of mineral wool can be trimmed a little using a sharp knife. Fixation with slats may be required when the insulation is not rigid enough in structure and does not hold well inside the frame cells. The final fixation is performed using anchors.
- When laying several layers of heat-insulating material at the same time, this is done overlapping so that the seams of the first row overlap the next one. All measures for external insulation of a building made of timber with mineral wool must be carried out in a protective suit, complemented by a mask.
- The membrane is fixed over the thermal insulation on its outer side. The joints are made with overlap and securely fastened with tape.
- Then you can begin assembling the forced ventilation system of the outer frame. To do this, you will need bars that will form the required width gap (about 5 cm) between the insulating material and the plane of the building facade. To secure the bars you will need self-tapping screws. The use of profile hangers will be justified only if the walls are not too smooth. This will allow you to adjust the distance to the frame yourself.
- Fastening is carried out according to the technology given by the manufacturer. For cladding the facade, you can use natural timber, metal profiles, block houses, and vinyl siding.
Alternative materials for thermal insulation: comparison with mineral wool
You can insulate a wooden house with ecowool or polystyrene foam. The first is a bulk material made from cellulose. Its installation is carried out by spraying from a blowing machine using a wet or dry method. Polystyrene foam is sold in sheets of different sizes and thicknesses. Insulation is carried out using a frame or frameless method.
Ecowool
Differences between ecowool and basalt:
- completely natural composition (no resins);
- also absorbs moisture, but is able to remove it without loss of thermal insulation properties;
- low air permeability (installation of vapor barrier is not necessary);
- less fire safety, although the composition includes boric acid, which prevents ignition;
- not damaged by rodents;
- is not subject to shrinkage, since a completely seamless coating is formed.
The main disadvantages of ecowool are the high price and difficulty of installation in the absence of experience and equipment.