15037 0 8
Mullvatt September 7, 2016Specialization: Capital construction work (laying a foundation, erecting walls, constructing a roof, etc.). Internal construction work (laying internal communications, rough and fine finishing). Hobbies: mobile communications, high technology, computer equipment, programming.
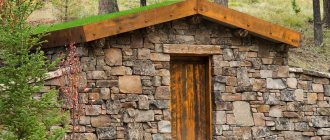
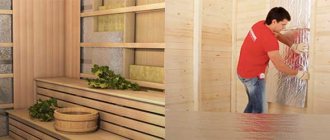
Only thanks to insulation, a comfortable microclimate for living is formed in the attic.
Some time ago I completed an order to insulate the attic for winter living. While doing the work, I thought that the technology I used was quite simple and even an untrained person could make thermal insulation from the inside with his own hands.
In today’s material I will tell you what is better and how to properly insulate an attic from the inside with your own hands. This instruction will help you avoid making mistakes that I had to face at the beginning of my construction career.
I assure you, upon completion of the work, the attic floor of a wooden house will turn from a useless storage of rubbish into a cozy and comfortable room in which all your household members will fight to live.
General points
Let's start with the fact that the attic is a bit of a special room. Its overall structure requires a careful, meticulous approach. And the insulation of the attic roof is even more so:
- Mostly vertical or inclined surfaces . Therefore, it is better to immediately exclude all soft “pliable” materials, namely mineral wool rolls.
- It is advisable to focus on materials with low dead weight . Since the rafter system is already experiencing significant loads from wind and snow. In addition, the load on load-bearing walls will not increase much.
- Often insulation is required for gables . They are not always made by analogy with a main wall. May be made of facing material. Or the frame is simply built for insulation.
- It happens that the area of the attic significantly exceeds the size of the house itself , while part of it rests on columns. In this case, you will also have to insulate the ceiling in contact with the street.
If the attic floor protrudes beyond the house, additional insulation of the floor is required. Source metasold.com
It should be understood that the thickness of the insulation must correspond to the weather conditions of a particular climate zone, while having a small margin. To gain the required thickness, the insulation is installed in several layers, and the relatively small dimensions require joining.
Important: splicing any insulation requires a careful approach. The joints of different layers should not be concentrated in one place. To prevent freezing, they should be spaced as far apart as possible. It is important to constantly remember this so as not to spoil the material, especially when insulating a sloping roof.
Features of geometry: insulation of the attic from the inside if the roof is already covered
On the one hand, there seem to be no particular difficulties in solving the question of how to properly insulate an attic from the inside with your own hands. But it was not there. The main difficulty may lie in the geometric shapes of the roof, especially if you tried to make it as attractive as possible. As a rule, the shape of the attic floor follows all the curves of the roof. The insulation is mounted directly on sloping walls. By the way, a heat insulator that is too elastic can sag, so it is important to think about how to securely attach it.
But what if you've added a pointed cone to your roof or other architectural flourishes? In this case, you will have to slightly correct the geometry from the inside using additional walls or even a ceiling.
An example of working with uneven ceilings in the attic in this video:
As you can see, it is quite possible to slightly correct the geometry from the inside, if necessary. In this case, all insulation work must be carried out on installed additional partitions.
Preparation
All wooden surfaces must be treated with antiseptic and fireproof impregnations.
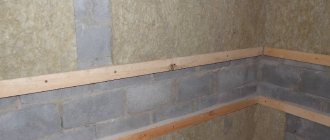
All wooden components must be treated with protective materials Source remontik.org
It is necessary to immediately identify “unreliable places” on structural elements. For example, the connection of the outer rafter to a pediment made of facing bricks. Or an overlapping connection between a rafter and a screed, made without insulation. It is necessary to eliminate the shortcomings - if possible, foam them or line them with a sealant. Otherwise, they will not be able to withstand through blowing and freezing.
It is necessary to minimize the use of metal fasteners. This is especially true for metal linings secured with bolts. Of course, the bolted connections will remain, but the plates should be made from thick, durable plywood and replaced. The remaining metal parts are painted with primer-enamel and covered with a layer of polyurethane foam. Metal directly in the insulation is a source of condensation and dampness.
Insulation of the rafter system
It’s great when the insulation of the attic from the inside was planned in advance, or “just in case” the constructive points for this were observed by the builders:
- A roofing membrane is mounted on the rafters.
- A counter-lattice is provided.
- The pitch of the rafters is maintained corresponding to the common length or width of the insulation.
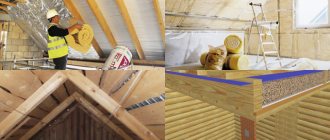
It is convenient to carry out insulation if it was planned at the construction stage Source bamban.ru
It is worth noting that these are ideal initial data that allow you not to look for a “way out of the situation” and to insulate the maximum volume of the attic efficiently without extra costs. Such conditions make it possible to use vapor-permeable insulation. And these are comfortable living conditions.
See also: Catalog of projects of houses with an attic presented at the exhibition “Low-Rise Country”.
How to properly insulate an attic for winter living with mineral wool
To carry out the work, access to the spaces between the rafters is necessary, that is, the interior decoration (if any) must be removed.
To complete the work you will need:
- construction knife (for cutting materials);
- construction stapler (to attach vapor and waterproofing);
- knitting wire or a strong thin cord (nylon) to secure the mat/roll in the cells of the frame. Mandatory only for loose materials on surfaces with a reverse (indoor) slope. You will also need nails or staples to secure the cord/wire to the rafters/sheathing.
Installation step by step:
- If there are doubts about the quality of the roof waterproofing, it is better to make another layer. The waterproofing and windproofing film (membrane) is attached over the entire surface of the roof and walls with an obligatory overlap of at least 10 cm. Fastening can be done with a construction stapler. Instead of staples, small nails can be driven in on the outer (facing the room) plane of the rafters - a cord or wire will then be attached to them to hold the heat insulator;
- the insulation is cut out. The strips are cut so that they are 2...5 cm wider than the gap between the rafters. The looser the material, the greater the margin should be. For mats with high density, an “allowance” of 1.5…2 cm is sufficient;
- the insulation is laid in the gaps between the rafters with a slight “tamping”. The mat or roll should lie flat, without protruding towards the room. If this happens, it means that the allowance was given too large and it is necessary to trim the strips to width. For inclined or horizontal (ceiling) surfaces, it is better to immediately secure the slabs/roll with a stretched cord or wire;
- if a second layer of insulation is planned, sheathing is installed along the rafters. The thickness of the slats is selected in accordance with the thickness of the insulation layer (for example, for a 50 mm slab, a 20x50 or 25x50 mm slat is required). Next, similar to the technology described, slabs or rolled material are placed in the cells of the sheathing and secured;
- a vapor barrier layer is installed (using a construction stapler). The material must be joined with an overlap or the joints must be glued with a special adhesive tape;
- internal cladding is installed, for example, lining or plasterboard, followed by finishing.
Important: it is necessary to ensure a ventilation gap between the insulation and the waterproofing! With a normal roof structure, this is already done using counter-lattice.
Foil materials, for example Penofol, are very appropriate as a second layer of insulation. In this case, a layer of foil facing the inside of the room reflects heat and allows for more efficient heating of the attic.
Additional nuances of the process in a short video.
Insulation of an unprepared roof
When the decision to insulate is forced, the roof is usually not prepared. There is nothing terrible about this, it is even possible to choose the following options:
- Insulate with materials that do not require waterproofing.
- Build a special frame for living space.
In case of insulation of a roof that is not prepared for this, special compounds can help Source paspraypros.com
Foamed polyurethane foam can play a special role here. Although equipment is required to apply it, insulation occurs in a continuous layer and does not depend on the design features of the roof.
Foamed polyurethane foam is one of them Source da.decorexpro.com
This also includes ecowool. Although its installation requires a roofing membrane, it is quite possible to make a continuous layer of insulation.
Which insulation to choose for the attic
The question of what is the best way to insulate an attic from the inside is a very pressing one, and reviews on forums vary radically; each material has its undoubted advantages, as well as disadvantages.
Styrofoam
Insulating the attic with polystyrene foam is the most cost-effective option to keep the room warm. To insulate the attic space, you will need a layer of foam plastic with a thickness of at least 100 mm. This is an almost weightless material, easy to install, suitable for insulating children's rooms and attic bedrooms. But it burns, becomes infected with mold, and in addition, rodents use it to organize their passages throughout the house. Despite the fact that this method of insulation has stood the test of time, the question of whether it is worth insulating the attic with polystyrene foam, reviews vary from “in no case” to “only polystyrene foam,” remains open. We invite you to watch the instructions, which tell you in detail how to insulate an attic with polystyrene foam; the video clearly demonstrates all the advantages and disadvantages of working with this material.
Extruded polystyrene foam
Insulation of the attic floor with extruded polystyrene foam is usually carried out from the outside of the building. Although many people think of this material as foam, their chemical composition is very different. Expanded polystyrene tolerates chemical influences well, has a thermal conductivity lower than that of polystyrene foam, and practically does not allow moisture to pass through. Even if water has penetrated the surface of the insulation, the material will retain its thermal insulation characteristics during freezing and thawing. Expanded polystyrene has different densities; the higher this indicator, the heavier the insulation; the lower the density, the better the heat and sound insulation properties. But extruded polystyrene foam is destroyed upon contact with complex carbohydrates, and it is also deformed by ultraviolet rays, therefore, when arranging a residential attic, it is not recommended to use nitro-based paints.
Watch the video on how to insulate an attic with your own hands using extruded polystyrene foam
Penofol
Insulating the attic with penofol is financially expensive compared to polystyrene foam. This is a new roll insulation that is a competitor to mineral wool. It has a low thermal conductivity coefficient, a good thermal insulator, and is resistant to moisture. A huge advantage of penofol is that it protects the room from the effects of radioactive substances, but does not tolerate mechanical loads well, and requires skills when laying the thermal insulation layer; violation of the technology leads to a deterioration in the thermal insulation characteristics of the insulation.
Spraying polyurethane foam
Thermal insulation made by spraying polyurethane foam has no joints and, therefore, cold bridges. Such insulation does not require the cost of preliminary preparation of the attic for thermal insulation; the material is poured to the thickness of the attic rafters or more. The insulation is sprayed directly onto the walls, floor, and ceiling using special equipment. Polyurethane foam is resistant to fungi, and practically does not allow moisture to pass through, but does not tolerate the effects of esters and concentrated acids.
Ecowool
Ecowool consists of 80% cellulose, and 20% antiseptics and fire retardant additives. When using this material to insulate an attic, you need to take into account the volume, since the insulation is greatly loosened. To perform high-quality insulation of the attic with ecowool, you should apply a layer about 200 mm thick. This is an environmentally friendly insulation material, it is applied to surfaces like papier-mâché, manually or mechanically, and does not form joints. It has a low thermal conductivity coefficient, is resistant to fungi and bacteria, and practically does not burn. Installation of the thermal insulation layer requires knowledge of application technology and professional skills.
Insulation with ecowool, this method of thermal protection requires skills and knowledge of the technology of applying material to surfaces
Mineral wool
Using mineral wool for insulation is the most popular way to keep heat in the attic. Depending on the composition and density of the wool, it can be placed in a spacer or in a special frame. Mineral wool does not rot, but absorbs moisture, because of this its thermal insulation characteristics are reduced, and the insulation saturated with moisture becomes noticeably heavier, which puts significant loads on the rafters and roof of the attic. When insulating with mineral wool, there is practically no waste left and it is easy to cut. To insulate the attic floor, a layer 100-200 mm thick is required, depending on the design features of the structure. When working with mineral wool, you should wear a protective suit and goggles.
Insulation of the attic, video instructions on how to properly lay a thermal insulation layer of mineral wool
Sawdust
I would like not to abandon the old, old-fashioned and almost free method of insulation. Construction of a thermal insulation cake using sawdust. This is an environmentally friendly, time-tested method of insulation. Sawdust is mixed with lime and an insulating layer 100 mm thick is laid. Such thermal insulation is several times inferior to modern insulation; in addition, it is a fire hazardous insulation method. But if this is a country house, and according to the design the attic is a cold, unheated room, then this method of insulation is completely justified.
To insulate the attic, you can use both traditional materials and modern insulation materials, the main thing is to correctly calculate the thickness of the thermal insulation layer
Now the market is represented by a huge selection of insulation: rockwool stone wool, slab foam, backfill, plates, mats, etc. Which insulation is better for an attic depends on what room should be insulated: if it is a warm attic, then basalt wool, PPU, and if it’s cold - polystyrene foam and sawdust. The second criterion for choosing insulation is how much you are willing to spend on thermal insulation. It is believed that in principle there cannot be universal insulation materials; each of them has its own advantages and disadvantages. We tried to select for you the most useful tips on how to insulate an attic; video materials will help you understand the intricacies of thermal insulation with each specific material.
Effective insulation
Next, we will consider the most effective materials that do not require serious equipment in order to efficiently insulate the attic.
Stone wool
Due to their elasticity, the mats adhere well between the rafters and allow installation without additional fastening. And the relatively dense structure of stone wool prevents its shrinkage over time. Therefore, it has proven itself well on vertical surfaces.
Stone wool mats come in different thicknesses, and you can choose the one you need based on climatic conditions and other materials used Source pallazzo.su
To further reduce the risks, every 3 meters of height it is necessary to arrange supports for the insulation - add a horizontal frame element.
Proper completion of work
The insulation has been installed, but the process must also be completed correctly. It must be protected from damp vapors from the room. For this, a vapor barrier film is installed. Moreover, the overall result greatly depends on the thoroughness of execution. Although each package is supplied with instructions, let us briefly repeat:
- The subsequent canvas overlaps the previous one by at least 15 cm.
- The joints are taped with special tape.
However, attic vapor barrier has a dual purpose. Oddly enough, it also protects the residents themselves. The fact is that vapor-permeable insulation is not strong enough and can be slightly weathered. From the outside this is not so important, plus it is protected by the roofing membrane. And inside it is necessary to exclude even the minimal possibility of the insulation components being released into the air - to reliably cover it.
The final stage is covering the insulation with canvases, on which the finishing is subsequently applied. Source obustroeno.com
Of course, this does not apply to Penoplex. But it is also recommended to protect against it; an effective material is penofol.
As for insulation of any type. In addition to the vapor barrier device, a technique that at first glance is unnecessary, but effective, is often used. Before finishing, intermediate, seemingly unnecessary material is installed. It can be OSB, GVL or GKL - it depends on the design. Moreover, the technology is fully observed - all joints are carefully sealed. This is an additional barrier against the unwanted effects of materials.
How to insulate an attic effectively: calculating the thickness of insulation
After the initial selection of the type of insulation, it is necessary to determine the required thickness of the layer/layers. This is done in accordance with the requirements of SP 50.13330.2012. Considering that the roofing material does not actually provide thermal resistance, it is actually necessary to choose a thickness of insulation that will provide the necessary thermal resistance of the enclosing structure.
Calculation formula
R=p/k,
Here p is the layer thickness in meters, k is the thermal conductivity coefficient. Then
p = R x k.
The required standard value can be taken from the SP (Table 3), taking into account the type of structure (in this case, walls) and the number of degree days of the heating period.
| Number of degree days of the heating period per year | Standard value R (m2 x degrees)/W |
| 2000 | 2,1 |
| 4000 | 2,8 |
| 6000 | 3,5 |
| 8000 | 4,2 |
| 10 000 | 4,9 |
| 12 000 | 5,6 |
You can clarify the number of degree days using the table; you must take into account the desired temperature in the room.
Naturally, all populated areas were not included in the list - we recommend finding the nearest large city and navigating around it. At the same time, for buildings in large settlements, you can take the nearest lower value from the table, since dense buildings and an abundance of transport increase the average daily temperature. And, on the contrary, for buildings around which there is a lot of free space, and the area is characterized by strong winds, it is better to take a larger number of degree days.
Example definition
For the Chita region, for an interior temperature of 20 degrees, the number of degree days is 7600. If the house is located on the shore of a lake or in the mountains, we take 8100, if inside the city - 7100.
An example of calculating the thickness of insulation
For the same Chita, the required thermal resistance of the structure is about 4...4.1 (m2 x degrees)/W. We accept insulation with a heat transfer coefficient of 0.05 (low-density mineral wool, polystyrene foam). Accordingly, insulation with a thickness is required
p = R xk = 4.1 x 0.05 = 0.2 m
Thus, even for such a cold area, 20 cm of insulation is sufficient. If you do insulation in two layers, you can not only save on material, but also eliminate the risk of “cold bridges” appearing. In fact, insulation will be achieved “with a margin”, since in reality the roofing material, waterproofing film, and interior decoration of the attic will also retain heat.
For those who do not want to independently calculate the amount of insulation for the entire attic, we recommend our online calculator.
After completing the calculations and making the final choice of insulation, you can proceed directly to installation.