A cellar at the dacha will allow you to store food for a long time and with high quality.
A do-it-yourself cellar at the dacha is a good opportunity to ensure long-term, high-quality storage of food. And since, if the cellar is built correctly, it stably maintains the same temperature all year round, it is simply irreplaceable for storing not only canned goods and pickles, but also vegetables and fruits. A cellar at the dacha is an absolutely necessary thing for those who have a vegetable garden or orchard at the dacha.
A cellar is a building necessary on a summer cottage and on any private estate.
Magnificent cellar in the form of a fairytale house
Cellar in the country: main types
Despite the structural features of construction, cellars can be divided into three types (diagrams of cellar construction, depending on type, are shown in Fig. 1):
Rice. 1. Diagram of the structure of the main types of cellars.
- ground - arranged in the case of a very high (0.5 m) groundwater level. It could be simply an insulated box made of wood, a wall cellar (attached to the main wall, in fact - another room, only with embankment, the diagram is shown in Fig. 2) or a brick storage with embankment (Fig. 3)
Rice. 2. Scheme of a wall cellar
Rice. 3. Ground cellar with embankment.
- semi-buried cellar - arranged in places where the groundwater level is located within 1.5-2 m from the surface of the earth. A diagram of a semi-buried cellar is shown in Fig. 4.
Rice. 4. Scheme of a semi-buried cellar
- To build it, you will need to dig a pit 0.8-1 m deep. The base is erected from brick or concrete, raising the walls to a height of 2-2.2 m. The ceiling is made of wood, concrete or slate. The entire structure is sprinkled with soil on top. The entrance to such a cellar is arranged at ground level, with a vestibule, stairs and a second, necessarily insulated, door. In principle, all construction operations, including waterproofing, ventilation and insulation, are similar to those carried out during the construction of a deep basement.
Beautiful cellar in the country, made of natural stone
A cellar is a small cold room for storing vegetables and fruits, preparations and wines, meat and dried products
- a recessed cellar is the most common type; it can be either separate (having its own cellar, Fig. 5) or located under the house, summer kitchen or garage. Therefore, we will consider in detail below how to build a cellar with your own hands at the dacha.
Rice. 5. Scheme of a separate cellar with a cellar.
What to consider before building a cellar
Before designing an underground storage facility, a number of factors should be considered:
- Stable temperature conditions, at any time of the day or year, are achieved at a depth of 3 meters underground.
- It is better not to build underground storage facilities near trees. Their roots are difficult to remove, and if this is not done, they can destroy the walls of the cellar.
- In a recessed or semi-recessed basement, it is recommended to separate the entrance door and stairs with a small vestibule.
- For storage it is better to use wooden boxes or racks. Since wood, unlike metal, does not conduct heat or cold so quickly.
- Air circulation is the only way to resist the formation of moisture in the basement. To achieve this, you should not move the racks directly to the walls; it is better to leave a small gap of 5 centimeters.
- Compacted soil is an excellent floor for proper temperature control.
- To make it easier to monitor the condition of the cellar, you should install a thermometer and a hydrometer in it.
Separately, you should think about the entrance to the basement. You can either make a cellar right on the street or build a small vestibule. Entering from the top saves space, but is not a safe option.
DIY cellar at the dacha step by step: tips and tricks
For the construction of a semi-recessed, and especially a recessed cellar, it is very important to accurately determine the location of construction, and more precisely, to determine the level of groundwater. To do this, you can use the help of professionals (expensive, but reliable), or you can try the folk method, which gives a fairly accurate result. To do this you will need a glass cap, a piece of wool and a fresh egg. In the place where you planned to build a cellar, place a piece of wool on the ground, an egg on top of it and cover them with a glass cap. Leave this “construction” overnight, and evaluate the results in the morning:
- wool and eggs in dew - the level of groundwater is insignificant, here you will have to limit yourself to an above-ground cellar
Fairy-tale style cellar
The cellar may well become one of the decorations of your site
- there is dew on the wool, and the egg is dry - groundwater lies deep enough to build a semi-buried cellar
- Dry eggs and wool are an excellent place to build a deep cellar.
Cellar located under the veranda
Advice! The best time to build a cellar is in the summer, when the groundwater level is lowest.
It is best to build a cellar in the summer
If the construction of a cellar is planned in a house (more precisely, under the house), then it is better to place it under non-residential (unheated) premises, ideally under a veranda (the temperature there is lower than in the rest of the house, it is easier to arrange ventilation, and in winter the veranda will protect from frost). If the layout of the house allows you to arrange a cellar only in the heated part of the building, additional thermal insulation of the ceiling will be required (for example, lay foam plastic 5 cm thick on the ceiling) and good ventilation, otherwise it is impossible to ensure optimal storage of food.
If the cellar is located under a heated room, then you need to take care of its thermal insulation
Cellar interior in the style of oriental fairy tales
After this, you can begin the practical part of construction.
How to make a cellar ceiling from concrete
Classic cellars are designed in such a way that their main part, which is used for storing vegetables and preparations, is completely underground. However, from above the room must be protected from precipitation with a special ceiling made of wooden beams and concrete (Figure 4).
It is important to consider that the ceiling is installed at the final stage of construction, when the base and walls of the basement are built and reliably protected from moisture. There are several options for creating floors, but we will consider the most reliable and popular of them - using beams and concrete.
Laying beams
To create a strong and reliable ceiling, it is necessary to use metal beams, since only they can withstand the weight of the cement mortar and soil layer, but for small storage facilities that are not too deep into the ground, thick wooden beams can also be used.
Note: To create this type of floor, even at the stage of wall construction, you need to provide holes in the brickwork into which beams will be inserted.
At the initial stage, you need to lay the prepared beams in the holes. Old rails are often used as a base for the ceiling, but any other metal products can be used. The beams are securely fixed with reinforcement and thick wire so that they do not move. After this, it is necessary to lay a layer of waterproofing material on each structural element, which will protect the storage from moisture. Next, formwork is installed, which will serve as the basis for the cement mortar.
Overlapping device
Preparation for pouring cement mortar necessarily includes the installation of retaining beams. They must be strong enough and able to withstand the weight of the finished solution.
Figure 4. Stages of construction of a beam and concrete floor
You can prepare the cement mortar for pouring yourself or order a ready-made one. Regardless of this, the finished mixture must be evenly distributed over the metal frame and leveled so that voids do not form inside. After the solution hardens, you will receive a reliable and durable floor slab, which will serve not only as a basement roof, but also as a kind of protection for the interior space from precipitation.
At the final stage, it is advisable to carry out additional thermal insulation of the ceiling so that a stable temperature is maintained inside the storage facility at any time of the year.
Digging a pit
The construction of a cellar at the dacha with your own hands begins with marking the foundation pit, while adding from 0.5 to 1 m to the planned dimensions - this will make it easier to waterproof the cellar. First, the top fertile layer of soil is removed - it can later be used to create flower beds, terraces, alpine slides, etc. After this, the pit itself is dug (Fig. 6).
Before building a cellar, you need to choose the right place
A cellar is practically the same refrigerator, but with slightly different dimensions, and without the constant costs of repairs and electricity
Advice! To prevent the earth from crumbling down and the soil to hold stronger, the walls of the pit are made not vertical, but with a slight slope, and the steepness of the slope is selected depending on the type of soil (the harder it is, the smaller the slope).
Rice. 6. Digging a pit
To make sure that water is not seeping through the walls somewhere, the pit is allowed to stand for some time. Places where water appears are sealed with so-called “clay tampons” - they dig out a ditch (up to 50 cm deep) and trample it with crumpled fat clay, compacting it tightly.
How to treat a cellar for storing vegetables
Underground storage for vegetables must be treated annually against bacteria and fungi. If these measures are not taken, the walls will become moldy and the crops will rot.
There are several ways to treat a cellar intended for storing vegetables. To do this, you can use both special chemicals and folk remedies available at hand.
Special means
There are special chemicals that will help quickly eliminate the fungus and prevent the spread of rodents. For example, in order to prevent damage to vegetables by rodents, the premises are fumigated with sulfur bombs.
Note: To treat an average cellar, two sulfur bombs are enough, which are placed on a metal surface, set on fire and left indoors for a day. After this, the room must be thoroughly ventilated to eliminate the unpleasant odor.
Disinfection concerns not only the walls and floor of the room, but also shelves and drawers. If they are made of wood, they need to be taken out into the sun, dried and treated with special antiseptics.
Figure 8. Methods for disinfecting the cellar: slaked lime, copper sulfate and sulfur bombs
The walls of the storage facility are washed with a 10% solution of copper sulfate. It allows you to get rid of all signs of fungus and mold. But after such treatment, all surfaces must be whitened with slaked lime.
Cellar base
To obtain the base, the bottom of the pit is leveled and compacted, after which a sand and gravel cushion is made and the first layer of concrete 5-10 cm thick is poured. Ruberoid is laid on top of the first layer in 2-3 layers or melted bitumen is poured (waterproofing layer, Fig. 7) , after which they are concreted again, pouring a layer 10-15 cm thick. If walls are built from brick (half a brick thick), then this base will be quite enough as a foundation. If the walls are made of concrete blocks or some of the walls of the cellar are continued as load-bearing walls of the house, then a separate foundation will be required.
Rice. 7. Waterproofing the base of the pit
Construction of a cellar for storing vegetables
After the pit has been dug and compacted, it is necessary to begin the internal arrangement of the basement and the cladding of the external walls and roof.
The arrangement of the cellar includes cladding of external and internal walls for thermal insulation and protection from moisture. For external insulation, you can use ordinary polystyrene foam or roofing felt, but such insulation must be sheathed on top with plywood or fiberboard sheets.
In addition, waterproofing and insulation must be done indoors. It is also necessary to provide storage racks, drawers, containers and compartments for fresh vegetables.
How to sheathe
The inside of the cellar walls must be insulated so that the optimum temperature is maintained inside. As mentioned above, external insulation can be made with polystyrene foam or mineral wool. However, it should be taken into account that polystyrene foam is easily damaged by rodents, so the material must be treated with special impregnations and covered on the outside with sheets of plywood or fiberboard (Figure 3).
Figure 3. Methods of external and internal cladding
In addition, external and internal wall insulation is carried out only on a previously prepared surface. To do this, you need to level their surface, putty and whitewash the walls with slaked lime to protect them from fungus.
In some cases, wall insulation is not enough to maintain the optimal temperature. In this case, you need to additionally insulate the floor: make a concrete screed, lay a thick plastic film on top of it, install joists, and lay insulation in the space between them. The floor is covered with boards on top and covered with oil impregnation and paint.
Containers and boxes for storing vegetables
You can buy ready-made boxes for storing vegetables, but if you have boards and beams, you can make them yourself (Figure 4).
Note: It is advisable to make containers and boxes from planks located at a short distance from each other. This will ensure the necessary air circulation and prevent premature rotting of the products.
The placement of boxes and containers in the basement should be planned in advance so that their size and location can be accurately calculated.
If you plan to place containers on top of each other, try to keep the bottom shelf 10 centimeters or more from the floor. This way you can easily clean the room without moving the drawers.
Figure 4. Types of boxes for storing vegetables
When placing boxes on top of each other, place wooden beams between them, which will create free space for air circulation. When storing vegetables on the floor, dividing partitions are made from boards. This condition is especially relevant if both fruits and vegetables will be stored in the same cellar. The dividing partition will prevent the smells of different vegetables from mixing, and the food will spoil more slowly.
It is advisable to arrange separate basements for vegetables and fruits, but if this is not possible, they can be placed in one storage facility, but at the maximum possible distance from each other.
The author of the video will tell you more useful information about the internal arrangement of a cellar for storing vegetables.
Walling
You can use different materials to build cellar walls. Most often, bricks, concrete blocks are used for this (Fig. 8, most often they are used to build load-bearing walls of a house on them), rubble, and cinder blocks (Fig. 9). Another option is to pour monolithic concrete walls; in this case, the walls can be integral with the base, for which purpose the reinforcement for the walls is initially fixed in it (Fig. 10), then the formwork is installed and the mortar is poured (Fig. 11).
Rice. 8. Cellar walls made of concrete blocks
Fig.9. Cinder block cellar walls
Rice. 10. Installation of reinforcement for a monolithic concrete wall
Fig. 11. Installation of formwork for pouring cellar walls
Disinfection of a cellar for storing vegetables
Before storing vegetables, the basement must be inspected in order to take timely measures to eliminate fungi, mold or signs of bacterial damage (Figure 8).
Note: If you ignore disinfection, fungi will begin to actively develop in the storage, which will lead to rapid spoilage of the crop in conditions of high humidity.
The first stage of disinfection is treating the walls with copper sulfate. Next, you need to remove all remnants of mold with a spatula or scraper, re-plaster the walls and paint them.
You should also inspect the basement for rodent damage. The cracks in the walls and floors should be sealed with glass wool and concrete, and poison for mice and rats should be spread throughout the entire storage area or special traps should be installed.
Floor installation
The choice of material for flooring is largely determined by what loads it will have to withstand during further operation. It can be produced:
- wood - beams or logs on which boards or beams are laid on top. Since there is always high humidity in the cellar, all wooden elements must be treated with an antiseptic
When building a cellar, all wooden elements must be treated with an antiseptic
Country cellar decorated with climbing plants
- metal beams on which concrete slabs can be laid. In this case, it is necessary to especially carefully process and seal the seams (joints of plates)
- monolithic concrete floor - poured in the same way as monolithic walls
Anyone can build a cellar with their own hands at the dacha
Further care of the cellar
Underground storage requires constant maintenance so that the basement maintains temperature conditions and moisture resistance. Therefore, after construction, the following work should be carried out in the cellar at regular intervals:
- clean the room at least several times a month;
- whitewash the basement walls if necessary;
- ventilate for several days at the end of summer;
- eliminate cracks in the structure;
- carry out a thorough check of the walls and ceiling for integrity every month.
Ladder
The simplest, but very inconvenient option is an extension ladder welded from pipes or knocked down from wood. It is advisable to include in the project a stationary staircase made of iron, concrete or metal; it is both more convenient and safer to use:
- the minimum width is 30-40 cm, but about 50-60 cm is better, it will be convenient to climb
A beautiful cellar will delight your guests for a long time
- if you plan to lower heavy, large-sized loads into the cellar that need to be carried by two people, then the width of the stairs should be at least 80 cm
- the maximum permissible slope is 75 degrees, but such a staircase will be within the capabilities of the young and energetic. To make the stairs comfortable, but not take up much space, the optimal slope is 45 degrees - it’s quite easy to climb (the flight is not very long) even with a load in your hands
- step height – 15 – 20 cm, width – 25-30 cm
You can purchase a ready-made cellar in the form of a capsule, which you simply have to hide in the ground
Video description
Video tutorial on waterproofing a cellar:
Ladder
When making a staircase to the basement, it is necessary to understand that it will not only be used to ascend and descend into the cellar, but also to carry out vegetables, fruits, and canned food. Therefore, it is important to calculate the parameters of the steps. Recommended height: no more than 200 millimeters.
The design of the stairwell depends entirely on the type of basement. In underground rooms with a horizontal hatch, a staircase without risers is installed. Preferred material: wood or metal. The angle of inclination is 60-70 degrees, so it is also worth providing a railing.
For basements with a vestibule, it is better to make stairs from more durable materials: concrete, brick, cinder blocks. Leveled soil is used for the foundation of the structure. Railings are installed upon request.
Overlap
The ceiling is made of the following materials:
- wood;
- reinforced concrete or metal slabs;
- concrete filling.
Wooden floors, due to the material’s tendency to rot, have practically fallen out of use. However, if the construction of the floor is still carried out with wooden structures, then before laying it is necessary to clean the material from bark residues and waterproof it with bitumen coating or sheets of roofing material.
Most often, poured concrete with a reinforcement frame is used as a floor. The thickness of the layer depends on the area of the basement and the soil covering the cellar from above. But this parameter of the concrete slab should not exceed 30 centimeters.
The layer is poured the first time with obligatory compaction. Then they begin waterproofing the ceiling. The construction is completed with a layer of soil.
Ventilation
There are two main types of ventilation pipes in underground storage facilities:
- Supply air - serves to circulate cold air near the basement floor.
- Exhaust - displaces warm moisture from under the ceiling of the cellar.
Supply and exhaust pipes are installed in two opposite corners of the cellar. It uses dampers to regulate air circulation.
Electricity supply
Electrical supply to the cellar should be carried out using a PR wire for stationary and mobile installation. It would also be a good idea to install motion sensors for light bulbs so that the lights in the cellar turn on automatically.
Waterproofing basement walls
To ensure water resistance, concrete and brick walls are additionally plastered with cement mortar. After the layer of plaster has completely dried, bitumen mastic is applied to the outside of the wall, onto which roofing material is glued (Fig. 11), after which soil is backfilled.
To ensure the watertightness of your building, it is necessary to waterproof the walls
Advice! To improve waterproofing, instead of backfilling with soil, you can make a clay castle. To do this, clay is mixed with water and coarse sand until a plastic mass resembling plasticine is formed. The resulting mass is placed in a pit between the walls and the ground, compacting it very tightly.
Rice. 11. Waterproofing cellar walls using bitumen mastic and roll materials
Ventilation
One of the main requirements for a good country cellar is the presence of high-quality ventilation, which maintains optimal temperature and humidity in the room, preventing fungi and mold from developing.
To ensure ventilation, only two plastic pipes of medium diameter are enough, one of which will serve as a supply, and the other as an exhaust. The supply pipes are located 20 cm from the floor, and the exhaust pipes are located on the opposite side, 40 cm from the ceiling.
In this case, the supply pipe must have a metal protective mesh against rodents, and the exhaust pipe must be insulated with glass wool, have a canopy to prevent rainwater from flowing in, and a tap in the lower part to drain condensate.
Alternative solution: cellar devices under the garage
This solution greatly simplifies the excavation work compared to constructing a cellar inside the house. Technologically, the operations are the same as those described above, but the cellar frame is made of brick.
How to build a garage yourself, read the article How to build a garage for a car on your own.
The masonry seams are reinforced with perforated steel strips, and a tie made of pins and metal strips is mounted in the top row.
A welded frame for the ceiling with a hatch is made, it is poured with concrete, followed by insulation with foam blocks. Ventilation is required.
Design
Even such a purely utilitarian room, if you have some imagination, can not only blend well into the surrounding environment, but also become its highlight. For inspiration and searching for original ideas, you can look at photos of cellars for summer cottages on thematic websites.
Using beautiful tiles and doors, you can decorate a semi-submerged cellar, and by planting flowers on the roof of an underground basement, you can completely hide it. From an above-ground basement planted with lawn grass, you can make a real “hobbit house”.
Waterproofing the cellar outside and inside
Water is the main enemy of basements and cellars. To prevent moisture from getting inside the room, and to prevent structures from deteriorating from moisture, external waterproofing and soil drainage around the perimeter are installed.
To protect against moisture use:
- coating materials – bitumen-based pastes and mastics;
- rolled - roofing felt, bikrost, hydroisol;
- penetrating - Penetron, Penekrit, Hydrohit, effective even when groundwater backs up;
- liquid glass;
- waterproofing dry mixtures;
- profiled membranes.
They are used from the outside or inside according to the instructions. The base is pre-cleaned, leveled, cracks and seams are sealed.
Important. To avoid leaks, the waterproofing barrier must be continuous, without gaps or cracks.
To prevent water from flowing in from above, the roof of the cellar is arranged in the form of a hill or slope, and the ceiling is sealed with rolled materials.
Drainage is laid around the perimeter of the base - perforated pipes wrapped in geotextile. They are placed with a slope, connected into a ring and discharged into a collector or drain. The accumulated water is pumped out from the well with a pump.
Create a cellar at the right temperature
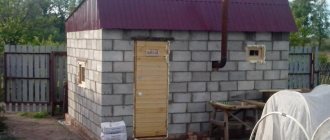
How to build a garden house over a cellar?
A garden house can be built using the same technology used to build sheds. We wrote about the most interesting options for independent implementation here...
We list the materials from which garden houses are made:
- Wooden boards . This is a frame technology that has become widespread in our time. The boards can be combined with OSB boards, corrugated sheets, flat slate and DSP. This option is perfect for self-construction. Even one person can build a frame garden house. Although with an assistant it will be easier and faster. Frame technology can rightfully be considered the easiest and fastest method of construction.
- Hardware. This can be a profile pipe or a light steel frame for a frame, onto which it is easy to “put” a variety of materials. Based on a metal frame, you can make a garden house for both seasonal and year-round use. This technology is not inferior to the construction of houses based on wooden frames. Metal parts can be fastened not only by welding, but also by bolts.
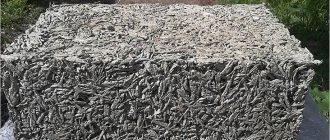
- Clay and firewood . These are the materials for the clay pot we have already described. You can read about it in this article. The second name of the technology is cordwood. If you want to build the cheapest and most authentic house, take note of it. Such construction will take longer than construction using frame technology. But the extraordinary budget of the event and the fabulous appearance are worth the time and effort spent.
- Gabions . Not only fences can be built from stones in a metal mesh. By the way, we have already written about the use of this technology in the construction of sheds here. Gabion allows you to quickly erect a modern, atypical building, which, with proper insulation, can be used even in winter. But this is also one of the simplest and fastest ways to build sheds, garages and other functional spaces.
- Bricks and various building blocks . These are the most common materials for the construction of all kinds of buildings. From them you can build a capital building. This job is suitable for people with experience in construction. That is, not everyone can build a garden house made of brick or block with their own hands. True, this does not stop many who like to do everything with their own hands. They boldly take on a new business and everything works out for them.
- Double beam. This is a modern technology that allows you to quickly erect one- and two-story buildings. It is more accessible to amateurs, although it requires certain knowledge and ability to deal with specifications. You can assemble such a house with your own hands, like a construction set, following the manufacturer’s instructions. By the way, it can be placed on a compacted platform filled with crushed stone or on the simplest columnar foundation. This is possible due to its relatively small mass.
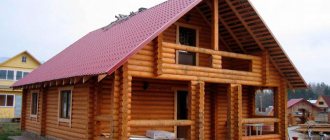
- Log house . This technology can be used to build anything - from a gazebo to a large chalet house. To build a log cabin, you need specialists. Although the possibility of independent construction is not excluded, if you have golden hands, you can easily deal with new information and study successfully. A log house can be built quite quickly.
- Modular house . Today you can easily find companies that produce modular houses. Their advantages are that either a ready-made house is delivered to the client, or it is quickly assembled on the site. This option does not take much time and effort, which for many is an undeniable advantage. The only thing needed in this case is money. Modular houses can be installed on a slab or column foundation, or simply placed on a compacted and crushed stone site.