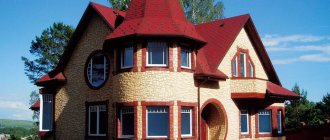
Choosing a roof covering for a bathhouse is both a simple and complex question. Even the large number of roofing options offered by manufacturers cannot satisfy everyone without exception; each bathhouse owner tries to find his own solution. And our goal is not to give advice on choosing a specific type of roofing, everyone should listen to their own opinion - there is no ideal roof, just as there is no completely bad one, each has strengths and weaknesses, very large fluctuations in price and installation complexity.
Do-it-yourself tile installation
Piece roofing tiles are considered the most prestigious and complex; they can be natural ceramic, concrete, with additives of polymers, dyes, etc. Metal and flexible tiles are considered a cheaper option, although among these types of coverings the price difference by brand may vary factor of. It all depends on the material, manufacturing technology and final performance characteristics. Options for covering with metal and flexible tiles are found most often in bathhouse coverings, and we will focus on them for now.
Ceramic tiles
Flexible tiles
Concrete tiles
Metal tiles
Flat roof technology and materials
A flat roof has a smaller area than a pitched roof, and for this reason alone it is cheaper. Money is also saved and, due to the absence of a rafter structure, roll waterproofing materials themselves have a lower cost than tiles or metal.
For domestic private housing construction, flat roofs are not typical. Many homeowners consider them to be attributes of industrial architecture and high-rise buildings. However, as soon as you move a little further west, for example, to Poland, cottages with flat roofs appear in large numbers. And this is not surprising, because the Poles are the closest neighbors of the Germans, and they know a lot about saving. In Germany there really is a huge number of private houses of post-war construction with a flat roof.
Recovering from the devastation, the Germans were forced to count every penny. And although houses with flat roofs were not traditional for them at that time, they began to build them. It was primarily the economic advantages that had an impact. Construction time was also reduced due to less complex and labor-intensive installation.
There are also functional advantages of flat roofs. First of all, this is the rational use of the space of the upper floor, due to the absence of inclined slopes. Additionally, the horizontal design of the roof makes it easier to inspect and repair. A flat roof can be made usable: arrange something like a terrace there, place air conditioning units or supply and exhaust ventilation units.
As for the climatic factor, the only limitation for building a flat roof may be regions where heavy snowfalls are typical. There it is better to have a pointed pitched roof, like you see in the Alps.
Tools for tiling work
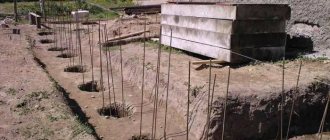
Before laying tiles, you need to prepare all the necessary tools and materials. First you need to calculate the amount of waterproofing required, adding ten to fifteen percent of the material to it. The waterproofing is fastened with an overlap, so the material will be consumed much more than the initial calculations. You can more accurately calculate the number of counter-beams by taking measurements of all rafter logs. Also, to the required materials you must add several packs of paper clips and a package of nails.
List of tools that will be useful in your work:
- hammer;
- screwdriver;
- chainsaw;
- metal shears or roofing shears;
- roulette.
Basic recommendations
Once the decision has been made to complete the roof of the house using soft tiles, you need to think about laying it yourself. Installation is not difficult, but the technology has some peculiarities. The following recommendations for performing the work can be given:
Roofing pie for soft tiles
After purchase, the material is stored indoors. The sheets are laid horizontally in pallets, the height of which is no more than 16 rows. The lining carpet, which is used for priming and leveling the surface under the tiles, is placed in a vertical position for storage.
To create favorable temperature conditions in the under-roof space, you will need to perform thermal insulation. The type of insulation is selected depending on the preferences and financial capabilities of the home owner. Most often, mineral wool is installed
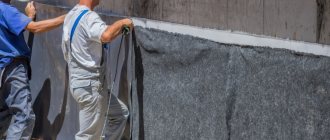
The technology for laying this material presupposes the presence of reliable waterproofing and vapor barrier. In addition, to remove liquid vapor from the surface of the insulation, a ventilated air gap is provided between it and the roofing, the width of which is on average 5 cm.
When purchasing roofing material, it is important to pay attention to the shipment of goods. The roof will look better if you use materials made at one time in one place. In this case, an exact match in color and physical characteristics can be guaranteed.
Installation of soft tiles is not carried out at subzero temperatures
This is due to the fact that the material becomes brittle in the cold and can easily be damaged when secured into a pie.
To lay the material yourself, the minimum slope angle should be 15 degrees. Installation with less does not guarantee waterproofing, since the liquid moves rather slowly over the surface and can easily flow into small gaps. In this case, it is worth considering the rule that for bitumen the roof slope cannot be too large and remember that the more the roof is sloped, the more material will be required per pie.
Do-it-yourself installation of soft tiles is carried out without the use of a torch. This material does not belong to the class of weldable materials. For additional fastening (in case of strong wind loads), special adhesive solutions are used. Peel off the transparent protective film from the inner surface immediately before placing it on the cake.
When doing work with your own hands, it is important to remember that you are not allowed to walk on the roof without special equipment in sunny, warm weather. This is because the material melts slightly when exposed to sunlight, and the person doing the installation may leave shoe marks on the surface that cannot be removed without replacing part of the coating.
Solid material is used as a base for the tiles. The pie may include a continuous sheathing or a sparse one, followed by laying moisture-resistant plywood on it. Installation directly on the insulation is prohibited.
If you follow these recommendations, then a roof with flexible tile cladding will delight its owner for many years.
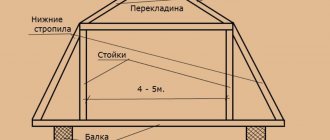
Features of the rafter system
The rafter system for a roof made of ceramic tiles has specific features due to the weight of the roofing material. Natural tiles are ten times heavier than metal tiles, and the load per square meter of roofing is about fifty kilograms.
For the rafter frame, you should choose dry wood with a moisture content of no more than 15%. The rafters are made of timber with a section of 50x150 mm or 60x180 mm. The pitch range should be 80 – 130 cm and depends on the roof slope. The greater the roof slope, the greater the rafter pitch.
Construction of a rafter system for natural tiles
On a roof with a slope of 15 degrees, the distance between the rafters is 80 cm, and with a slope of 75 degrees, the rafter pitch is 130 centimeters. In addition, it is necessary to take into account the length of the rafter legs. The longer the rafters, the less distance is maintained between them.
Roof covering with roll materials
The construction of flat roofs allows the use of rolled materials, the strips of which are laid overlapping, and in the same direction:
- when the slope of the flat roof is more than 5%, then the outer overlap width is 10 centimeters, and the inner width is 7 centimeters;
- when the slope does not exceed 5%, the overlap width for all layers is at least 10 centimeters.
If during the gluing process the panel deviates from its location, you should try to return it to its place without peeling off the material. But if it is impossible to move, the glued piece is cut off and the panel is glued again, maintaining a 10-centimeter overlap.
When a flat roof is installed, strips of rolled material are laid in layers (for more details: “Roll roof installation - coating properties”). If installation is carried out using liquid mastic, each layer is glued at intervals that cannot be less than 12 hours.
Features of flat roofs, detailed video:
Installation of tiles on a ridge
| Fig 4.6-1 | Fig 4.6-2 |
The ridge elements are fixed with nails to the upper bars of the sheathing (Fig. 4.6 - 1 and Fig. 4.6 - 2). If the roof is pitched, the ridge is made according to Fig. 4.6 - 4. A flat sheet is made based on the slope of the roof and the thickness of the rafters. Semicircular ridge elements are laid as shown in Fig. 4.6 - 3.
| Fig 4.6-3 | Fig 4.6-4 |
To protect yourself from moisture and snow getting between the ridge beam and the ridge element, a universal seal is installed.
Fig 4.6-5
The ends of the skates can be closed with plugs, if necessary, Fig. 6.6 - 5.
How to make a soft roof
Installing a roof is a complex task that includes a number of specific stages.
Moisture-resistant plywood, OSB board or edged board are used as the foundation on which the soft roof will be laid. It is also allowed to use other building materials with a flat surface and a humidity of no more than 20%. The seams of such cladding must have a certain gap. For plywood and OSB boards, a minimum gap of 2-3 mm is allowed; for edged boards, a gap of 5 mm must be left. This is necessary so that when expanding under the influence of temperature and moisture, the base does not begin to deform. On edged boards, annual rings are centered down.
This system is designed to ensure proper quality of air circulation, which prevents the formation of condensation on the back side of the base. If you neglect this stage, then soon the rafter system may begin to rot, and in winter ice and icicles may form on it.
Roof ventilation includes the following elements:
- vents in eaves overhangs;
- ventilation outlets;
- the gap between the waterproofing and the base is at least 5 mm.
To ensure that the attic is properly ventilated, shingle manufacturers recommend that the vents be distributed evenly along the entire ridge.
The arrangement of a soft roof includes the organization of a lining layer. It is mounted on the eaves overhangs, ends and valleys of the roof from top to bottom. For roof slopes greater than 18 degrees, you can make a lining layer only in those places where there is the greatest likelihood of leaks. Ridges and valleys are covered with a layer 25 and 50 cm wide, respectively. In this case, the valleys are equipped with a lining layer on both sides.
For roof slopes from 12 to 18 degrees, the lining is placed over the entire roof area, starting from the bottom, moving parallel to the eaves upward. The overlap between the lining strips in the longitudinal direction should be 15 cm, in the transverse direction - 10 cm. The lining is fixed with special nails at a distance of 20 cm from each other. To achieve better tightness of the lining layer, the overlap areas are lubricated with bitumen mastic.
Installation of cornice strips
The elements are made of metal. They are attached to the eaves overhangs directly onto the lining. Wooden strips are necessary to protect the edge of the sheathing from rain and wind. Fastening is carried out using mounting nails with a wide head at intervals of 100 mm. At the junction of the cornice strips, an overlap of at least 2 cm is made.
Installation of gable strips
As in the previous case, the slats are made of metal. They are laid at the ends of the roof on top of the lining layer. The purpose of these strips is to protect the edge of the sheathing from the ends. Fastening is carried out similarly to the strips on the cornices.
Necessary for additional protection of the roof from rain and snow. Choose it to match the color of the roof. Fix the carpet with wide-headed nails. The overlap is carefully glued with bitumen mastic.
Installation of cornice tiles
When laying soft tiles, remember that before starting work you must remove the protective film from the back of the tiles. Eaves tiles are placed at a distance of 10-20 mm from the edge of the eaves (for more details: “Soft tiles - laying technology: “six rows” method”). In this case, each element of the tile is laid exactly end-to-end.
CALCULATION AND MARKING OF STEP FOR RATES WITH VIOLATED GEOMETRY.
Measurements and calculations of the sheathing pitch must be made for each slope separately. In general, the sheathing should be horizontal and parallel to each other.
However, the length of the rafters on different slopes may be different and the pitch may also be different with the same number of rows of tiles. In this case, the lathing pitch must remain within the permissible lathing pitch range of 31.2-34.5 cm.
If the measured dimensions of the outer rafters differ so much that the calculated pitch of the sheathing exceeds the permissible value (for example, a crooked ridge), then it is necessary to nail the sheathing 3, starting from the top marking of the smaller rafter leg, marking it horizontally along the building level. The pitch of the sheathing on this slope will be the same, and the topmost row of tiles will need to be done according to the rules for laying tiles on the ridge, cutting the upper part of the tile and securing it with a clamp for the trimmed tiles to an additional sheathing bar nailed parallel to the curved ridge at an angle.
After installing bars 1, 2 and 3 on the plane, measure the distance along the upper edges of bars 2 and 3 strictly along the outer bars of the counter-lattice of the rectangular slope (long arrows). Bar 2 is installed level, and bar 3 is installed parallel to the ridge line.
Let's say the dimensions on the left and right sides do not match (see picture on the right). The difference is 9 cm. It follows that bars 2 and 3 are not parallel.
The step at the overhang (marked with short arrows) is a constant value over the entire width of a given slope: bars 1 and 2 must be parallel to each other. Therefore, the calculation of the sheathing pitch for each side of the slope of 649 and 658 cm must be done separately.
Calculation example:
Calculate the sheathing pitch separately on the left and right sides. In this case, the number of rows should be the same.
Next, mark the sheathing spacing on the leftmost (in 32.4 cm increments) and rightmost (in 32.9 cm increments) counter batten bars.
Connect the corresponding marks of the left and right bars with a dye cord and beat off lines on all the bars of the counter-lattice for subsequent filling of the bars and sheathing.
In this case, the sheathing bars will be arranged in a fan-shape, but the tiles laid on them visually form parallel rows, hiding the oblique angle of the slope.
This method of marking and stuffing the sheathing is also recommended with the correct geometry of the slope to ensure more accurate marking and eliminate the curvature of the sheathing.
When further filling the sheathing, place slats or bars of the required thickness under it, leveling the plane of the slope
Inversion flat roof installation technology
The inversion type of roofing is more reliable and durable than a traditional roof; it does not leak for several decades.
When constructing this type of structure, the order of the layers changes, which improves the quality of the roof. Unlike the first method, such a structure can be operated.
- For minimal loads, foam-insulating, heat-insulating, and waterproofing materials are used. Roll-type materials are used as the final coating.
- For medium loads it is necessary to use stronger and denser thermal insulation. Paving slabs or other types of similar material are used as the final covering.
- For significant loads, reinforced material is installed between the main layers of insulation. And as a final coating, a reinforced concrete slab is used.
Installation of an inversion flat roof is carried out in the following sequence:
- First, prepare the base, lay a reinforced concrete slab, then cover it with a primer so that the built-up waterproofing adheres well.
- Laying waterproofing material is somewhat different from the traditional method. First, waterproof material is laid, it can be PVC or rolls containing bitumen.
- Then they begin laying the insulating material.
- Then geotextiles are laid out, which should be located between the insulating materials of the internal composition and the final covering.
- At the end, the final covering is laid; for roofs with minimal load, roll-type materials or crushed stone are used, which are applied to the entire surface. For a roof with an average load, you can lay paving slabs or use other durable materials. For significant loads, use a monolithic reinforced concrete slab.
Variety of types and shapes of ceramic tiles
Among the variety of companies producing natural roofing materials, the following should be highlighted :
- Natural tiles Braas.
- Koramic.
- Creaton.
- Erlus.
All of the above-mentioned manufacturers have been producing natural roofing tiles for many years and do not need advertising. These companies use the highest quality raw materials . Also, all finished products undergo strict final control, so when purchasing material from these manufacturers, you can have no doubt about its quality.
Today you can find tiles of various shapes on sale. Here are the main ones:
- Groove elements.
- Grooveless.
- Skates.
- Specialized. They are produced individually or in small batches to solve specific problems.
Types of ceramic tiles
Also, natural ceramic tiles are divided into several types according to certain characteristics.
- According to the production method , it can be divided into stamping and tape.
- According to their shape , ceramic tiles are divided into smooth, grooved and profiled.
- By surface type.
The surface, in turn, is divided into the following types:
- In the absence of specialized surface treatment of the tiles, the tiles have a natural color and texture of baked clay. Color solutions vary greatly depending on the manufacturer, as they depend on the characteristics of the raw materials used.
- Angobated tiles have a matte surface. This effect is achieved by adding specialized minerals to the clay mixture.
- The glazed coating of the tiles has a glossy surface. Glazed material is the most expensive and prestigious among all natural roofing coverings. This coating is obtained by applying a glassy mass to the tiles, followed by firing.
Color solutions
Today, many roofing companies offer shingles with different profiles to solve specific problems. The main types of profile are:
- Traditional (low profile).
- S - shaped.
- Beaver tail.
- Groove.
- Flat.
- Romanesque.
Variety of profiles
By size, tiles can be divided into large-format and small-format.
Types of soft roofing structures
Roofing pie is a generalized technical term that combines a number of structures with a similar “layered” structure. The combination of layers should protect the home owners from atmospheric attacks and protect the internal filling of the pie from premature deterioration.
The standard structure of a roofing pie includes the following required components:
- Vapor barrier. Prevents the penetration of vapors from the interior of the house and the condensation of moisture on the building materials used in the construction of the roof;
- Thermal insulation. Helps retain heat, protects against noise, winds, and cold temperatures coming from outside;
- Waterproofing. Prevents the penetration of rainwater and melted winter precipitation into both the roof structure and the building;
- A decorative coating that simultaneously acts as a wind barrier.
The category of soft roofs includes materials with excellent waterproofing qualities. These include bitumen roll representatives, piece analogues, mastics and a new generation of membranes. A couple of decades ago they served only as a barrier against water, but now they also successfully play the role of decorative coatings. This is due to the improved external surface and the development of installation methods that allow super-thin materials to be attached to any type of base.
The combination of insulating and decorative properties has made it possible to reduce the number of main layers in a roofing pie to 3, if one of the types of rolled materials is used for arranging the roof.
When laying bitumen shingles, waterproofing is not completely abandoned. However, it is laid as an additional waterproof layer and covers the roof either completely, if the slope of the slopes does not exceed 18º, or partially in strips along the overhangs, along the ridge and valleys, around pipes and at junctions on roofs with slopes steeper than 18º.
The above list of main roofing layers has the nature of general recommendations. In fact, it is modified by reducing or adding functional elements, because the scheme for forming an ideal roofing structure is influenced by a number of significant circumstances, such as:
- type and purpose of the object being developed, i.e. is it a residential building or a domestic structure;
- temporary or permanent use, determining the use or rejection of thermal insulation;
- the shape of the roof and the steepness of its slopes, directly related to the choice of materials for the roofing;
- type of base for installing a pie and laying a soft roof;
- the presence of an exploited or unexploited attic;
- regional climatic features, according to which the thickness of thermal insulation is determined;
- compatibility of construction layers, because in case of incompatibility, separation or migration layers will be required.
A well-designed soft roof pie is constructed taking into account the entire range of the listed conditions. Without information about the specifics of the project, no one will give exact recommendations, but it is worth familiarizing yourself with the principle of construction, regardless of whether you will build the cake yourself or hired roofers will do its installation.
Installation of tiles on the gable
Fig 4.5-1
Fig 4.5-2
Fig 4.5-3
Fig 4.5-4
Fig 4.5-5
Mount the roofing sheets flush with the ends of the sheathing bars. Rice. 4.5 - 1 Using a manual bending device, bend the edges of the sheets upward by 90 degrees to a distance of 30-40 mm. Rice. 4.5 - 2 Attach a wind board with a cross-section of 25x130 mm to the ends of the sheathing bars.
ATTENTION! The edge of the wind board, located at the top, is set in such a way that the end strip just touches the surface of the roofing sheets with its curly teeth. A universal sealant should be applied to the roofing sheets. Rice. 4.5 - 3 Installation of the end strips is carried out from the bottom up. The lower end of the first end strip from the cornice is closed with an end strip cap. The plug is inserted inside the end plate, sealed with silicone and secured with four self-tapping screws. Before fixing, all end strips are laid out on the wind board. After making sure that the planks are laid evenly and correctly, nail them to the wind board, at the rate of five or six nails per plank Fig. 4.5 - 4. The end strip can be replaced using a semicircular ridge. Section of the end plate fastening unit, see Fig. 4.5 - 5 - A. An additional apron is placed under the end strip, which is made of a flat sheet, if the thickness of the roofing pie on the gable is more than 130 mm. Rice. 4.5 - 5 - V
Installation of flexible tiles
Flexible tiles can generally be thought of as fiberglass tiles that have been impregnated with bitumen. Its main layer is sandwiched between layers of oxidized bitumen containing polymer additives. Thanks to these layers, the material acquires strength and ductility. It gets its color from granulates of different colors that cover the top layer. They simultaneously perform a protective function, protecting the material from UV radiation and atmospheric exposure. Recently, manufacturers have been supplying the material with a bottom adhesive layer, which is most often covered with mounting film. This arrangement of the material not only simplifies its installation, but improves the quality of installation, as it increases adhesion to the base and better seals the coating.
Installation of composite tiles over an old roof
MetroTile® composite shingles are quickly and efficiently laid over the old roofing surface, reconstructing the roof in a short time. A unique installation technique allows MetroTile ® composite shingles to be installed on standing seam roofing, corrugated roofing and shingles.
| Fig 4.15-1 | Fig 4.15-2 |
The counter-lattice on a seam roof is installed from a bar with a cross-section of 50 mm x 50 mm with a pitch of 500 mm Fig. 4.15 — 1. Next, installation of the sheathing and the MetroTile® tiles themselves is carried out in accordance with these instructions. If, for example, a seam roof (Fig. 4.15 - 2) leaks, then it is necessary to add an additional layer of under-roof waterproofing.
| Fig 4.15-3 | Fig 4.15-4 |
For installation on top of a roof that has a wavy profile with a pitch not exceeding 500 mm, a counter-lattice is mounted Fig. 4.15 - 3. Thus, along the wave of the old, outdated roof, a block is attached, the cross-section of which must exceed the height of the wave in height, and the width of the block must be trimmed in order to fit tightly into the recess of the wave. Next, we install the sheathing and the tiles themselves.
MetroTile® in accordance with these instructions. Installation of the counter-lattice on bitumen shingles is carried out from a bar with a cross-section of 50 mm x 50 mm and a pitch of 500 mm. Next, install the sheathing and MetroTile ® shingles in accordance with these instructions. In addition, the roof can be additionally insulated Fig. 4.15 - 4.
Installation tools
Flexible roofing can be laid by 1 person; the only requirement for the roof surface is that its slope must exceed 12º. The maximum slope angle is not limited. The work requires the following materials and tools:
- knife,
- hammer,
- sealant,
- mastic,
- roofing nails,
- work gloves,
- trowel for applying mastic,
- ridge-cornice strip,
- end and cornice strips,
- waterproofing underlay carpet.
Surface preparation
The base to which the material is attached must be solid. This distinguishes the construction of a roof made of soft tiles from roofs for which other materials are used. For comparison: metal tiles are laid on a sheathing, between the beams of which a gap is allowed. This is due to the high rigidity of metal tiles. A soft roof does not have this, so it requires preliminary installation of a solid base.
OSB (oriented strand boards), moisture-resistant plywood with a thickness of 9 mm or more, as well as edged or tongue-and-groove boards are used for it. Any of these materials are laid with the seams shifted, that is, staggered, while leaving a gap of 1 cm between them.
The surface must be clean, smooth and dry. The quality of installation and service life of the coating depend on these conditions.
The roofing pie must also have the following layers:
- first, a vapor barrier material is laid on the rafters;
- if you plan to install an attic, mineral wool insulation is laid on top;
- from the outside, a waterproofing roofing carpet is attached to the base, for example, OSB boards, using the overlapping method using roofing nails; each of its strips is unfolded horizontally from bottom to top with an overlap of 15 cm.
In addition to protecting against moisture, the underlayment protects the roof from destruction if the installation of soft tiles is temporarily not carried out.
Installing shingles
The shingles of the overlying row must be moved relative to the shingles of the underlying row by at least 15 cm. The shingles forming the roof joint are trimmed along the axis. Then a cut is made in the underlayment and the roof structure itself for air passage - at a certain interval and indentation from the edge of the roof.
TECHNONICOL
A solid plastic aerator is placed on top along the axis. After which it is covered with ridge-eaves tiles using a technology similar to the construction of a roof slope.
What is a green roof and how to build it
Green roofing allows you to give the building an original look and design. This roof has a number of advantages:
- By saving space, you can grow various vegetables and berries, ornamental plants on the roof, and create a comfortable area for relaxation or business meetings in a green atmosphere.
- With the help of plants, more oxygen appears on the site, that is, they have a beneficial effect on the environment. Plants are also capable of absorbing various toxic substances if the city is heavily polluted.
- The layer of soil located on the roof cools the room inside in the summer and insulates the room in the winter.
- Thanks to this structure, the level of sound insulation increases.
If you plan to build such a roof, then you need to strengthen the structure, since a significant load will be placed on it.
Green roofing can be of two types:
The extensive type of roof is covered only with ornamental plants or lawns, while the soil layer is up to 15 centimeters. Watering is carried out only when the grass begins to grow and other plants are placed in pots. At the same time, lawns are trimmed periodically, as needed.
The intensive type of roof allows the placement of soil up to 60 centimeters, that is, you can plant not only decorative, but also fruit plants that have shallow roots. A garden or vegetable garden can be placed on a roof of this type, and the load-bearing structures must withstand significant loads. This type of roofing is expensive.
Installation of a green roof is carried out according to the principle of a conventional reinforced structure. First, a reinforced concrete base is laid, then waterproofing material is placed. After this, polystyrene foam is laid, it serves as an insulating material. Geotextiles are laid out and drainage is made from crushed stone or gravel. Then the geotextiles are laid again and the soil placement begins. After all the layers have been laid, the necessary plants can be planted.
They construct such a roof at a slight slope so that excess water can flow down without hindrance. Otherwise, it is necessary to install a drainage system, otherwise in case of stagnation of water, the roof pie will deteriorate. Moisture will begin to penetrate into the room, this can lead to the destruction of the flow, and subsequently the walls.
Thanks to this solution, the roof can be given an original look, and various vegetable and fruit plants can be usefully grown. Among such an atmosphere, you can create a play complex for children, an area for relaxation, tea drinking, and other events.
When installing a green roof, water should not be allowed to stagnate on the surface. It is better to plant plants that do not require frequent watering. You also need to take into account the load exerted by the soil located on top; the structure must be reinforced to withstand the entire expected weight. It is advisable to make all calculations before work on the construction of the roof begins.
Installation of tiles on a hip roof
50 x 50 mm bars are attached to the sheathing along the hip ridge, at a distance of 150-160 mm, which is necessary for fastening a semicircular ridge element, or at a distance of 120-130 mm, necessary for fastening a rib ridge element. Rice. 4.7 - 1. MetroTile® sheets that are adjacent to the hip are manufactured as shown in Fig. 4.7-2 and Fig. 4.7- 3. To begin with, having measured the required sheet size, marking a fold line on the sheet in accordance with it, to which an allowance of 50 mm is given, draw a cutting line. We cut the workpiece along the cutting line Fig. 4.7 - 2. Along the fold line, bend the edge up 90 degrees using a hand or special tool Fig. 4.7 - 3. Measurements are taken on the roof, but it is necessary to cut and bend the sheets on the ground.
Fig 4.7-1
| Fig 4.7-2 | Fig 4.7-3 |
Fig 4.7-4
Before you begin installing the hip ridges, it is necessary to additionally lay seals along the ridge beam. Further, the fastening of hip skates is carried out similarly to the fastening of an ordinary skate. Semicircular ridge elements are laid as shown in Fig. 4.7 - 4.
Ventilation of the under-roof space
The ventilation duct VK-1 is created thanks to counter-lattice. During the design of the cornice, air enters from below into the ventilation duct VK-2. (see Fig. 4.3 - 1). A ridge ventilation outlet is constructed to allow air to freely exit from the under-roof space at a distance that does not exceed 1 m from the ridge. Dormer windows are installed if the upper part of the roof has a sufficiently cold attic Fig. 5 - 1. The total area of the dormer windows can be no less than 1/300 of the area of the horizontal projection of the roof. Roof fans are installed if there is no cold attic or the project does not provide for dormer windows Fig. 5 - 2. Roof fans provide air outlet from the ventilation ducts in the ridge area.
The support platforms of MetroTile ® roof fans follow the profile of the selected material – MetroBond®. The fans are made of PVC, and are protected on top with basalt chips, like other parts. In order to achieve the recommended performance of the ridge ventilation outlet, roof fans are installed no further than 0.8 m from the ridge. One for every 50-70 sq.m. roof surfaces. By providing quality ventilation, roof fans prevent rainwater, snow and birds from entering vulnerable attic spaces.