15485 0 0
Rednasty June 25, 2016I'm not a wizard, I'm just learning. But I know everything about interior styles, comfortable home improvement and the transformation of Khrushchev’s apartments into luxury apartments. Hobbies: I like to give good advice.
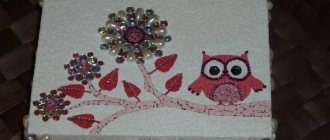
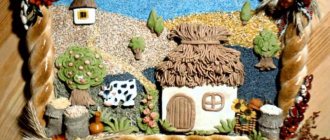
Don't throw away unnecessary boxes, it's better to make stylish boxes out of them
Think for a moment about how many shoeboxes or other small items you have thrown away in your life. Quite a lot, isn't it? What if you knew how to decorate a box with your own hands and turn it into a beautiful, and most importantly, convenient organizer for necessary things?
Today I will tell you why it is not at all necessary to throw away unnecessary cardboard boxes and what is the best way to deal with them. Well, let's get started.
Cardboard box decor using decoupage technique
There are several ways in which you can decorate even small cardboard boxes. Perhaps the simplest and most popular method is decoupage with napkins. Decorating the box in this way yourself will not be difficult. All work is carried out in several stages. First of all, you should prepare all the necessary tools and materials. To decorate the box you will need:
• Cardboard box; • Oil or acrylic paints; • PVA glue; • Decorative napkins with a suitable pattern; • Scissors; • Sponge; • Brushes.
A cardboard box of any size and shape will work. If it does not have a perfectly smooth surface, it must be sanded. After this, a layer of paint should be applied to the box. Next, you need to carefully cut out the design from the prepared napkins. The finished blank must be applied to the surface of the box and with a simple pencil mark the place where the drawing will be located. Using a sponge, apply a layer of paint to the remaining surface of the box, leaving only the areas for the drawing untouched. The paint should not contrast too much. After the box has dried, you need to glue the drawing onto it. If desired, you can cover the entire box with napkins.
Variety of materials
If all the existing boxes in the house have mysteriously disappeared, you can make them yourself using the materials you have on hand.
Cardboard or thick paper
The most common option from which you can make decorative boxes with your own hands is products from cardboard or thick paper. Interestingly, the shape of such boxes can be very different - from a traditional parallelepiped or cube to a heart- or star-shaped box.
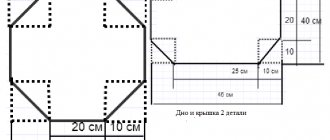
The principle of operation here is as follows: first, a development of the future box is drawn, and then it is cut out and glued together. If information about what a development is has remained in the distant past since geometry lessons, you can simply cut out individual sides of the box with allowances for gluing or fastening, and then connect them one by one. The box can be closed using a magnet or Velcro, but a simpler option with a completely removable lid has also not been canceled. Further decoration of such a container is entirely up to the conscience and imagination of the creator.
Tree
Making a box or box out of wood is quite easy if there is a man nearby who will do it. You can use small boards or plywood, but it will still be quite difficult for young ladies to fasten the parts together and cut out the original decor, for example, on the lid.
You can make original boxes from birch bark, and in different variations - either weave from strips of birch bark, or create solid boxes. You can connect parts in solid baskets using fishing line.
Newspaper tubes
Wicker decorative baskets look interesting in the interior of a kitchen or bedroom. If there are no vines or jute threads, from which products are usually woven, you can get by with ordinary newspapers, and such a basket will look no worse.
Weaving from newspaper tubes is a rather painstaking process. You need to start the weaving process by creating a large number of these same tubes: to do this, you need to wrap newspaper strips tightly around a knitting needle and fasten them with glue at the end. After this, the densest tubes need to be glued to the base box a few centimeters from each other. This will be the basis for weaving. Then you can start weaving by threading newspaper tubes alternately under or above the main tubes. At the end, the remaining edges of the main tubes can be secured inwards using tweezers, although some simply cut them off. The resulting product is painted and then decorated with ribbons, fabric, brooches or other decorations.
Egg trays
To store small items, you can create interesting boxes from egg packaging. You can take small packages, or you can take large ones, designed for 30 eggs, which are then fastened together. These cute little boxes are great for storing beads, sewing supplies or small jewelry.
Plastic bottles
There are definitely plastic bottles in every home, and you can use them to make beautiful small boxes that are not afraid of moisture. To do this, you need to cut out exactly the middle of 1.5 liter bottles to make a cylinder, and flatten it to make a rectangle. For a regular box you need 6 such parts, including the bottom and lid. Using a hole punch, holes are made along the edges of each rectangle, which are then used for crocheting and joining the parts. In order for the lid to slightly overlap the box itself, you additionally need to attach the side surfaces to it. Further design is invented directly by the author.
Of course, it’s easier to purchase ready-made decorative boxes in a store, but only with your own hands can you create something unique and inimitable, adding not only bright details to the interior, but also the individuality of its owner.
In the next video you can see how to make a decorative box with your own hands (master class).
Join the discussion! We would be interested to know your point of view, leave your opinion
DIY gift box with lid - instructions with photo
Box with a lid
Of course, the most common are square boxes with a lid. But you can always stand out and create something special. In our case, you can make a box using the origami technique. This product is suitable for those who do not want to glue something and waste time preparing the necessary templates. And the result will be no worse.
DIY gift box with lid - instructions:
Photo instructions
- We take two square sheets of paper, one of them should be slightly smaller in size by about 2-3 centimeters
- Using a pencil and ruler, draw two intersecting lines from the corners of our square
- We bend the corner at the bottom so that it falls exactly in the center, and then we bend the same side in half (see photo 3)
- We repeat this procedure with each corner.
- Next, using scissors, we make two parallel cuts in the upper and lower corners (see photo 6)
Photo instructions
- We bend the left and right parts of our workpiece towards the center (see photo 9)
- We wrap the same sides so that they form the walls of the future box
- Next, we wrap the upper and lower parts deeper, and place the left and right walls on top of this structure
- We repeat this process with another sheet of paper.
- Now they are easily connected into a box, since these two parts are of different sizes
Memorable gifts in original packaging
You can buy anything as a gift to people dear to your heart, but when the work of your own hands is attached to it, it is doubly pleasant. Using the same technique or common materials, you can decorate boxes, frames and photo albums. Small shells, dried flowers, gem crumbs or other natural material are suitable for this.
You can create a beautiful gift wrap by wrapping the box in burlap and decorating it with twine flowers.
Most often, to decorate a gift cardboard box with your own hands, you select something from the category of decorations:
- beautiful buttons;
- artificial pearls;
- small and medium beads;
- small beads;
- pieces of a chain, old brooches, earrings, pendants.
Decorating shoe boxes is not only useful, but also very exciting.
You can decorate gift publications (books, notebooks, diaries) with such materials. A specially designed cup box makes a trivial gift an especially memorable gift. A beautifully decorated shoe box makes great packaging for home baked goods. In an original container you can present something to your boss or friend for a sweet feast. These are chak-chak, cookies, homemade chocolates or cakes according to your own recipe (it will be written inside on the lid).
Paper box decor
To decorate the box you will need:
- compact box;
- paper for the base (photo printout, textured wallpaper, hologram);
- good glue;
- stapler and tape.
You need to wrap the box and lid with background material, but so that there are fewer bends. The corners need to be folded very carefully and the paper secured by cutting off the excess.
Just “try” the paper to the box and fold the edges as shown in the photo
Carefully fold the paper along the marked fold lines, then unfold the sheet and make cuts
Place the box on the blank and glue the paper with a glue stick
The bottom of the box can be lined with velvet paper or thin cardboard, which will hide the folded corners. We wrap the lid in the same way.
If you are using double-sided paper, the cover can be covered with the reverse side
Next, we decide how to decorate the box with your own hands on the lid in an original way - the decor can be voluminous. These are ribbons and paper figures - hearts, flowers, stars. The decoration of the lid can be varied depending on what will be stored inside or presented as the main gift.
Decorating with fabric
Leftover beautiful fabric is an excellent material for needlework, think about this when thinking about how to decorate a shoebox with your own hands. Pasting will not work, since the adhesive substance often bleeds through the fibers. You have to limit yourself to tightening the box and its lid. You can secure the fabric with double-sided tape and staples.
Let's prepare fabric, lace, glue, double-sided tape, thread and stapler
Suitable for covering a cardboard box:
- leather and eco-leather (imitation leather, dermantine);
- velvet and velor;
- jacquard and brocade;
- denim;
- thick silk and linen;
- furniture flock and artificial suede;
- guipure (for decoration only, it is difficult to hide seams and corners).
The pattern of colored fabric is also important; it will give additional meaning to the gift and decorate the box with your own hands. Bright colors will make the offering more spectacular, polka dots and flowers will make it feel homely, hearts and roses will make it more sensual and romantic.
We cut the fabric to size, stick tape on the inside and cover all sides of the box one by one.
We secure the edges of the fabric with glue at the corners and then decorate them with lace.
For the lid of the box it is better to use a different fabric - the decor will be much more interesting
Decor for decoupage boxes
Usually, original and unusual spice sets and sweet stands have a high price. But you can save money by decoupaging a shoe box with your own hands. You can choose any style, decoration and box size to suit your kitchen interior.
If you are decorating a box for a children's room, then you should choose the appropriate designs. It is better that the design is made in one stylistic direction.
Decorating shoe boxes
Shoe boxes can be decorated in several ways - painted with acrylic paints, covered with cotton fabric or paper using PVA glue, self-adhesive film, paper wallpaper, old magazines or geographical maps. After processing, the boxes become very durable.
You can use small paper fans, buttons, beads or rivets as decoration. You can create different styles of boxes during the pasting process. And such items will not need to be hidden from prying eyes; on the contrary, they will serve as additional decor for the interior of your home.
An excellent material for creating such boxes and decorating them will be the pieces and sections of wallpaper left over from the renovation; in addition, you will need double-sided tape or PVA glue.
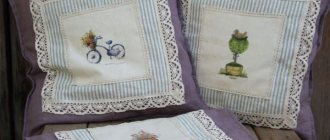
Fabric is also suitable - for example, a piece from a damaged dress, old jeans, a skirt that has become too small. Using natural material you can turn any item into an exclusive piece.
You can also decorate the box using a regular rope or braid; just apply glue and stick it on. It can be either straight stripes or various zigzags and convolutions.
Ways to decorate a shoe box
A shoebox can become a unique decorative object, such as a briefcase, and no one will suspect what it is made of.
It is enough to use old straps, thick braid, buttons, buckles or buttons for decoration.
Original gift
Shoe boxes are ideal for gift packaging. It is enough to show a little imagination and this item itself will turn into an excellent gift.
Just cover the box with fabric, add bows or artificial flowers, and the beautiful organizer is ready for use.
Organizer for small items and handicrafts
If you're into crafts, shoe boxes are a great way to store all your essentials.
And by making a hole in it, you can store chargers, which will always be in one place.
Placement of shoe boxes
Decorated shoe boxes do not need to be hidden; they will fit perfectly into the interior and serve as an additional decoration.
You can store decorated shoe boxes on shelves, shelves or racks.
You can also make small shelves from shoe boxes for various pleasant little things.
Shelves
You can also use a shoebox as a decorative object on the wall, turning it into a shelf. It is enough to remove the lid, cover it with paper or paint.
Then attach it to the wall using the material you find most suitable and add a few decorative items. Just keep in mind that these items should not be too heavy.
If you need to make a small cardboard box for gift wrapping, then options, models and templates can be seen and downloaded in this article.
Some practical tips for those who decide to decorate shoe boxes with their own hands using scrap materials:
Before you start work, carefully measure the material for packaging packaging and think over the overall design concept of the product.
Boxes need to be decorated not only on a spacious surface, but also with good lighting. It is advisable if the lighting is natural.
To work, you may need sharp scissors, good PVA glue, thread, a stapler and staples for it, a ruler and a stationery knife, chalk, a simple pencil and much more.
And for dessert, a useful video for visual reference.
Loading…
Loading…
Origami box
Origami is a popular type of paper crafts on a wide variety of topics. On the Internet you can find master classes on DIY boxes and detailed instructions on how to make a beautiful box out of paper using the origami technique. Since the box is made of paper, it is better to store lightweight items in it.
A box made using this technique can be of different sizes; they can be used both at home, for example, for storing napkins, jewelry, and as gift packaging.
Description of technology
What do we need
Any instructions for performing a particular job should begin with a list of everything necessary. Our case will not be an exception, so first we will figure out what we need.
Corrugated cardboard will also work
First of all, we are looking for the box itself. Since trellises are a fairly dense and durable material, they are not suitable for small products. To prevent the walls of the box from being deformed during pasting, it must be made of thick cardboard and securely fastened with either glue or metal staples.
Advice! It is best to use shoe boxes, household appliance packaging, etc. Containers made of so-called corrugated cardboard are also suitable, but their edges must be carefully sealed.
- Next - wallpaper. Since we don’t need excessive durability, paper trellises (preferably single-layer) are quite suitable. You can also use non-woven fabric or textiles for work. In general, what is left after finishing the room is what we take!
- The third required component is glue. In principle, wallpaper adhesive is also used for this work, but it is better to buy high-quality PVA. Despite the fact that the price of this material is low, it is an almost ideal choice for decorating small objects.
In addition to the box itself, trellises and glue, we may need varnish to protect the product from moisture and damage, paint (if appropriate wallpaper is used for painting), materials for decoration, etc. It all depends on how you see the result of your work.
Model scalpel with attachments
Separately, it is worth taking care of the equipment.
In principle, a one-time job can be done with almost any cutting tool, but if you want to decorate several boxes, then you should stock up on everything you need according to this list:
- Scissors with straight blades.
- A knife with a replaceable cutting element (a model scalpel will do).
Advice! To avoid damaging the table during work, you can lay a special thick rubber mat on it. This coating self-heals some time after a cut, so you don’t have to worry about the force of pressure on the tool.
- Metal ruler.
- A protractor and compass (needed if the box is not rectangular in shape).
- Stapler for temporary fixation.
- Brushes for glue and decor.
It is more convenient to cut on a special mat
Pasting process
There are several methods for decorating boxes with colored paper and trellises. Below we present the easiest one to implement: you are guaranteed to be able to master it yourself.
So, we carry out the work according to the following scheme:
- Cut a piece of material from the remaining roll. We choose the size of the fragment with a good margin so that there are no joints on the walls of the product.
- We lay out the trellises on a flat surface and place the box on them.
- We draw along the perimeter of the bottom with the blunt side of the knife: this will help us make the folds along these lines more even and clear.
- We wrap the walls with trellises, bending the edges inside the container. At the same time, we try to mark the folds in straight lines, preventing the material from being removed.
Wrap the box as shown in the photo
- Unfold the wallpaper and remove the box. Using a ruler and a modeling knife, cut off the excess material.
- Using a knife or scissors, cut the lines along which we will fold the wallpaper. Mark the folds with a blunt instrument.
Note! If you have drawing skills, then you don’t have to worry about wrapping the product itself, but simply build a pattern according to the measurements taken. In principle, with due care, both methods give identical results.
The pattern can also be created on a computer.
Next we proceed to pasting:
- First, apply PVA glue to the bottom of the box and install it on the decorative material in the marked place. At the same time, you should not apply too much glue, as this can lead to wetness and deformation of the wallpaper.
- Next, we coat the walls and glue the side parts to them.
- Lastly, we glue those areas that should be located inside the container.
To make our box look as neat as possible, we need to “ennoble” it from the inside. To do this, the bottom, and sometimes the walls, are sealed with a single-color material. Most often, thick white paper is used for this purpose, but you can also use beautiful fabric (satin, velvet, etc.).
Application in different rooms and interior styles
Boxes and caskets will become an indispensable assistant in any room: from the living room to the bathroom. In the living room, large boxes can be used to store entire sets for parties with friends, where board games, cards or other entertainment accepted in the company will fit. You can also store photo albums or individual photo cards, rarely used dishes, tablecloths or craft kits. The advantage will be that you will not need to separately take out various items from the drawers of the table or cabinet, everything will be in one box.
How to use decorative boxes in the interior
In the kitchen there are even more things to store in boxes: dishes, towels, food supplies in the form of cereals, tea, coffee, etc. By the way, decorative baskets look especially good in the kitchen interior, for example, for storing fruits, seasonings or as flower stands.
Decorative storage boxes in the kitchen interior
In a nursery, bright decorative cardboard boxes can be used for toys, cubes, construction sets, clothes and shoes, books, coloring books and many other things. It is better to label the boxes together with your child to teach your child to put things in the right places. But a timely parental inspection of his boxes will never hurt.
Decorative boxes in the interior of a children's room
In the bedroom, in separate baskets you can store bed linen, various cosmetics for use before bed, magazines or some intimate items. If the bedroom is combined with a dressing room or boudoir, then some kind of “storage” for cosmetics, jewelry, accessories, hats, etc. would be appropriate. If numerous things are stored in closed or even open boxes, any room will not look cluttered.
Decorative storage boxes for the bedroom
Open decorative boxes look great in the hallway interior. They can be placed on shelves or even hung on the wall. Here you can store various little things in the form of keys, umbrellas, players, without which it is impossible to go outside, shoe care products, newspapers, torn buttons and replacement laces. What might get lost if left in the depths of the apartment will never be lost in a basket in the hallway.
The use of decorative boxes in the bathroom interior
In the bathroom, boxes and baskets can be used to store towels, some washing supplies, and household cleaning products, if they are stored here and not in the pantry or hallway. The only thing is that it is better not to use decorative cardboard boxes in the bathroom, since high humidity will negatively affect them.
Decorative boxes in the bathroom
The decorative function of boxes is very important: by choosing a certain color, shape and pattern, you can successfully emphasize the style of the interior. Thus, the soft pink tones of round boxes will perfectly emphasize the femininity and tenderness of a bedroom or boudoir, plastic translucent containers will fit well into a high-tech or minimalist style, boxes with interesting and voluminous decor will look harmonious in classic interiors, a certain ethnic pattern can be selected for interiors in Japanese, African or Scandinavian style. Wicker decorative baskets look appropriate in the interior of a country house or in the eco-style of a city apartment.
The use of decorative boxes in the interior of an apartment
For almost any interior style and any room, you can create decorative boxes with your own hands by choosing the appropriate material or decorating an existing container.
What boxes can be used
In addition to the fact that decorative boxes designed in-house are an interior decoration, they also help organize free space in the house. This especially applies to apartments whose area is small.
If you put extra things in boxes, then they will be easy to find later. In order to remember what purpose the box is intended for, it can be marked with a specific color scheme. This method will help both adults and children get used to order. This indicates that decorating the box will not only help decorate the interior, but will also instill neatness.
It is important to note that the box cannot be left in its original form, because it will spoil the appearance of the interior. Initially, choose a style, and then apply it to a specific box
There are many options for using the item in question. Depending on the size of the box, they can be aimed at different purposes. For example, storing rings and other jewelry.
If there are kids in the apartment, then the box can act as a place where pencils and other office supplies will be located. The box can also be used to store a phone charger. For each room you can choose your own box design style.
Option for decorating boxes for the kitchen:
Original boxes
If you want to make the packaging unusual, you can show your imagination and make a stylized container for a gift.
Cake box
A good idea would be to design the packaging for a gift in the form of its contents. For example, you can make a box in the shape of a cake.
For work you need to stock up on satin ribbons, velvet paper, fabric braid, and various decorative elements.
- In this case, the dimensions and shape of the blanks are copied from the finished cake container.
- To attach parts of blanks and decorative elements, it is more convenient to use double-sided tape.
Particular attention must be paid to the design of the lid. You can copy the design of a real cake or a suitable picture from the Internet.
You can decorate packaging for other gifts in a similar way.
Decor of ready-made boxes
If you want to make an unusual box with your own hands for gifts or storing items, you can use the finished product as a basis. Shoe boxes are a good basis for decoration; they are durable and comfortable in shape.
For decoration, you can use gift paper, lace or thick fabric, such as linen or denim.
In addition, you need to stock up on PVA glue, scissors, measuring tape, a ruler and finishing elements.
The parts for gluing are cut out based on the shape and size of the base. They are glued using PVA glue
In this case, it is important to apply the glue in an even layer and carefully smooth the glued fabric onto the surface of the base, otherwise bubbles may form.
After the product has dried, you can start decorating. Depending on the idea or theme of the gift, you can decorate the box in a New Year's or folk style.
Penoplex box
Unusual materials can also be used to make original packaging boxes. For example, a building material for thermal insulation called penoplex. It does not absorb moisture, is durable, but easy to process and glues well.
Heart-shaped box
To work, first of all you need to make paper patterns. You will need a heart-shaped bottom and two pieces for the sides. After cutting out the parts from paper, it’s a good idea to “try on” to ensure that the sizes of the bottom and sides match.
- After this, parts are cut out of the foam sheet using a sharp knife.
- The edges of the parts are treated with sandpaper.
- It is better to glue the parts together with hot glue.
Making boxes for gifts and storing items is a simple but fun creative process. Original design will make any gift more enjoyable, and homemade boxes for storing small items will not only decorate the interior, but will also help save the family budget.
How to cover a box with fabric with your own hands in a step-by-step lesson
With a set of tools for such a simple task, everything is quite simple. Ruler, chalk or fabric marker, scissors. It is advisable to take scissors that are used to cut only fabric - then the cutting of parts will be quick and accurate.
There shouldn’t be any difficulties with materials either. The best glue to use is Moment “Crystal” or “Gel”. This is a transparent, non-toxic glue that turns into rubber when hardened. It does not deform either the box or the fabric, does not leave stains, and the fixation is more than reliable. If the work involves thick cardboard - for example, a shoebox or similar goods, then it is quite possible to use PVA glue, but you need to apply a lot of it, and it will bleed through the fabric. After drying, this will not be visible, but the fabric will look as if it is starched.
The choice of fabric directly depends on the purpose of the box that you will decorate. The easiest and most accessible material to work with is denim. Of course, you also need to know how to handle stretch denim, but even stretchy material is much easier to work with than satin. Satin and similar fabrics are very beautiful materials, but they are very inconvenient to work with.
Another suitable material option is burlap. The combination of this material with jute, lace and other natural materials will allow you to create a very specific style, or simply a cozy atmosphere.
Application options.
Where and in what capacity will boxes covered with fabric be appropriate and useful? First of all, in everyday life, for example, as organizers. Especially where a box covered with paper will not last long, for example, in the bathroom.
As an organizer for needlewomen who constantly deal with ribbons. Holes are made in the box covered with fabric and eyelets are inserted. The ends of the tapes are pulled out into the resulting holes, the reels with which lie inside the box. Thus, the necessary tape is always at hand, but the tapes themselves do not get tangled.
A box for storing memorabilia or jewelry - especially if it is covered with fabric not only on the outside, but also on the inside.
It is also better to cover an organizer for underwear, socks and small towels with fabric, since even dense and thick cardboard will quickly become unusable from constant use.
To summarize, we can safely say that the option of decorating a box with fabric is best suited in cases where the use of the box will be long and intensive. The fabric is less susceptible to moisture and sunlight, therefore, it will last longer.
It’s quite simple to cover a box with fabric, but it’s better to proceed step by step and be guided by the corresponding photos.
To work you will need:
- Box
- Ruler, fabric chalk or felt-tip pen, scissors, paper clips
- Glue
- Textile
First step. Cut out the fabrics. A box is placed in the center of the piece of material, the bottom is outlined along the contour. Use a ruler to measure the height of the walls of the box, and set aside the same distance along the fabric, plus 5 cm for the inner fold.
Second step. The bottom of the box is coated with glue and glued to the fabric. Carefully smooth the fabric from the center to the edges, but do not need to stretch it.
Third step. Draw a line from each corner, and another one after two centimeters - as in the photo.
Fourth step. Cut out the resulting outer square and make a cut along the diagonal line.
Fifth step. Fold the resulting allowances on the first side onto the adjacent sides of the box and glue them. On the next two sides, one edge is folded inward and glued, and the second is glued to the next side with an overlap. This distribution of fabric will give smooth and neat edges and corners. Working with each side, not only the corner allowances are sealed, but also those allowances that were left along the height of the box. For convenience, you can make cuts with scissors.
The last side is glued a little differently. The allowances are folded inward, and the side is covered with fabric flush with the corners. Ready!
The inside of the box can also be covered with fabric. This is done according to a similar principle as with the external part. A layout is drawn on the fabric - the bottom and walls, allowances for folding on the vertical sides, but the allowance for horizontal folding will be an order of magnitude smaller - after all, the upper edges are already decorated. The pattern is cut out, the same is done with the corners as with the pattern of the outer part. First, the fabric is glued to the bottom of the box, then one by one - the sides. The top allowances are folded inward and glued last. To secure the fabric there more tightly, you can use paper clips.
