Recommended types of stoves for small spaces
You can build a brick oven for your garage yourself, but before you start, explore alternative options. This will make it possible to finally verify the relevance of the stove design for the garage space.
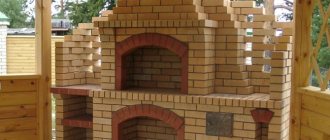
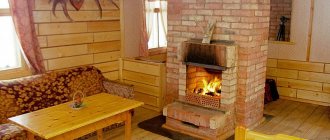
Types of brick stoves.
To heat such an area, you can use the following heat source options:
- Inverter air conditioner. This is the best option for a temperate climate, the purchase and installation of which will cost about 25 thousand rubles. The unit is able to maintain optimal temperature conditions and consumes no more than 200-300 watts of electricity.
- Gas convector. A budget option that can operate autonomously on mains, bottled gas. The average need for thermal power is 1-1.5 kW at a cost of 8 thousand rubles.
- Potbelly stoves made of metal, solid fuel. They are compact in size, do not operate autonomously, and operate on wood and coal.
The relevance of installing a brick stove will become clearer if you study the main parameters of such a design: advantages and disadvantages.
Let's celebrate! Budget inverters are not able to operate at temperatures below -25 degrees Celsius.
Brick stove in the garage: advantages and disadvantages
It's time to dwell in more detail on the specific advantages and disadvantages of brick stoves in garages. Let's start with the positives.
- The brick structure differs in a positive way from its cast iron and steel counterparts: it cools down much longer after kindling and retains heat for a long time. Here the heat capacity is doubled, since the brick itself retains heat well, in addition, the structure as a whole weighs a lot.
- A brick oven allows you to maintain the desired temperature thanks to the presence of a blower and dampers. If you learn how to use them correctly, you can provide a comfortable microclimate in the garage.
- Such equipment is very economical. A particularly budget-friendly option is obtained when the garage owner does all the work himself. Then you can build a brick oven, investing literally 10-15 thousand rubles in it. You will need to purchase the brick itself, cement for preparing the mortar and cast iron.
- The heating power will depend on the size of the firebox. You can make a small stove if the garage has a modest area and is well insulated.
- During operation, costs are also minimal. Coal and firewood are the most economical after mains gas.
Unfortunately, there are also some disadvantages.
Of course, a brick oven will need to be lit every day if you want to maintain a certain temperature in the room for a long time. In addition, it will also not be possible to quickly warm up the air with it: the brick takes a long time to cool down, but it also heats up the same way.
Cost-effectiveness and minimum construction budget are also controversial issues. The fact is that a stove made of refractory bricks will be more efficient and reliable. And it costs about 5 times more. In addition, car enthusiasts often want to make the structure more aesthetically pleasing, and facing bricks are also expensive.
The efficiency immediately drops sharply if you limit the flow of air through the blower, since the products of incomplete combustion are carried into the chimney due to draft. The difficulty here lies in the operation of all traditional inexpensive stoves. A gas generator boiler can solve the problem, but it is too expensive an option and completely unjustified from an economic point of view in a garage environment.
Alternative options
Experts offer alternative solutions. For example, you can purchase a gas convector. This unit operates autonomously, thanks to a gas cylinder. Such equipment costs approximately 8 thousand rubles. Some people choose inverter air conditioners. Here the budget will be 25 thousand.
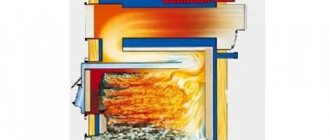
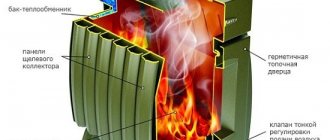
Another interesting option is a long-burning stove. It is also in quite high demand among those car enthusiasts who are looking for the most economical methods for heating the garage. You can see in the diagram how such a unit is constructed. The big advantage of the device is long-lasting combustion and heating of the room. You can add fuel, and then it will gradually be consumed throughout the day. The secret is that the combustion process is gradually replaced by smoldering with the release of heat. The efficiency here is extremely high.
A waste stove is also a good heating device. The savings are based on the characteristics of the fuel - it is already used engine oil. But here, too, not everything is so simple, since the oil will have to be purified in a special installation, otherwise the unit will quickly break down.
The traditional potbelly stove is also still trusted. It is relatively easy to make from metal pipes and will quickly warm up the garage. True, the potbelly stove also cools down instantly.
Advantages
A self-built stove in the garage will delight the motorist with a number of positive qualities:
- the ability to create optimal temperature conditions indoors, which will avoid the risk of unpleasant odors, mold, and mildew. By adjusting the dampers and blower, a person can reduce the rate of combustion of firewood and coal. If you add wood to the firebox, the air temperature will rapidly increase. It will be much more pleasant to work inside a warm room, and the risk of catching a cold when repairing a car in the winter will be reduced;
- long cooling period. A high-quality brick stove is superior in this parameter to structures made of cast iron and steel. After adding fuel to the firebox, the space will remain warm for a long time;
- The larger the brick structure, the more powerful it will be in terms of heating the surrounding air. However, even a tiny structure, if constructed correctly, can make a small garage warm;
- the costs of purchasing coal and firewood are significantly lower than in the case of using main gas.
Pros and cons of the solution
We have formulated the conditions. Now let's see to what extent a brick oven for a garage satisfies them.
Advantages
- A brick oven is undoubtedly capable of providing an acceptable temperature: by adjusting the dampers and the blower, you can limit the rate of combustion of wood or coal. If it is necessary to increase the room temperature to a more comfortable one, you just need to add fuel and ensure air flow into the firebox.
- A brick stove for a garage differs favorably from steel and cast iron in that after lighting it cools down much longer: the high specific heat capacity of the brick is combined with the solid mass of the structure.
- The rated thermal power depends linearly on the size of the firebox. The lower the requirements for heat transfer, the smaller the final dimensions of the furnace will be. No problem.
- If you do all the work yourself, the costs will not exceed 10-15 thousand rubles. You will only have to buy bricks, some cement and cast iron. Compared to most alternatives, the costs look quite modest.
- Operating costs will also not be ruinous: after mains gas, wood and coal remain the cheapest sources of heat.
Comparative cost of heat obtained in different ways.
Flaws
- A brick stove for a garage is really good because it takes a long time to cool down after lighting. But it also takes a long time to heat up. It will not quickly heat the room to a comfortable temperature.
- There is no need to talk about complete autonomy. A brick stove needs daily lighting: otherwise the temperature in the room will drop below acceptable levels.
- When the flow of air through the ashboard is limited, the efficiency of the stove drops sharply: the products of incomplete combustion are carried into the chimney by draft. However, this is a problem with all cheap stoves: only gas generator boilers, which are clearly more complex and more expensive than the reasonable maximum for a small garage, lack it.
- The minimum amount of expenses means masonry from suboptimal materials. If building bricks can cost 6-7 rubles apiece, then the optimal refractory (fireclay) brick for lining a firebox will cost 4-6 times more. An attempt to make the stove more beautiful by laying stove facing bricks will increase costs even more.
Flaws
Drawing of a stove for a garage.
Before starting work, it is important to study the disadvantages of a brick oven for a garage. Let's describe them in detail:
- Long heating time of the structure. This fact entails the impossibility of quickly heating the space to a comfortable air temperature.
- The need for manual labor. It is impossible to achieve complete automation of such a unit. You will still have to melt it with your own hands every day, otherwise the temperature inside the room will quickly become sub-zero.
- Risk of a drop in product efficiency. This situation is possible if a high-quality ventilation system is not installed indoors.
- Significant costs for construction and finishing work. The average cost of building bricks is 7 rubles/piece; a higher quality fire-resistant type costs 35 rubles/piece. If you want to give the stove an attractive look, you can use stove facing bricks, which will increase the level of costs even more.
Self-construction will help to significantly reduce the cost of building a brick kiln. You will only have to spend money on purchasing materials.
What requirements must be kept in mind to ensure high-quality heating
Experts insist that absolutely any size stove, built with your own hands in a brick garage, must meet certain requirements.
Only then can you be satisfied with the results of your work:
- A brick oven for a garage with your own hands must certainly be safe. This can be achieved by adhering to all standards for the safe construction of using such a unit. You should not save excessively when purchasing materials; their quality will guarantee the normal functioning of the furnace;
- To use the structure comfortably, it must have dimensions that would suit a particular garage. An excessively large stove will overheat the room, and a small one will not be able to cope with its heating;
- Before starting work, it is important to decide on the current shape of the stove. The simplest option is a rectangle. It is worth choosing it if you have little experience in construction work.
On a note! There are no special requirements regarding the design of the future product. It all depends on the taste preferences of the garage owner.
Construction instructions
You can build a brick oven in a garage with your own hands quite quickly if you approach the work responsibly.
Drawing of a brick stove.
Work begins with solving important points:
- selection of optimal dimensions for the future structure. To heat a garage for one car, a stove measuring 60x60 cm is suitable. Its walls will consist of 2 bricks.
- choosing an installation location. Place the brick stove at the back wall of the room, since that is where it will not interfere with the entry of the car;
- assessing the need to organize a foundation. It will only be needed for a stove whose weight exceeds 750 kg. For less heavy structures, there is no need to pour a foundation;
- choosing the optimal thickness of furnace seams.
When using ordinary bricks, the stove masonry should have seams 5 mm thick, when using fireclay bricks - 3 mm. Bricks folded this way will be reliable and durable.
How to build a brick stove without the help of an experienced stove master? We'll talk about this later.
Overview of possible options
For the garage, the following options for homemade stoves are most often used:
- brick wood stove;
- potbelly stove;
- long burning stove;
- furnace in progress.
Each of these DIY garage oven options has certain advantages and disadvantages. Some units can be combined to expand your garage heating options and make this process more convenient and profitable.
#1: Brick – problems may arise
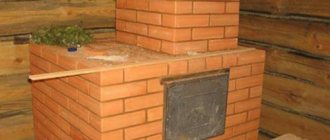
A brick oven is sometimes made in the garage, although this is not the easiest option. A device with a base of two by two and a half bricks can cope with heating a small space.
However, such a stove does not heat up too quickly, and then gives off heat for a long time. Therefore, it is not very suitable if the owner only enters the garage for a short period of time.
It is almost impossible to create the warm cap mentioned above using a wood-burning stove, since it is not capable of producing a sufficiently intense flow of warm air. It is recommended to heat such a stove in advance, about an hour before starting work.
To build this type of wood stove, you will need fireproof and fireclay bricks. Fireclay and fireclay powder should be added to the masonry mortar. The fuel chamber is made at the level of the second to fourth rows, of which there are usually no more than nine in the masonry. Of course, you will need to install a chimney.
It is also made of refractory brick, and a steel liner is placed inside. The chimney exits through the roof; the masonry must be neat and even.
When choosing a brick oven for your garage, you should remember that constant changes in moisture after some time will lead to a deterioration in the viscosity of the masonry mortar - the device will not last too long.
#2: Potbelly stove - simple and reliable
The simplest option for a homemade stove for the garage is to create an ordinary potbelly stove. It is not difficult to make from scrap materials. Sheet metal, an old gas cylinder, a piece of pipe or an unnecessary barrel will do.
The main thing is that the metal thickness is at least 5 mm. If a cylindrical object is used, its cross-section must be at least 300 mm.
For the chimney, it is recommended to use a metal pipe with a wall thickness of 2-3 mm and a cross-section of at least 120 mm. A combustion chamber is cut out of metal or a blank (cylinder, pipe, barrel, etc.). At the bottom there is a grate for fuel, and under the grate there is a box for collecting ash. Metal 3 mm thick is also suitable for this element.
The chamber is closed at the top and the chimney is brought out vertically. All that remains is to attach the legs from a metal corner. To increase heating efficiency, some craftsmen weld small metal “wings” to the sides of the potbelly stove.
This will increase the area of contact between the air and the hot metal and speed up the heating of the room.
For a potbelly stove, you should prepare a flat and durable base, covered with fire-resistant materials. Surrounding walls should also be protected from possible fire. In addition, there should not be any foreign objects in the immediate vicinity of the stove.
The surface of such a stove can heat up to very high temperatures. You should be aware of the danger of getting a serious burn if you accidentally touch it.
When making a potbelly stove from a gas cylinder, you need to be careful. There have been cases of explosion of gas residues when sawing such a container. Experts recommend pre-filling the container with water to displace flammable residues.
This video demonstrates the experience of making a classic potbelly stove:
#3: Exhaust furnace – efficient, inexpensive
The design of such a unit is a little more complicated than a potbelly stove, but its efficiency breaks many records. Every car enthusiast can find used oil, and if there is not enough of it, then such fuel can be purchased at almost any car service center at a more than reasonable price.
Unlike a potbelly stove, such a stove is made of two sections connected by a perforated metal pipe.
In the lower section, waste oil burns, which produces some heat and turns into a flammable gas. This gas enters the second combustion chamber through the pipe, simultaneously mixing with a small amount of air. The resulting gas mixture, when burned, produces an impressive amount of heat.
The first chamber, in which the waste oil is burned, can be made of sheet metal or a suitable metal container of a square, round or rectangular configuration.
In order for the combustion process to proceed correctly, a damper is installed in this container to regulate the amount of air entering the chamber.
At the bottom you need to attach legs from a corner or thick wire, the main thing is that they are strong enough to support the metal structure. A round hole is made at the top and a perforated pipe is inserted into it.
Typically this pipe serves as support for the upper chamber and is also exposed to high temperatures from burning oil.
Therefore, you will need a structure with walls thick enough to withstand both the additional weight and temperature. Otherwise, it will burn out very soon. The upper chamber is usually made in the form of a short and wide cylinder made of thick metal.
A chimney must be placed on top - a side position of the pipe to remove smoke gases is not allowed in this case.
The requirements for installing a furnace during mining are approximately the same as for a potbelly stove: a level and solid base, protection of the surrounding area from overheating and fire. Almost any waste oil can be burned in such a furnace: diesel fuel, transmission compounds, fuel oil, diesel fuel, kerosene, etc.
You should refrain from experimenting with compositions that are characterized by easy and rapid ignition, i.e. from burning gasoline or various solvents in such a stove.
A small amount of gasoline can be used to ignite the waste. And gasoline spilled directly near a hot stove can lead to a serious fire.
It is impossible to officially obtain permission to install such a stove; this is prohibited by fire safety standards. Owners of a private garage have the right to install such a unit, but they bear full responsibility for a possible fire.
An interesting solution could be a hybrid of a potbelly stove and a waste furnace. To do this, the chamber in which the waste is burned is equipped with a curved perforated tube, and the potbelly stove is made two-chamber so that not only wood, but also waste oil can be burned in it. The unit can be used for two types of fuel depending on the situation.
Additional options for homemade garage stoves are described in these articles:
A detailed overview of the manufacture and operation of the furnace during mining is presented in the video:
#4: Long burning stove – high efficiency
The operating principle of this stove allows you to obtain the maximum amount of heat when burning ordinary wood. Large quantities of fuel are loaded into the combustion chamber, and a moderate amount of oxygen is also supplied there. In such conditions, the wood does not burn immediately, but slowly smolders, releasing flammable gas.
This gas burns in the upper section of the combustion chamber at a very high temperature, which ensures the high efficiency of this type of device.
The process of creating an interesting version of a long-burning stove is shown here:
You need to load fuel into a long-term combustion furnace no more than twice a day, so such devices are more suitable for constant heating of a garage or for use over a long period of time.
The easiest way to make a long-burning stove is from a metal barrel with thick walls. A container measuring about 200 liters is considered optimal for such purposes. On top you need to make a lid with a chimney and a hole to supply fresh air necessary for combustion.
The cross-section of the chimney should be about 150 mm, and the air pipes should be 100 mm. An important element of this type of stove is the weight that presses down the smoldering wood. To make it, you will need a metal circle slightly narrower than the diameter of the barrel, as well as two pieces of channel that will act as a weighting agent.
A hole is also made in this element for air supply, to which a pipe with a cross-section of 100 mm is then welded. It should be slightly longer than the height of the stove body.
A loading hole for firewood with a door is made on the side, and a grate and a container for ash are placed at the bottom, and strong legs are welded.
Firewood burns almost completely in a long-burning stove, leaving a small amount of waste, so a large ash pit is not needed here. To start such a stove, you need to load firewood on top, press it with a weight, then cover the structure with a lid, threading an air pipe into the corresponding hole.
What you will need
We will announce a list of current materials and tools that are needed to build a brick garage with your own hands and install a stove inside it.
| Tools: | Materials: |
| yardstick | brick |
| building level | doors of the firebox, ash pan, chimney valves |
| furnace hammer | metal wire |
| container for solution | steel chimney pipe |
| square | sand, crushed stone, cement, clay |
| plumb line | roofing felt |
Step by step plan
Scheme of a furnace for a garage.
Let us describe the main stages of the work:
- drawing up a drawing, diagram;
- performing calculations for the purchase of materials;
- organization of the foundation. It will be necessary to waterproof the base using 2 layers of roofing material;
- a concrete foundation is poured over the waterproofing;
- using brickwork, a brick ledge is formed, on top of which a grate is mounted;
- the firebox is made of refractory bricks;
- Doors and blowers are installed in the front wall of the structure. The firebox doors and ash pan will need to be installed with special attention. Wrap them with a cord of asbestos, and then plant them on a clay solution;
- using metal corners to create a brick lid;
- brick chimney laying. Wire is also used, which must be laid between brick rows of bricks and fixed on the ears of the doors;
- installing the metal pipe will complete the job.
It is important to prepare the correct solution. This is done like this: fill the clay with water and leave for 2-3 days. Then, the mixture must be thoroughly mixed until lumps are eliminated. The instructions are simple, if you follow them without errors, the results will certainly please you.
Learning to make a brick oven in the garage
Now you will learn useful tips: they will help you properly lay out a brick stove in the garage.
- If your room is designed for one car and has fairly modest dimensions, a stove with dimensions of 60 by 60 cm will be enough for you. In this case, the walls are laid out in two bricks.
- The best place is near the back wall, further from the gate. Then there will definitely be no obstacles to free entry.
- You will need reliable waterproofing. Ruberoid is laid in two layers under the base of the stove. A base of two bricks is already installed on it.
- When the stove is small, it will not weigh as much, although the material is dense. Typically the entire structure weighs approximately 600 kg. When the floor in the garage already has a reinforced screed, there is no need to pour a special foundation for the stove.
- You still need to keep an eye on the size and weight of the stove. So, when its weight exceeds 750 kg, it will be necessary to pour a separate foundation, which is not connected to the main foundation of the room. It must be made of reinforced concrete.
- The rows following the base, up to the chimney, are laid out on a clay mortar. It must have an optimal composition. To determine how “correct” the clay is, do a simple test: roll a five-centimeter ball and dry it. It should not crack in the sun. In addition, the durable ball will not break, even if it is dropped from a meter height onto concrete.
- Remember how to prepare the correct solution. The clay is soaked in water for three days. Then the mixture needs to be mixed well and all lumps removed.
- You can take red, solid facing brick. Silicate cannot be used at all for laying a stove. Fireclay bricks are more suitable for the firebox, since they are more durable and fireproof.
- Keep an eye on the thickness of the seams, as there are also certain requirements here. For masonry made of fireclay bricks, the thickness of the seam is 3 mm, and for red bricks - 5 mm.
- The doors of the firebox and ash pan must be carefully installed. They are wrapped in asbestos cord and then placed on a clay solution. Wire will come up during the installation process. It is laid between rows of bricks and fixed on the ears of the doors.
- The best solution for a chimney is a removable design. You can make a chimney from a so-called sandwich pipe. It is made of two-layer stainless steel, and basalt wool acts as a layer. In summer, the pipe will turn into a ventilation pipe.
If you are careful and seek advice from a professional, you will end up with an excellent brick stove in your garage.
Look at different masonry schemes: you can choose the one that suits you best.
