What is siding
The first siding appeared in North America. Initially, these were wooden boards that were fixed to the facade in a certain way. Each upper part hung slightly over the lower one, creating a kind of visor. Due to this, precipitation did not penetrate under the cladding, and the walls remained dry.
Modern siding is thin panels made of plastic, metal, cement, wood or composites. It is similar to its ancestor in the way it is attached. The locks between the elements are arranged according to the tongue-and-groove principle, making the cladding waterproof.
The most popular and inexpensive siding is made of PVC or polymer-coated metal. Light weight and technological installation make it possible to quickly and inexpensively transform unsightly walls into a modern, well-groomed facade. Fiber cement or wood composite panels are used somewhat less frequently. These materials are more expensive and require a professional approach during installation.
Features of modern siding
Siding allows you to give your home new life with an attractive exterior finish.
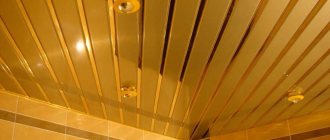
This is especially true for wooden buildings. Correct work with such material will ensure warmth and a pleasant atmosphere for many years. Other types of siding, such as metal, go well with the basement look.
When implementing the final stage, it is necessary to use various corners for connection. This applies to internal and external parts, as well as modules and all kinds of small elements.
Before starting work, it is recommended to additionally watch the necessary video material, in which you can glean a lot of important and interesting information.
Where to begin
Before covering a house, you need to solve several problems:
- develop a design project, that is, determine how the house will look after finishing;
- calculate and purchase materials;
- prepare the necessary tools.
Siding should be stored on a flat, dry and clean area, protected from rain and sun. To work at height, you will need strong, stable scaffolding or scaffolding.
Design project development
A variety of colors, textures and textures of panels allow you to refine and transform a house of even the simplest geometry. You can make the base slightly protruding, highlight corners and openings with a contrasting color, place the soffits parallel to the ground or rafters, etc. It is not recommended to use more than 3 colors in the decoration, so as not to create unnecessary variegation and dullness.
The design project is developed taking into account the architecture of the building, the desired color scheme and siding sizes.
You need to determine in advance where the panel joints will be located, how and how the base, pediments, and roof eaves will be hemmed. The configuration of the subsystem, as well as the type of finishing as a whole, depends on the design of each unit.
Material calculation
After developing a detailed design project, you can begin to determine the consumption of materials for its implementation:
- siding panels;
- shaped elements;
- profiles or bars for sheathing;
- insulation;
- hydro-windproof membrane;
- fasteners
Since calculations are labor-intensive, it is very convenient to use an online calculator. It is enough to enter the geometric dimensions of your house (walls, openings, gables, external and internal corners), and the program will display the result in the form of a table, taking into account all technical parameters.
Some calculators offer to calculate the fastening subsystem - anchors, brackets, profiles. But the program is not always able to determine the nuances of the project, so it would be better to do it yourself, taking into account your profile pitch, options for attaching connecting and corner strips.
It is recommended that you review the manufacturer's installation instructions in advance to determine the correct spacing for the supporting frame. For PVC siding it should be small - about 40-50 cm. This will ensure reliable fastening of fairly flexible panels. For a stiffer material, such as WPC siding, the pitch can be increased to 60, 80 or even 100 cm.
The thickness of the insulation is determined from a thermotechnical calculation, which contains a lot of initial data and formulas. It is difficult for an untrained person to do it on their own. To make your task easier, you can seek the help of specialists or make calculations in an online program.
Buying siding
High-quality material is not difficult to find today. These are products of Russian manufacturers - Grand line, Docke, FineBer, AltaProfile, Nordside, or foreign ones - Mitten, Tekos, Foundry.
When purchasing, you need to pay attention to whether the seller has certificates, as well as proper storage (in a warehouse, on a flat area, away from heat sources and direct sunlight). During transportation, the siding is laid on a horizontal surface with support along its entire length. Packs must be secured. Do not move them by dragging them, allow them to be dropped, hit, removed the protective film or other damaging actions.
How to calculate quantity
There are two simple calculation methods: by area and by the number of panels.
First method:
- Calculate the areas of the sheathed planes. For ease of calculation, a surface with complex geometry is “broken” into simple shapes.
- The area of window and door openings is subtracted from the resulting amount.
- Multiply the result by a correction factor that takes into account trimming waste. For simple planes it is taken equal to 1.07-1.1, for complex ones – 1.15.
- Divide by the useful (not total!) area of one panel.
- Round the result to a whole number, and get the number of siding panels for installation with a margin.
Visual calculations in the video:
The second method is convenient only for “simple figures” of the planes of the facade or plinth. In this case, each subsequent plane is calculated taking into account the possible use of scraps from the previous one. The calculation method for a “blind” wall is as follows:
- Measure the height of the wall and divide it by the useful height of the panel. Round to the nearest whole number.
- Measure the length of the wall, divide by the length of the panel. If after the decimal point you get 5 or more, round up, less than 5 - round down.
- The results obtained are multiplied.
- When rounded up, this will be the required number of siding panels. If the second figure was rounded down, then they calculate how much additional siding will need to be purchased in order to increase each strip in length.
When determining the number of stripes for walls with openings, the planes between the corners and boundaries of the openings are calculated separately from the “blind” areas.
Additional profiles are calculated individually for each type, depending on the size of the areas where they are used.
The most common types of additional profiles Source fasadec.ru
How to properly cover a house with siding: general principles
In order for the finish to be neat, beautiful and durable, you need to follow a certain technology:
- Installation should be carried out at positive air temperatures. This is especially important for PVC panels, which become brittle in the cold.
- The siding is attached to the sheathing or directly to the base surface in the direction from bottom to top. There are some types of metal siding, for example “block house”, which are mounted from top to bottom.
- To connect elements at corners, joints and junctions, use special shaped profiles. They are attached loosely to allow movement during thermal expansion.
- Installation begins with the installation of corner, starting and window strips. The panels are inserted into their grooves and fixed with self-tapping screws to the sheathing through the mounting holes.
- Install the hardware in the center of the lock without tightening.
- Use galvanized or stainless steel fasteners that are corrosion resistant.
- There should be a gap of at least 6 mm in summer or 10 mm in winter between the ends of the siding and the profile strips to compensate for linear temperature expansion.
- Wood composite and fiber cement siding do not have perforations, so they are installed overlapping or using hidden clamps.
- Leave a ventilation gap of at least 40 mm between the sheathing and the wall. It serves to remove condensation and protect structures from moisture.
If the PVC panel needs to be dismantled, it must not be pulled or bent. This can damage the lock. It is recommended to use a special tool or a bent hanger, which is inserted into the joint and pulled along the edge.
Installation of main siding panels
Do-it-yourself work on decorating the facade of a house with siding always begins with the most inconspicuous part of the building. This allows the installation technology to be developed with minimal losses.
- The panel is mounted in the corner profile and fits into the lock of the starting guide.
- The panel is fixed to the frame.
Subsequently, the panels are mounted using H-profiles or overlap one another. Installation of the remaining panels is no different from fixing the first one. When approaching the opening, the excess will need to be removed. Don't forget to check the horizon of the panels every three levels using a level.
To furnish the lower part of the house, basement siding in the form of slats is used; you should not use ordinary panels for these purposes.
In addition to its decorative functions, siding protects the house from precipitation, winds, and when laying a thermal insulation layer, from temperature changes.
Installation stages
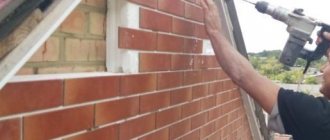
Siding cladding is compatible with any walls - wooden, brick, concrete, frame. Their load-bearing capacity is usually enough to hold the panels with the subsystem and insulation. The exception is very dilapidated structures that first need to be strengthened.
If it is planned to cover it with fiber cement siding, its weight along with the overlap of 17-18 kg per 1 sq.m. is taken into account. In some cases, if the base is not strong enough, load calculations will be required.
Main stages of installation:
- Installation of brackets.
- Laying thermal insulation boards.
- Hydro-wind protection device.
- Installation of lathing from profiles.
- Fastening of shaped parts, including slopes and ebbs.
- Siding installation.
The panels can be attached directly to the wall, but this creates more complications than simplifies the work. Firstly, the base must be geometrically correct and even, which is rare, secondly, the cladding can be easily and quickly attached only to wooden walls, and not brick or concrete, and thirdly, it will not be possible to provide the necessary ventilation gap. And this in the future can lead to dampness and damage to the wall material.
Installation of panels: step-by-step instructions
Having completed all the steps described above, you can proceed directly to finishing the house with siding. According to the instructions, in order to correctly install the panels yourself, you must adhere to the following scheme:
- We take the guide profile and fix it to the wall along the perimeter;
- Next, the panels are inserted into the profile, after which we begin assembling the siding, adhering to the vertical installation pattern.
Thus, it becomes clear that the last stage is where the least difficulties arise. However, there are some nuances that you need to be aware of. When screwing in the screws, you need to make sure that they do not go in all the way. Then, when it gets especially hot in the summer, the material will have free space to expand. If you neglect this recommendation, this may subsequently lead to cracking of the panel.
How to cover a house with siding: step-by-step instructions
If all layers are installed correctly, mold or mildew rarely grows under the cladding. But still, manufacturers recommend antiseptic treatment of surfaces, especially wooden ones. It is also necessary to remove platbands from windows and doors, seal cracks, and remove poorly adhering fragments.
Tools you will need:
- siding cutter;
- knife for cutting insulation;
- scissors for profiles and strips;
- perforator;
- screwdriver;
- building level;
- square;
- tape measure, pencil.
A mask and glasses are useful for contact with mineral wool.
Preparation
At this stage, marking is carried out. Starting from the corners on the façade, the mounting points for the brackets are marked so that the following conditions are met:
- from the edge of the walls at least 100 mm;
- between guide profiles 40-45 cm for PVC panels;
- 50-60 cm for metal siding.
Also, the sheathing should be located around openings, ledges, niches, etc. with an indentation of 100 mm.
For marking, a bubble or laser level or plumb line is used. To simplify the work, you can mark 2 extreme points, and between them, using a tape measure, mark the intermediate ones horizontally. Then determine the position of the vertical outer profiles.
Bracket installation
If the panels are located horizontally, the brackets are mounted vertically, and vice versa. The length of the bracket is selected taking into account the insulation layer and the ventilation gap. If the thickness of the cake is more than 240 mm, reinforced brackets (RKU) with extensions (UK) will be required. Due to this, it is possible to increase the extension of the substructure to 350 mm.
Using a drill or hammer drill, holes are drilled in the wall, the depth of which should exceed the length of the anchor rod by 15 mm. Dust from the wells is removed with a jet of compressed air so that the dowel fits tightly, without interference. After tapping the dowels with a hammer, anchors and brackets with paronite (isolon) gasket are attached. It will help reduce heat loss through cold bridges formed at the attachment point.
In brick walls, it is necessary to avoid installing fasteners in the seam. It is recommended to retreat at least 60 mm from the poke, and 35 mm from the spoon.
Thermal insulation of the facade
Not every home needs insulation, but most often it is highly desirable. Thermal insulation work is carried out in dry weather to prevent the material from getting wet. The slabs are placed on brackets, for which holes are pressed or cut in place of the protruding fasteners.
The insulation is installed from the bottom up to provide support. The fit should be snug, but without excessive compression. Each slab is first secured with 2 disc dowels. The remaining voids are filled with the same material.
A wind- and moisture-proof membrane is spread on top (usually with the logo facing out) and stapled in place. You cannot use plastic film, which prevents water vapor from escaping from the insulation. The overlap of the top panel on the bottom panel is 100-150 mm. The edges are sealed with tape or left open, depending on the recommendations of the membrane manufacturer.
After laying the protection, the remaining dowels are additionally installed at a rate of at least 7 pcs. per sq.m.
If according to the project the thickness of the insulation is large, it is recommended to lay it in 2 layers with the seams spaced apart. This will avoid severe shrinkage of the heat insulator and the formation of cold bridges.
Installation of guides
The next stage is the design of the subsystem. The profiles are attached to the brackets using self-tapping screws or rivets, 2 pieces per connection. For convenience, you can first install guides at the extreme points, and stretch a thread or lace between them. All that remains is to align all the internal profiles along the sheathing plane thus broken off.
The vertical pitch between the brackets is set by the project. For residential buildings up to 2 floors high, it can be taken 40-50 cm. At the bottom, the brackets are not mounted close to the base (or blind area), but with an indentation of at least 100 mm. The end of the profile should be located above the ground at a height of at least 40 mm to avoid deformation during seasonal heaving. Between the two guides along the length you must also leave a compensation gap of 10-15 mm.
Subsystem profiles are attached around window and door openings. Window strips and ebbs will subsequently be attached to them.
The moldings for the outer corners are not wide enough to be screwed to two mutually perpendicular outer guides. To secure them, separate small frames are made in the form of right angles:
- Cut a piece of rail equal in length to the sum of the distances between the 2 guides to the corner of the trim.
- Cut and bend the workpiece so that a right angle is formed. Screw in a self-tapping screw at the bend.
- Trim and bend small sections of the side flanges of the profile. You should get a rigid corner with two protrusions for attaching to the sheathing.
Make 3-4 such elements each. on the outer corner and fasten them to the frame every 75-100 cm in height.
Installation of shaped profiles
Before installation of siding panels begins, some components are installed:
- basement flashings;
- starting bar;
- complex profiles;
- window and door trims.
Simple additions, unlike complex ones, are attached after installation of the sheathing. They are screwed with self-tapping screws on top of the finished coating, hiding the joints, but at the same time their own fastening remains visible.
Complex planks consist of 2 parts. The lower one is installed with self-tapping screws or rivets before installing the panels, and after installation, the upper one is inserted into the grooves until the lock snaps into place. Here no additional fasteners are used.
Setting the outside corner
Joining strips allow you to close the joint of the siding, but visually it remains noticeable. Therefore, before installation, it is advisable to lay out the panels taking into account their sizes so that the connection is as aesthetic as possible. The joint between sections 2.5 and 2.5 m looks much neater and more logical than 3 and 2.
Implementation of an internal angle
When designing openings, special attention must be paid to the direction of precipitation flow. When cutting window trims, special tabs are cut out to protect the internal space from water ingress or allow it to be easily removed.
All corners and strips are fastened with loosening. They should not be allowed to fit tightly together or to the sheathing. This makes it possible for the cladding not to deform during temperature fluctuations, moving freely in the joints.
Siding manufacturers have developed optimal solutions for various components to ensure normal operation of the ventilated facade.
A prerequisite is the presence of a ventilation gap and supply and exhaust slots at the base, cornice and openings with a width of at least 3 cm. Thanks to this, a draft is created between the wall and the cladding, carrying water vapor into the atmosphere.
Installation of cladding
Siding can be installed on a plinth or without it. In the first case, the basement drain must already be installed. The starting bar is attached a little higher. The waterproof membrane is tucked under the insulation.
Fastening and location of the H-profile on the sheathing
The panels of the first row are inserted with the lower edge into the starting strip (it must be strictly horizontal along the entire perimeter of the house). The top of the siding is secured to the guides with self-tapping screws. The screwdriver must be set to “do not press” so that the stroke is adjusted automatically.
The panels of each next row are placed edgewise into the lock of the lower element until it clicks and are attached to the sheathing, starting from the middle. Sometimes they are pushed from the side as if on a rail. Do not pull the material, pull it out of joints or hammer it with a hammer.
If the cladding is mounted from top to bottom (for example, a metal house block), then the panel is inserted into the groove of the overlying element, and the bottom is screwed to the subsystem. When the siding is positioned vertically, fastening can be done from right to left or vice versa.
In the case where the sheathing is carried out from ground level, you need to find the highest point of the foundation, step back 40 mm, hammer a nail or screw in a screw. This will be the starting point for installing the starting bar. The shaped parts are loosely screwed to the sheathing. The first and last strips should come together.
The top eaves row of siding often requires trimming. A loose part cannot be held in the J-bar or J-bevel. To secure its edge in the profile, notches are made along the entire panel. Using a special punch, holes with U-shaped edges are formed every 10 cm along the length of the panel. Due to the small protrusions, the siding is easily fixed in the grooves of the finishing strip.
Instead of a specialized tool, you can use a piece of pipe with a diameter of 10 mm with a sharpened end and a hammer. The panel is laid on a semi-solid base, such as a board, and processed along the cut with a homemade device.
Method of working with siding
Regardless of the material from which the building is constructed, after preliminary work, do-it-yourself siding installation is carried out in the same sequence.
Work on finishing a brick, monolithic, timber, or any house begins with installing the starting panel and fixing it with nails or self-tapping screws. The next step is to install the H-rail, if provided, and install the corner fasteners. Window blocks and doorways are designed using profile J.
Starter profiles and guides must be installed flawlessly, and the step-by-step instructions serve as a guide for novice finishers. The first steps look like this:
- Initially, you need to use a level to find the bottom point on the frame, and, stepping back 5 centimeters from it, make a mark. This is done using a self-tapping screw or nail.
- Consistently, moving around the house, we screw in the screws as marks. Starting profiles will be installed in these places. Do not forget about the marks in the corners of the building.
- We stretch the construction cord between the corner screws.
- We apply the boundaries of the profiles installed at the corners to the frame slats. To do this, we apply the profile to the sheathing, and, using a pencil or marker, apply marks to its edges.
- Adhering to the cord, we make a horizontal gap of six millimeters from the corner profiles and mount the starting guide to the profile or sheathing slats.
Don't forget to leave a gap of 10 millimeters between the profiles.
This is necessary to compensate for temperature differences. A gap of six millimeters should not be made if you remove part of the nail strips in advance, and they will not rest against the J profile when there is a temperature difference. The initial profiles should only be mounted horizontally. Don't waste your time on this. Otherwise, it will be extremely difficult to correct the subsequent distortion of the siding.
The better to cut
You can cut vinyl siding with any sharp cutter or saw. There must be support on a rigid base. The material becomes brittle at low temperatures, so working with it in cold weather is not recommended.
It is better to cut metal siding with tin snips. Even if burrs remain, they will hide under the slats and will be invisible. Abrasive tools are prohibited for use because they burn out the protective layer, which causes rapid corrosion of the metal at the cut site.
Rules for installing metal siding: instructions
The principle of covering a facade with metal siding is the same as with vinyl siding. For installation you will need:
- internal and external corners;
- starting rail;
- connecting profile;
- finishing rail;
- platbands.
Installation of metal siding begins from the corner of the building. The first row of panels is attached to the starting rail with a bottom lock. The following rows are secured with the lock of the previous row. This is how the entire wall is gradually covered. The top row is fixed with a finishing strip.
Helpful advice! If during installation it is necessary to lengthen the corner strips, then the upper part should be mounted on the lower part with an overlap of 2-2.5 cm.