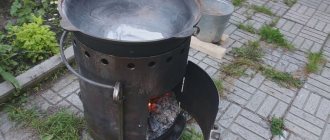
The tandoor is made in the form of a container, hollow inside. A hole is made on the top surface for storing food and firewood. A blower is installed below, providing traction in the device. To enhance thermal insulation, an additional shell is made of brick, and sand or clay is poured between the body and the brick fence.
When wood burns, the tandoor becomes hot, and the temperature in it can rise to 400 degrees. The oven retains heat well, so the heat lasts up to 4 hours, during which it is allowed to cook dishes continuously. Food cooks quickly because the heat spreads not from the outside, but from inside the vessel. The device prepares aromatic dishes, evenly fried meat, fluffy bread and other uniquely delicious products.
Advantages and disadvantages
The original country stove for cooking is simple to construct and easy to operate. But, despite these significant advantages, it also has several important disadvantages that are worth paying attention to before you start building.
Advantages
- Fuel economy.
- Maintaining optimal temperature.
- No difficulties in use and maintenance.
To heat a tandoor you need much less wood or coal than for a barbecue or barbecue. With one load of firewood you can cook about five servings of shish kebab, when you can’t even get two in the grill. Shish kebab is cooked much faster and easier in a tandoor; you just need to hang the skewers inside and close the lid.
The meat will cook on its own; there is no need to constantly turn it. Good tandoors with fairly thick walls cook food much faster than thin-walled ones, due to greater heat accumulation and longer retention of heat inside.
Flaws
- No chimney.
- When operating, it is necessary to constantly use special gloves that resist burns.
- After igniting the wood, a coating of soot appears on the inner surface.
- Heavy, thick-walled tandoors are difficult to transport.
- Food and fuel are placed in the same hole.
If you want to use the stove indoors, you can make a portable tandoor on wheels, which is lighter and more compact. To get rid of soot, it is enough to clean the walls with a hard brush and rinse with water.
Devices of the main types of tandoors, how they work
The first such devices were earthen. A round hole was dug in a special soil consisting of stone chips (loess).
An air duct was installed on the side. Then they began to coat the inside of the pit with clay. Externally, the device began to resemble a jug. This shape retains heat better, since the upper opening in the oven is narrower.
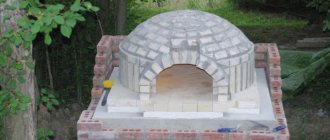
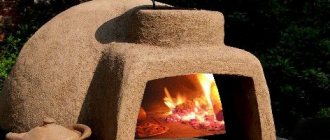
Later they began to create above-ground clay structures located on the foundation. They have the shape of a hemisphere or egg with a cut off base. Later, bricks or stones were also used in construction.
Reference. Traditional technology for making the device involves the use of sheep wool. It is finely chopped and added to the clay-sand mixture. This makes the material more viscous and flexible.
Recently, portable models have appeared, most often ceramic. They are smaller than stationary ones. For ease of carrying, handles (usually cast iron) are attached to them.
Dimensions and principle of operation of ground tandoors made of clay or brick
A foundation is required to build a ground-based instrument. There is a dome-shaped chamber on it, the inner surface of which is smooth. At the bottom there is a hole for air flow. A cast iron grate is placed at the bottom of the chamber.
Indentations are often made in the upper part. They contain a rod on which skewers with shish kebab are later hung.
The entire structure is covered with a lid on top. It is made from fire-resistant materials, such as metal.
Typically, such braziers reach one meter in height. There are models of greater or lesser height. But it is inconvenient to cook in very tall structures.
The weight depends on the size of the device and in some cases reaches 1 ton. Portable structures weigh about 30-140 kg.
The operating principle of all furnaces is the same. Thick walls accumulate heat while the fire burns, and then release it for a long time. Food is cooked by this heat. The coals can be removed or left.
Attention! The inner surface of the structure becomes very hot. To avoid getting burned, be sure to use heat-resistant gloves and special tools
Traditional semicircular design: how to build it yourself, drawing
Traditionally, the walls of such a device are made of clay. Giving the tandoor the desired shape is not easy. The material is laid in separate strips, and then the inner surface is leveled. Sometimes a barrel is used. It is pre-soaked and soaked in oil, and then coated with clay. After drying, the clay chamber is easily separated from the barrel.
To increase the heat capacity, the walls are often lined with brick or stone. The gap between the materials is filled with sand.
Photo 1. Drawing of a traditional type tandoor. The arrows indicate the parts of the stove and the dimensions of the structure.
Sometimes the device is made differently: they lay out a brick base, and then the walls. After this, the base is coated with clay inside and outside. The seams are carefully filled.
Important! During construction, it is advisable to use fireclay bricks. It withstands high temperatures well
The brick is laid in different ways: on the wide side or on one of the narrow sides. The thickness of the walls of the structure depends on this.
Bricks that are laid vertically are sometimes pre-cut. It is given a shape close to wedge-shaped.
How is a square brick tandoor constructed? His scheme
The device is made of brick and covered with clay. The manufacturing technology of the square design is the same as that of a traditional oven. A hole for the firebox is not required in such devices.
In the corners the device warms up worse. Therefore, it is better to place the cakes closer to the middle of the wall. Meat and fish dishes are prepared in the same way as in a regular round tandoor.
Features of a horizontal oven
As a rule, such stoves are located on a hill about a meter high.
This makes them easier to use. The hole for storing firewood and food in such models is not on the top, but on the side. With their round vault they look like a Russian stove.
Conclusion
With the help of simple steps, an exotic Uzbek stove is made that can cook delicious dishes. Food from the tandoor will give you a unique feeling of oriental sophistication. In this convenient and interesting barbecue substitute, you can cook not only meat or fish - the tandoor is famous for its aromatic flatbreads.
The dough is placed directly on the inner surface of the oven base and thus baked. Making a real tandoor from clay with your own hands is not only pleasant, but also very useful, because you can treat yourself and your loved ones to special dishes while relaxing in nature.
Option #3. We make a tandoor from bricks on our own
So, making a classic version of the stove is quite difficult, we have already found out. What’s more, not all masters succeed in this! Therefore, in order to simplify the task and not take unnecessary risks, we recommend that you familiarize yourself with the technology of making a brick tandoor - this way you are guaranteed to get the desired result, despite the fact that the finished stove will be very different from the traditional version described above.
First you need to prepare:
- stove brick;
- wooden template;
- masonry sand mixture;
- cement;
- kaolin;
- reinforcing mesh;
- sand.
The main thing is just beginning - the manufacturing procedure itself. The process consists of several stages, let's look at the details of each of them.
First stage. Base
Select a suitable flat area on which the future tandoor will be located with your own hands. Dig a round hole there, the diameter of which should be slightly larger than the planned diameter of the structure. Fill the bottom of the resulting hole with a “cushion” of sand (the thickness should be about 10 centimeters).
Cover the finished “pillow” with an iron mesh constructed from reinforcing rods or thick wire.
Fill the hole with concrete mixture, carefully level everything using an iron rule. Don't forget to check the levelness of the surface using a horizontal level. Now wait at least 7 days for the mortar to set and the concrete surface to regain its original strength.
Second phase. Brick walls
Start laying the brick in a circle, the diameter of which you designated at the planning stage. As a rule, this is about 100 centimeters. Place the bricks on the end and, using the frame as shown in the image below, begin to form a circle. For installation, use only a kiln mortar consisting of fireclay clay, appropriate plasticizers and, of course, quartz sand. This will ensure that the composition will not crack when fired, will set quickly and will generally be plastic.
Traditionally, leave a small hole at the bottom of the case, which will serve as a blower during operation. This can be either a small window equipped with an iron door or a chimney.
If the height of the stove is 100-120 centimeters, then four rows of bricks will be enough. Typically, when laying the last row, a tapering neck should be formed in parallel; therefore, the brick at this stage should be laid with a slight inclination towards the inside.
Third stage. We carry out coating and cladding
Coat the internal and external surfaces of the constructed furnace with refractory clay, the thickness of which should be approximately 5 centimeters. In addition, decorate the body of the tandoor with natural stone - this will make the finished product look more attractive.
Fourth stage. We fire the kiln
Let us immediately make a reservation that the firing procedure in this case is performed in the same way as in the previous two options. It is necessary to light a fire inside the tandoor, the walls of the oven must gradually heat up to a high temperature (more precisely, up to 400 degrees), and then slowly - and this is very important! - cool down.
For a more detailed look at how to build a brick tandoor at home, we recommend that you watch the thematic video below.
Video - Making a tandoor with your own hands
What is a tandoor: design features
What is tandoor? This is a special type of roasting oven in which food is cooked due to heat transfer from the walls of the structure. The food cooks slowly as the heat is introduced gradually. Its uniform distribution helps preserve the juiciness of products and all the beneficial qualities of food.
A classic tandoor is a jug-shaped product made of fireclay clay or ceramics.
In appearance, a tandoor looks like a large clay cauldron with holes that is turned upside down. The height of the product is 1-1.5 m, the diameter of the bottom is 1 m. The thicker the walls of the structure, the more heat the stove will give off. At the bottom of the tandoor there is a channel for supplying fresh air, which helps maintain the combustion process. The classic design has a round shape, but there are rectangular and square tandoors made of brick.
To improve the thermal insulation properties, the outside of the stove is lined with brick. The special shape of the tandoor promotes the accumulation of heat in the walls of the structure, which is slowly released inside. This helps maintain a constant high temperature inside the product for a long time.
Note! To create the optimal amount of heat in a tandoor, you will need half as much firewood as you would need for a classic barbecue. With economical fuel consumption, dishes in a tandoor are prepared faster than on a conventional grill. The main advantages of tandoor are the following characteristics:
The main advantages of tandoor are the following characteristics:
- long-term preservation of high temperature inside the structure;
- no need for constant monitoring of the cooking process;
- economical fuel consumption;
- the ability to prepare several dishes during one heating of the structure;
- ease of operation;
- the design does not require special care;
- unpretentiousness of the stove in relation to the type, quality and quantity of fuel;
- simplicity of design.
The disadvantages of the stove include:
- the presence of one common hole for firewood and food;
- lack of chimney;
- formation of soot deposits on the walls of the product after ignition;
- the need to use fire-resistant gloves to prevent burns.
A portable tandoor on metal legs can be installed in any convenient place.
Assembling a simplified version of a tandoor with a barrel
Many people say that making a classic tandoor with your own hands without appropriate experience is extremely difficult; in particular, it cracks when drying. That is why, without having skills in this matter, it is better to assemble a simplified version of the stove, where clay walls are placed around a wooden barrel.
For work we will need the following materials:
- kaolin;
- fireclay sand, fraction up to 0.5 mm;
- sheep or camel wool;
- a wooden barrel with metal hoops;
- vegetable oil.
The operating procedure will be as follows:
- fill the barrel with water and leave it for a day so that the wood becomes saturated and swells;
- mix clay with sand and wool and leave for several days until the mixture dries and becomes plastic;
- drain the water from the barrel and wait until it dries;
- Apply a layer of oil to its inner surface and leave overnight until it soaks in;
- apply a clay-based solution to the inner walls of the barrel in a layer of up to 5 cm;
- level the surface manually with wet hands so that the walls are even;
- Gradually, the layer of clay mortar must be increased upward so that the neck of the stove becomes narrowed;
- leave a hole at the bottom for blowing air during the fire;
- leave the oven to dry for a month in a dry, dark and ventilated place;
- Over time, the wood staves will separate from the clay sides. When the tandoor is dry, remove the metal hoops from the barrel and free the structure from it.
Next, the tandoor should be placed on a thick sand bed and set on fire. Light a low fire inside and maintain it like this for about 6 hours , adding fuel little by little. Then the tandoor is covered and the fire is heated up, gradually reaching its maximum. Then it should cool slowly.
And to improve the thermal insulation properties of the tandoor, it can be insulated with brick walls and a layer based on felt, clay, sand or cotton wool can be placed between them and the clay wall.
