Brickwork
I am glad to welcome you, dear reader! Today we’ll talk about how to prepare the right clay solution for a stove or fireplace.
Those who have dealt with the laying of a brick structure are well aware of the procedure for preparing the mortar, which should be prepared not anyhow, but according to all the rules of stove art. A real stove maker can immediately determine whether a mortar for laying stoves is good or bad. To do this, the master just needs to rub it between his fingers.
But it is difficult for a beginner to understand this “competent issue”. And he gets the impression that “brick glue” can be prepared by mixing clay, sand and cement. All this is true, but... The solution for the oven must be prepared correctly.
Heat-resistant, heat-resistant, fire-resistant - what's the difference?
Beginner stove makers often experience some difficulties associated with a correct understanding of terminology. Regarding mortars for stove masonry, the greatest confusion arises with the concepts of heat resistance, heat resistance and fire resistance of the material. These parameters are fundamental in the furnace business, so we will now try to clarify their meaning and clarify the understanding of this issue.
Heat-resistant is a material that can withstand heating to high temperatures. At the same time, during its subsequent cooling, the structure and chemical composition are preserved and no irreversible changes in shape occur. In addition, heat-resistant materials in a heated state are still able to withstand the original specified physical overloads without the risk of possible destruction.
The main property of heat-resistant materials is resistance to temperature, provided that the original mechanical properties are maintained. Heat-resistant substances and compounds have an order of magnitude lower thermal expansion index than heat-resistant ones. Such materials are used in the construction of not only furnaces, but also mechanical devices operating in extreme temperature conditions, while being subjected to powerful dynamic effects.
Finally, fire-resistant materials are heat-resistant or heat-resistant compounds that, among other things, calmly withstand the action of chemically active (often aggressive) substances contained in gaseous substances. Specifically in the case of stove masonry, this may be smoke or products of thermal decomposition of fuel.
All solutions and materials used in the construction of furnaces must be heat-resistant and fire-resistant. This requirement applies even to those elements that, during normal operation of the stove, do not heat up by more than four hundred degrees. No standard building mixture meets these parameters.
Fireclay clay - how to dilute and what to mix with?
To say that this material is easy to work with will not be entirely correct - many beginners who use fireclay complain that the plaster based on it cracks and crumbles, and the masonry with fireclay mortar does not hold firmly. It should be remembered that when fired, clay almost completely loses its plastic properties, and our task, when mixing the solution, is to at least partially return these characteristics to it or give them to the solution using other components, for example, special glue or ordinary quartz sand.
What solutions are used when laying individual brick oven elements?
The choice of solution for work must be carried out depending on which part of the stove it will be used for laying. Using the diagram below, we will consider each of them in detail.
General structural diagram of a standard furnace masonry
- The reinforced concrete base of the furnace foundation, which is also called the pillow or root. It is manufactured using standard technology, however, in order to avoid unpleasant consequences, it must be physically separated from the foundation of the house itself. The need to comply with this condition is explained by differences in the degree of shrinkage of the building and the furnace in it.
- Waterproofing layer. To create it, roofing material is perfect, which needs to be laid on top of the foundation in several layers.
- Actually, the stove foundation itself. Since it is not exposed to powerful thermal effects, it does not require the use of particularly heat-resistant mixtures when laying. At the same time, the reliability of the entire structure depends on the quality of assembly of this furnace element. There are cases when, due to errors in laying the foundation, it was necessary to completely disassemble the stove and redo it in a new way. Complex, three- or more-component cement-lime mixtures are used for work. Well, red solid brick is best suited here as the main building material.
For the manufacture of compact stoves or stoves with a large base area (for example, a Russian stove), you can also use a regular lime mixture.
- A layer of thermal insulation with a fire protection area. It is made from a mineral cardboard or asbestos sheet, on which a sheet of iron is placed on top, covering the entire structure with a finishing layer of felt cloth soaked in so-called clay milk (this is a solution of very thinly diluted clay; we will describe how to prepare it below).
- A heat exchanger that accumulates the energy released during the combustion of wood. It is one of the main parts of the so-called furnace body. During kindling, it rarely heats up above six hundred degrees, but is subject to very active influence from the smoke and other gaseous substances released during combustion. It is not uncommon for destructive acid condensate to settle on the inner surface of heat-storing masonry. The brick used here is special: stove type, M150 grade, solid red ceramic. The bricks are fastened together with a simple one-component clay solution. It should be noted that the term “simple” refers only to the composition of the building mixture. Its preparation is a rather labor-intensive process, the features of which we will consider below.
- The hot part of the stove body is also called the combustion chamber. It is subject to moderate chemical influence from gases, but heats up to very high temperatures, up to 1200 degrees. For masonry, so-called fireclay bricks and fireproof clay-fireclay mortar are used.
- The source of the chimney. It is made from the same brick and fastened with the same mortar specified in point No. 5, since this element of the furnace is subject to similar temperature and chemical influences as the heat-accumulating part of its body.
- "Fluffing" of the stove chimney. Its task is to create a flexible mechanical connection connecting the ceiling and the chimney itself. Allows you to avoid a situation where ceiling subsidence is possible. The fluff can be repaired separately; it does not require complete disassembly of the entire structure. The bricks used for masonry are standard stove bricks, and lime-type mortar is ideal for laying this part of the stove.
- A fireproof cutting is a special metal box filled with a non-flammable heat-insulating substance.
- Chimney pipe. This element is susceptible to wind and precipitation. It heats up weakly, so the pipe is laid from standard red brick. However, for greater reliability and heat resistance, they use lime mortar.
- Fluffing the chimney pipe (11). It is made from the same materials that are used when laying the main part of the pipe.
Types of mortars for furnace masonry and their main properties
Having read the previous paragraph of the article, you may have noticed that for laying different components of the furnace, it is recommended to use your own type of mortar that is most suitable for the job. Let's look at each of them in more detail.
Clay mortar for laying a furnace: pros and cons
Clay mortar is the cheapest building material. It can usually be obtained and prepared at home yourself. We will consider this process in detail later, since the preparation of the constituent components itself is quite labor-intensive and requires separate instructions. The strength of the clay mortar, as well as its heat resistance, is average. The composition is able to withstand temperatures up to 1100 degrees Celsius without consequences. As for fire resistance, here clay has practically no equal: it does not ignite, and only hydrofluoric and fluoric-antimonous acid can dissolve it. It also has absolute gas density indicators. A stove built on clay mortar can be easily reassembled, since the mixture moistened with water will become limp again. In addition, such material is suitable for work for an almost unlimited period of time: a container with a solution covered with a damp cloth will not dry out even after a couple of months. On the other hand, this is also its disadvantage: clay is completely unsuitable for masonry outside.
Appearance of clay mortar
How to make clay mortar for laying a stove: video instructions
Lime and cement-lime mixtures: are they used for laying stoves?
Mortar
In any case, it will cost more than clay. To prepare it, you will have to purchase special lime dough or lump quicklime. It should be noted that quicklime will allow you to save money, but later this will come back to haunt you with serious labor costs: preparing a solution from “boiling lime” is a scrupulous process, because you need to extinguish every last particle. If quicklime is present in the mixture, the masonry seam may then rupture. The mortar itself has reduced heat resistance and fire resistance. It is able to withstand inactive flue gases with a temperature of less than five hundred degrees. Compared to the clay mixture, it has a lower gas density. On the other hand, lime mortar does not absorb atmospheric moisture, so you can work with it outdoors. The finished mixture is suitable for use for a relatively short period of time (relative to clay): it can be used in the oven from one to three days after mixing.
This is what the lime slaking process looks like
Cement-lime mortar
Costs more than regular limestone. However, this is partially offset by its increased strength. On the other hand, the heat resistance here is approximately two times lower: the cement-lime mixture will withstand temperatures only up to 250 degrees without consequences. The gas density index of the solution is low. In most cases, it is used to construct a furnace foundation. It dries quite quickly, so it remains suitable for use only within an hour after preparation.
Appearance of cement-lime mortar
Clay-chamotte and cement-chamotte mortars
Clay-fireclay mortar
It has all the properties of a regular clay mixture, but is more heat-resistant (its maximum operating temperature reaches 1300 Celsius). This material, naturally, is more expensive than clay, since for its preparation it is necessary to purchase special fireclay sand. Clay-fireclay mortars, for the most part, are used to construct a furnace firebox.
Cement-chamotte mortar
It is quite expensive because it requires the use of high-quality components. The strength of the mixture is equal to that of cement-lime, while its heat resistance is similar to that of clay-fireclay mortar. On the other hand, it has average fire resistance. However, it is quite enough for laying the furnace part of the furnace. The shelf life of the finished cement-chamotte mortar is about forty minutes. It should also be noted that the components are not mixed manually !
Appearance of cement-chamotte mortar
The names of multicomponent mixtures for masonry are usually compiled in such a way that the name of the strongest binder comes first. In this case, the percentage of its content in the solution may be the smallest. For example, there is 10-15 times less cement in a cement-lime mixture than lime.
Two terms used above require separate explanation: “gas tightness” and “fireclay”. Let's understand their meaning.
The term " gas tightness " refers to the ability of a material to allow gaseous substances to pass through. If the solution has a high gas density, then it will not allow particles to pass out and, due to diffusion, they will not get inside the heated room. It should be noted that gas density and hygroscopicity are not mutually exclusive concepts. Water vapor molecules are smaller and more mobile than smoke particles. A good quality solution must combine both qualities, both gas density and hygroscopicity, in optimal proportions. The stove must “breathe” and, at the same time, not let smoke inside. It is these requirements that are key to the formulation of stove building mixtures.
As for the second concept under consideration, “ fireclay ” is a special fireproof and heat-resistant material. It is produced by deep firing of a mixture of special clay (the so-called “high alumina”), zirconium compounds, garnet crystals and some other components. Deep firing differs from ordinary firing in that it involves continued heating of the substance even after the complete release of all crystallization water from it, up to sintering and the formation of lumps.
This is what fireclay clay looks like
Ready-made formulations
Of course, it is more convenient to use ready-made masonry mixtures, which you only need to dilute with water and stir according to the instructions. The advantage is obvious: there is no need to wash sand, sift components, or wait for the clay to swell. Many of them even speed up the laying process, as they have fast setting. But if you're on a budget, check out the cheaper option outlined above.
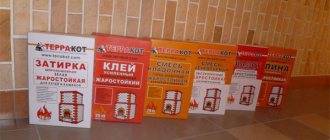
Ready-made masonry materials include powdered mixtures and adhesives for masonry stoves.
Powder mixtures
Special powder mixtures for laying stoves. Usually these are prepared, standard mortars for masonry - clay (clay-sand, fireclay mixtures), cement, lime, requiring dilution with water.
Advantages:
- The components have already been selected and purified;
- Usually special modifiers are added to improve ductility, strength, and heat resistance;
- Information about the area of use and guidance is on the packaging.
Disadvantages - they are more expensive than making them yourself.
When purchasing a mixture, pay attention to its consistency. Do not buy mixtures with lumps, open packets from hand, or those that have been stored in questionable conditions.
How to save on masonry materials?
The answer to this question would seem to be quite obvious: it is necessary to make maximum use of available materials, which can be obtained for free right at the site of construction of the furnace. In our case, we can independently obtain the following components: clay, sand and water. But, as practice shows, in reality everything is far from so simple. You can’t just take any water, mix it with the first available sand and clay, and as a result get a good quality mixture for masonry. A number of serious requirements are put forward for each component for creating a stove mortar. Let's learn more about each of them and learn how to select all the necessary components.
How to distinguish high-quality clay suitable for laying a furnace from other minerals?
Quite often, broken clay can be purchased cheaply from local stove makers, but we do not recommend that you take the easy route. Such material is usually heavily contaminated with organic impurities. Subsequently, they will rot and decompose, worsening the consistency of the mixture and the quality of the finished joints. It is much more profitable to find good clay in the surrounding area and dig it yourself. The difficulty lies only in learning to distinguish high-quality deposits from contaminated ones.
Clay is essentially a mixture of aluminum oxide Al2O3 and silicon oxide SiO2 (in simple terms, sand). The main determining parameter for clay is its fat content. In turn, the strength of its structure, plasticity, adhesiveness (ability to stick to other surfaces), hygroscopicity and even gas tightness will directly depend on it. Typically, the fat content of clay containing 62 percent aluminum oxide and 38 percent sand is taken to be 100%, and the fat content of pure sand without impurities is taken as the zero reference point - 0%. To mix the mortar for laying the stove, we will need clay with average fat content, because seams made from material with too high a fat content will crack during drying. “Low-fat”, or as it is also called, “skinny” clay is also not durable.
Clay deposits of various types
Clay has several fossil twins that are often confused with it. However, furnace work with other mineral materials is impossible, so it is important to be able to distinguish them from what we need.
Shale and marl. The material is a brittle rocky rock. It lies in horizontally arranged layers that are visible to the eye and have rounded edges. In addition, if you take a sample of shale and break it, the shale structure will be clearly visible on the resulting section.
Appearance of shale
The greatest difficulty in identification is caused by bentonite, also known as bentonite clay ( bentoclay ). This is a valuable mineral resource, but it is completely unsuitable for use in the furnace business. Sometimes bentonite is found in bright colors, virtually identical in appearance to the clay we need.
Bentonite clay, consisting of sodium-calcium compounds, montmorillonite and other impurities, has found its use in pharmacology, medicine, perfume production, winemaking and even in mining. The uniqueness of this mineral compound lies in its ability to absorb moisture. Bentonite saturated with water can increase in volume by one and a half dozen times without consequences, turning into a gel-like state. But, unfortunately, it does not have the properties of ordinary clay, such as fire resistance, gas tightness and heat resistance. It is quite simple to distinguish benthoclay from the building material we need. It is enough to take a small test sample and place it in a glass filled with water. After a short period of time, bentonite will absorb moisture and noticeably increase in size. After waiting a sufficient period, you will be able to witness the transformation of the sample into a bentonite gel, which looks like a jelly, somewhat similar to jellied meat. Clay in water will not turn into anything like that.
Appearance of bentonite clay
In the figure below you can see a schematic cross-section of the soil structure characteristic of our country. Clay located in the upper layers of the earth is highly contaminated with organic impurities. On top, the main layer of clay deposits is covered with so-called loam - a layer of soil with a significant admixture of alumina and sand. In the diagram, loam is indicated in yellow. Actually, the main layer of clay has uneven fat content: at the top it is minimal and grows as it goes deeper into the soil.
Layout of clay layers
We will determine the fat content of clay using a special test. Raw materials for analysis must be collected after passing through a layer of loam. In this situation - starting from five meters from the surface of the earth.
The clay test itself is very simple: we pick up a lump of material the size of half a fist. We wet our hands with water and begin to knead it like plasticine, gradually giving the sample the shape of a ball.
Test ball rolled from clay
After the ball is ready, we begin to slowly press it with two flat boards on both sides exactly until the first cracks form. If you managed to compress the ball by at least a third of its diameter, then such clay is quite suitable for our tasks. We take about five more kilograms of material in a bucket and take it home for further tests, which we will talk about later.
Testing a clay sample using boards
How to find high-quality water used in mortars for masonry stoves
It is necessary first of all to check the quality indicators of the water that we plan to use to create the stove solution. Only so-called “soft” water, or at least water with medium hardness, is suitable for work. Hardness is measured in units called German degrees. One such degree means that each liter of water being tested contains 20 milligrams of calcium and magnesium salts. Kneading the stove solution can only be done if the water hardness is below ten degrees.
| An experiment that allows you to determine water parameters will require purchasing about 0.2 liters of distilled water from a pharmacy. We also take a piece of laundry soap and crumble it into small pieces. It will be our indicator, since soap neutralizes salts dissolved in water. One gram of standard 72% soap neutralizes about 7.2 milligrams of hardness salts. Until the process of completely softening the water is complete, the soap solution will not foam. This is what will show us how “hard” the water is. | |
| Heat the water and add soap crumbs to it | Heat distilled water to about 75 degrees and carefully dissolve the soap in it. This operation should be performed carefully, avoiding foaming of the mixture. The proportions in which our “indicator” must be added will be as follows:
|
| Draw a soap solution into the syringe | As a result, after everything has cooled, we will get the so-called “titration mixture”. We take about 500 milligrams of the test water using a beaker, and 20 milliliters of the resulting soap solution with a syringe (without a needle). |
| Water with soap dissolved in it | Add the solution drop by drop to the water being tested, stirring it carefully as you do so. First, the soap, interacting with calcium and magnesium salts, will begin to precipitate in the form of characteristic gray flakes. We continue the process until foam with rainbow-colored soap bubbles begins to form. When bubbles appear, we stop adding soap dissolved in the distillate and see how much solution we needed to completely neutralize all the salts. Next, we perform simple calculations and find out the hardness of the water. |
| Example of calculations. | |
| Let's say we used pure 100% soap, 10 milliliters of which contains one gram of soap. This amount of soap in 500 milliliters of tested water should have precipitated 10 milligrams of Mg and Ca salts. This means that one liter of water contains 20 mg of hardness salts, which corresponds to one German degree. And if we spent 80 milliliters of soap titration solution, then the water hardness is 8 degrees and it is also suitable for stove masonry. The main thing is not to cross the hardness limit of 10-11 units. | |
What sand is suitable for laying a stove? Sand preparation
As for sand, there is no need to take samples. Near clay deposits you can always find layers of white quartz sand and yellow sand containing feldspar. The first is suitable for creating any stove structures, and the second can be used in the laying of all elements except the hottest part - the firebox. Remember that preparing sand for use will require a significant amount of water. That is why you should take care in advance to resolve issues regarding uninterrupted water supply.
Sand dug up on your own must first be passed through a sieve with a mesh size of 1-1.5 millimeters. This allows you to get rid of various large debris and obtain the necessary set of fractions. The biggest problem for self-dug sand is organic impurities and various living microorganisms living in it. The sand must be cleaned from them, otherwise the masonry seams may deteriorate over time.
Sifting sand with a sieve
There are many industrial methods for cleaning sand, but they all involve significant energy costs. In order to save money, we will use a simple and accessible washing method for everyone.
To make a cleaning apparatus, we need a piece of pipe 15-20 centimeters in diameter. Its height should be approximately three times its thickness. We fill a third of the volume with sand and supply water from below under high pressure. The power of the water jet must be selected in such a way that the washed sand swirls, but does not flow into the drain located on top. After clean water flows into the drain, wait about ten minutes more and finish the procedure. The first batch of purified sand is ready. All that remains is to dry it.
Scheme of a sand washing apparatus
The method of filtering sand by washing also allows us to remove from it various inclusions of alumina that we do not need.
Proportions of mortar for laying a stove, how much sand, water and clay should there be?
An important step in preparing a construction kiln mortar is to determine the optimal proportion between sand and clay. After we bring home the clay sample selected according to the algorithm outlined above, it is necessary to divide it in two. We set aside the first half, and divide the second again into five identical pieces. We place each of them inside a separate bowl and add water (hardness up to 11 German degrees), about a quarter of the volume of the clay itself.
Next, we leave the clay to liquefy in the water. Typically, this process takes approximately 24 hours. After a day, stir it thoroughly and pass it through a sieve with a mesh size of three millimeters to sift out large lumps.
Clay dissolving in water
Place the container with the strained solution back to settle. When a cloudy slurry (the so-called “sludge”) appears on the surface of the solution after settling, remove it by pouring it onto the ground.
That's it, now you can start adding sand to each container with prepared clay. This must be done in the following proportions:
- First container - do not add sand;
- The second is one part sand to four parts clay;
- Third - two parts sand to four parts clay;
- Fourth – 3 parts sand and four parts clay;
- Fifth - sand and clay are added in equal quantities.
Adding sand to each container must be done gradually, in small portions, in several approaches (optimally - no less than three and no more than seven). Everything needs to be mixed very thoroughly. Do not rush to add the next portion of sand before the previous one has completely and evenly dissolved in the mixture. A well-mixed clay-sand solution is quite easy to identify: just try rubbing it between your fingers. If the roughness of individual grains of sand is not felt, then everything is done correctly.
Add sand to the clay
The next step in preparing the clay-sand mortar will be the production of prototypes. We take clay in each of the five containers and alternately do:
- Two bundles of approximately 35 centimeters in length and a centimeter and a half in diameter;
- We fashion a ball with a diameter of five centimeters;
- A round clay cake with a thickness of 12-15 millimeters and a radius of 7.5-8.5 centimeters.
As a result, we will have exactly 20 samples on hand that need to be marked and left to dry inside the building. For normal drying, samples should not be exposed to drafts or direct sunlight. Usually the ropes dry out in a couple of days, but cakes and balls can take up to two dozen days. If the ball does not wrinkle and the cake no longer bends in half, it means the material has completely dried.
Clay ball and cake
When the samples are ready for testing, we proceed to the next classic experiment, which allows us to determine the fat content of the clay solution. To do this, wrap a clay rope around the handle of the shovel, then tear it apart and observe the results:
- The greasy clay, indicated in Figure G (from the German “greesy” - greasy) will practically not crack, and when the rope is torn in half, the break point will have teardrop-shaped ends.
- Clay of normal fat content (marked as N) will have a cracked top dried layer and, after breaking the rope, its thickness at the point of separation will be approximately a fifth of its original thickness. These are the samples we need to select.
- Dry (lean) clay, designated as L (from the German “Lean” - lean), will be marked by the maximum number of deep cracks and, when broken, will have the largest area where the pieces of the rope separate.
As a rule, after selection, several (usually 2 or 3) seemingly suitable samples remain.
Determination of clay fat content
Dried balls and cakes will help us carry out the final “clay casting”. We drop samples from a height of a meter above the bare floor. The most durable of them will indicate the required consistency of sand and clay. If, after falling from a meter, all samples remain intact, we begin to gradually increase the height until we can determine the strongest of them.
Checking a clay-sand mortar using a flat cake as an example
Checking the quality of a clay-sand mortar using a ball as an example
The next step in preparing the mortar for laying the stove will be to calculate the required ratio of water to the proportion of sand in the mixture. The physical limits within which a clay mixture will have normal fat content are quite wide. Our main task, since we are building the stove for ourselves, is to make the strongest possible structure, with excellent gas tightness of the connecting seam material.
First of all, we sift the clay remaining during the test sampling. Press the clay through a fine mesh sieve so that it mixes evenly with the sand. Add the required amount of prepared washed sand. We learned the proportions of sand and clay earlier thanks to experiments. We start adding water and gradually mix the solution. Remember that the water must meet the hardness parameters that we talked about earlier.
Next, we take a trowel in our hands and make a depression on the surface of the mixed solution.
The mark from the trowel (trowel) will help determine the readiness of the solution
- A tearing hollow indicates that there is not enough water (Fig. 1)
- If the hollow immediately behind the trowel begins to float, it means you have overdone it with water (Fig. 2). Let the solution settle and remove the sludge into a separate bowl. The difference in volume between the filled water and the squeezed out sludge will show us the required optimal proportion.
- If you immediately guessed the required amount of water, the trowel will leave a clear, clearly visible, even trace with highlighted edges on the surface of the mixed solution (Fig. 3).
Proportions and proper preparation of clay mortar, testing for strength
The so-called cross test will allow you to find out whether our clay solution will be sufficiently strong and have the required degree of adhesiveness. This final test will show how accurate the results of all our preparatory checks on the material were and how well we cleaned the constituent components of the oven mixture.
To test, we need a couple of bricks, one of which we place flat on the ground and cover its largest plane (the so-called “bed”) with a thin layer of prepared test clay mortar. Place a second brick on top and, tapping it with a trowel, let the mixture dry for about ten minutes . After this, we grab the brick located on top with our fingers and pull it up. Having raised it to a certain height, we shake the structure by weight: if the bottom brick does not come off, it means that all the preparatory work was carried out carefully and we correctly calculated all the proportions of the clay mortar.
If you still do not understand the individual details of preparing mortar for laying a stove, we recommend that you watch this video:
