The time is coming for the winter holidays that children are so looking forward to.
On the eve of the New Year and holidays, various festivals, events and competitions are organized. Children and parents are encouraged to create their own crafts and decorations. I would like to do something special at this time: beautiful, but simple and not requiring much time. I'm already pretty tired of banal snowflakes, and making papier-mâché takes a long time. In this article I will tell and show you how to make a good and easy Christmas tree out of paper yourself.
This will not take much of your time, but the work will be neat and pleasing to the eye. The resulting crafts can also be used as decoration for gifts and at home. Try making your own New Year's tree with your loved ones or friends. In the selection you can find many good and unusual Christmas tree designs that are easy to implement.
When it's not a problem. And the Christmas tree!
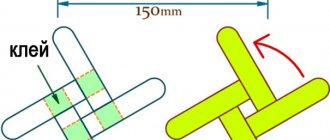
Making Christmas trees from paper tubes is quite a fun activity that children will love. The main thing is to pre-prepare tubes of colored paper. The tubes should be of different lengths, but of the same thickness. Glued onto a flat surface in the shape of a Christmas tree, they will become a cute and unusual gift.
Christmas tree using origami technique
A Christmas tree made of green paper is very simple and quick to make using the origami technique. Not only children, but also adults will be happy to master the art. This technique is attractive because figures can be made from it anywhere, without having additional tools at hand.
You will need green colored paper and scissors.
See alsoDecorating a vase: a highlight in the interior
Instructions
- Make a square out of paper.
- First join in half by running your finger along the bend. Then unfold and bend in half diagonally on both sides. Expand. You will get a square with highlighted stripes.
- Roll along the resulting preliminary bends, as shown in the figure.
- Fold each side to the middle.
- Unfold the resulting bend to form a pocket, and connect the edge of the pocket to the center.
- Turn the corners of the Christmas tree outward, then fold them inward.
- The tree will have 8 equal sides, which must be cut along the edges horizontally in 4 places.
- Fold the cut sides down diagonally.
- Bend the previous bend and tuck it inside the tree along the resulting line.
- The top of the head can be sewn with a thread, making it into a Christmas tree toy or a pendant for interior decoration.
This Christmas tree can be made quickly and easily.
This Christmas tree can be made without additional funds.
See alsoDecorating a swimming pool: original solutions and useful recommendations
Christmas trees from the forest? No, from a cone!
The easiest way to create a New Year's craft with your own hands is to make a Christmas tree from a paper cone. The materials and procedure are so simple that they are accessible to both children in kindergartens and office employees with busy work schedules.
It doesn’t matter what will serve as the basis for making cones: white, colored, craft or crepe paper. It doesn’t matter what serves as decor: rhinestones, beads, push pins or circles of colored paper. The main thing is that the result will always be the same: cute hand-made things that will easily become the basis of the most stylish New Year's composition.
Making master class:
- Cut a circle out of paper and cut it in half.
- Roll the paper semicircle into a cone and fasten it with glue, a stapler, tape or a regular paper clip.
- Attach decorative elements to the surface of the cone. Glue rhinestones; In rows, starting from the bottom, stick white or colored paper circles; insert curly pushpins.
Using circles of different sizes or from colored paper of different shades, you can create several crafts in the same style.
Curvy shapes are beautiful!
Volumetric paper Christmas trees will help you decorate your workplace or give a small souvenir to your colleagues. Schemes for creating New Year's origami offer several options for the paper embodiment of the evergreen beauty. Such a voluminous Christmas tree, complemented with decorative stars, will certainly look not like a modest souvenir from colleagues, but rather like an unusual designer item.
New Year's quilling
Masters of creating paper masterpieces using the quilling technique will also be able to delight others with festive crafts. Even when creating gifts for a large family, you can be smart and present everyone with an original surprise, never repeating it. Using the quilling technique you can create a variety of crafts:
- large volumetric panels made of many elements;
- small decorative figures that will perfectly complement gift wrapping or become a serving element;
- unusual New Year's pendants;
- tabletop 3d figurines;
- Christmas decorations;
- Greeting Cards.
Fir trees, dense forest...
New Year 2022 will be remembered by both adults and children if you complement the festive table setting with original cards with the names of the guests.
In order to make these simple paper Christmas trees you will need:
- From thick paper of suitable colors, cut out an even number of triangles - future Christmas trees.
- Secure a wooden toothpick or skewer to the wrong side of the triangle with tape. If you use double-sided tape and glue a small strip of it on the wrong side of the triangle, the Christmas tree will turn out double-sided. In this case, it will look beautiful not only for its owner, but also for his neighbors on the table.
- Insert a stick with a paper triangle into a chocolate candy in foil of a suitable color.
- Write the name of the guest on the Christmas tree (or on a white strip glued to the top) and place the figurine in the middle of the plate.
Do-it-yourself voluminous paper Christmas tree for the New Year (the easiest options)
Do you urgently need a New Year's toy, craft or attractive decoration? Try this simple design: you'll get a pretty tabletop paper Christmas tree quickly and easily. Creation does not take much time; anyone can make such a forest beauty.
Using the template, we cut out four Christmas trees from thick colored single-sided paper. Glue the shapes together with the white sides facing inward. We will get two dense pieces. If you have double-sided paper, then there is even less hassle - you don’t need to glue anything and you only need to cut out 2 blanks. The main thing is that the paper is thick.
Next, we make slits along the dotted line, as shown in the figure. On one blank from the top to the middle of the tree. And on the other, on the contrary, from below. Now it remains to connect two parts into one and we get the simplest volumetric Christmas tree. To finish, we decorate the little green beauty in our own way.
The next simple option for making a paper Christmas tree. It can be placed on a window or table, or hung anywhere in a room or office. If you follow these instructions and carefully repeat each step, the craft will come out neat and beautiful.
Step-by-step instruction:
- Using a compass we draw 4 circles of different circumferences: the largest and all subsequent ones - smaller and even smaller. Cut out 4 round pieces.
- If you want the Christmas tree to have an elegant golden or silver rim, draw it with a marker or paints along the edges of the blanks.
- We bend the cut circles in half and in half again, as well as along two diagonals. You will get 8 folds around the circumference from which we form a tier with 4 bends. We do this with each blank circle.
- Now we connect the tiers starting from the largest and ending with the smallest, coating the “top” of each with glue.
- We decorate small Christmas trees to your taste. You can glue bright glitter, decorate with a marker, or attach a paper loop so that the tree can be hung.
This craft is made using a similar principle, when cones of different sizes are placed on top of each other.
COLORFUL ENVIRONMENT
For a simple and interesting craft, you will need several circles of different sizes and colors. Each circle needs to be folded in the same way as paper is folded to cut out a snowflake. Afterwards, the circles can be slightly straightened and strung onto a vertically mounted skewer (bamboo stick), fixed at the base for stability.
Schemes and templates for printing a three-dimensional paper Christmas tree
Often a snowflake is chosen as a craft for the New Year. You've probably seen a lot of paper crafts, especially hanging from the ceiling. I suggest you make a craft for the New Year in the form of a lovely Christmas tree made of paper. Here I will tell you in detail about the different schemes for creating this decoration.
Do you want to create a fabulous atmosphere in your home? Simple templates will help with this, according to which you can cut out such wonderful Christmas trees from paper. Let's look at the stages of creating 3D Christmas trees.
There is nothing complicated here, just print these stencils on a printer (or attach a sheet of paper to the monitor to redraw).
Fold sheets of paper in half and cut out Christmas trees from them.
Then make cuts from the center to the periphery.
Spread the resulting tiers of “Christmas tree branches” in different directions and you will get 3D paper Christmas trees.
If you liked cutting out forest beauties, grab some more interesting templates, for example, these two cute Christmas trees with a deer.
Using these templates, you can make Christmas trees of different sizes and colors if you use not only white, but also colored paper.
Do you want an openwork forest beauty to appear in your home? This star pattern will definitely suit you. True, even more effort will be required; very small details will have to be cut out. But you will get very beautiful fluffy beauties.
I’ll give you a few more templates to download so you can definitely decide which one will suit you best.
You have chosen the template, redraw it on a piece of paper, and you are ready to start. Armed with small nail scissors, we cut out the stencil.
Now fold the workpiece in half.
We glue the parts together with PVA glue or connect them with tape. You can also sew with thread of a suitable color.
As you can see, there is nothing complicated, but the result is extraordinary beauty!
Made from cardboard doesn’t mean ugly
Rare and special materials are not always required to create a beautiful craft. Packaging cardboard will be a wonderful base for colorful creations. A simple Christmas tree made of cardboard with candies pasted on can pleasantly surprise you with its beauty!
Cardboard crafts, decorated by children to their taste, will be a wonderful New Year's gift that can be prepared together in kindergarten.
The symbol of the New Year 2022, made from ordinary packaging cardboard, will look very stylish if you make holes in it using New Year-themed shaped hole punches.
Video on how to make a 3D paper Christmas tree at home
I also bring to your attention five new crafts that were not discussed in the article. Here the step-by-step process of creating a voluminous paper Christmas tree is clearly explained and shown. These crafts look great and can be used as home decorations for upcoming holidays and holidays.
At home, it is possible to create with your own hands a simple, but truly beautiful and impressive craft for the New Year. And this can be done literally from improvised means - paper, scissors and pencil. In some cases, more materials are needed. However, such a toy, which is a symbol of the holiday, will be an excellent decoration for any room.
The Christmas tree can be given as a small present or as an additional decoration to the main gift. Moreover, making cute decorations and crafts can be a good time spent with family and friends.
Friends, I will be glad if you vote for the article with stars and by clicking the social buttons, it is important for me to know your opinion! Best regards, Love.
Christmas trees made of corrugated paper
A Christmas tree made from special paper for scrapbooking looks original. If it was not possible to purchase such material, ordinary thick colored paper will successfully replace it.
To create a three-dimensional paper figurine you will need:
- Connect two adjacent corners of a square of corrugated paper and glue the sides of the square touching in this way. The result should be a corrugated semicircle. If special paper is not available, you can use regular paper (colored if desired) and fold the square of paper yourself into an accordion shape.
- Fasten two paper semicircles together with glue.
- Make circles of different sizes of the same or different colors.
- Thread the circles onto a reinforced skewer.
- Decorate the top with a large bead or star.
Ideas in pictures about what other Christmas trees can be made from paper
Paper Christmas trees can come in different colors and sizes. The main thing is to make the tree in compliance with the correct proportions and not overload it with decorations. This elegant craft will enliven any holiday and will be a wonderful gift for a child or adult. The decor depends on your imagination. The main thing is that it matches the color and size of the New Year's tree.
When choosing a method for making a craft, you should take into account the availability of materials, as well as the level of complexity of making the product. If a child under six years of age is making a paper Christmas tree using a lei and scissors, all work should only be done under adult supervision. The finished tree can be used to decorate the interior or as an addition to a New Year's gift.
Lesson for literati
Even in the era of electronic “readers” and audio books, most people are sensitive to books made of paper. However, not all books are worthy of taking up space in family libraries. And, if not everyone raises their hand to throw them away, then everyone can have a hand in transforming them into a holiday craft.
Elki-vytynanka
Perhaps there is nothing more elegant than a neatly cut out paper Christmas tree. It seems to be woven from thin lace, filled with air and fragility. It is easy to make using a stencil. Such a tree will certainly become a source of admiration and pride.
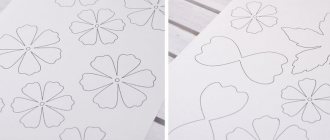
Here are some of the templates. You can download other stencils here.
Crafts based on templates
Ready-made templates will help you prepare a lot of New Year’s beauties as mini-gifts without spending a lot of time. It is enough to print the suitable material on paper, and then cut and glue the figures according to the instructions on the diagrams.
From simple to complex
If a small child is involved in the craft, it is advisable to choose an option that the young master can do.
To work you need to take:
- Green and brown paper;
- Ruler, compass;
- Glue;
- Scissors;
- Cocktail straw;
- One bead.
Using a compass, several circles of different diameters are drawn on paper. Moreover, each subsequent circle differs from the previous one by 1-2 cm.
The circles are alternately folded in half 3-5 times. Each fold line should be carefully marked by running scissors along the edges. The blanks are straightened, and a small hole is made in the center of each. The cocktail tube is covered with brown paper.
Each prepared circle is strung on a tube so that the element with the largest diameter is at the bottom, and the one with the smallest is at the top. It should look like a cute Christmas tree. The top of the tree is decorated with a bead. The openwork Christmas tree looks elegant.
To do this, just cut out several strips of paper of different widths. Finish one edge of each piece with a curly cut, creating a light lace (the technique of cutting out paper snowflakes is applicable).
The strips are folded like a fan and the width sections are glued together. The inner cut - the one that does not contain openwork patterns - is carefully pulled together with thread.
Related article: Do-it-yourself keychain made from a cartridge case
The part takes the shape of a circle. This should be done with each strip. The resulting blanks are put on the base, forming a copy of the coniferous tree.
To give it a festive look, it is appropriate to use paper of a non-standard color for the Christmas tree.
The top is decorated with a decorative element in the form of a bead or star.
The simplest way to create a Christmas tree is to use a ready-made diagram. The template is printed on a printer and cut out. Then it is applied to colored paper.
The workpiece is folded by attaching the outer elements to each other like a box.
By decorating the top of the product with a ribbon loop, it can be presented as a mini-souvenir or used as a Christmas tree decoration.
Complicated work on a paper Christmas tree requires a little more free time. But the result is worth it.
You need to prepare:
- Double-sided green paper;
- Scissors;
- Pencil;
- Glue;
- Wire;
- Ruler, compass;
- Igloo.
Using a compass, a circle is created on paper equal to the intended size of the Christmas tree. This circle will be its lower tier.
Another circle is laid inside the circle, the diameter of which is less than half the diameter of the first circle.
Using a ruler, the circle is divided into 12 parts.
The laid lines are cut from the outside to the beginning of the inner circle. Each cut element is twisted into a cone in turn and fixed with glue.
In a similar way, you need to make several blanks. In this case, each subsequent circle must be smaller than the previous one.
A hole should be made with a needle in the center of each finished part.
The wire is twisted into a spiral at one end. All blanks are strung on wire, forming a three-dimensional Christmas tree.
The top of the product is a cone-shaped “cap” made of green paper.
The Christmas tree can be decorated with colored rhinestones or lightly sprayed with sparkles. The craft is ready.
This miniature green beauty, made by hand using the quilling technique, looks unusual.
To work, you will need green paper strips 10, 15, 20 and 30 cm long (5 mm wide), instant glue and toothpicks.
Related article: How to weave animals from rubber bands on a machine and on a slingshot for beginners
The strips are wound onto a toothpick, then removed from it, slightly unraveled, and their ends are fixed with glue. Each twisted element should be slightly pressed with your fingers so that it takes on a teardrop shape.
Separately, a tree trunk is created from wide strips by tightly twisting and gluing them. The top is one of the twisted blanks with a strip length of 30 cm.
The barrel elements are glued together and a toothpick is placed inside it. Next, drop-shaped parts are gradually attached to the base. You need to start working with smaller elements. Lastly, the top of the tree is glued.
To make the tree look elegant, it is decorated with colored “toys”. They are paper strips of different colors rolled up without a toothpick.
The quilling Christmas tree is ready.
Large wall tree
Often people prefer to decorate not only the living room, but also other rooms in the house, including the hallway. This type of decoration is perfect for a hallway (or a room with a wall free of furniture).
Paper rings secured to the wall with tape or safety pins will allow you to create a panel in the shape of a Christmas tree. The Christmas tree can be decorated with garlands, beads and a star attached to its top (see making circles from corrugated paper).
Paper New Year 2022
Don’t have the opportunity to install at least some kind of Christmas tree, but at the same time you need to create a place for gifts? This unusual option will suit you.
Ideas as a basis for creativity
Ideas for creating crafts in the form of Christmas trees can be implemented in completely different ways: make an applique, create a Christmas tree from crepe paper, come up with an unusual garland... Try it, and you will definitely succeed!
Christmas tree made from disposable plates
Another craft accessible to kids. Paint a disposable cardboard plate green on both sides. Now cut it into three equal sectors. Make a trunk out of brown cardboard and glue the sectors on it one above the other. Decorate the Christmas tree with an applique in the form of balls and garlands and hang it on the wall.