Disassembling the indoor unit of the air conditioner
1. Turn off the air conditioner from the power supply.
2. Open the cover of the indoor unit housing and remove the mesh filters. We do not close the lid.
3. Remove the housing of the internal device:
- Any block has self-tapping screws at the bottom under the blinds (they are most often located under decorative plugs). Unscrew these screws;
- There may also be screws (or clips) under the cover of the indoor unit (where the filters are) - unscrew (or snap off) them. Carefully open the lower part of the case;
- Next, our task is to “free” the clips on top of the case. They are very rigid, and in order to “snap them off” you need to carefully look at how they are attached (in most cases they “snap off” when you lift the bottom of the case towards you);
- disconnect all the chips from the body, if any;
- open the blinds slightly and remove the body (from below towards you or from above towards you, depending on the model).
4. The next task is to remove the drainage tray (in very rare models it is not removable, but is made together with the entire body). It is important to consider how it is installed so that it “falls into place” during subsequent assembly. We recommend preparing a bag or container to drain possible condensation (water) from the tray:
- usually you need to unscrew one screw on the left side of the tray, then release the clips from below;
- disconnect all the chips from the tray (or unscrew the blinds drive motor);
- carefully remove the tray and at the same time disconnect the “tail” of the drainage hose (it can be secured with a latch or a self-tapping screw).
5. The next task is to remove the shaft (fan). This is the most difficult and responsible operation. There may be two options depending on the device of a particular model:
- an “easier situation” is when the shaft is removed to the left without removing the motor and control unit. In this case, there must be a screw inside the fan itself (and the entire left side of the case must be collapsible);
- unscrew and release the left part of the radiator from the frame of the indoor unit;
- unscrew the screw on the right inside the shaft (not all the way, but only a couple of turns). Here you need to act very carefully, not to break the shaft blades or damage the propeller head. This screw is often “tightened” too much!;
- remove the shaft down without damaging any parts (and your hands). It is usually very tightly installed and requires experience to remove. We can hold the screw with a screwdriver and thus push and guide the shaft.
When installing the shaft back, the screw must very accurately screw into place. Otherwise, the shaft may rotate or touch the walls of the housing.
How to disassemble an air conditioner
Before inspecting the internal contents of the air conditioner, you need to prepare for this work. First, you should wipe the case from accumulated dust and then disconnect the device from the DC source. Disassembling the unit requires special tools and materials.
What tools and materials are needed for the job?
Dismantling the internal contents of the device can be done using the following tools:
- ladder;
- drill;
- containers for condensate;
- hexagons;
- screwdrivers.
In addition, you should stock up on rags to wipe surfaces and collect excess dust. It would be a good idea to include an industrial vacuum cleaner that can safely clean the structure of accumulated debris.
Note! Before removing the device body, you should wipe it well, thereby eliminating the possibility of debris getting inside the air conditioner elements.
How to remove the cover
Before disassembling the internal unit of the split system, carefully remove the front cover from it. It is secured to the device using bolts or clip elements. Typically, such fasteners are hidden under decorative fixtures. The clip elements can be removed using a regular straight screwdriver with a thin body. To remove the cover bolts, use an electric drill with an appropriately sized bit.
By the way, the clip elements are located at the bottom and top, so to conveniently remove the front panel, each of them should be removed. Next, you need to remove the strainer (rough cleaning). After this, you should remove the plastic blinds from the unit, which can be easily removed from special grooves. Now you can disassemble the indoor unit.
Disassembling the indoor unit
The true air conditioning system is located inside the fascia. To remove it, open the clips located inside and unscrew the bolts securing the block. Now you need to drain the resulting condensate into a container prepared in advance. Many devices have an internal drainage system similar to a tray. Some air conditioner models have a single system of housing and internal unit. In such cases, these elements should be carefully removed together.
You may be interested in: Electricity consumption of an air conditioner
The algorithm for the following actions is as follows:
- Disconnecting all the chips from the tray (unscrewing the blind motor).
- Removing the tray and then disconnecting the self-tapping screw (latch) holding the “tail” to the drainage hose.
- Removing the fan element (shaft).
Depending on the air conditioner model, the fan shaft can be dismantled in different ways:
Removing the shaft motor and control unit
This is one of the most labor-intensive jobs that requires care and precise coordination. In this case, it is necessary to remove the control tray from the housing, having first disconnected the suitable wires with sensors. Next, you need to unscrew the screws and release the clips securing the block. Then you need to unscrew the screws (4 pieces) securing the motor casing. After a careful inspection of the structure, it is necessary to disconnect the motor from the shaft and then remove it. Most often you have to bend the copper tubes going to the radiator.
Note! Simultaneously removing the shaft motor and control unit is a very important job that requires some skills. It is advisable to entrust these actions to professional repairmen with such an air conditioner device.
Removing the shaft by moving to the left without removing the motor
This is a simpler way to deform the structure, which consists of unscrewing the screw inside the shaft (not completely). When carrying out such work, you should work carefully with the tool, fearing breakage of the shaft blades and damage to the screw head. It is problematic to disassemble such a screw by unscrewing it, since it is tightly tightened. A slight downward movement removes the shaft from the housing.
Freon collection
The role of refrigerant inside air conditioners is performed by freon compounds. You can assemble them from the structure in the following ways:
Method No. 1
- Unscrewing the “plugs” on the taps and attaching pressure gauges.
- Starting the device in the “cooling” mode with selecting the lowest possible temperature.
- Closing the tap with a thin tube using a hex wrench.
- Tighten the nut until it stops in a clockwise direction (decrease in pressure on the pressure gauge).
- When the pressure drops to “zero”, close the tap with a thick tube and turn off the air conditioner.
Note! Freon is extracted in this way under high pressure! Wearing protective gloves will help prevent burns.
Method No. 2
If there are negative temperatures outside and there is no need to turn on the air conditioner, the procedure for collecting freon is as follows - closing both taps on the external tray. The maximum amount of refrigerant will remain inside the structure, and the connections in the tubes will be “bleeded” when the fasteners are subsequently unscrewed.
These methods will help preserve freon inside the structure when dismantling the air conditioning system. Thanks to this, you do not have to resort to refilling the system with refrigerant after repairs.
How to remove the case
The housing should be removed after disconnecting the copper tubes, which are cut off at a distance of 2 cm from the fitting. To cut them hermetically, you should use sharp tools that do not cause severe deformation. It is advisable to further “caulk” the resulting sections for complete sealing.
You may be interested in: Air conditioner drying function
Next, the algorithm for the work carried out is as follows:
Removing Thermal Insulation
This requires a partner located outside the building. As a result, one of the technicians must turn off the power and then disconnect the wires in the area where they are connected. It is advisable to mark the disconnected terminals.
Removing the housing
Hands straighten the tubes for safe passage through holes in the walls. The cable is removed indoors. It’s better to do this kind of work together!
Unscrewing fasteners
Special nuts hold the device on the brackets. After unscrewing them, carefully remove the block and then bring it inside the room. At the final stage, the brackets are dismantled from the external walls.
It is recommended to place the outdoor unit vertically during transportation and storage. This allows you to minimize the risk of mechanical damage, which means you will maintain the functionality of the entire system.
Disassembling an air conditioner whose shaft is pulled out from the right
- the most difficult situation is when you have to remove the control unit and the motor shaft (we warn that in this case it is highly advisable to contact specialists):
- remove the control unit from the air conditioner housing. To do this, disconnect all the sensors and wires that connect to it. Then we release the clips and unscrew the screws that secure it;
- unscrew the motor mounting casing (usually 4 self-tapping screws). We unscrew all the screws that will help free the casing and shaft;
- We carefully study how to disconnect the shaft from the motor and remove it from the housing. Most likely, you will have to carefully bend the copper tubes that fit the radiator.
For more details on this case, see the article about cleaning the air conditioner.
To assemble the air conditioner, perform the above operations in reverse order.
Thus, we have a rather long, but quite detailed instruction on how to disassemble the air conditioner.
Source
General procedure
First you need to prepare to disassemble the indoor unit: disconnect the device from the network, prepare the necessary tools and materials. You will need various screwdrivers, hexagons, a rag, a container to drain condensation, a stepladder, etc.
Large air flows constantly pass through the indoor unit of the air conditioner, and dust particles remain inside. You need to periodically remove this debris for the device to work correctly.
Different ]split systems[/anchor] use different types of fastenings: bolts, latches, clips, etc. Particular care should be taken when working with plastic fasteners. Excessive force will cause the element to break. Instead of cleaning the device, it will need to be repaired.
First, remove the front panel of the indoor unit. You will have to unscrew the bolts or disconnect the clips; you can carefully pry them off with a straight screwdriver.
After this, the mesh filter and blinds are removed from the housing. Usually these elements, which need to be cleaned quite often, are simply inserted into the housing. Manufacturers provide the possibility of their easy dismantling.
It is important to consider which side the condensate drain tube is connected to. With some Panasonic air conditioners connected to the left, this tube will have to be disconnected to remove the condensate collector
Now you need to find and disconnect the drainage tray, if possible. Sometimes it is built into the body. At this stage, you will need a container for the accumulated liquid, as well as a rag, in case the water spills. In LG air conditioners, such an element is usually attached to one bolt; there are clips located at the bottom; they need to be snapped off.
Then you should remove the impeller shaft. A lot of dust usually accumulates in its grooves. This element is usually removed from the bottom or side. If the design allows, it is preferable to use the first option, it is simpler.
They do it like this:
- Disconnect the radiator mounts located on the left side of the case.
- Loosen the impeller fastening screw on the right.
- Carefully lower the shaft down, holding the loosened bolt with a screwdriver so as not to touch the blades.
All operations must be performed slowly and carefully. The screw that holds the impeller in place is very tight. It must be unscrewed so as not to damage the thread. You don't want to unscrew it all the way because it can be difficult to put it back in exactly the same position.
If it is not possible to remove the shaft from below, you need to use a more complex option:
- Disconnect the wiring from the control unit.
- Remove the fasteners and disconnect the unit from the split system.
- Remove the motor mounts and remove the casing from the shaft.
- Disconnect the shaft and engine by bending the radiator tubes.
- Remove the impeller and clean all elements.
When reassembling the device after cleaning the equipment, it is very important to connect all the elements correctly. The blades of rotating parts must not touch the walls of the housing or other components of the device.
Attention will also be required when connecting the wiring. It is better for inexperienced craftsmen to first draw a diagram or photograph the wires so as not to confuse anything while connecting them.
How to remove the indoor unit
To remove the indoor unit of any type of air conditioner, you need to unclip the lower clips. For most devices, they are located at the bottom and are indicated by arrows or serifs. Types of clips:
- The hook to the wall plate is made from above. In these cases, the clips are pressed upward.
- Bottom hook on the plate. In such devices there are additional holes at the bottom. The fasteners are pulled down from the block.
- Clips located under the decorative cover. First remove the cover and then press out the fasteners.
How to dismantle the indoor unit of a split system?
The indoor unit of the air conditioner is removed from its mountings only after dismantling the outdoor unit
Here you also need to be careful, especially with the clamps of the evaporator and the equipment itself. If these elements are damaged, the subsequently newly installed unit will vibrate during operation, which will lead to its failure
How to dismantle the air conditioner yourself:
- remove the front panel so that you can get to the latches;
- disconnect the cooling circuit pipe;
- turn off the power supply;
- remove the evaporator (carefully unclip the latches closed with the lid)
- release the latches of the indoor unit and remove it from the guides;
- dismantle the plate on which the indoor unit was attached;
- remove the cooling circuit pipeline from the wall grooves;
- remove the drainage pipe;
- dismantle the decorative box.
Disassembling the indoor unit of the air conditioner
You can disassemble the internal unit of the split system after disconnecting the device from the network. Then open the housing cover and take out the filters. The next step is to remove the housing:
- Any air conditioner has screws on the bottom that are easy to find under the plugs. They need to be unscrewed.
Having opened the blinds slightly, it is easy to remove the body by pulling it towards you.
The next step is to remove the drainage container. Some models are made monolithic, so it is impossible to separate the tray from the body. It is important to understand the features of its installation in order to install it correctly during assembly.
It is recommended to prepare a container for condensation from the tray. To disassemble the container, simply unscrew one screw and then disconnect the clips at the bottom. The blind motor must be disconnected from the tray. After removing the container, separate the “tail” of the drainage hose.
Air conditioner indoor unit fan (impeller)
The next task is to remove the fan (shaft). This procedure is the most responsible and complex. A simple option for removing the shaft is applicable when it is removed to the left without affecting the control unit and engine:
- Unscrew and release the left side of the radiator from the device body.
- Unscrew the fastening on the right in the shaft itself a few turns. This screw is often over-tightened, so it is important to be careful not to damage the head of the fastener or break the blades.
- Remove the shaft from the bottom of the housing, ensuring the safety of the parts. Since the fan is often installed quite tightly, removing it requires a lot of experience. The screw can be held with a screwdriver while pushing the shaft.
When installing the shaft into the device body, the screw must be exactly in its original position. Otherwise the fan will touch the walls.
There is also a more complex option for removing the fan. If the shaft is pulled out from the right side, you will have to remove the electric motor and control unit.
- Remove the control unit from the housing. This will require disconnecting all wires and sensors. Then disconnect the latches and unscrew the screws securing the control unit.
- Unscrew all motor mounts. Disconnect the casing with the shaft.
- Carefully study how the shaft is disconnected from the motor. Carefully bend the copper tubes leading to the radiator.
Indoor unit dimensions
Before installing the indoor unit of the air conditioner, you should inquire about its dimensions. This is especially important during repairs, because modern technologies quite often involve the installation of suspended ceiling systems, which can affect the height of the ceiling, as well as the parameters of the device being described.
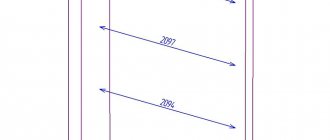
On sale you can find non-standard models that have unique sizes. The block length usually varies from 700 to 800 mm. Products up to 900 mm are somewhat less common. Experts recommend taking into account an average length of 770 mm.
As for the height, it is usually 250-290 mm. The average value is 270 mm. The depth is not of much interest to consumers, but it reaches 240 mm. The minimum value is equivalent to 170 mm. From this we can conclude that the average dimensions of the indoor air conditioner unit are 770 x 270 mm.
Knowing these parameters allows you to determine at what distance from the ceiling and walls to hang equipment. There are a lot of contradictions on this issue. Some instructions set the minimum distance to 50mm, while others go as high as 300mm. The optimal value is between 60 and 150 mm.
Experts usually install an air conditioner at a distance of 100 mm. Before installing the indoor air conditioner unit, it is important to consider whether there will be curtains in the room. The step between them and the split system is usually 150 mm. This value can be increased to 250 mm. The average distance from the block to the wall is 400 mm.
Disassembling the external module
Dismantling a mobile or window air conditioner does not take much time - just remove the device from the window or remove the air duct. When disassembling a full-fledged split system, it is necessary to preserve all the refrigerant.
The connecting tubes through which freon is transported have different diameters. A thin channel serves to transport liquid refrigerant. The large tube is designed to pump freon gas. When disassembling the air conditioner, it is necessary to “drive” the refrigerant into the outdoor module. Then you can turn off the main channels. To pump the refrigerant, while the device is running, it is necessary to screw in the pipe with liquid freon, which flows from the outdoor unit into the room. The device will pump the gaseous substance into the outdoor unit in 1 minute. After this, you should immediately turn off the device.
It takes two people to disassemble the outdoor unit of the air conditioner. This way you can eliminate unnecessary risk and reduce work time.
After disconnecting the device from the power supply, disconnect the cables by marking the terminals.
The copper ducts that carry the refrigerant can be straightened yourself with care. Along with them, the electrical cable is removed into the room. It is screwed to the end of the tube. Then you need to unscrew the nuts that hold the outdoor module. It takes two people to remove the block. Lastly, the brackets are removed from the wall.
The removed outdoor unit requires vertical storage and transportation. To avoid possible damage, it is placed in a box with foam plastic.
Removing the compressor
In some cases, only dismantling the outdoor unit is required, for example, when it is necessary to adjust the operation of the compressor. In this case, the indoor unit remains in place. The main task is to remove the compressor correctly:
- remove the cover of the outdoor unit;
- disconnect the discharge and suction pipes;
- disconnect the electrical wires;
- unscrew the fastening elements of the fan and condenser;
- remove the capacitor from the housing;
- dismantle the compressor mounts and the part itself.
By performing this sequence of actions, you can reduce the risk of damage to pipelines and gain access to other elements located in the housing.
Instructions for dismantling the air conditioner yourself
Let's proceed directly to uninstallation.
Outdoor unit
Disconnect the freon lines. This can be done by unscrewing the nuts with which the lines are screwed to the fittings of the outdoor unit. This method is used if the length of the tubes allows them to be used in a new location. Open fittings must be securely sealed with electrical tape or tape - this will prevent them from clogging.
Dismantling the outdoor unit
But in most cases, freon pipes are not reused, especially since their extension is not allowed. Then the tubes are simply cut with a pipe cutter at a distance of 150–200 mm from the fittings, immediately caulking their ends with a bench vice.
Caulked highways
Advice. If it is known that the air conditioner will be stored unassembled for a long time, the tubes can be filled with nitrogen and sealed tightly. Unlike air, or more precisely, the oxygen contained in it, nitrogen does not lead to oxidation of the material.
After all manipulations, it is necessary to remove the thermal insulation from the outer part of the freon pipes.
After making sure that the device is disconnected from the network, remove the protective cover over the electrical cable connection point. Its terminals must be marked in some way to avoid confusion when connecting in a new location. After this, you need to unscrew the clamps with which the cores are screwed to the contacts of the outdoor unit. The freed end of the cable is screwed to the freon pipes, which are then manually straightened in order to be able to pull them out through the hole in the wall.
Now we unscrew the nuts holding the outdoor unit to the brackets, and together with an assistant, remove it, and then the brackets themselves.
Note! The outdoor unit must be in an upright position during storage and transportation. When transporting, it is very important to avoid shaking and shock - for this it is better to place the unit in a box with foam plastic pre-laid in it.
Disconnecting the compressor
If the air conditioner is dismantled to repair the compressor, the latter must be properly disconnected. This is done like this:
- The covers are removed from the outdoor unit.
- After this, you can disconnect the suction and discharge pipes from the compressor.
- Disconnect the wires supplying the compressor and fan.
- We unscrew the fastenings holding the valves and the capacitor.
- We remove the condenser, gaining access to the compressor mounts.
- We remove the compressor.
By doing this, you will eliminate the risk of damage to the piping pipelines. Another plus: it becomes possible to repair several elements of the outdoor unit at the same time, which will allow you to cope with the task faster.
In order to be able to operate the compressor, you need to pour out the oil in it.
In the case of the piston model, it drains without problems through the suction pipe. For spiral and rotary models, you have to drill the bottom (hole diameter is 5–6 mm). You cannot drill through, otherwise chips will get inside. A thin septum is left, which is then pierced with a punch.
How to remove the indoor unit
To gain access to the latches of the indoor unit, you need to remove the front panel from it. Then disconnect the freon lines and electrical wires, snap off the latches and remove the block from the guides.
Dismantling the indoor unit
Note! At this stage, the average person faces some difficulties: careless actions can easily damage the evaporator latches.
The manufacturer usually closes this element with a lid, the latches of which are pressed against the wall. They were made difficult to access on purpose: this precaution, according to the developers, is a guarantee that only specialists will dismantle the device. To get to the fasteners, use two thin screwdrivers. In this case, it is necessary for someone to hold the block.
You should also be careful when unlatching the latches that hold the block on the guides. If they are damaged, the device cannot be firmly fixed in a new place and it will quickly fail due to vibrations.
Be careful with latches!
Having removed the internal unit, unscrew the mounting plate, remove the freon pipes with the power cable from the wall and unscrew the decorative box laid along the outer wall.
Consequences of improper dismantling
If dismantled incorrectly, it is easy to damage the air conditioner. Possible unpleasant consequences:
- Depressurization of the cooling circuit, which entails a freon leak. When installing the device later, you will have to pay extra to refill the system with refrigerant.
- Mechanical damage to the casing of the outdoor unit, freon pipes, and other parts.
The air conditioner is usually dismantled when changing place of residence, during repairs and cleaning. When disassembling simple units, you do not have to understand their structure. However, full-fledged split systems require a careful approach. Since the equipment is expensive, it is better to turn to professional installers who will perform the work efficiently and with a guarantee. You can disassemble the device yourself only if you are fully confident in understanding its structure.
Source
How to disassemble and clean your home air conditioner yourself
Antibacterial treatment and cleaning of the existing split system must be performed annually. Let us clarify: we are talking about internal modules used in your home, and office units need to be washed even more often. Maintenance of the external unit is carried out as it gets dirty, but at least once every 2 years. Let's figure out how you can clean your home air conditioner without calling a service technician, that is, with your own hands.
Why servicing more often is beneficial
Unlike old climate control equipment, modern split systems are capable of not only cooling, but also heating the air. Therefore, owners of apartments and private houses often use them for heating in winter, until the street temperature drops below -5 ° C. Accordingly, the main elements of the air conditioner - filters, heat exchangers and fans - become dirty twice as fast. There are other compelling arguments in favor of timely maintenance:
- To your health. It is exposed to the harmful effects of fungi and mold that settle and actively multiply inside an overly dusty unit. The sign is an unpleasant musty smell.
- Dirt accumulated in the external and internal radiator prevents the normal passage of air flow, which reduces the efficiency of the entire installation. With a constant output of heat or cold, more electricity is consumed.
- Seasonal washing is one thing, but cleaning and antibacterial treatment of a heavily contaminated indoor module is another thing entirely. You will do the first yourself, but for the second you will have to call a specialist with specialized equipment (high pressure washer, steam generator), which will cost you a pretty penny.
Note. A decrease in the efficiency of any refrigeration machine leads to an increase in the load on the compressor - the most expensive part. It turns out that heat exchangers clogged with dirt bring the time of repair, or even replacement, closer.
There is no point in developing the topic of harmful microorganisms living inside dirty air conditioners and harming people’s health, since this fact has long been known to everyone. But it would be useful to find out how much professional cleaning of split systems with disinfection costs in your region. After all, if the evaporator has not been washed for several years, then calling a specialist becomes inevitable.
Comparative example. The cost of comprehensive cleaning of household air conditioning systems with a power of up to 5 kW is in the range of 2-3 thousand rubles. (35-53 USD). These are Moscow prices; in the regions they may be lower. If you wash the split with your own hands, then you can easily do it in 5, maximum – 10 cu. e., which you will spend to buy the cleaner. Agree, independent prevention is much more profitable than after-sales service.
In the photo - applying Bizol cleaning foam (price - about 6 USD)
Cleaning the split system yourself
There is a lot of information, articles and videos on this issue on the Internet; we will try to summarize with you a little and look from the technical side at the process of cleaning and servicing a split system (air conditioner) both with our own hands and when calling specialists.
To begin with, I would like to answer a question that worries everyone and everything.
How often should you clean your air conditioner?
There is no definite answer; it depends on the operating conditions and habitat. Air conditioning in an apartment is one thing, and air conditioning in a Bar, Cafe or Food Unit is another thing. Let's assume that we have an ordinary household air conditioner in an apartment, with a standard power of 7-12 kbti.
We answer:
Cleaning and maintenance of the air conditioner must be carried out
annually
!
What is proper air conditioner cleaning?
The second question is what is meant by cleaning the split system (air conditioner). Cleaning the filters of the indoor unit can also be called cleaning, but such “cleaning” is of little use. Cleaning an air conditioner (split system) is, first of all, cleaning the heat exchangers (evaporator and condenser) of the indoor and outdoor units, cleaning the fan, cleaning the squirrel wheel, cleaning the drainage system.
How to properly clean split system filters?
Cleaning split system filters should be taken by default; filters must be cleaned every two to three weeks. This sweet girl will show you how to do it correctly.
Well, how to clean the split so that it can be of real use?
It is difficult to do this without a steam cleaner and a high-pressure washer, but you can do it with improvised means; it is advisable to do such cleaning before each summer season.
Simple foam rinsing
This method of removing dirt from an indoor unit is very simple and accessible to everyone, including housewives. It is performed using detergents sold in aerosol cans (Liqui Moly, Plak, Bizol and the like). The technology is like this:
- Disconnect the device from the power supply, open the lid and remove the filters. Rinse them with running water and leave to dry.
- Apply foam from the bottle onto the evaporator fins and wait for the time specified in the instructions (from 10 to 30 minutes).
- Install the filters and turn on the split system in heating or ventilation mode (depending on the recommendations on the can) and let it work for half an hour. Ventilate the room.
How to foam clean an air conditioner at home is clearly demonstrated in the video:
Unfortunately, this method cannot be called effective, because it only allows you to flush the heat exchanger. The fan turbine, drainage basin and hidden cavities of the device remain dirty. Therefore, next we propose to consider how to properly clean the split system units, having first disassembled them.
Necessary items for cleaning your air conditioner
Prepare well before starting the operation. A regular screwdriver will not be enough, since the air conditioner has a complex design. Here's what you'll need to stock up on:
- rags;
- a container (plastic container or tin can);
- a brush on a long handle;
- vacuum cleaner;
- new filter;
- oil;
- a set of screwdrivers;
- cooling plate;
- spraying apparatus;
- detergent.
Disassembly instructions for Samsung vacuum cleaner 1600w
How to disassemble and wash the indoor unit
The cleaning process is proposed to be considered using the example of a Korean Daewoo split with a power of 18 kBTU or 5.3 kW. What you will need for work:
- flat and Phillips screwdrivers;
- alkaline-based cleaner Carlyclean or similar in a container with a hand sprayer;
- a special polyethylene cover with a water drain, made to fit the dimensions of the indoor unit;
- latex gloves;
- another hand-held sprayer to rinse off the cleaner.
For reference. A single dose of Carlyclean can be ordered at any specialized online store at a price of about 3 USD. e. They also sell covers that protect walls from drips (cost is about 2 USD). If you wish, you can solder such a device yourself from plastic film.
To thoroughly clean and disinfect all parts of the internal module, you need to disassemble it in the following order:
- Unplug the air conditioner, remove the filters and wash them. Remove the plastic blinds by carefully bending the ends out of their slots.
- Unscrew all screws located on the front panel. They hold the electrical compartment cover, the panel itself and the condensate tray. Some of them are located under decorative plugs.
- Pull the front panel towards you and tilt it up to disengage the 4 top latches. Do not remove it until you have disconnected the LCD connector located on the right side.
- Mark with a marker the position of the servos that rotate the blinds, then unscrew and remove them. Release the retainer of the condensate tray (held by its left end) and disconnect the drainage tube. After this, the element can be easily dismantled.
- Pull out the temperature sensor inserted between the evaporator fins and bend it towards the electronic unit. Protect the latter from water with a plastic bag, as shown in the photo above.
Note. Split systems from other manufacturers are disassembled in approximately the same order. Differences occur in the methods of attaching the panels, the number of blinds and the placement of the display.
If you are servicing your home air conditioner for the first time, the disassembly procedure will take approximately 1.5-2 hours. This gives you access to the fan turbine and the cavity behind it, which also needs to be cleaned. Then everything is simple: pull the cover over the module, sliding its edges between the wall and the body, then start cleaning the “split”:
- Wear rubber gloves and thoroughly apply cleaning fluid to the heat exchanger, fan drum and internal cavities. At the same time, rotate the turbine with your free hand.
- After 5-10 minutes, take a water sprayer and wash off the product along with the dirt. You need to spray until clean water runs out of the block.
- Wait until all the water has drained out of the indoor unit, then remove the cover and let the unit dry.
- Wash the removed panel, bath and filters and dry them. At the same time, try not to wet the foam seals. After drying, the air conditioner can be assembled.
This is what the turbine and heat exchanger look like after flushing
Advice. It is better to start assembly the next day so that all the parts have time to dry thoroughly. Our expert Vitaly Dashko will tell you how to properly disassemble and clean the internal unit of a split system in his video:
Classification of indoor units
In order to disassemble, it is necessary to determine the type of indoor unit of the air conditioner, which can be represented by:
- wall split system;
- duct air conditioner;
- cassette device.
The most common are wall-mounted models, which are more affordable and are sometimes also called household models. Their installation can be carried out in a room for any purpose, and the power within 7 kW allows cooling up to 70 m 2 of area. Such blocks are usually installed at the top of the wall, near the window, since the design provides for the presence of an outdoor unit, and the nodes must be interconnected.
Wall-mounted air conditioners are not capable of supplying fresh air to the premises, since this requires a separate ventilation system. If you are wondering how to disassemble the indoor unit of an air conditioner, you can find this information below. It is for such a device that recommendations are given in the article.
In addition to household air conditioners, some manufacturers supply the market with semi-industrial appliances whose power reaches 10 kW. Outwardly, they resemble traditional split systems, but in terms of parameters they are semi-industrial equipment.
Duct air conditioners are installed with suspended ceilings that hide them completely. Distribution of cooled air is ensured using thermally insulated air ducts, which are located in the inter-ceiling space. Such designs can cool several rooms at once. The power of the equipment reaches 25 kW, which makes it possible to provide cooling for a cottage or several rooms in an apartment. The main feature of duct systems is the ability to supply fresh air in the volume that is guaranteed by the functioning of full ventilation.
Cassette air conditioners require a suspended ceiling during installation. When compared to ducted designs, cassette designs distribute cooled air through the bottom of the unit. It is covered with a decorative grille and usually has the following dimensions: 600 x 600 and 1200 x 600 mm.
Instructions for cleaning the outdoor unit
The main difficulty in servicing the external unit is its location. If it is installed on the wall of a high-rise building on the side of a window opening, then it is better to avoid cleaning it yourself, unless you live on the first floor. It is safer to work when the capacitor is placed in the following places:
- on an unglazed balcony or loggia;
- on the wall of a private house where you can attach a ladder;
- under the apartment window.
The disassembly and cleaning procedure itself is quite simple and is performed in the following sequence:
- Unscrew the screws holding the top cover and remove it. Remove the fan protective grille.
- Unscrew the impeller fastening nut (thread - left) and remove it from the shaft. Wrap the engine in plastic to prevent liquid from getting into it.
On the left is a top view of the heat exchanger, on the right is the engine wrapped in a package
- Thoroughly spray the cleaner onto the heat exchanger (condenser) on both sides and wait 5-10 minutes.
- Using a hand sprayer, flush until no more dirty water flows from the radiator. Wash the impeller, remove the package from the motor and reassemble the unit in reverse order.
For reference. The electronics and compressor installed in the external unit are separated from the condenser by a partition, so you can safely apply the product and rinse it off with water.
It is also better to postpone turning on the cooler for a day so that the seals have time to dry. How to clean the outdoor unit of the air conditioner is shown in the video: