Method one - using bitumen-polymer mastic
This is a fairly simple and common way of attaching insulation to walls. To do this, they usually use brands of mastic specially designed for polystyrene foam, and they are sold in finished form - no need to be fancy, it’s convenient, fast and reliable.
To glue a slab of expanded polystyrene, the composition is applied in dots in the corners, sides and in the center, after which the slab is firmly pressed against the wall, and after 5-10 minutes you can glue the next slab. To increase the adhesion of the mastic to the slab, it is recommended to roll the latter with a needle roller, and only then apply glue.
Foundation insulation
First, the foundation wall is leveled if the differences in unevenness are ≥ 2.5 cm. The cement-sand mortar is applied directly to the surface or to a chain-link mesh secured with staples. Then waterproofing is carried out, bitumen mastic is applied in a layer 2–4 mm thick, and a roll of material is glued on top. Acrylic glue is applied pointwise (at 5-6 points) to the foam sheet. After this, the plate is pressed against the surface for 30 - 60 seconds. The following slabs are glued above the bottom row.
After sheathing, the seams are filled with glue, the surface is covered with fiberglass reinforcing mesh, and the foundation is plastered again.
How to attach
Where to buy PENOPLEX® thermal insulation?
is a manufacturer of thermal insulation; distributors sell products. On the website, in the “Where to buy” section, you can select: country, city, partner status and select the supplier closest to you. You can also order PENOPLEX® products in the online store
How to attach PENOPLEX® thermal insulation?
The method of fastening PENOPLEX® directly depends on the structure in which thermal insulation is used.
— When insulating structures located below ground level, such as foundations, plinths, blind areas, preliminary adhesive fixation and weighting using backfilling of soil is sufficient.
How to properly secure penoplex to the wall?
The choice of method for insulating buildings remains an urgent problem. When heat passes through walls unimpeded, heating efficiency decreases and costs rise. Penoplex sheathing is considered one of the simple and inexpensive methods of insulation. To save money, many people prefer to carry out repairs themselves. To perform high-quality insulation, you need to know how to properly attach penoplex to the wall.
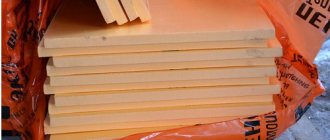
Advantages and disadvantages of using penoplex
According to its characteristics, this material belongs to the optimal insulation options:
- low thermal conductivity;
- high moisture resistance;
- strength, flexibility;
- does not rot, is resistant to the spread of mold and mildew;
- can be used at temperatures from -50 to +70Сº;
- does not burn;
- It is lightweight, does not overload the supporting structure, simplifies storage and transportation;
- easy installation, cut with a construction knife;
- service life reaches 50 years;
- low price makes it possible to inexpensively insulate a building.
The disadvantages of penoplex include the following features:
- melts in a fire, releasing toxic smoke;
- insulated surfaces do not breathe due to low vapor permeability;
- the material may be favored by rodents;
- destroyed by exposure to ultraviolet radiation;
- reliable fastening of the penoplex is ensured by dowels.
Fastening methods
Surfaces made of different materials can be insulated in different ways. The process of covering a building includes several steps:
- surface preparation;
- insulation fastening;
- finishing.
In order to perform high-quality thermal insulation, penoplex should be installed correctly. First, the starting bar is screwed strictly horizontally. The bottom row of insulation is laid on it.
It is recommended to install a factory additional element (perforated, metal). You need to buy a strip that matches the width of the insulation and the required number of corners.
Before installing penoplex, a horizontal level is drawn along the walls of the building. The starting bar is screwed to the line. It holds the insulation and maintains the “geometry” of the installation.
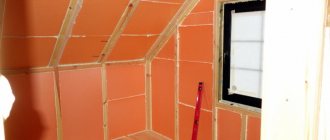
With lathing
A special frame is constructed on the surface from wooden beams or aluminum profiles. The finishing material (siding, block house, wall panels) is then attached to the sheathing. The insulation is placed in the cells of the frame. The gaps are filled with polyurethane foam (it also fixes the sheet).
Advice! It is recommended to choose penoplex whose sheet size corresponds to the sheathing cell (to reduce the amount of waste).
For special teams
Without a frame, penoplex is fixed with a special compound to a concrete, block or brick base. This cement-based adhesive is also used to attach foam or mineral wool. The powder is diluted with water before use.
The mixture is applied to the insulation with a spatula. To glue, the foam is set in place and held for one minute. If the insulation panels do not fit together tightly, the seams must be taped with foil tape. The glue will harden in one hour, during which time the foam sheets can be repositioned.
- bitumen-polymer mastic;
- glue foam;
- liquid Nails;
- polyurethane foam.
Quite often, penoplex is secured with bitumen-polymer mastics. Using this technology, the bases of buildings that are constantly exposed to adverse factors (humidity, reagents) are usually insulated. Installation of penoplex is carried out quickly, the insulation is attached securely. You need to buy ready-made mastic and install it in the gun.
The insulation is securely fixed to smooth concrete surfaces with foam adhesive. From a pistol, the composition is applied around the perimeter and center. The grooves are also filled with glue, the sheet is pressed and held for 30 seconds. Installation with dowels and further work can be done after 2 hours.
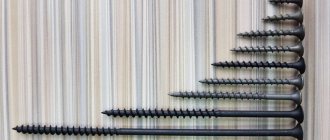
Key features of dowels
- Such fasteners for thermal insulation and other facade structural elements have a distinctive feature - an elongated rod. It is designed for high-quality fixation of materials and stability of the dowel itself in the structure. Dimensions of 10x100 millimeters or more allow you to secure building materials with a wide cross-section.
- For the manufacture of dowels, special materials are used that are not affected by corrosion, atmospheric phenomena, or mechanical deformation. The dowel is often made of nylon or frost-resistant polypropylene; the screw is a rod made of galvanized steel.
- The temperature range at which façade fastening elements can function normally is from -40 to +80 degrees Celsius.
- Despite the impressive operating temperature range, it is better to install thermal insulation and work with screws and dowels at air temperatures above 0 degrees Celsius.
- Installation of thermal insulation fastening elements and other façade components is carried out as standard. A hole is made using a drill, an expansion dowel is inserted, and then it’s up to the screw, which is mounted with a screwdriver or screwdriver.
- When it comes to installing cladding materials, the sides of the dowel are recessed into the seam between the cladding elements.
Where are they used?
We can say for sure that facade dowels are not limited to their use exclusively in the construction of a ventilated facade, installation of metal profiles and fastening of facade facing materials.
In fact, fasteners of this kind serve perfectly well when installing window frames, windows themselves, doors, wall cabinets, gates for private houses, and all kinds of structures made of wood.
How to choose
To organize the installation of thermal insulation and use the screw correctly, you will need to choose the right façade fastener suitable for your specific purposes.
Therefore, listen to a few useful tips that will allow you to make the most correct choice, correctly organize the work process, and be sure that the installation of the facade or facade elements was carried out correctly.
- What is the outer wall made of? Today, the market for construction and finishing materials offers a wide range of dowels designed for specific materials in which they will be mounted. We are talking about concrete, foam concrete, brick, gas silicate, wood, polystyrene foam, etc.
- What insulation is used and what it is made of. The thermal insulation material and its size influences which dowel and screw you will ultimately use. If we are talking about mineral wool, then a metal facade fastening element will come in handy here. For thermal insulation of less weight, a plastic analogue with impact-resistant characteristics may well be suitable.
- Material thickness. Take careful measurements to understand how deep the dowel will go into the façade material. The most common size of the fastening element is the facade dowel 10x100 millimeters. But it is not universal, so in some situations it may be too short, and for others it may be too long.
- Features of the climate of your region. Air temperature, humidity, and wind will exert pressure on the façade dowel with screw. In strong winds, weak plastic dowels simply cannot withstand the load, causing your entire façade insulation and insulation structure to collapse.
- 5 The height of the building on which façade work is being carried out. There is a fairly simple principle of choice here - the higher the building, the stronger the dowels should be. Deciding on such a nuance of a purchase is clearly not difficult.
- 6 Cost. Price should not be the determining factor, since low cost indicates appropriate quality. But dowels themselves are not an expensive pleasure, even if they are made of high-quality materials. On average, the price for a package of facade dowels is from 150 rubles. This package contains 100 elements. That is, to cladding a new façade structure of a small private house, you will need literally 2 packages of fasteners. 300 rubles is definitely not a huge amount of money.
Facade fasteners actually play a more significant role in achieving the final result than you think. They are responsible for the reliability of fastening and fixing the thermal insulation, waterproofing, and cladding layers of the renovated walls of your home. Therefore, take a responsible approach to the choice of screws and dowels, and do not skimp on such inexpensive components.
Features of fastening to different types of walls
There are buildings made from various building materials (wood, brick, concrete, gas blocks). For different surfaces, taking into account operating conditions, the methods of attaching thermal insulation differ.
The combined method of attaching the heat insulator is especially common. In this case, bitumen (or adhesive) compounds are used together with umbrella dowels. The result is a sealed layer of heat insulation with an increased insulation coefficient. After installation, the surface is reinforced with mesh and decorative finishing is performed.
Brick
Often rough masonry has strong unevenness on the surface.
It is recommended to attach insulation to such a base using combined methods. Before installation, the wall must be primed. Advice! It is recommended to attach penoplex to a brick base with glue, with additional fixation with umbrella dowels.
Insulation of a brick wall.
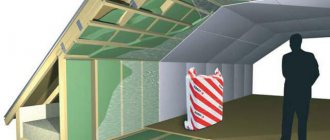
Wooden
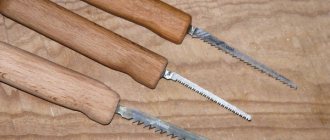
Wooden surfaces are treated with anti-rotting impregnations. Next, a frame is constructed from bars, which will ensure ventilation of the facade (the wood will “breathe”). Free air flow will protect the wood from rotting (a ventilation gap is created). Thermal insulation slabs are installed on the sheathing. Penoplex must be secured with special nails or self-tapping screws.
Insulation of wooden walls.
Block
Walls made of aerated blocks must be insulated and decorated with decor (without protection they become damp). Before installing the heat insulator, the walls must be primed. An uneven surface can be leveled with a drill and protruding areas can be trimmed off. If wall panels are chosen as the final finishing, then the penoplex is mounted on the sheathing. The insulation is attached with glue (fixed with dowels) if decoration and painting are planned.
Insulation of block walls.
Concrete
Concrete is particularly absorbent. Low adhesion leads to increased glue consumption. First you need to coat the surface with an impregnating primer. The composition increases adhesion and strengthens the structure of the material. Penoplex slabs should be mounted offset (checkerboard pattern).
Insulation of concrete walls.
The choice of glue and what is better not to use
Before purchasing, you need to consider the following points:
- acceptable price;
- suitability for indoor or outdoor use;
- adhesion strength;
- consumption;
- harmlessness (for interior decoration).
Typically, any polyurethane or polymer adhesives are purchased for interior work. It is prohibited to use waterproofing products indoors; they can be harmful to health. Cement-based mineral mixtures are often used outside the house. For exterior work - balconies and plinths - acrylic mixtures are ideal.
Compositions containing benzene, toluene, acetone, formaldehyde, and xylene should not be used for penoplex. Kerosene and gasoline, coal tar and polyesters, and formaldehyde will also spoil the material. Otherwise, you can easily glue the material with your own hands without extra costs.
There are many options for materials for construction and finishing. Penoplex is in great demand. The surface finished with such panels should serve for a long period. Properly selected adhesive for penoplex will ensure the performance of this function.
You need to choose the adhesive for insulation very carefully. After all, it is on this that the slabs themselves will need to be glued, and the entire insulating structure rests on it. If the glue cannot cope with the load, the consequences will not be very pleasant.
Applying glue to a foam board
It is the choice of adhesive for extruded polystyrene that will be discussed in this article. By the way, we recommend buying polystyrene foam in Ufa.
How to attach penoplex to the wall
Before you start attaching the penoplex to the wall, you need to draw a diagram with the exact location of the insulation sheets and indicate the dimensions, as well as make markings. This helps to calculate the required number of sheets, fasteners, and glue.
Inside
Indoor insulation work with penoplex is carried out sequentially:
- preparing the wall surface (removing old finishes, priming, sealing cracks);
- fastening of the slabs is carried out in rows (placed with a shift along the perimeter) or in a pyramid (the first row is around the perimeter, then the corners are laid out);
- glue protruding from the seams is removed with a spatula;
- The mounting mesh is laid on the surface of the heat insulator, and finishing work is carried out.
Outside
For external insulation, you should buy façade penoplex. The insulation must be installed using umbrella dowels. Next you need to act in the following sequence:
- preparatory work (all decorative elements are removed, cracks are puttied, primed);
- installation of the frame if it is planned to cladding a ventilated façade;
- installation of the starting bar;
- sheets are placed in frame cells;
- if the sheets are attached with glue (without lathing), then it is applied with a notched trowel;
- penoplex is fixed with umbrella dowels;
- the surface is reinforced with mesh, plastered, and after complete drying it can be painted with weather-resistant facade paint.
Polyurethane foam should not be used for external insulation.
Instructions for insulating a house with Penoplex from the outside
After the preparatory work, you can sheathe a wooden house with penoplex, following the steps of the step-by-step instructions:
- attach penoplex to a wooden wall, glue the slabs “bottom → up” from the bottom of the building upwards;
- after the 3 days required for the glue to dry, nail the sheets with disc-shaped dowels;
- Fill the joints with polyurethane foam and seal with tape;
- if necessary, glue the 2nd and 3rd layers of penoplex, moving them away from the joints of the previous row in order to bandage the seams;
- attach a reinforcing mesh and plaster, or construct a new sheathing to attach the facing material.
Glue application process
Depending on the type of adhesive composition, the following methods of applying glue are used:
- dry mixtures are diluted in water and distributed evenly over the surface of the stove using a notched grater;
- polyurethane adhesive compositions are sprayed from a can in stripes around the perimeter and in the center of the sheet;
- liquid nails are squeezed out of the tube onto the surface at several critical points;
- bitumen mastic is applied with a spatula or roller.