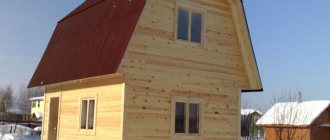
The bathhouse soars, the bathhouse rules, the bathhouse will correct a hundred ailments. This is how a popular proverb characterizes the bathhouse eloquently. Indeed, this is an inexhaustible reservoir of health and vital energy.
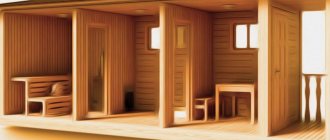
Bathhouse layout diagram.
Therefore, those who have the opportunity to build such a wonderful structure on their own site are truly lucky. However, having a bathhouse is one thing, but building it with your own hands is a completely different matter.
And first of all, because the structure must be strong, durable, and most importantly, capable of retaining heat for a long time. To do this, you need, at a minimum, to know the specifics of construction work and the ability to select the right materials.
But any knowledge and skills fade into the background when solving issues related to heat conservation. This means that you will have to insulate the walls, floor, and ceiling.
From this chain one cannot exclude such an important element of the entire bath structure as its foundation. It serves as the foundation of the structure, so high-quality insulation of the foundation will significantly reduce heat losses and save on fuel.
Why do you need a warm foundation?
Comparison of the characteristics of thermal insulation materials.
Quite often you can hear the opinion that insulating a bathhouse and its foundation is a waste of effort and money. This work is undoubtedly very labor-intensive and painstaking, so some believe that it is better to spend more firewood once a week in order to properly warm the floors and create a comfortable temperature regime than to properly insulate the bathhouse.
But the premature destruction of the foundation and walls will very quickly make itself known and force one to admit the fallacy of this judgment.
In the warm season, the uninsulated foundation becomes covered with condensation. Air heated by the sun from the street penetrates under the foundation, where it meets a cold wall, cooled by damp soil.
The moisture in the air condenses and falls on the concrete base in the form of dew.
Alternative ways to build a plinth
Sometimes craftsmen use non-standard designs for the installation of a bathhouse plinth, for example, from sand-lime brick, ordinary ordinary brick, wall stones, slate, etc. It is worth noting that any wall materials as plinths are undesirable, since they are not designed for direct contact with the ground . Still, it is better to construct structures in a single mass with a base. If the foundation base is made in the form of piles, then it is preferable to make the above-ground part in the form of a monolithic reinforced concrete belt.
The first and last row of the red brick plinth must be placed in a poke, and all the inner ones in a spoon. This will ensure a good bond and give the necessary rigidity. If there are more than 10 bricks nearby, then on the 5th row it is also necessary to “plug” the base.
If the foundation ends at a level equal to the ground level, additional brickwork can be made as a plinth for the construction of wooden walls of the bathhouse. It is better to use silicate type bricks, as they interact well with a humid environment. It is necessary to raise the level by 500-600 mm from the ground surface (but not less than 250 mm). The thickness of such a wall will be 400 mm for a large bathhouse and 250 mm for a small one-room building.
Ventilation outlets must be made. To do this, vents are left approximately in the middle part of the masonry in height. It is advisable to make a reinforcing belt of reinforcement and concrete on top of the masonry. Waterproofing is laid under the brick and under the wall, since in this case we use three types of materials for the foundation, plinth and walls.
Plinth cladding
The external cladding will additionally protect the base and wall structures from moisture and temperature changes. The materials used for cladding are extremely durable - moisture-resistant and frost-resistant. These include decorative facing bricks, tiles, and hanging plastic systems. The base, decorated with natural stone - limestone, sandstone, as well as artificial stones, looks very beautiful.
The basement part of the foundation of a small bathhouse in a summer cottage can also be lined with various available materials, for example, fragments of ceramic tiles or glass, laying them out in the form of a mosaic.
PS Here the base is ready, now we choose a log house for the bathhouse and EASY STEAM FOR YOU!
Have fun!
Installation of insulation
As a result, the inside of the foundation remains wet all summer. Over time, the wet surface first becomes covered with mucus, then with mold. And after a few years, the foundation, and perhaps also the walls, will require major repairs.
Scheme of foundation insulation using expanded clay.
In winter, with the onset of cold weather, the situation looks even more depressing. An uninsulated foundation becomes absolutely defenseless against buoyant forces, under the influence of which it swells, warps and quickly collapses, the consequences of which can threaten the entire structure. And then even repair work will not be able to correct the situation.
Taking into account the importance of the problem, its solution should be started at the stage of design and construction of the foundation of the bathhouse. Fortunately, the modern market offers a wide selection of heat-insulating materials produced using advanced technologies.
Their main advantage is their small thickness and excellent heat-saving properties. Therefore, if you wish, spending very little money and without resorting to the help of specialists, you can insulate the foundation of a bathhouse yourself.
How to insulate the base of a bathhouse with polystyrene foam?
To achieve high-quality insulation, polystyrene foam is also well suited. This material varies significantly in density. The optimal result can be achieved if you use a thermal insulation coating whose density is 25 kg/m3 or more. The use of polystyrene foam as a material for thermal insulation involves the creation of additional protection against rodents, which often damage such insulation.
Scheme of base insulation with foam plastic
- Marking. When placing foam plastic outside, the base will increase in volume, so marking will be required;
- Preparation of the working surface. There should be no dirt or dust left on the basement walls. A waterproofing primer is applied to the prepared base to protect it from moisture;
- Fastening foam sheets. The insulation is glued to the surface, starting from the corners of the building. Fastening is carried out with glue and dowels;
- Surface reinforcement for finishing. A reinforcing mesh is glued to the thermal insulation layer. Glue is also applied on top of it;
- External cladding. When the glue is completely dry, the surface of the base is covered with putty. Then you can cover the bathhouse with paint or PVC panels.
By properly insulating the base of the bathhouse, you can ensure a very pleasant microclimate in it. Therefore, taking bath procedures will become incredibly comfortable.
Arguments in favor of insulating the bathhouse foundation
It is known that almost a quarter of the total heat loss of a bathhouse is lost through the foundation.
Its freezing leads to premature aging and destruction of the waterproofing coating. At the same time, insulating the foundation allows you to:
- reduce heat loss and heating costs;
- maintain an optimal and stable air temperature inside the bath;
- prevent the formation of condensation on the inner surface of the foundation;
- protect waterproofing from mechanical stress and damage, and increase its service life
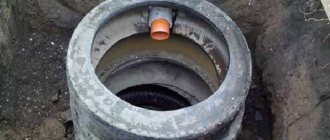
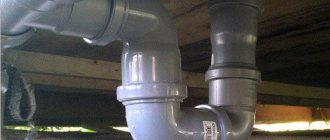
Networks and drain.
Width and height of the foundation for the bathhouse.
Laying pipes for water supply networks for drainage in the bathhouse.
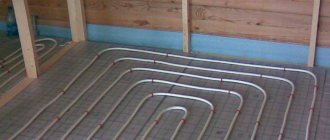
Let's move on to laying pipes for water supply networks. Calculation of the diameter and length of water supply networks is carried out in advance, before all concrete work is carried out. Separate trenches are dug under the water supply pipes to the pipe outlet points. The installation of water supply networks requires special skills and knowledge, but you can prepare trenches yourself. According to the technology, the pipes are laid on a bed of crushed stone. The bottom of the ditches is filled with gravel, the standard layer thickness is 80-100 mm. The ends of the pipes are brought out 100 mm above the floor level, in the right place and closed with plugs.
Subsequently, after all the concrete work and the construction of walls from sleepers, all pipes and internal networks are installed. The depth of laying pipes in the ground on the outside of the room is 1200 mm, and on the inside 600 mm. The installation of networks can be carried out simultaneously with the drainage by laying the pipes together.
The cushion for laying pipes and networks must be compacted. The slope for laying sewer pipes, the height of the inlet and outlet openings, and the drainage angle are measured. Before making the entire foundation for the bathhouse, take care of the wastewater drain. Prepare a hole or pit and drain there. The optimal distance between the bathhouse and the drain is 6-10 meters, otherwise the log house will become damp.
Advantages of extruded polystyrene foam
Scheme of thermal insulation of the foundation with polystyrene foam.
The properties of the raw materials and the closed-cell structure of extruded polystyrene foam prevent the penetration of moisture into the slab, due to which the service life of the insulation is at least 40 years.
Excellent technical characteristics make it indispensable for thermal insulation of baths.
At the same time, this material is less likely to be damaged by rodents than conventional granulated polystyrene foam.
Today, foundation insulation with extruded polystyrene foam is the most rational and gives the best effect. The use of other materials is usually more expensive and less effective.
Other parameters affecting the depth of the foundation.
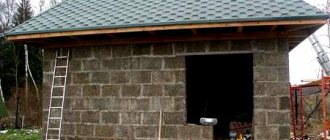
The depth of the foundation depends on the material . from which the walls for the bath are made. A stone bathhouse requires from 1 m, preferably from 1.5 m. A bathhouse made of logs or timber also needs a foundation of at least 1 m. Laying cinder block walls is 1.5 times lighter than brick, so the foundation can be laid from 0.5 m. Aerated concrete and foam concrete blocks need foundation with a depth of 40 cm.
a significant influence on the depth of the foundation for a bathhouse.
Having compared all the factors that influence the depth of its occurrence, having determined the required depth for a specific foundation, you can proceed to the stage of its construction.
Insulation of the foundation from the outside
In the process of preparing the foundation for pouring, the formwork and trench for it are made wider than the calculated value by the thickness of one or two polystyrene sheets, the insulation of which gives the best result.
In this case, the density of the material must be at least 35 kg/m³, and the thickness must be more than 10 cm. The insulation is attached to the foundation.
After removing the formwork, it does not require additional mechanical protection. The part of the foundation that rises above ground level is finished with decorative stone or tiles directly on top of the insulation.
Finishing the basement of a house with decorative plaster
Decorative plaster is one of the most inexpensive and simplest ways to cladding a base. But it requires mandatory preliminary leveling of the wall surface, and in some cases, additional installation of reinforcing mesh. You cannot do without a mesh if the plaster layer exceeds 12 mm or if the base is installed unevenly, with significant deviations horizontally or vertically.
An interesting solution is mosaic plaster containing grains with a diameter of up to 3 mm. From a distance, this decoration of the base looks like a multi-colored mosaic.
The disadvantage of plaster is its fragility. Pretty soon, cracks and chips will begin to appear at the corners, bottom and top of the base.
Insulation of the foundation from the inside
Scheme of horizontal insulation of the foundation.
If for some reason problems arise with insulating the bathhouse foundation from the outside, you can insulate it from the inside. True, most experts do not recommend doing this, because in winter this can lead to increased freezing of the foundation walls.
Thus, by protecting the heat remaining inside, through the external defenseless part, you give them over to the power of frost. Increased soil heaving will certainly lead to accelerated destruction of the foundation.
In this regard, it is not necessary to insulate the internal part without insulating the external part.
If there is nothing else left but to insulate the foundation from the inside, then at least first check the ability of the walls to accumulate condensation moisture. Attaching the thermal insulation from the inside is done in exactly the same way as with the external device.
How to inexpensively insulate the base of a log bath?
Often, in a chopped bathhouse, the floor turns out to be damp and cold. This means it's time to take up thermal insulation measures. When insulating the base, different technologies can be used. For example, insulation can be placed from the inside. But this will require dismantling the floor in the building. A more convenient method is to insulate the base from the outside.
The need to place thermal insulation materials on the outside can be explained by the fact that the most correct way to lay the insulation itself is on the cold side. Then the structure will not freeze. Internal thermal insulation should only be considered if you have decided to carry out complex insulation, which may be useful, but will be expensive. As for inexpensive insulation, it looks like this.
Inexpensive basement insulation scheme
- The bathhouse is dug in with a trench 40 cm wide. Rotten logs are removed;
- New logs are coated with antiseptic substances or drying oil;
- Jute is placed in the cracks between the logs to eliminate drafts;
- The logs of the bathhouse walls become jammed;
- The seams are caulked with jute and covered with gypsum putty with sawdust;
- A painting mesh is attached to the logs, which is then used for plastering;
- The surface is covered with roofing felt or other material for waterproofing;
- To eliminate the risk of freezing, earth and sawdust are poured into the trench.
As a result of the work described, the base of the bathhouse will be well insulated. But to increase the level of thermal insulation, you can additionally build a veranda or terrace on the north side of the property.
Insulation of the foundation with a slight depth
When laying a foundation above the freezing line of the soil, you need to keep in mind that very soon heaving forces will begin to manifest themselves, very often leading to deformation of the structure.
You can reduce the depth of freezing under the foundation by insulating the soil around the perimeter of the bathhouse under the blind area. Thanks to this, it is possible to maintain the frost line in the backfill, gravel or sand cushion.
https://www.pogreemsya.ru/youtu.be/86roPTexbfE
In this case, extruded polystyrene foam is laid with a blind area slope of 2%. The perimeter thermal insulation made from it must have a width no less than the freezing depth of the soil.
At the same time, the thickness of the horizontal thermal insulation should be no less than the thickness of the vertical thermal insulation of a conventional foundation.
The depth depends on the type of foundation.
Height of the foundation for the bathhouse.
The columnar foundation is formed by horizontal pillars located along the contour of the bathhouse walls. The main advantage is considered to be high wear resistance, suitability for many types of soil and cost-effectiveness. Its versatility deserves attention. Depending on the material for the walls of the bathhouse, you can use concrete, wooden, or brick pillars. The standard length of pillars is from 2 m. It is laid at 1-1.5 m. There is a shallow columnar foundation, occupying a height of only 50-70 cm. It is laid at 40-60 cm.
The pile foundation is prepared for construction by drilling wells. It is laid in several ways. The easiest way is to pour concrete mixture into pre-dug wells using a hand drill. Wooden and steel piles are laid. The main advantage of a pile foundation is that the foundation lies below the soil freezing level. A team of workers will be able to install the piles in just 1-2 days. The burial depth is determined for each structure, the maximum is more than five meters.
The screw foundation got its name due to its manufacturing technology. Screw piles resemble the shape of a screw and, thanks to special blades, are easily screwed into the ground. Building a foundation on screw piles has many advantages. For such a foundation you do not need to dig a trench or even level the ground. Suitable for all types of soil, except rocky. Service life more than 100 years. Disadvantages include average load-bearing qualities.
The piles are installed in a certain order. The distance between the piles should not be less than 3 m. The piles lie at least 1.5 m deep into the ground. The maximum depth of the pile foundation is 2.4-2.6 m, since the longest pile length is 3 m. If the required depth is greater, than indicated, piles can be built up using reinforced concrete.
The slab foundation consists of a monolithic reinforced concrete slab. Its minimum thickness is only 15 cm.
A shallow foundation is laid 30-40 cm deep into the ground.
Floating foundations are a type of shallow slab foundation. It differs from other foundations in the presence of stiffening ribs - dense placement of reinforcement along the entire perimeter of the slab.
The peculiarity of the floating slab is the ability to move. Unlike other types of foundation, a floating slab does not compete with the pushing forces of the soil, but moves slightly as they rise in the cold season, due to their lowering with the arrival of spring.
A floating foundation will be an excellent way out of a difficult situation related to soil characteristics. When there is close groundwater and a high level of soil freezing, a floating foundation is built on the surface. The minimum deepening of the foundation is only 40 cm.
How high is the foundation for a bathhouse?
Foundation slab
When insulating the foundation slab, thermal insulation boards are laid on top of the waterproofing.
When reinforcing a monolithic foundation slab in a bathhouse using knitted reinforcement, a polyethylene film having a thickness of 200 microns or more is used to protect the insulation from liquid concrete.
When performing reinforcement work using welding, a protective screed is made on top of a film of cement-sand mortar or low-grade cement. In this case, the film sheets are laid on double-sided tape with an overlap of 130-150 mm.
Only in this way can you save the foundation from freezing and premature destruction. Take care of it today, otherwise tomorrow may be too late!
Is it necessary to insulate the base of a bathhouse or steam room?
One of the main problems of the base is that it is located quite close to the ground. The same, in turn, causes the transfer of dampness to the bathhouse building itself. If you do not protect the building from negative influences, the base may collapse much faster than it should. Therefore, such an element of the bathhouse must be protected from water and insulated very responsibly.
The purpose of insulation is to prevent heat from being lost from the heated steam room. Waterproofing is necessary to protect walls from moisture. Taken together, such procedures allow you to make your stay in the bathhouse as comfortable as possible. Moreover, insulating the base as such is not enough. You will also have to protect the floor from heat loss. There are several methods of thermal insulation. The simplest is to use polystyrene foam and penoplex.
It is also possible to provide insulation of the base using mineral wool. But this is not the best option, since basalt insulation has an extremely negative ability to absorb moisture. When wet, such materials provide much worse insulation.
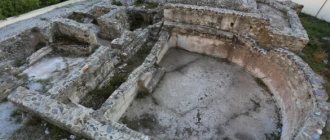
Repair of wooden base.
The height of the foundation above the ground for a bathhouse.
Scheme of one type of base for a bathhouse made of blocks.
Sometimes the foundation for a bathhouse is prepared from thick timber, concreted directly into the ground, and sometimes a monolithic version is installed. You need to know some little things before you properly repair the foundation of a bathhouse or build a new foundation for a bathhouse with your own hands:
- For example, a wooden structure made from sleepers or a log frame is tightened from the outside with brackets in places where they settle. You can calculate how to tighten the frame, how many staples are needed. With other foundations it’s a little more complicated. You need to know how long it takes for the concrete itself to dry, and only then install the frame or beams. If the load-bearing blocks burst during installation and their height is small, you can add a reinforcing layer of concrete around the blocks, filling in all the cracks formed in the column.
- By deciding to make the foundation of the bathhouse yourself, you will not only save a lot of money, but also get a good experience. It’s not difficult to build a monolithic or any other foundation with your own hands; you just need to go through all the stages of construction one by one and not violate the technology.
- Make the correct calculations, markings for construction, soil development, reinforcement, and insulation. Do all necessary waterproofing work. It would be a good idea to consult with builders (developers) who have been building this type of foundation for a long time and have good experience.
Decide what material to build the foundation from, logs, sleepers, what the height of the building will be, how many sleepers or timber you need. Do you need a monolithic or concrete foundation for a log house, a wooden one made from sleepers, or a permanent foundation for a building made of foam blocks?
Knowing how to make a foundation for a bathhouse is not everything; you need to make preliminary calculations, and only then can you confidently begin its construction. It’s up to you to decide which foundation is best for a bathhouse, but it’s better to calculate how much materials you will need for this in advance and draw its structure. Having carried out a simple calculation, you can do everything perfectly, because you won’t need heavy equipment here, except perhaps a concrete mixer with a wooden chute and a concrete drain.
Base width
To select the overall width of the plinth, you should refer to the building design drawing to determine the material that will be used to construct the walls. For example, for gas silicate bricks (commonly known as foam concrete) with a side size of 600 X 300 X 200, the thickness of the masonry should be 30 cm, and if additional insulation of the walls is planned in the future, then a width of 38 cm is what is needed. But when using brick as a decorative element on top of foam concrete blocks, the thickness increases to 60 cm.
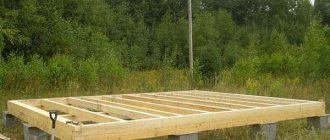
Construction of a load-bearing structure for lightweight materials.
Slab foundation for a bathhouse.
Sketch of a slab base for a bathhouse.
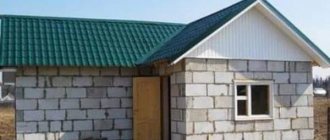
The weight of foam blocks is small, up to 24 kg, with dimensions of 200 x 300 x 600 mm, unlike expanded clay concrete. We calculate the foundation slab differently than for a pillar foundation. In this case, the entire structure will lie on the slab, transferring all loads to the ground evenly, making it stronger. The construction of a slab (slab version of the foundation) is easier to do than the pillar version, but for a log building it will also work. Depth is not needed for a monolithic surface foundation 1-1.5 meters high; a 40-50 cm deepening into the ground along the entire plane or perimeter is enough, it depends on the configuration of the log house.
The height of the above-ground part of the concrete slab is 10−15 cm. When poured, a monolithic layer (slab) is obtained that carries the entire frame, evenly distributing the load from the building onto the ground. The slab option is suitable both for medium-weight buildings and for structures made of foam blocks, foam concrete blocks; on it you can build a bathhouse from sleepers, build a log house; there are many options for using slab technology, as many as are necessary for high-quality construction of buildings.
The slab foundation for the construction of walls made of foam blocks is arranged as follows:
- Markings are made for the slab, the building is taken in width and length, but with a margin of 800-100 mm. It would be correct to lay only a slab around the perimeter under the bathhouse, and fill everything inside with clay when finished.
- The soil is removed to a depth of 400 mm, the pit is filled with sand, 200 mm thick. For foam blocks this pillow is enough. Now we compact it around the perimeter, there should be no gaps. Although the frame is not heavy, the slab must work over the entire plane; the depth here is not as important as the uniform compaction of the soil and sand.
- Now the formwork is placed around the future foundation, the height of the board is selected according to the protruding part, in this case 150 mm.
- Cards are knitted from 12mm reinforcement, with a cell size of 300×300, laid on a prepared site, having previously placed plastic distances, or spilled small nickels from the solution. After reinforcement, you can pour the solution. Such a foundation does not dry for long, 7-12 days.
Tip: In summer, sand dries quickly; before pouring concrete, moisten it with water.
Brick plinth manufacturing technology
The most widely used insulation material is solid thermal insulation. This can be slab polystyrene foam, which has the best characteristics. It holds its shape perfectly, does not allow moisture to pass through, and is easy to install. Therefore, the question of whether to insulate the base with more traditional materials can be answered in the negative.
The base in the photo is insulated with extruded polystyrene foam.
We suggest you familiarize yourself with the whites of the eyes turning red after a bath
Expanded polystyrene has different thicknesses - from 30 mm to 120 mm, so before you insulate the base, you first need to decide on the best option. It all depends on the climate zone in which the bathhouse is built: the colder it is, the thicker the insulation should be.
Insulation of the base with polystyrene foam occurs in several steps:
- Preparing the base. We clean the surface of the base from debris, and then thoroughly treat it with a primer.
- Preparation of polystyrene foam. Using a special knife, cut out the necessary pieces of material.
- Installation. On the prepared polystyrene foam we apply an adhesive mixture that does not contain harmful and flammable substances (bitumen-polymer mastic or polyurethane glue), and using a spatula with slots we level it over the entire surface. We apply a sheet of polystyrene foam to the base and, lightly tapping with our palms, achieve an even fit.
- Final works. After gluing the entire surface of the base, we seal the seams and putty the surface with a moisture-resistant mixture for external use.
- After insulation, the base must be given an aesthetic appearance. The cheapest thing would be to simply plaster it, but everyone, of course, wants to decorate the base to their own taste.
If you are thinking about whether to insulate the base yourself or call specialists to do this work, we advise you to contact our company or order a turnkey bathhouse in Kazan.
It will be interesting to read:
- How to attach a veranda to a bathhouse?
- Ventilation in the bathhouse is a necessity.
- How and with what to insulate the floor in a bathhouse?
Material selection
- clinker is the most durable of existing analogues, has a long service life, does not require finishing, is absolutely waterproof, but is too expensive, so it is rarely used;
- clay - more often called ordinary, has minimal aesthetics of perception, decoration is necessary, the material is chosen according to frost resistance (M 150 - M 250 for 50 - 100 seasons, respectively), this is a budget brick that allows you to reduce the construction budget;
- ceramics – average price, excellent decorative properties, solid and hollow modifications are available;
- porous - minimally loads the foundation structure, does not require cladding, is an improved analogue of ceramics, therefore costs more, there are large-format modifications with non-standard sizes;
- dry, semi-dry pressing - looks like ceramics, but does not fire, has lower frost resistance, is inexpensive, the masonry does not need lining;
Solid clay brick is the most suitable material for the plinth.
When choosing a brick other than the walls, the plinth by default becomes an independent element of the facade design.
To build a brick plinth, you will need a standard trowel, a level, a mooring, a plumb line, a cord, and a pick. When using facing bricks, cutting is best done with an angle grinder (grinder) with a diamond blade or stone equipment. For the solution you will need a bucket with a shovel or a bucket with a drill or mixer. Professionals can make do with a piece of roofing felt or a sheet of iron; it is better for a home craftsman not to risk the quality of the batches.
For facing masonry, special devices are produced that make it easier to level the pastels in each row. The only drawback of the Bricky device is its adaptation to foreign bricks, the dimensions of which are somewhat different from their domestic counterparts.
The brick plinth has a width depending on the type chosen (flush, protruding, recessed) and the thickness of the walls. For example, for a masonry of 51 cm, this value is in the range of 45-57 cm. There are options when the base is wider than the foundation - in this case, the release of brick on any side is limited to ¼ of its length (6 cm).
Due to the lack of regulatory documentation for the installation of the foot of the house, the brick plinth can be of any height. Experts do not recommend building it higher than half of the first floor - this will disrupt the architecture of the building and the exterior of the facades.
Without a project, only garden houses can be built; in all other cases, the necessary marks for all structures are included in the documentation. Self-builders solve the problem of foot height as follows:
- if the foundation is poured at ground level, choose a masonry height of 0.7-1 m;
- if a plinth is needed for a technical underground, they are guided by the dimensions of the engineering systems (usually pumping equipment, valves) that must fit in it;
- if a footstool is needed to complete the basement, choose a comfortable ceiling height in the lower level.
In the last two options, insulation is often placed into the base structure (if the brick is facing) or external insulation is performed, taking into account its thickness.
Unlike the external soil, the ground under the house does not freeze in any frost. It contains moisture absorbed by the concrete and transferred to the upper structures. Therefore, the foundation is necessarily cut off from them with a waterproofing layer.
In order to waterproof the foundation efficiently, it is enough to lay two layers of rolled material, a membrane or a film along its perimeter. The side surfaces of the concrete strip also need to be treated to protect against flood, groundwater, and melt water. In this case, deep penetration primers that change the structure of the material are much more effective.
The top waterproofing is laid overlapping at the joints, protrudes 2-3 cm beyond the perimeter, and is cut off upon completion of the masonry.